
Anyone who has an XBOX knows that the XBOX Game Bar allows screen recording. However, not everyone knows that the XBOX Game Bar can also record screen recordings such as an image or video of your Windows 10 screen.
In this PC Tip I explain how you can take a screen recording with the XBOX Game Bar in Windows 10 without additional software.
Screen recording in Windows 10 with XBOX Game Bar
To get started, you need to have updated Windows to the latest version. Make sure Windows is fully updated.
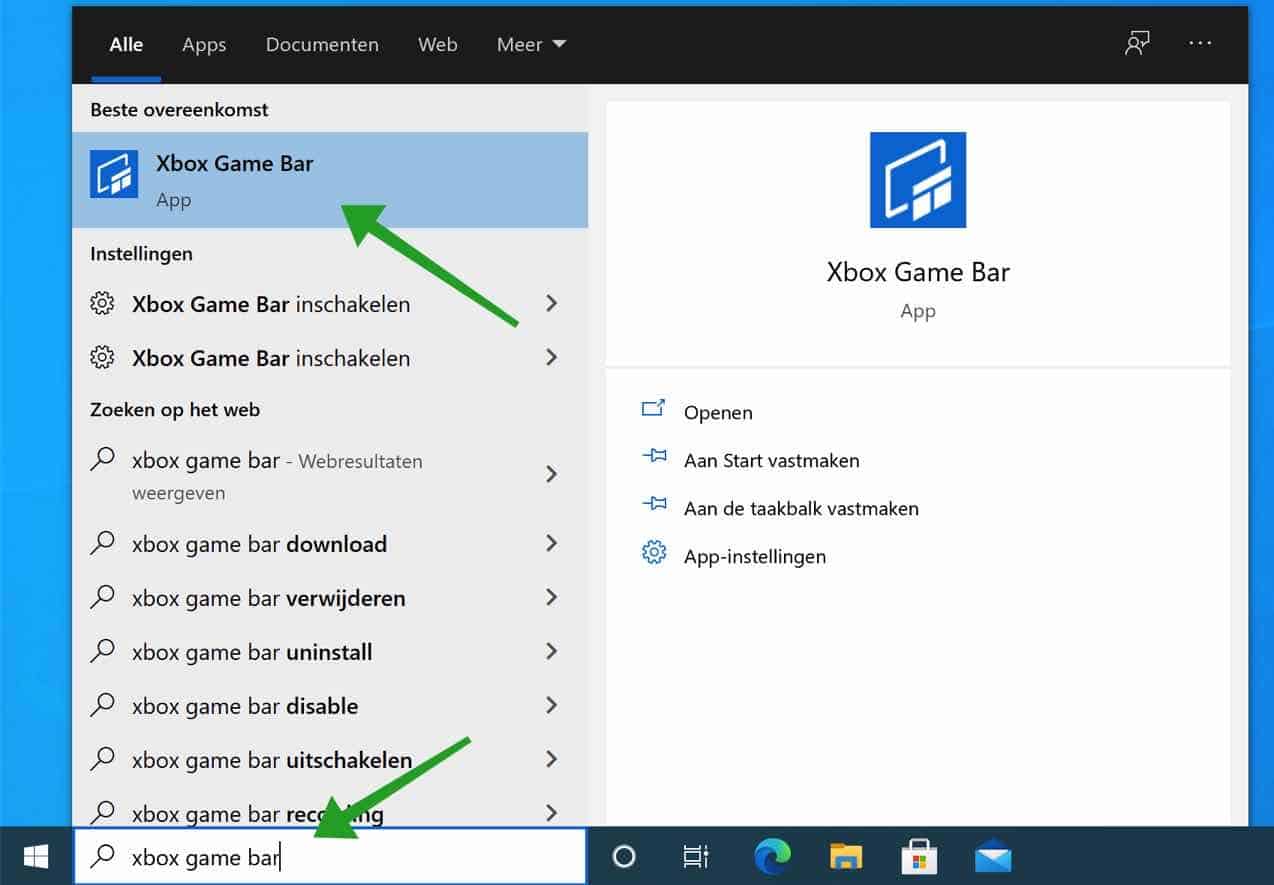
In the Windows search bar type: XBOX Game bar.
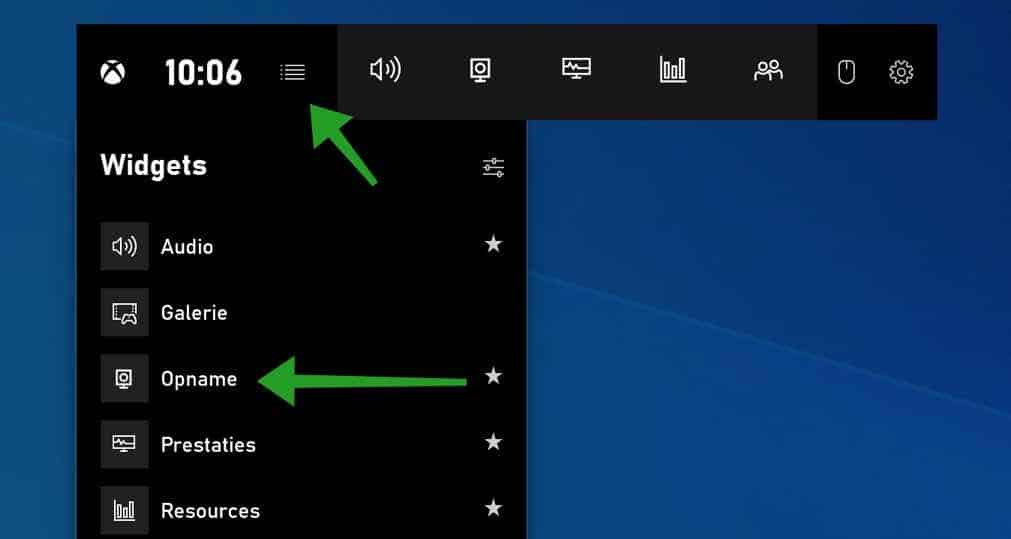
In the XBOX Game Bar, click the Widget menu, then click Recording to add the Recording menu to the widgets menu bar.
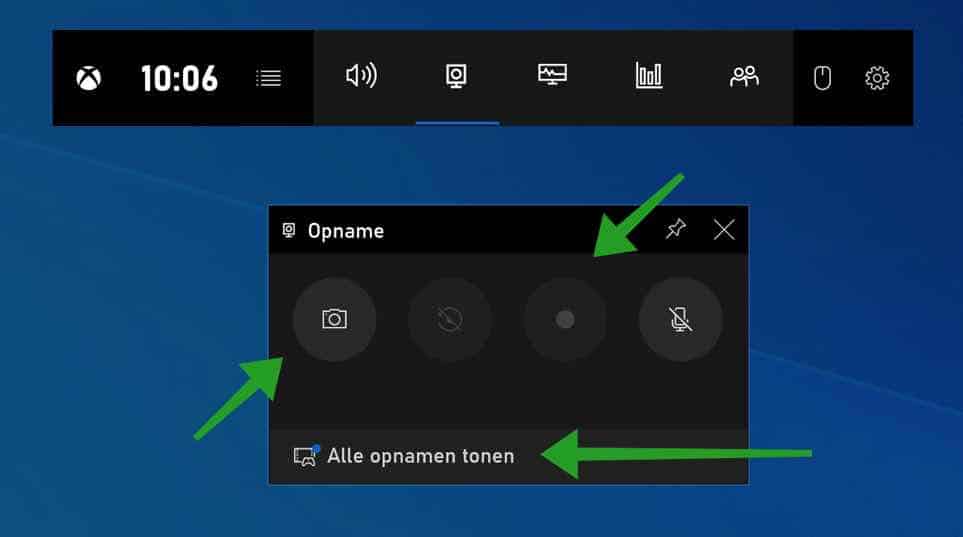
To start a screen recording, click on the recording icon (circle circle). To a to take a screenshot of a window or the entire desktop, first click on the window and then on the Camera icon.
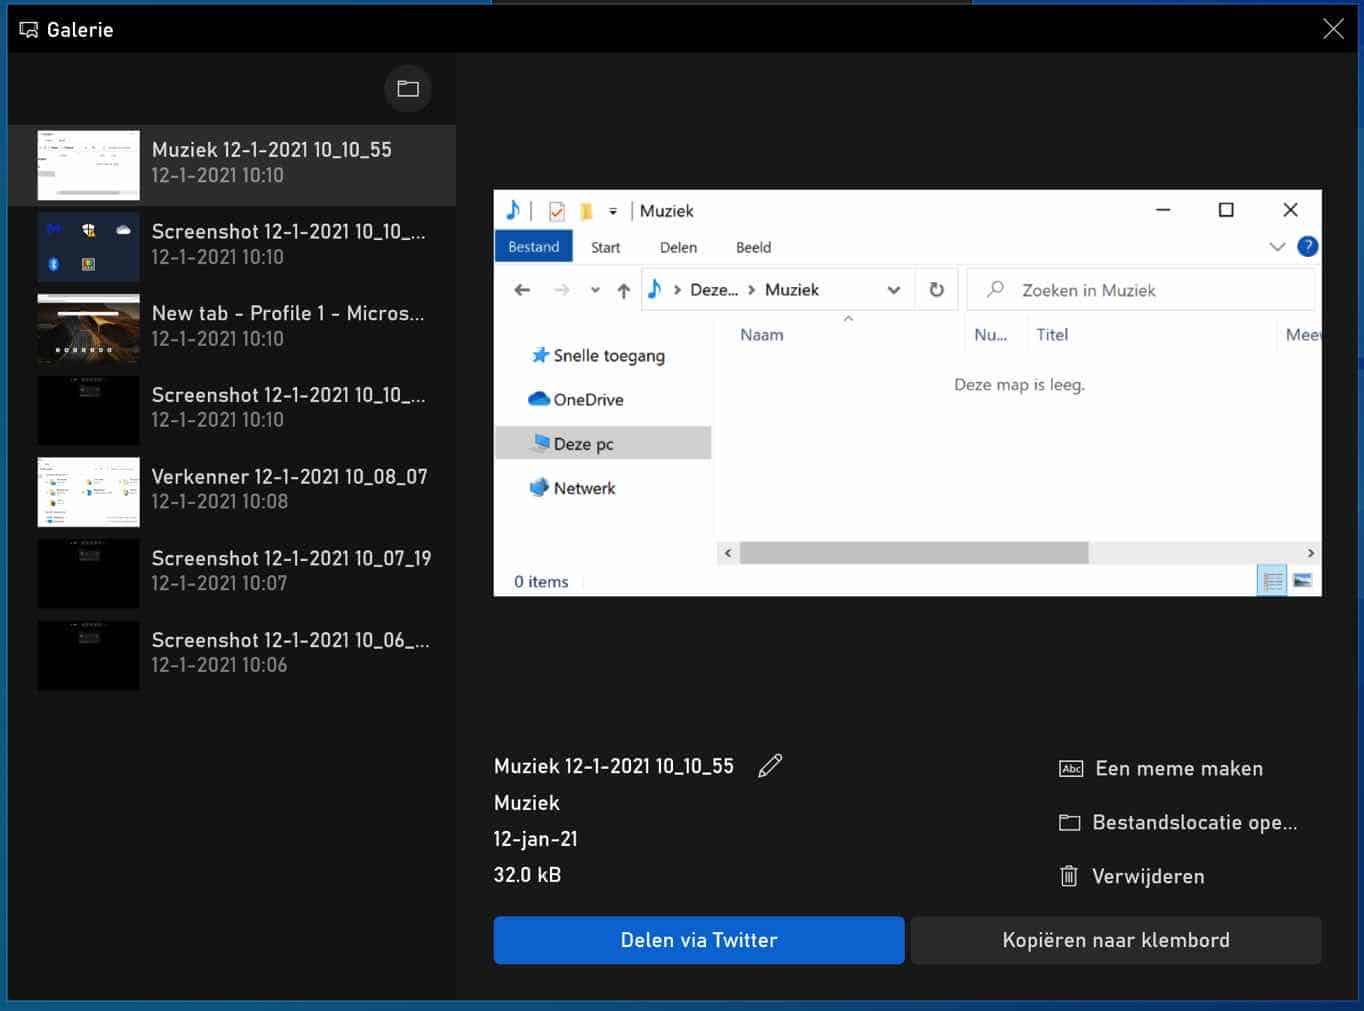
All screen recordings performed with the XBOX Game bar software are automatically saved to: C:\Users\your username\Videos\Captures\
Screenshots in video are saved in MP4 format and Screenshots are saved as PNG format.
If you click on the Recordings button in the XBOX Game bar, the Gallery will open where you can view, share and manage the screenshots and screen recordings.
I hope this tip helped you. Thank you for reading!