
De Windows Verkenner zoals veel mensen die nog kennen uit Windows 10 is in Windows 11 behoorlijk veranderd. Zo is het menu aangepast en zijn er verschillende weergave opties bijgekomen. Een optie die nooit veranderd is, is het voorbeeldvenster.
Het voorbeeldvenster toont de inhoud van een specifiek bestand wat op dat moment is geselecteerd in de Verkenner. Zo wordt bij het openen van een afbeelding, een miniatuur van de afbeelding weergegeven in het voorbeeldvenster. Dit geldt ook voor de inhoud van PDF-bestanden en mediabestanden zoals video’s.
Het is een veelgestelde vraag onder nieuwe Windows 11 gebruikers hoe het voorbeeldvenster in de Verkenner getoond kan worden. Daarom dit artikel waar ik stap voor stap uitleg hoe het voorbeeldvenster ingeschakeld kan worden.
Voorbeeldvenster weergeven in Windows 11
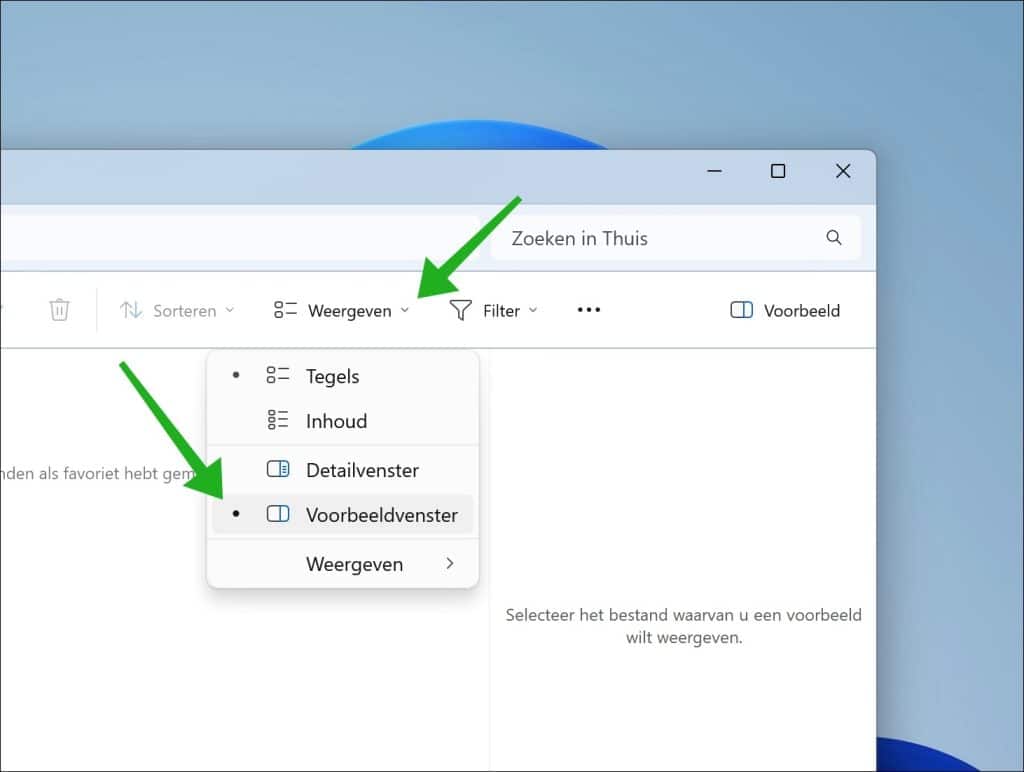
Om te beginnen opent u de Windows Verkenner. In de Verkenner klikt u in het menu op “weergeven” en vervolgens op “voorbeeldvenster”.
Het voorbeeldvenster verschijnt nu aan de rechterzijde van de Verkenner.
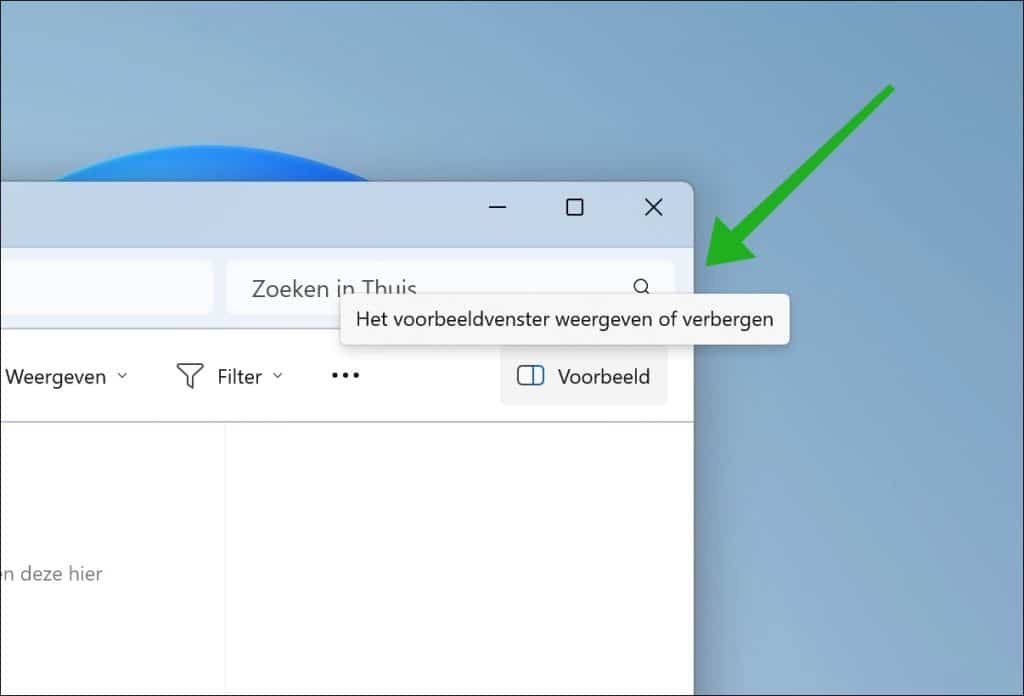
Als u het voorbeeldvenster heeft ingeschakeld en u ziet het alsnog niet, dan klikt u rechtsbovenin de Verkenner op “voorbeeld”. Het voorbeeldvenster wordt nu alsnog getoond.
Lees ook deze 16 tips voor de Windows Verkenner. Ik hoop u hiermee geïnformeerd te hebben. Bedankt voor het lezen!
❤️ Help mee en deel
Voordat u verdergaat, zou ik het waarderen als u overweegt mijn werk te steunen. In tegenstelling tot veel grote websites is er op PC Tips geen betaalmuur die lezers blokkeert, maar daardoor is uw steun des te belangrijker.Als u onafhankelijke initiatieven zoals deze waardeert, overweeg dan alstublieft om mij te steunen, zodat ik kan blijven doen wat ik met plezier doe. Deel mijn website PC Tips op andere websites, social media of binnen uw eigen netwerk. Hartelijk dank.
🙂 Overzicht met computertips
Bekijk ook mijn uitgebreide overzicht met praktische computertips, overzichtelijk gesorteerd per categorie.