

IIS is a web server, and available in several Windows versions. The first IIS web server version was already available in Windows NT 3.5.1 and was IIS 1.0.
IIS (Internet Information Services) is Microsoft's web server and has been around since 1995. The latest version, IIS 10, is included with Windows and IIS is a free product.
There is a lightweight version of IIS called IIS Express that can be installed separately, but is intended for development purposes only. IIS Express only supports HTTP and HTTPS protocols and supports only local requests by default. In this article I will explain how to install the full version of IIS.
Since version 7, IIS has a modular architecture, which allows users to add only the functionality we need. IIS 10 added support for HTTP/2, HSTS, and containers. IIS is the third most popular web server (after Apache and Nginx), running approximately 8,7% of all websites.
IIS is more often used for intranet network environments, and less often for web servers on the Internet. This is because, in addition to IIS, there are better and, above all, safer alternatives available via Linux.
Install Microsoft IIS web server in Windows 11 or Windows 10
Install Microsoft IIS web server
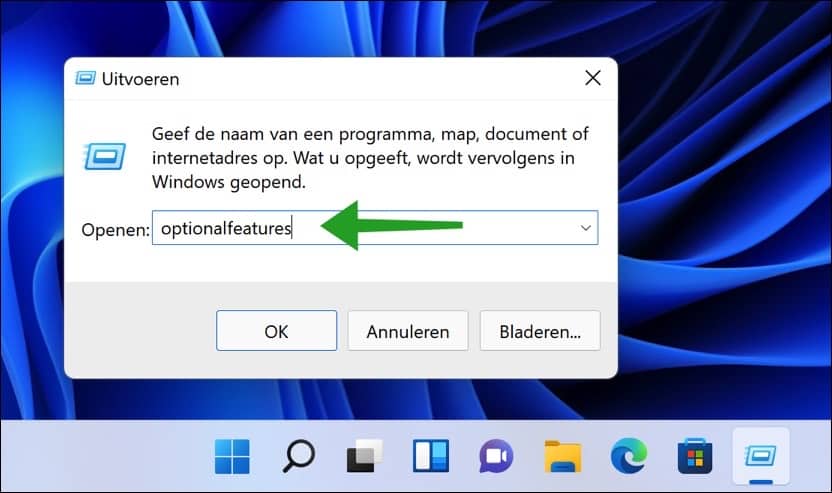
Right-click on the Start button. Click Run in the menu. In the Run window type: optionalfeatures
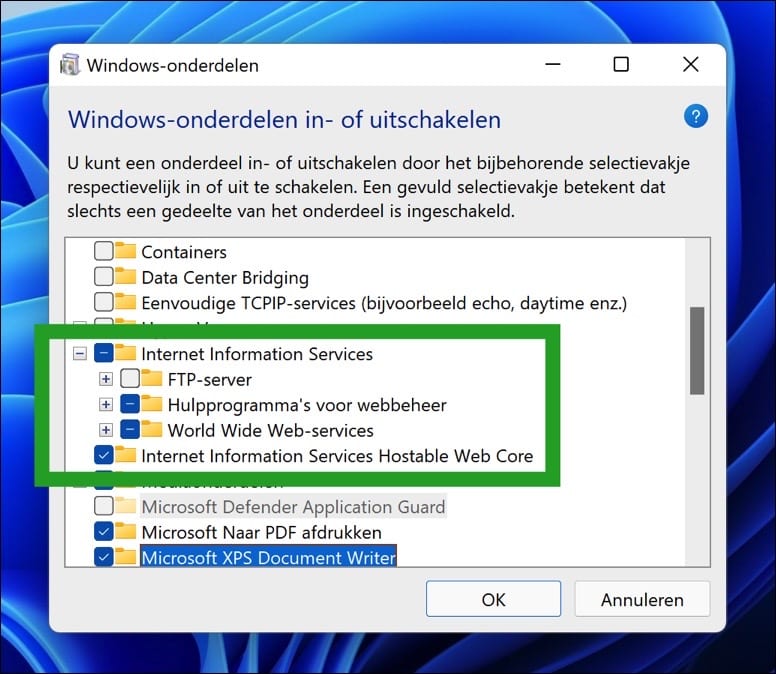
In the Turn Windows components on or off, click on “Internet Information Services” and “Internet Information Services Hostable Web Core”.
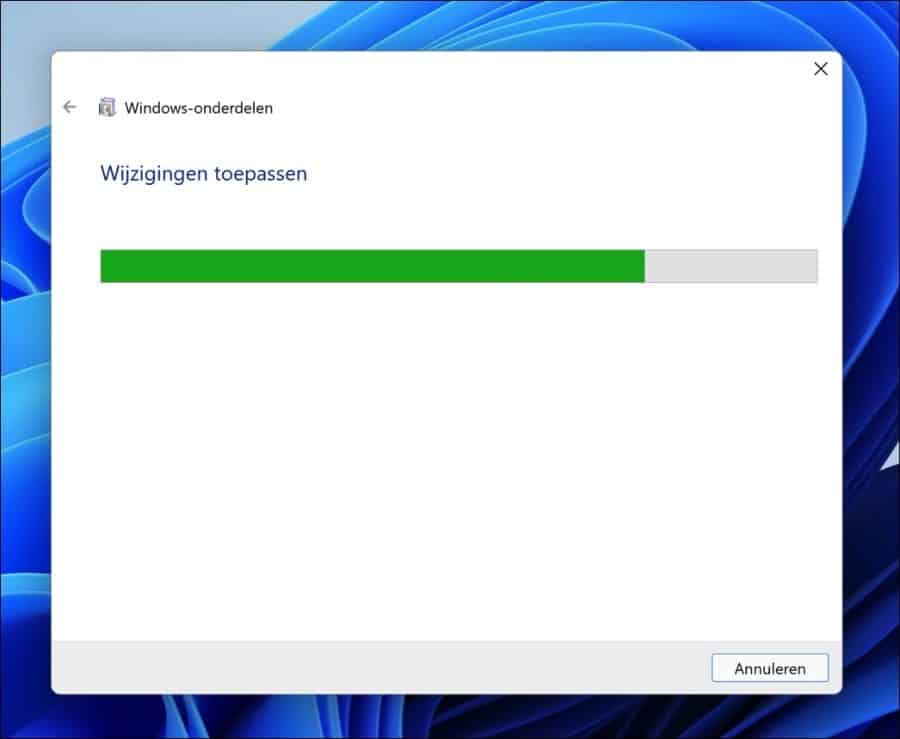
The changes are now applied, in other words the IIS components are installed. This may take a while.
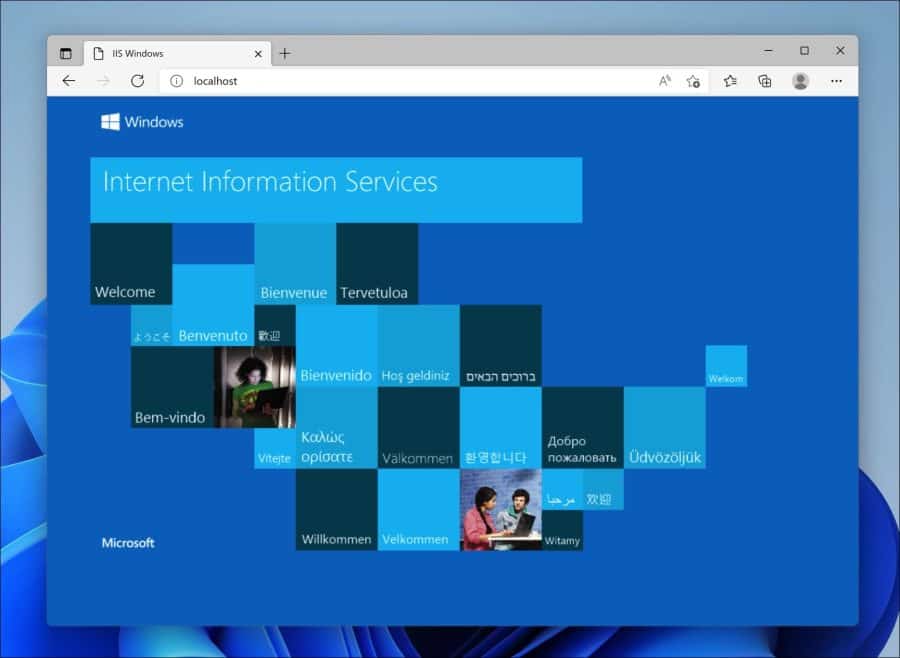
After installation, you can check whether IIS web server has been successfully installed as follows. Open a browser on your computer and navigate to the following address:
http://localhost/
If an IIS information page is displayed, the IIS web server in Windows has been successfully installed.
Manage Microsoft IIS web server
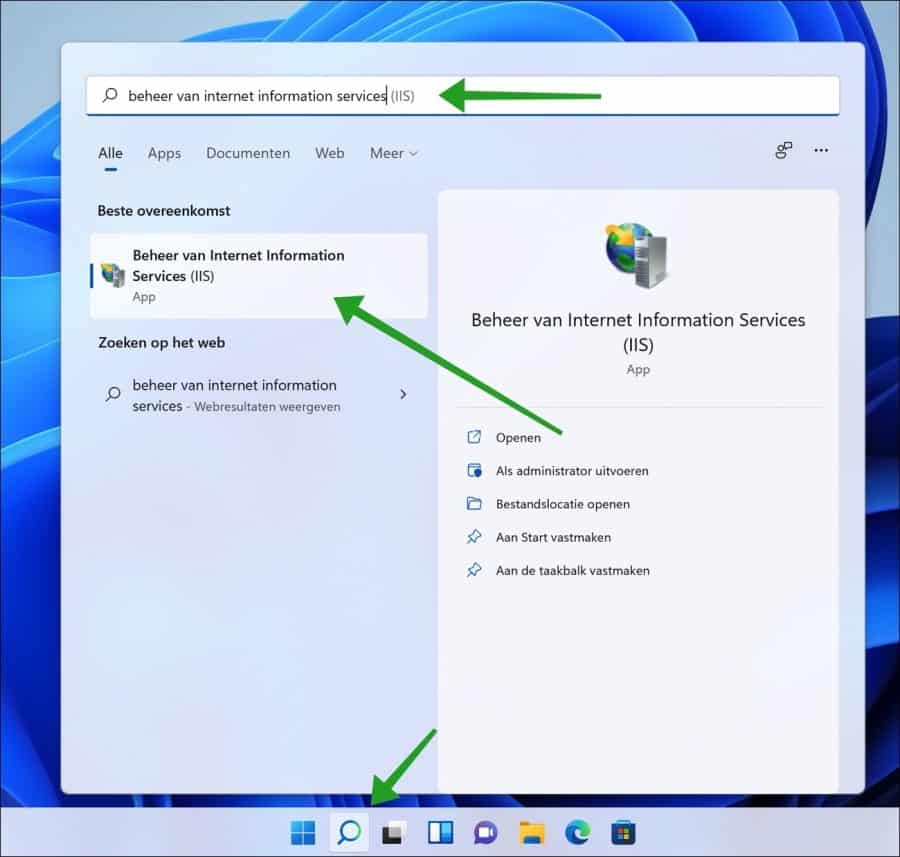
After successful installation, you can manage Microsoft IIS by opening “Internet Information Services (IIS) Management”.
Click the magnifying glass in the taskbar or search box. Then search for “Internet Information Services (IIS) Management” and click on the result.
In IIS Manager you will see various settings for Microsoft IIS web server. On the left you will see “connections” which includes “Sites”, these are the websites that the IIS web server manages. By default this is the “Default Web Site”.
In the middle you will see the “Function view”. From the 'Functions View' you can manage most IIS web server functions. On the right side you will see “Actions”, “Manage website” and “Configure” with which you can adjust the web server yourself, such as changing the default port (80), restarting, stopping the web server and setting connection limits.
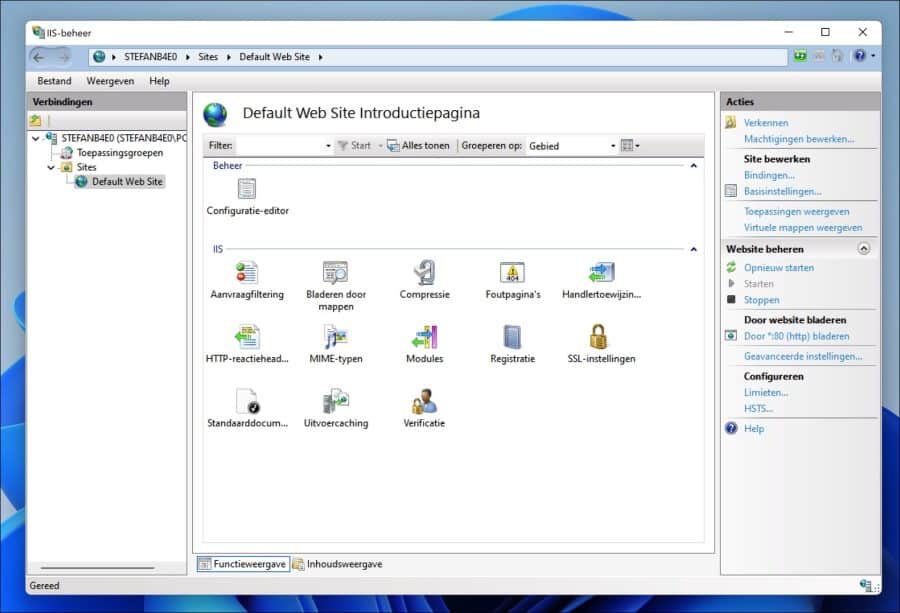
The default inetpub directory to place files in is for IIS web server: C:\inetpub\wwwroot\
I hope this helped you. Thank you for reading!