
Het muisaanwijzerspoor kunt inschakelen of uitschakelen in Windows 11. Het muisaanwijzerspoor is een visuele functie in Windows die een “spoor” of een reeks schaduwbeelden van de muisaanwijzer achterlaat wanneer u deze beweegt. Deze functie is ontworpen om u te helpen de muisaanwijzer gemakkelijker te volgen op het scherm, vooral op grote beeldschermen of in situaties waar de aanwijzer moeilijk te zien is tegen de achtergrond.
Wanneer u het aanwijzerspoor inschakelt, creëert Windows een reeks vage kopieën van de muisaanwijzer die de beweging van de aanwijzer volgen. Deze kopieën vervagen geleidelijk naarmate ze verder van de werkelijke positie van de aanwijzer verwijderd zijn, wat helpt om de aandacht op de actuele locatie van de aanwijzer te vestigen zonder het zicht te belemmeren. Hieronder ziet u een voorbeeld.

Deze functie kan bijzonder nuttig zijn voor presentaties of onderwijsdoeleinden, waar het belangrijk is dat het publiek de bewegingen van de aanwijzer gemakkelijk kan volgen. Het is ook handig voor mensen met visuele beperkingen of voor wie moeite heeft om de aanwijzer te zien op schermen met hoge resolutie of bij gebruik van meerdere monitoren. U kunt de lengte van het muisaanwijzerspoor wijzigen, zodat het muisspoor zich aanpast aan de gewenste zichtbaarheid.
Muis aanwijzerspoor inschakelen of uitschakelen in Windows 11
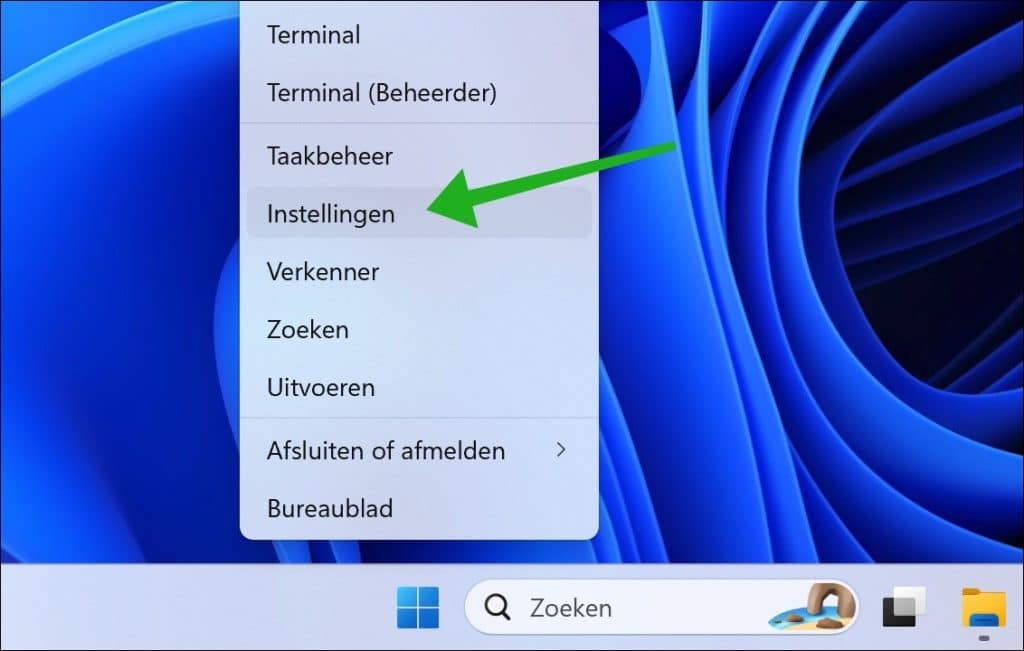
Klik met de rechtermuisknop op de Startknop. Klik vervolgens op “Instellingen” in het menu.
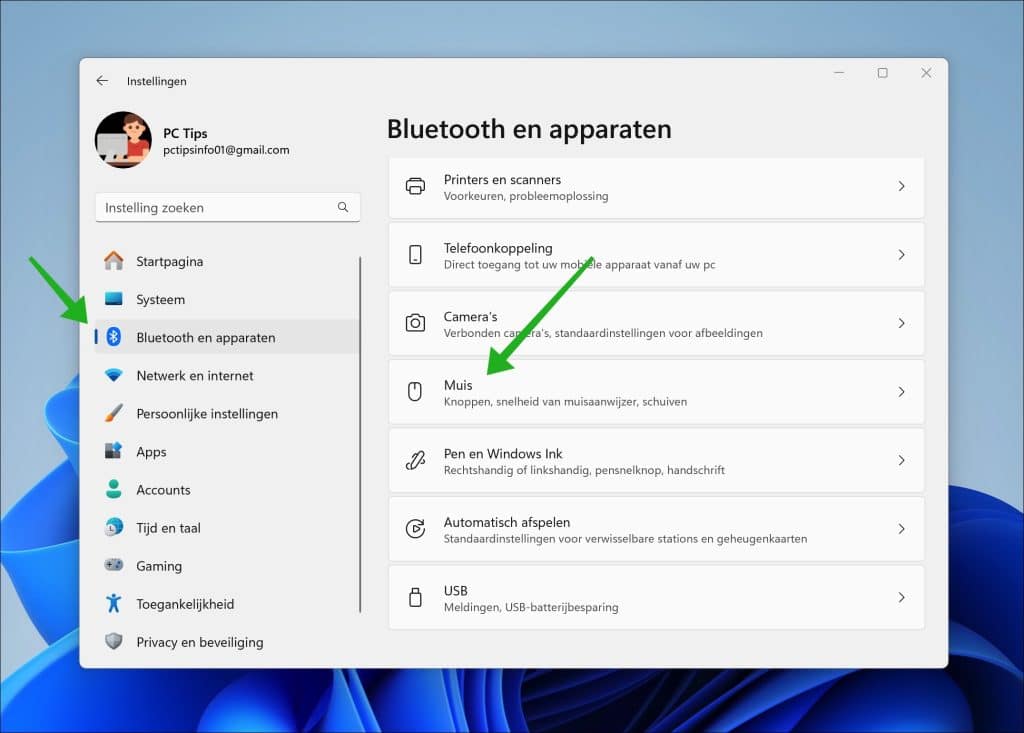
Klik in de instellingen op “Bluetooth en apparaten” en vervolgens op “Muis” om de muisinstellingen te openen.
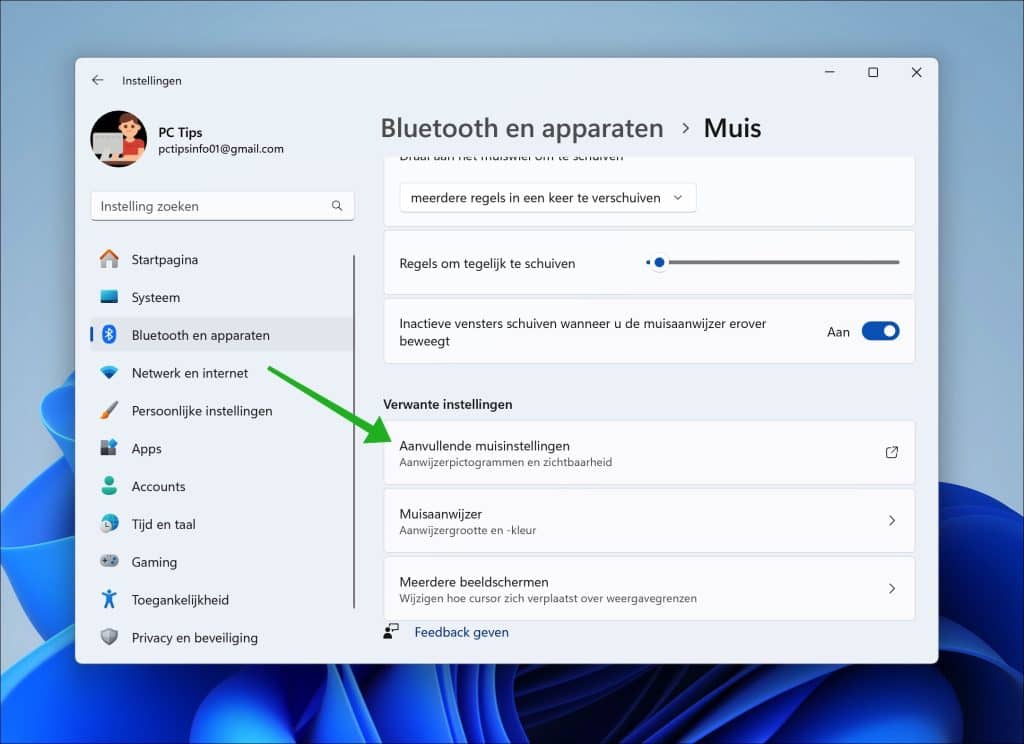
In de “Verwante instellingen” klik op “Aanvullende muisinstellingen”.
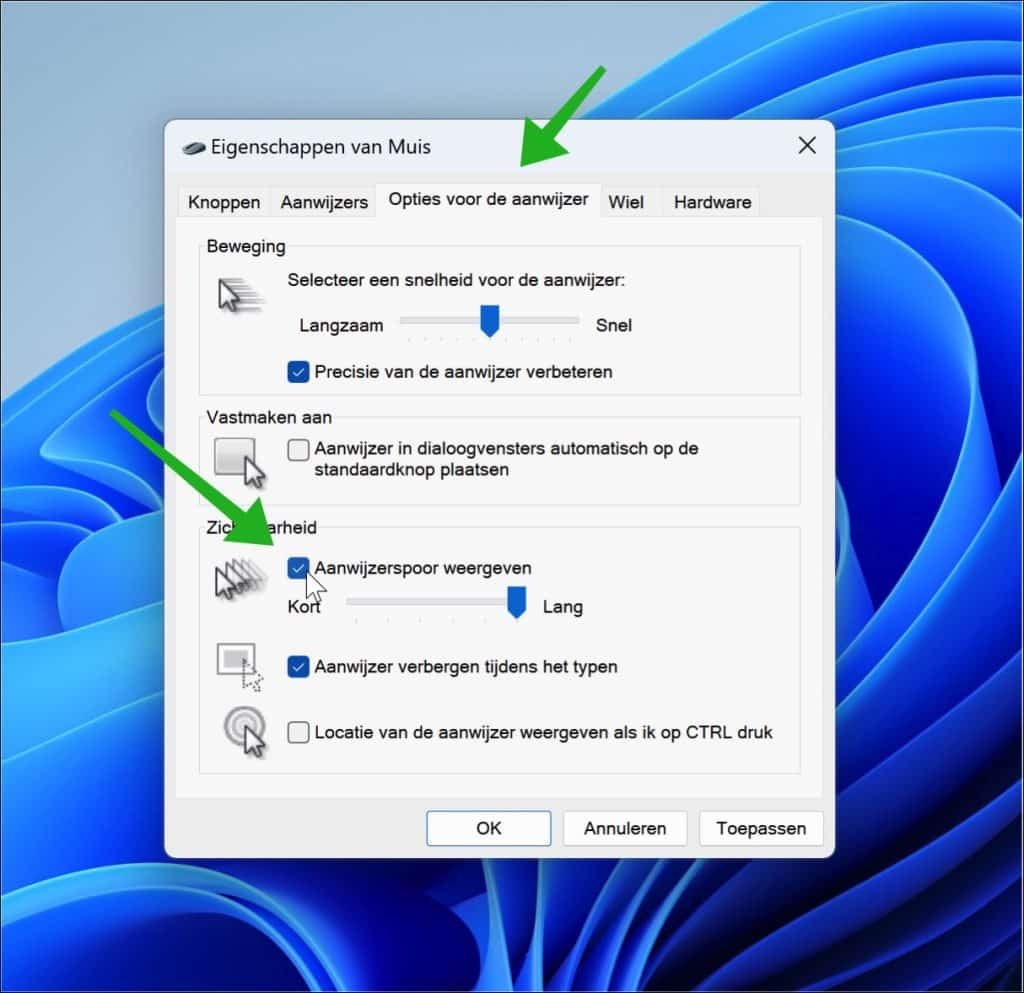
Klik in de eigenschappen van de muis op tabblad “Opties voor de aanwijzer”. Schakel vervolgens de optie “Aanwijzerspoor weergeven” in of uit in de “Zichtbaarheid” instellingen. U kunt hierna de lengte van het muisspoor wijzigen door de balk te slepen van kort naar lang. Door de muis te bewegen ziet u direct een voorbeeld van deze weergave. Klik op “toepassen” en “OK” om te bevestigen.
Ik hoop u hiermee geïnformeerd te hebben. Bedankt voor het lezen!
Lees verder:
❤️ Help mee en deel
Voordat u verdergaat, zou ik het waarderen als u overweegt mijn werk te steunen. In tegenstelling tot veel grote websites is er op PC Tips geen betaalmuur die lezers blokkeert, maar daardoor is uw steun des te belangrijker.Als u onafhankelijke initiatieven zoals deze waardeert, overweeg dan alstublieft om mij te steunen, zodat ik kan blijven doen wat ik met plezier doe. Deel mijn website PC Tips op andere websites, social media of binnen uw eigen netwerk. Hartelijk dank.
🙂 Overzicht met computertips
Bekijk ook mijn uitgebreide overzicht met praktische computertips, overzichtelijk gesorteerd per categorie.