

Normally you have to wait until Windows 10 21H2 becomes available via Windows update. However, if you want to install Windows 10 21H2 update manually, this article will tell you how to do it.
Before manually installing Windows 10 21H2 update, it is recommended that you have at least 10 GB of free space on the drive where Windows 10 is installed. This is because some files are downloaded during installation.
However, if you don't have enough free space, the Windows 10 21H2 update installation may fail. Follow the steps in the first section below to check the free space on your Windows 10 computer.
Install Windows 10 update 21H2 manually
Check disk space
Open Windows Explorer. Under “Devices and Drives” you will see the “Local Disk (C:)” where Windows 10 is installed. Here you can immediately see how many Gigabytes of data are still available to install the 21H2 update. Check that there is at least 10 GB of free disk space available.
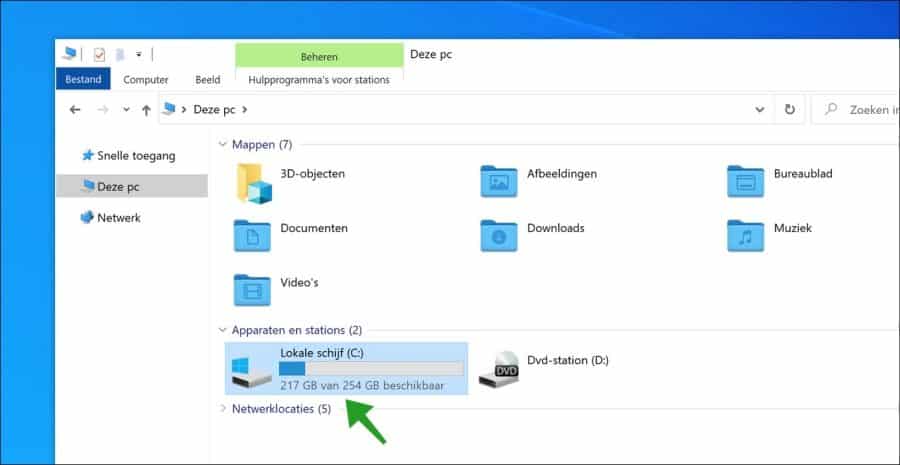
If there is still enough disk space available, you can install the Windows 10 21H2 update. This is how it works.
Download Windows update 21H2
Open the Windows 10 21H2 update page. Then, under Windows 10 November 2021 Update, click the Update Now button. Your browser will download the Windows 10 Update Assistant file to your computer.

If you are using Google Chrome or Microsoft Edge browser, the browser will display the Windows 10 Update Assistant file at the bottom left. To manually start the installation of Windows 10 21H2 update, click on the file.
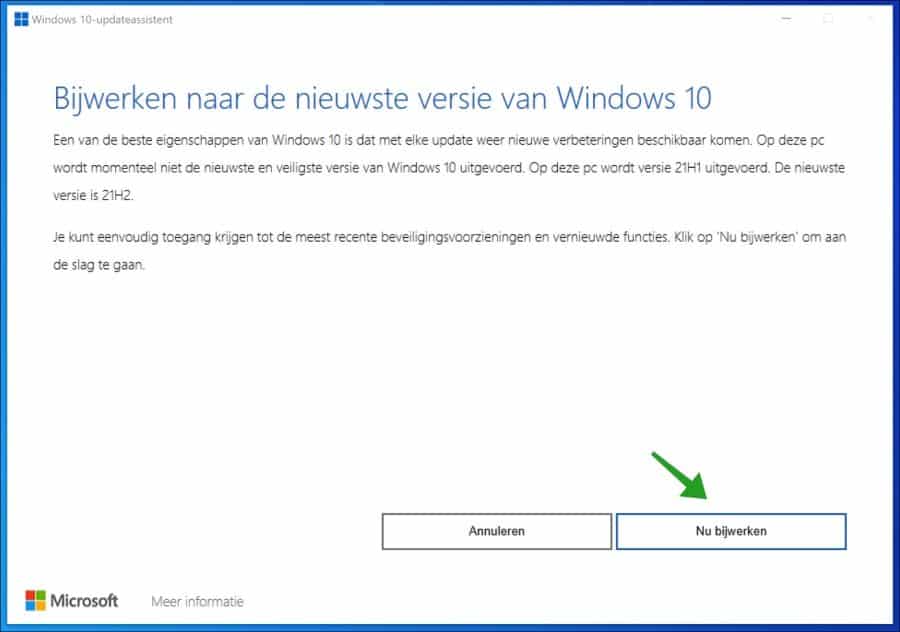
Install Windows update 21H2 manually
Then, click the Update Now button at the bottom right of the first page of the Windows 10 Update Assistant. The Windows 10 Update Assistant will perform a check prior to installation.
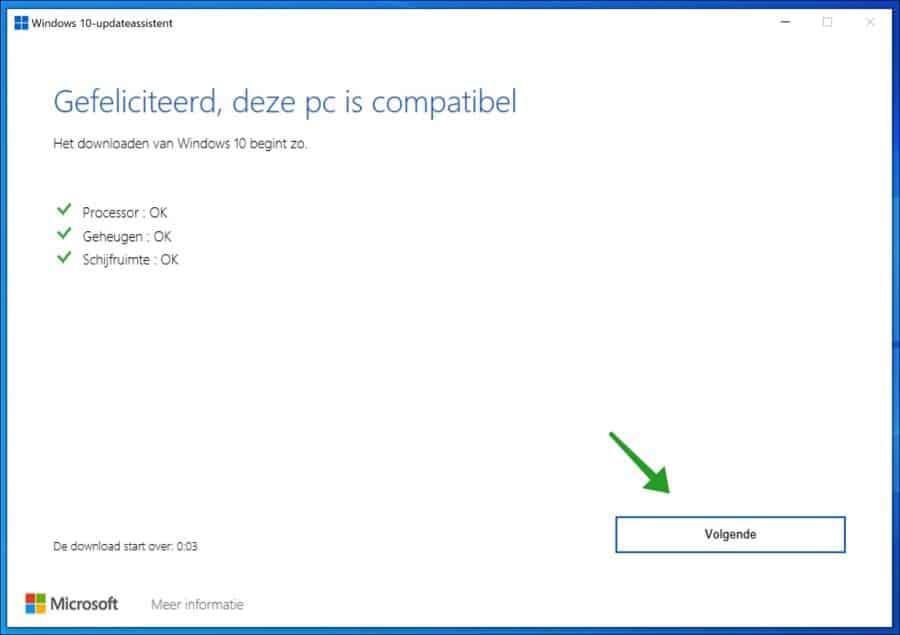
If your PC meets the requirements to install Windows 10 21H2 Update, the Next button will be available. Click Next at the bottom right to continue.
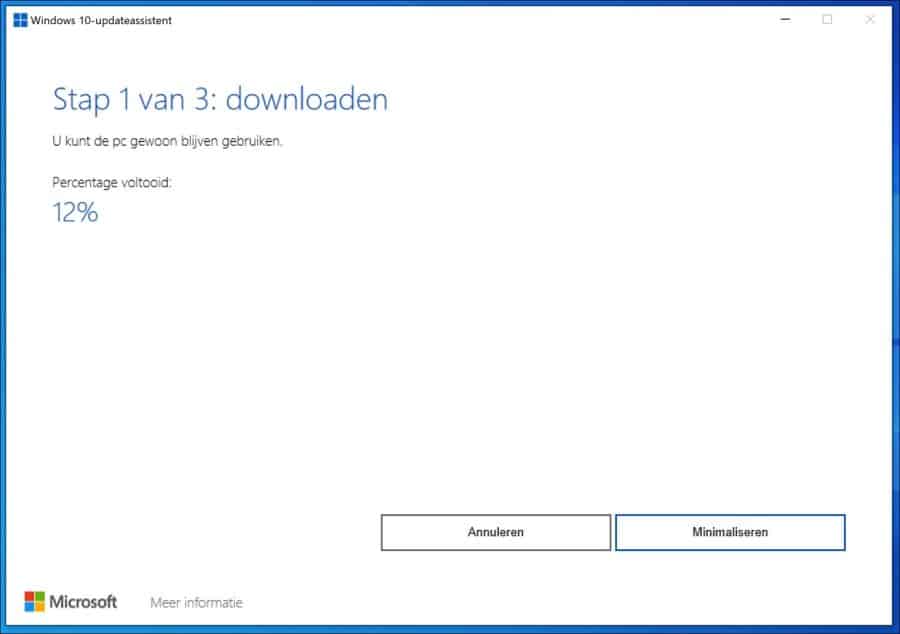
Wait until the installation reaches 100%. Then continue to the next step. During this process, you can minimize the Windows Update Assistant and continue working on your PC as normal.
When Windows 10 Update Assistant finishes installing Windows 10 21H2 Update, a screen will appear allowing you to count down 30 minutes to restart. To restart immediately, click Restart Now at the bottom right of the screen.
Finally, when the Windows 10 Update Assistant has finished installing Windows 10 21H2 Update, Windows 10 will display a login screen. Log in with your normal username and password. After you log into Windows 10, it will perform the final stages of the update.
To confirm that Windows 10 21H1 Update has been installed manually, type: winver in Windows 10 search. Then open the app, it will now show that the Windows 10 update 21H2 (build: 19044.1382) has been successfully installed.
Lees meer:
I hope this helped you. Thank you for reading!
Thanks for the tip! Regular update did not work and it kept getting stuck at 20 percent installation. In any case, this already works at 76%!!!
Hello, glad it has been resolved! Thanks for your response.
Greetings, Stefan