

You can easily reduce images on a Mac computer. No third-party Mac software is required to adjust or reduce an image.
You can adjust the image on a Mac using the Preview app. Preview is the default application your Mac uses to open images. It is recommended that you set the Preview app as the default app to open images.
In this tip, I'll show you step-by-step how to resize an image on your Mac using Preview. I also explain how you can adjust the compression or quality of an image to limit the size of the image file.
If you want to edit images for a website, it is advisable to adjust the size of the image file to the dimensions required for the website. If you use image files that are too large, the website will become slow because the size of the image must be fully loaded. This takes time.
If you only use images for design or photo editing, I recommend that you only change the size of the image and not reduce it through compression. If you reduce the size of an image using compression, the quality will deteriorate slightly. It's up to you what you want.
These are two ways to resize an image on your Mac.
2 Ways to Resize Images on Mac
Resize the image with the Preview app
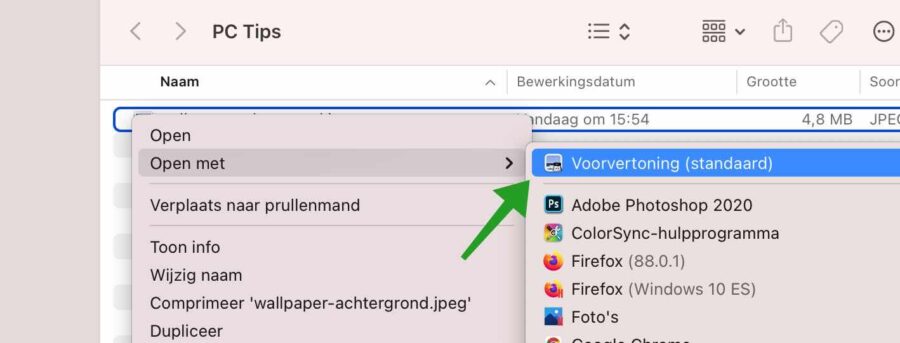
To open the Preview app on your Mac, simply open the image. The image will automatically open in the preview app. If the Preview app is not your default image editor app, right-click on the image and choose open with and then Preview.
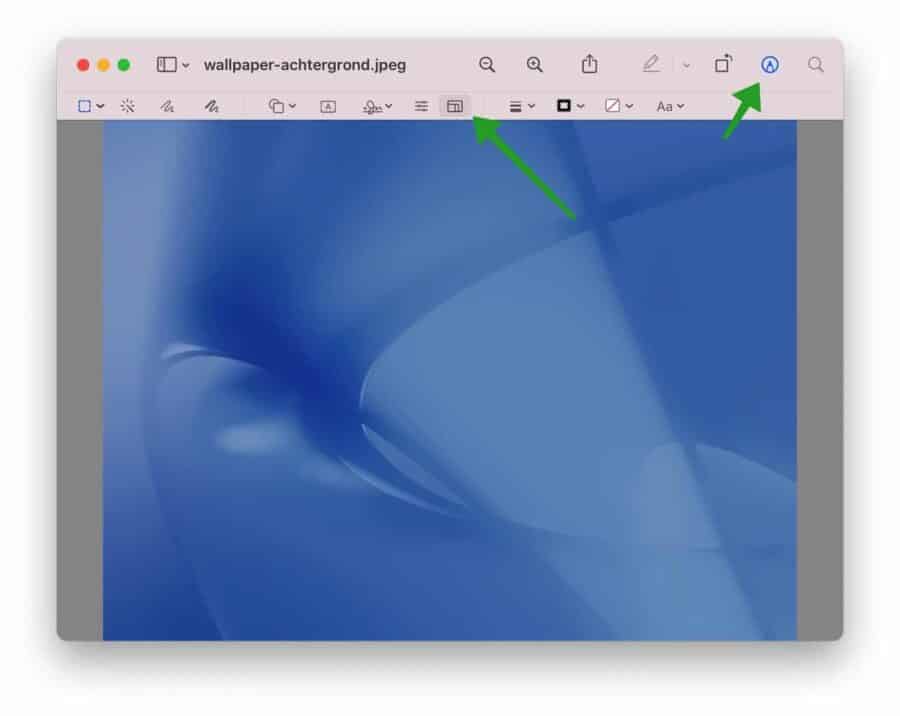
When the image is open in preview, click on the pen icon in the menu bar. Then click on the window icon to resize the image via the preview app on your Mac.
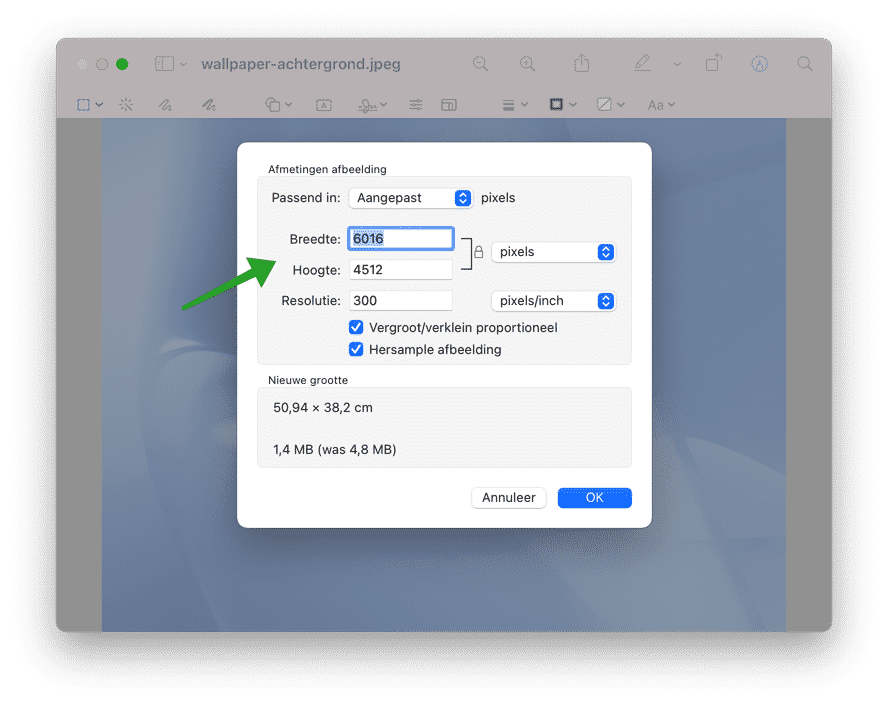
You will now see a new window where you can change the dimensions of the image. I recommend that you adjust the image using the number of pixels. Most image sizes are displayed in pixels, not centimeters.
Reduce image size through quality and compression
You can also use the preview app on your Mac to resize the image by adjusting the quality of the image. Adjusting the quality reduces the total number of kilobytes and may slightly reduce the image quality.
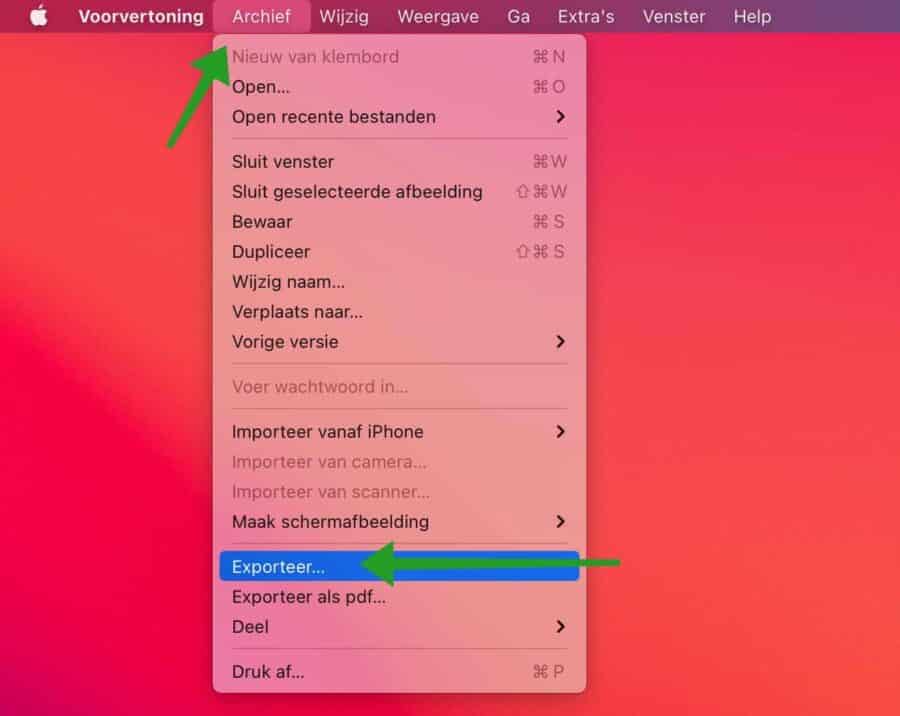
Open the image with the preview app on your Mac. In the menu, click on Archive and then on Export.
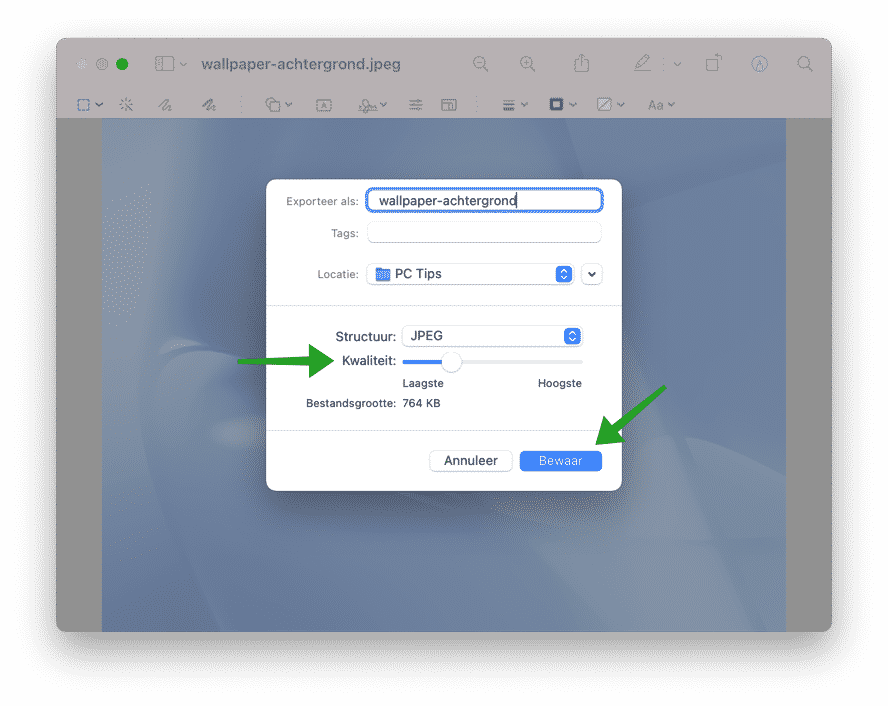
Here you can adjust the structure and quality of the image. Both structure and quality affect the file size and quality of the image. You can choose from the HEIC image structure, JPEG, JPEG-2000, OpenEXR, PDF, PNG and TIFF.
To adjust the quality, drag the blue bar from left to right. The file size will be adjusted and you will immediately see how large the final image file will be when you save it to your Mac.
Click Save to save the image to your Mac in the new or adjusted image quality.
I hope this helped you. Read more about the preview app - 10 useful Mac tips of make your Mac faster.
Thank you for reading!