De opstartvolgorde op uw computer is een instelling die verwijst naar het opstarten van een bepaald besturingssysteem. Niet alleen een besturingssysteem, ook externe hardware zoals een USB-stick of externe harde schijf kan ermee worden opgestart.
Uw computer begint met het zoeken naar de BIOS of UEFI en daarna naar de hardware. Als er hardware is gevonden dan wordt er gezocht naar een besturingssysteem dat kan worden gestart.
Wanneer u de opstartvolgorde (“boot order”) wilt aanpassen dan kunt u dit doen via de UEFI instellingen. Om de UEFI instellingen te openen dient u de computer op te starten naar de geavanceerde opstartopties. Dit is hoe het werkt.
Meld u dan aan voor onze nieuwsbrief.
Opstartvolgorde aanpassen in Windows 11 of Windows 10
Windows 11: Om te beginnen opent u de Windows instellingen. In de instellingen klikt u op “Systeem” en vervolgens op “Systeemherstel”. Klik op “Nu opnieuw opstarten” naast de “geavanceerde opstartopties”.
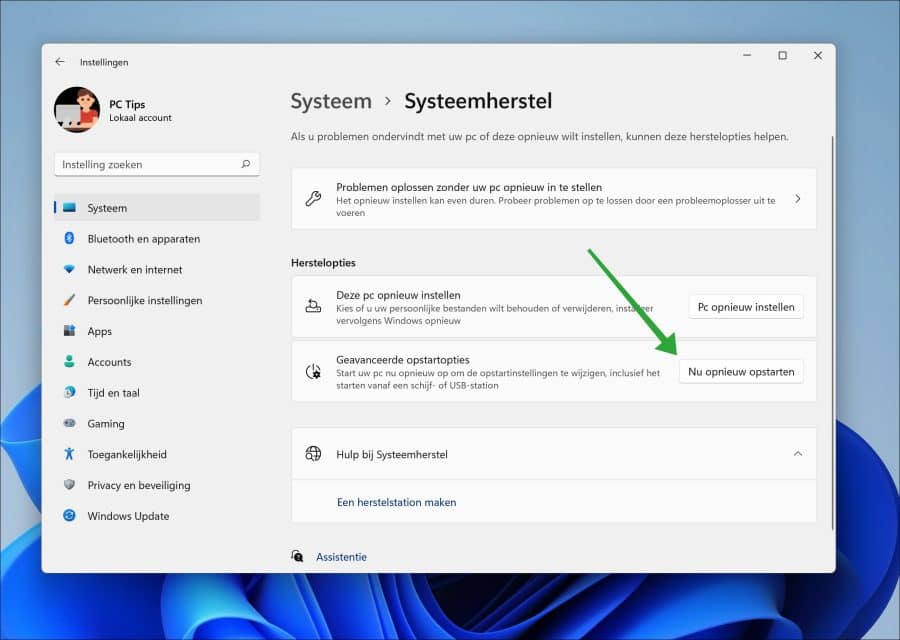
Windows 10: Om te beginnen opent u de Windows instellingen. In de instellingen klikt u op “Bijwerken en beveiliging” en vervolgens op “Systeemherstel”. Klik op “Nu opnieuw opstarten” naast de “geavanceerde opstartopties”.
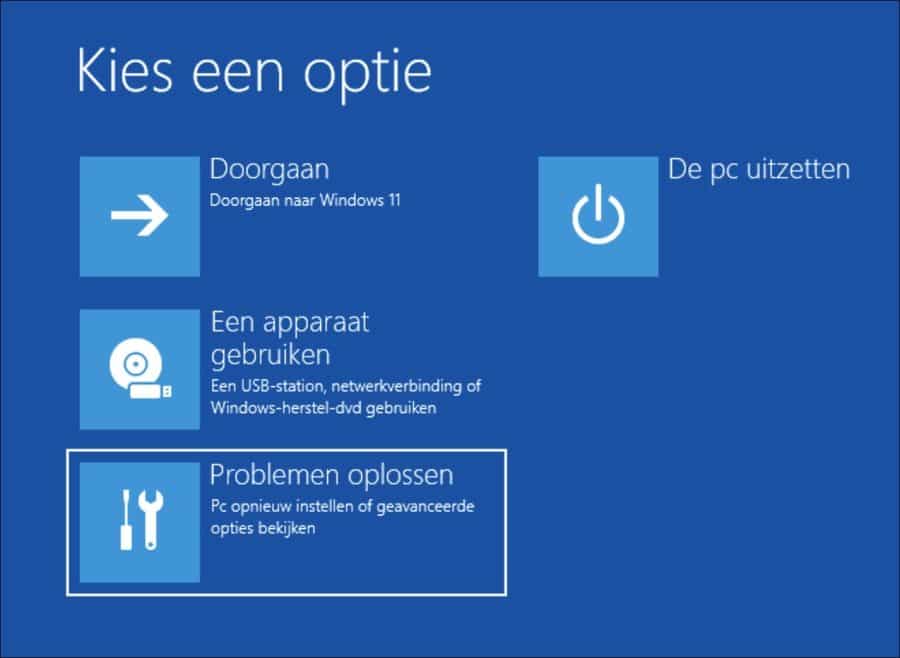
In de geavanceerde opstartopties klikt u op “Problemen oplossen”.
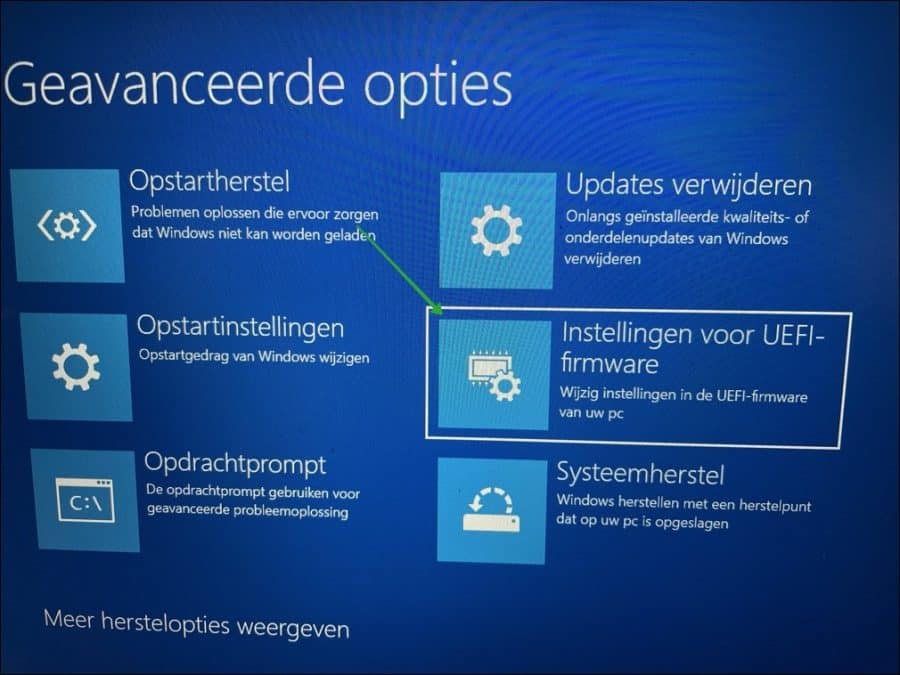
Klik vervolgens op “geavanceerde opties”.

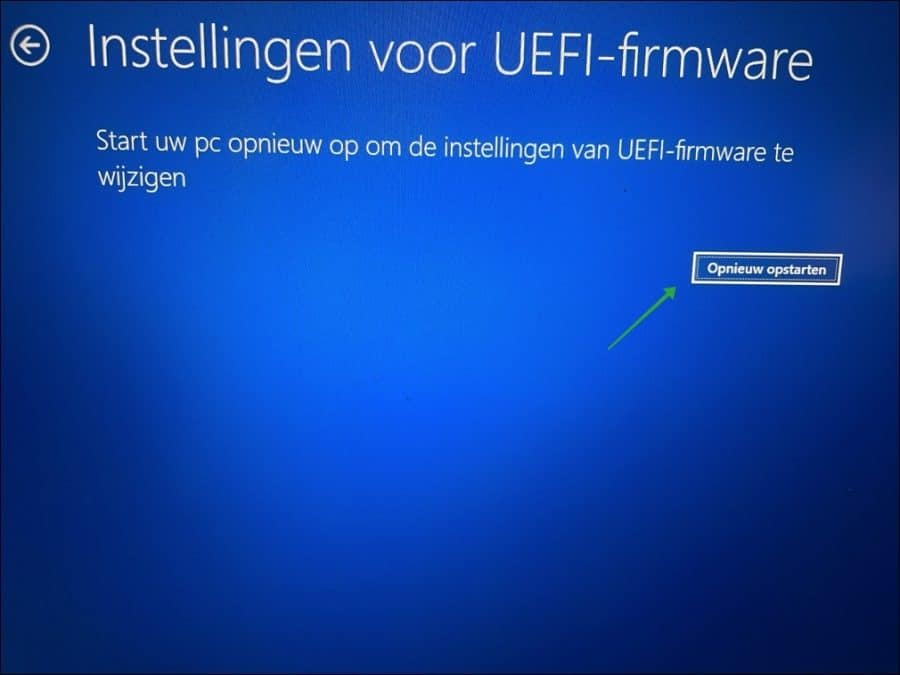
Klik nu op “Instellingen voor UEFI-firmware” om de UEFI-firmware instellingen te wijzigen.
Om de UEFI-instellingen te laden moet u de computer opnieuw opstarten.
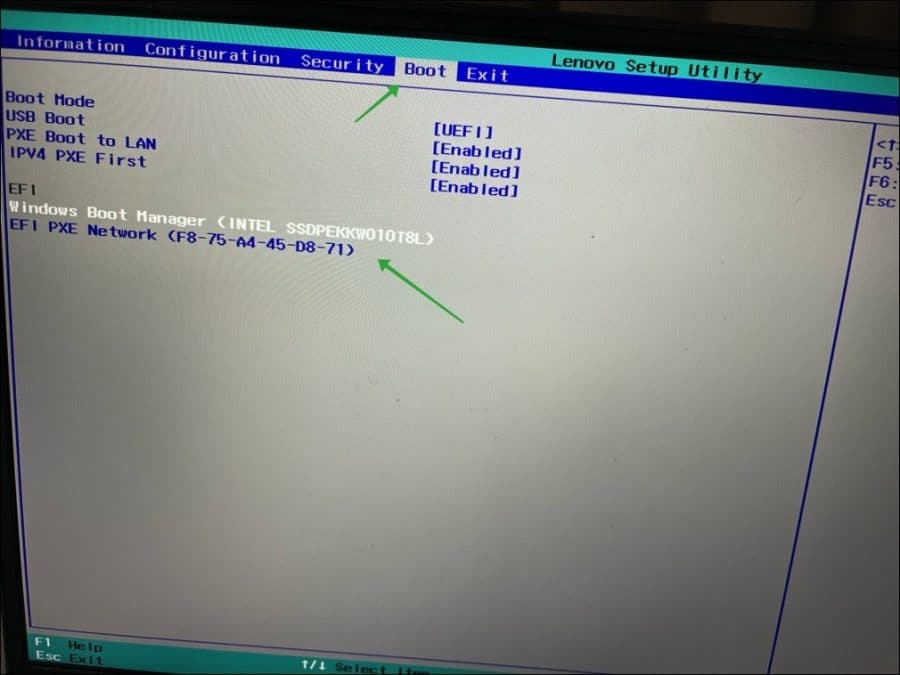
Afhankelijk van welke UEFI u heeft, dit verschilt per merk en model moederbord, wijzigt u de opstartvolgorde. Druk hiervoor op de “Boot options” of “Opstart opties” en wijzig het apparaat wat u als eerste wilt starten door de instructies op het scherm te volgen.
Over het algemeen wijzigt u het apparaat door één van de “F” functie toetsen te gebruiken. Als u bijvoorbeeld een USB apparaat als eerste wilt starten, dan zorgt u dat het USB apparaat als eerste in de lijst staat. Het tweede apparaat als tweede enzovoorts. Om de aanpassing op te slaan drukt u meestal op F10 toets en slaat u de aanpassing in de opstartvolgorde op.
Uw computer gaat nu herstarten en probeert via de UEFI instellingen de ingestelde opstartvolgorde uit te voeren. Ik hoop u hiermee geholpen te hebben. Bedankt voor het lezen!
Lees meer: BIOS opstartvolgorde wijzigen.
Help mee
Mijn computertips zijn gratis en bedoeld om andere mensen te helpen. Door deze pc-tip te delen op een website of social media, helpt u mij meer mensen te bereiken.Overzicht met computertips
Bekijk ook mijn uitgebreide overzicht met praktische computertips, overzichtelijk gesorteerd per categorie.Computerhulp nodig?
Loopt u vast met uw pc, laptop of software? Stel uw vraag op ons computerforum en krijg gratis computerhulp van ervaren leden en experts.