

Apple introduced the HEIC image format in 2017 as the standard photo format for their devices. This was implemented with the update to iOS 11, giving any user who updated their device to this version or later access to the new High-Efficiency Image Container (HEIC) format.
HEIC is able to store one or more photos that use the High-Efficiency Image Format (HEIF). This format uses an advanced compression technique, which makes it possible to create digital photos with smaller file sizes, while maintaining high quality. This technology therefore offers the advantage of more efficient storage space without sacrificing image quality.
Convert HEIC to JPG
Convert HEIC to JPG with Photos app
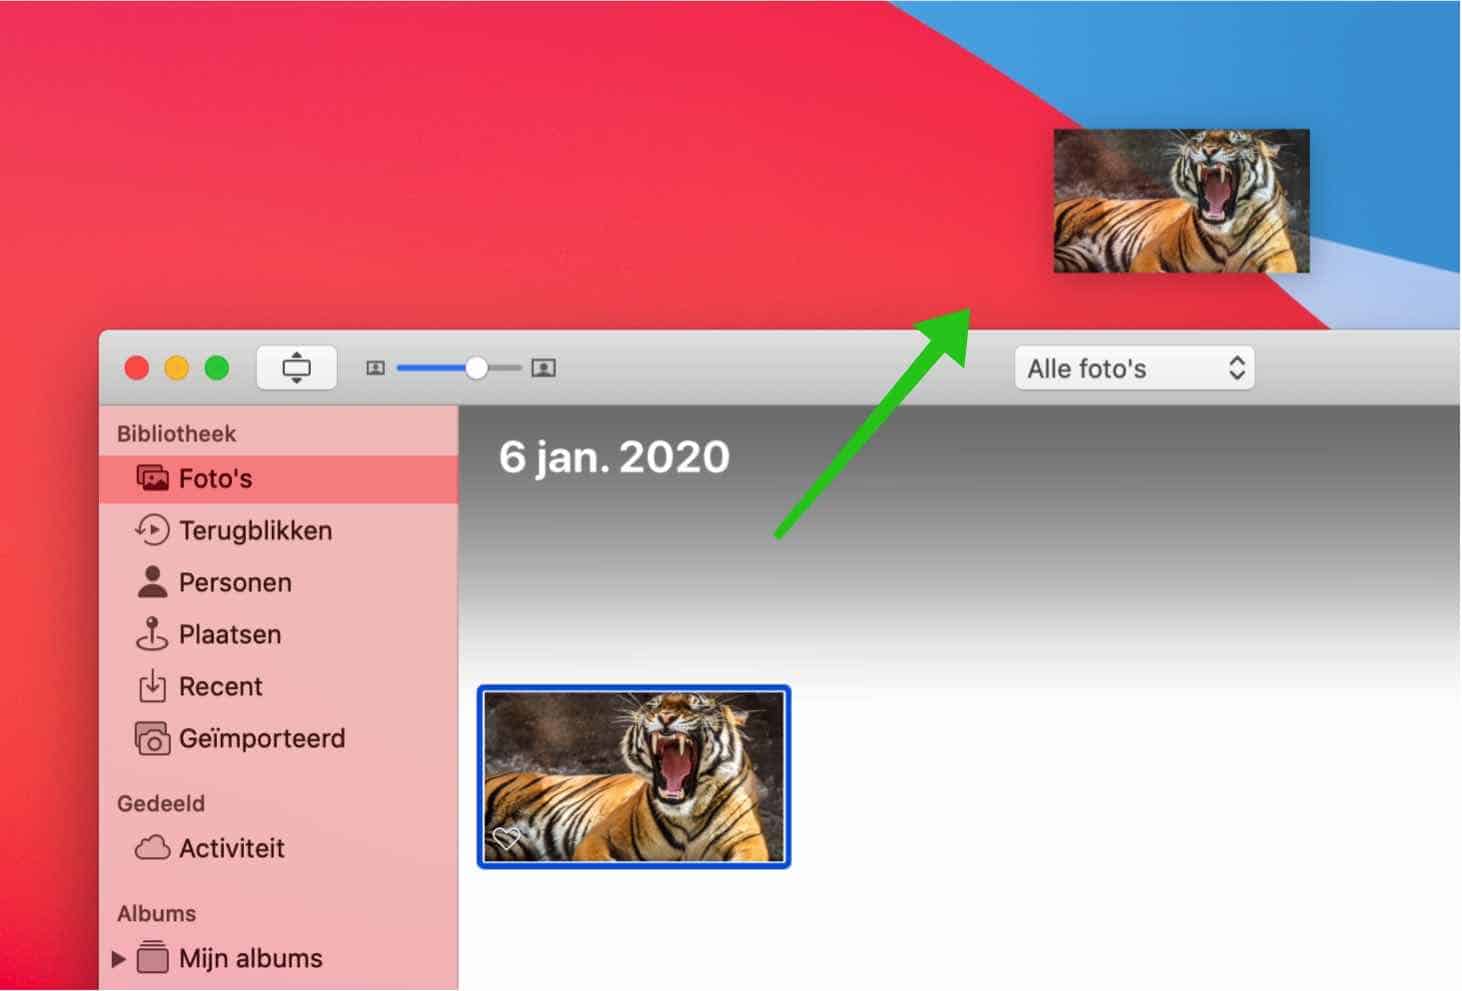
The fastest way to convert HEIC photos from the Photos application to JPEG is to simply drag the photo to the desktop.
If you do not have the photo file available in the Photos app on your Mac, first import the photo into Photos.
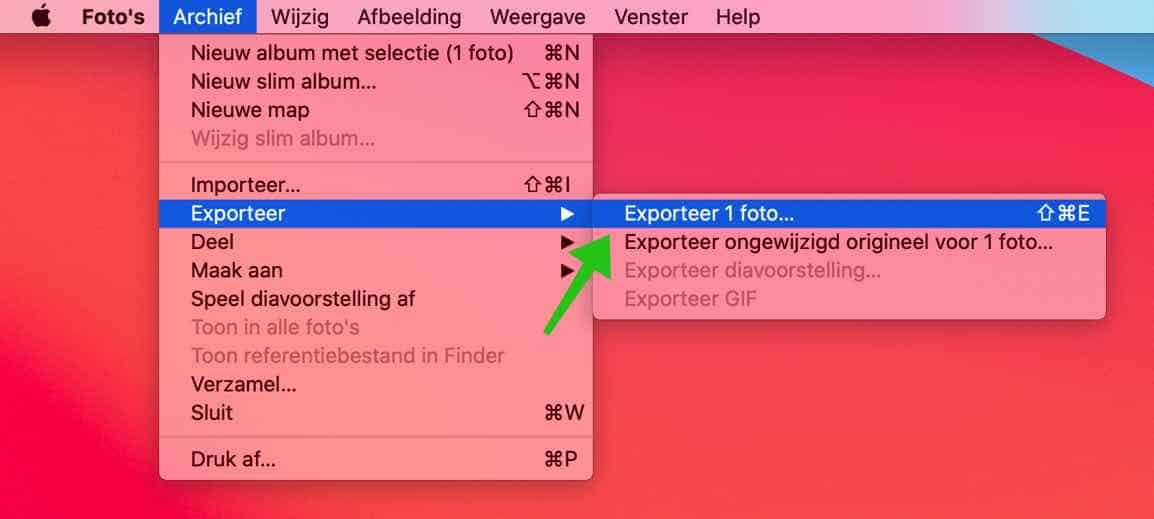
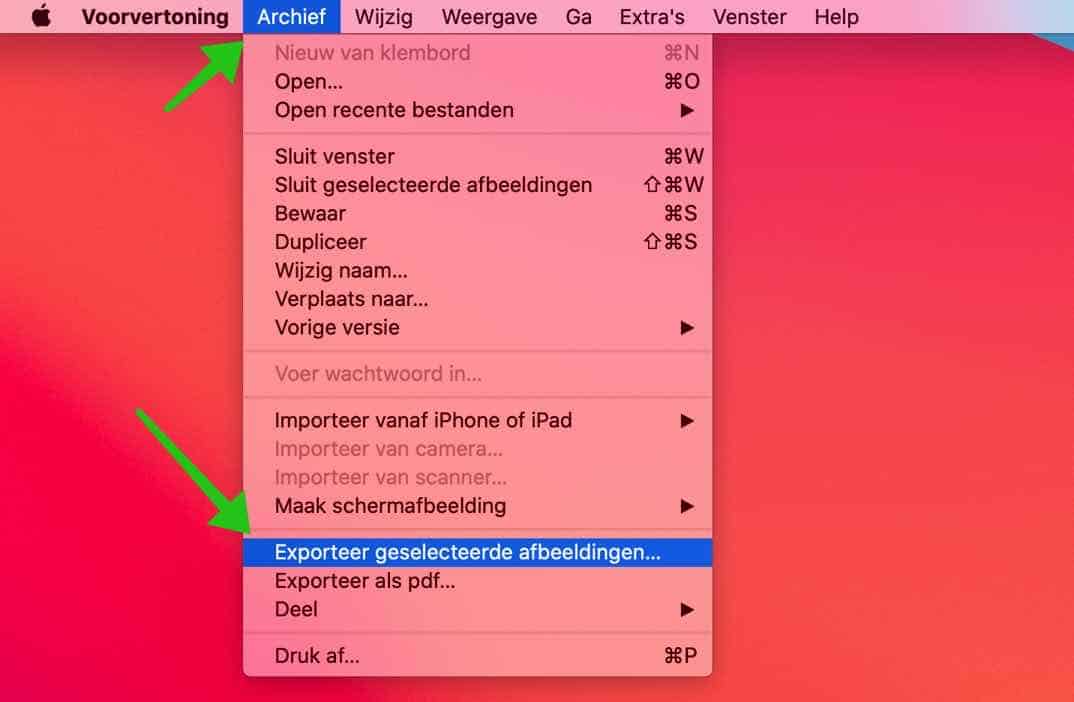
Another way to convert from a HEIC file (imported into Photos app) to JPEG is to select the photo in Photos. In the menu go to Archive then Export and click on Export 1 photo…
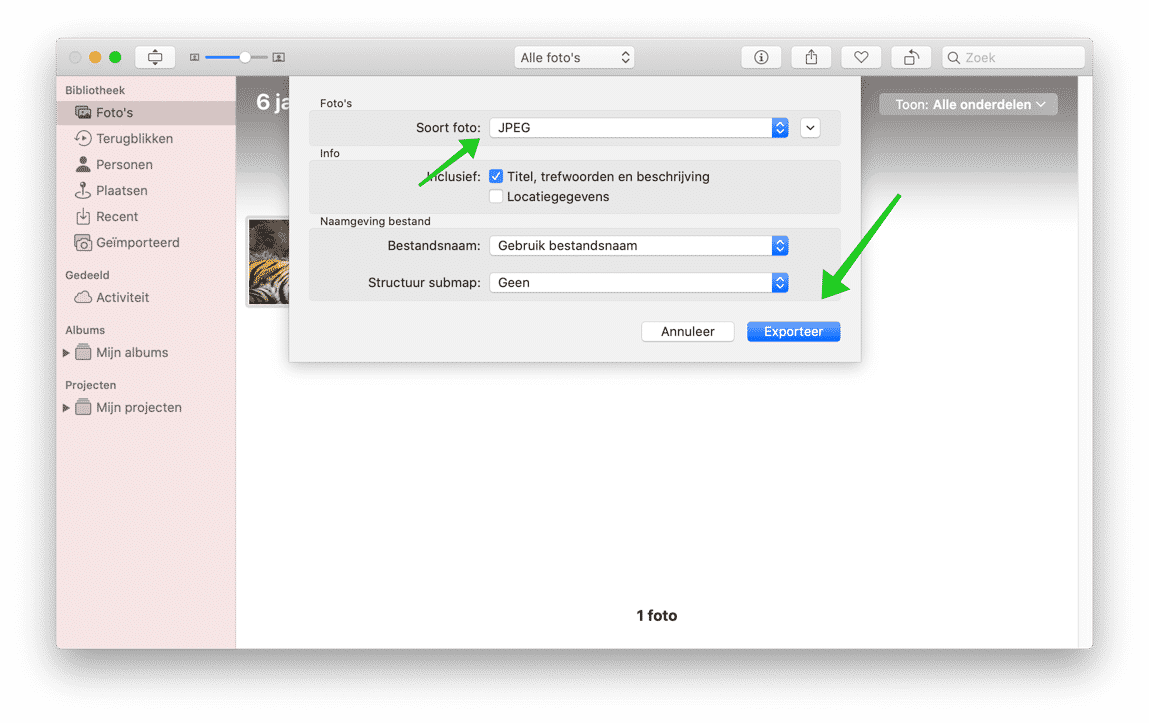
Then select JPG as the file format and click Export.
Convert HEIC to JPG with Preview app
Open Finder, go to the location with the HEIC images.
In the folder, press Command ⌘ + A on your keyboard. Select all HEIC images.
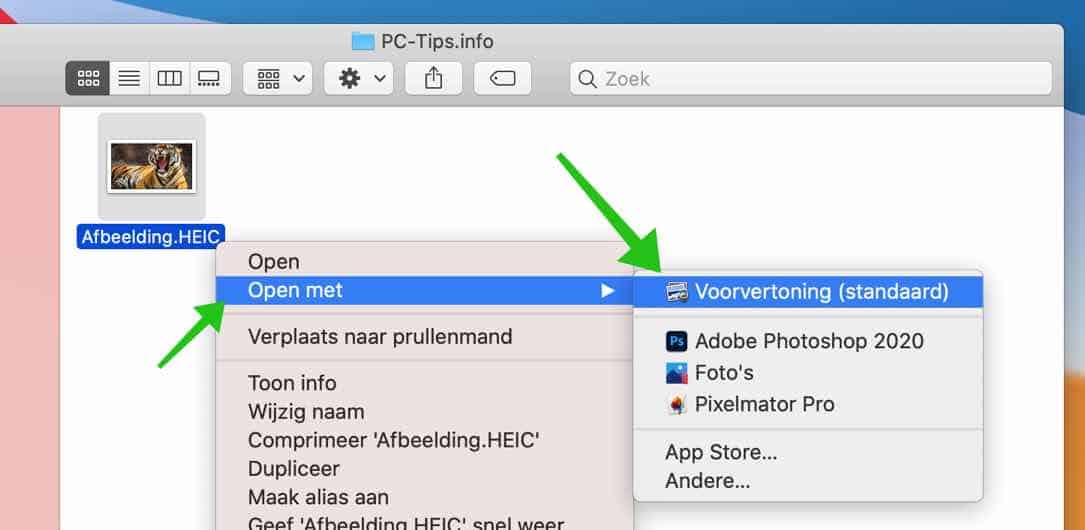
Right-click on one of the selected images (while they are all still selected), then click Open With and select Preview.
De App preview is now open with all HEIC images. Press Command ⌘ + A again to select all images in preview.
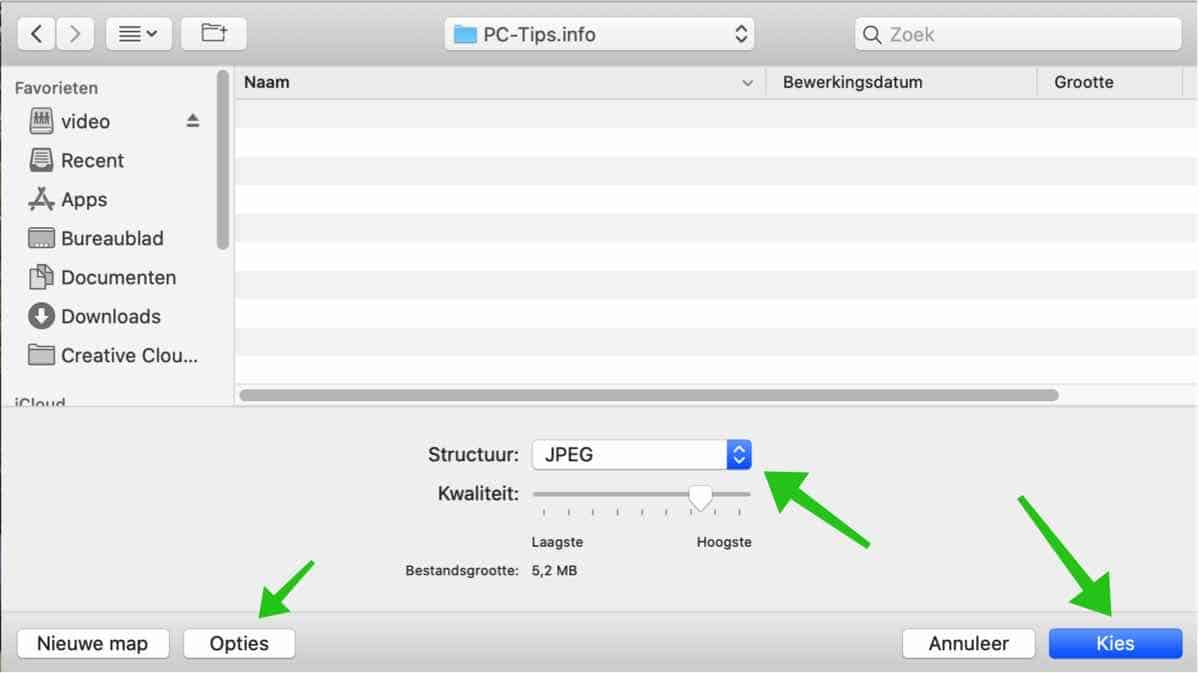
In the Preview menu, go to File and then click Export Selected Images.
Click the Options button to display the export options in Preview. Export the image(s) as JPEG format, select the quality of the image(s) and click Choose.
You now have two ways to convert images from HEIC to JPG/JPEG file format.
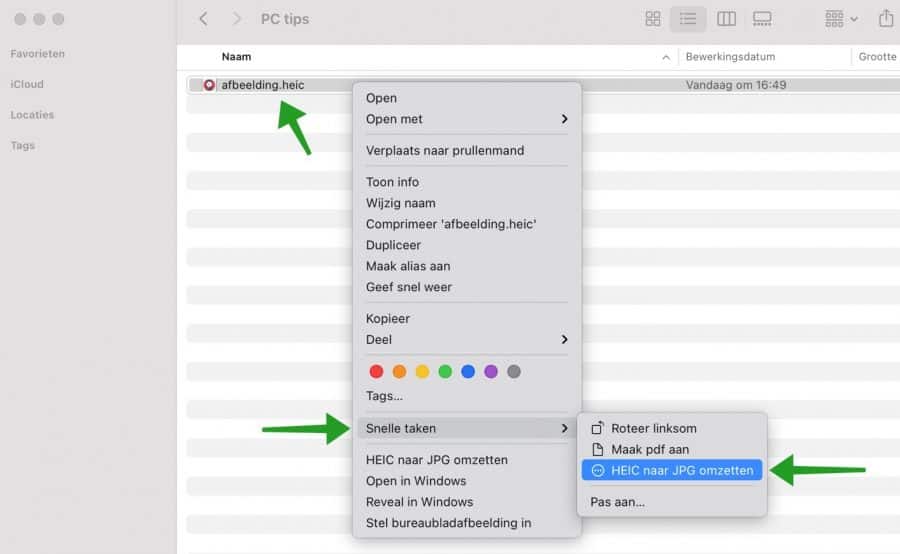
Convert HEIC to JPG via task with Automator
You can convert HEIC to JPG via Automator. You then create a quick job to convert HEIC files to JPG. This way, you can quickly convert multiple HEIC files on your computer with a right-click.
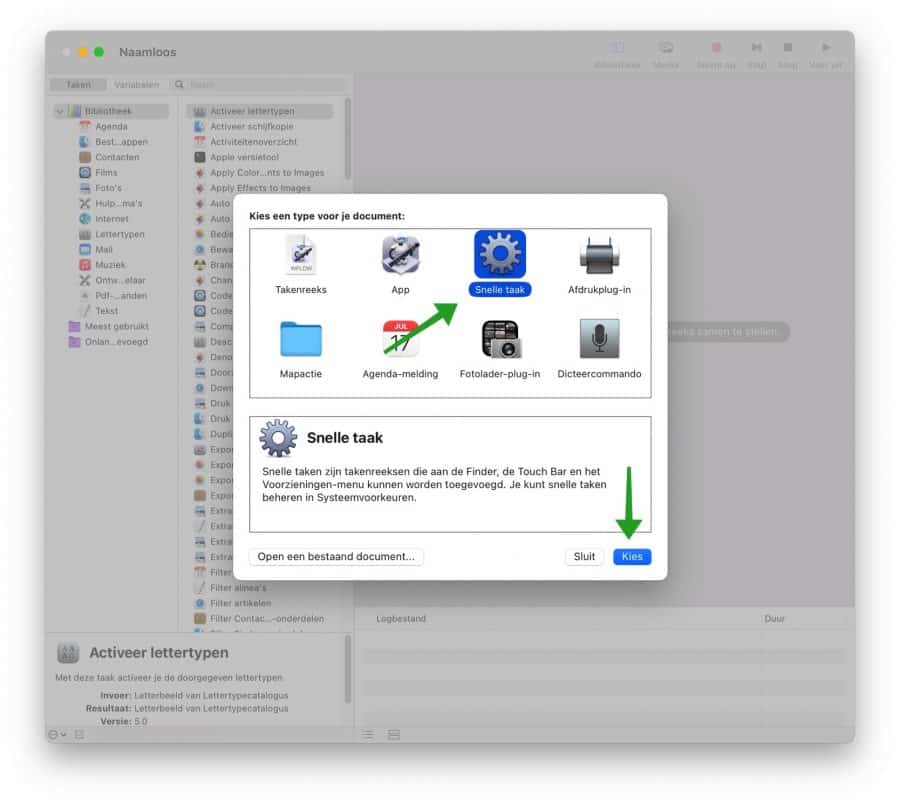
Go to your applications folder and open Automator. Click on New Document at the bottom left. Then click Quick Task and then Choose.
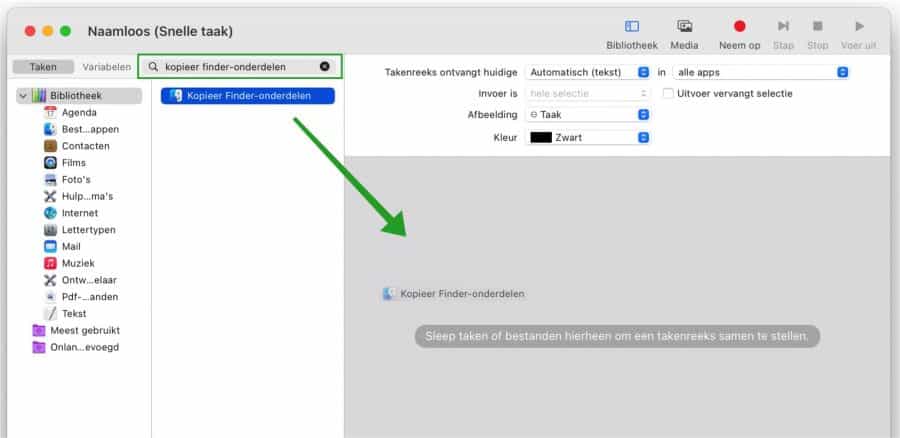
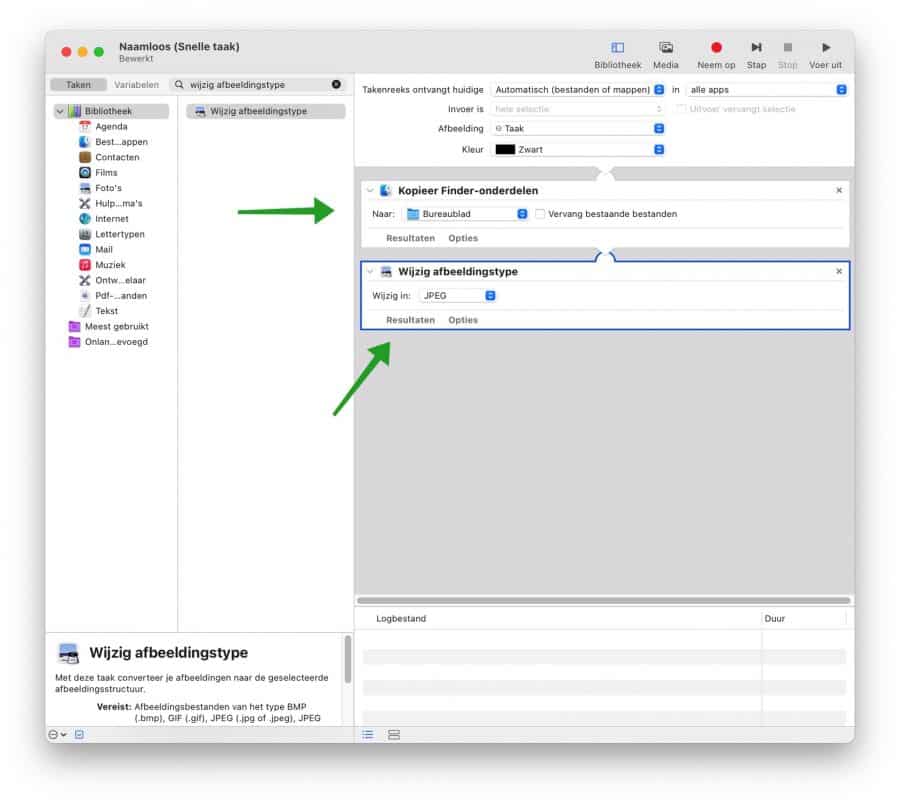
At the top of the search window, search for: copy finder items and drag this item to the right to create an automator task.
If necessary, adjust the location by changing “to: ” to a location for the JPG file. This is the location where the converted HEIC file to JPG will be saved.
Search again at the top of the search window for: change image type and drag this item to the right to create an automator task.
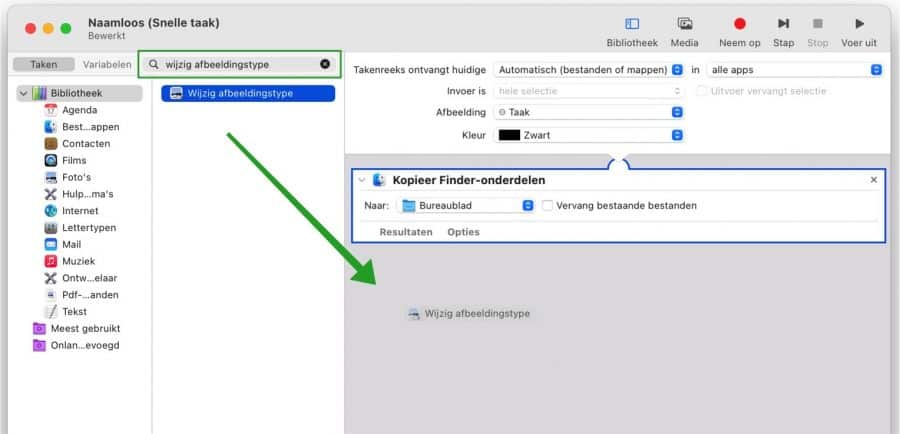
You will now see two tasks. To convert a HEIC file to something other than JPEG, change “JPEG” to the desired image type.
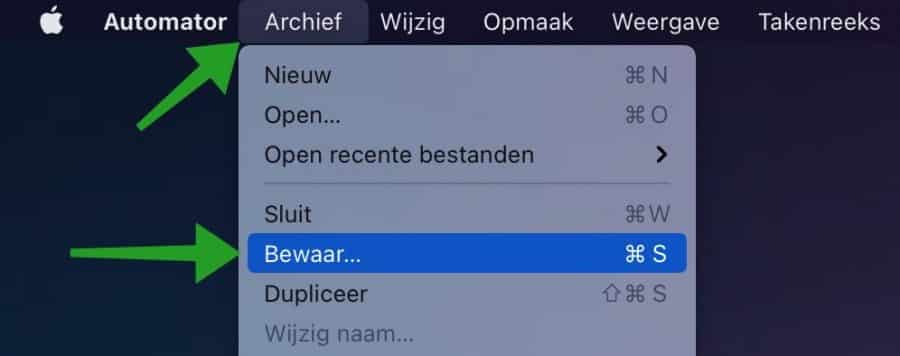
Then click on Archive at the top of the menu and click Save.
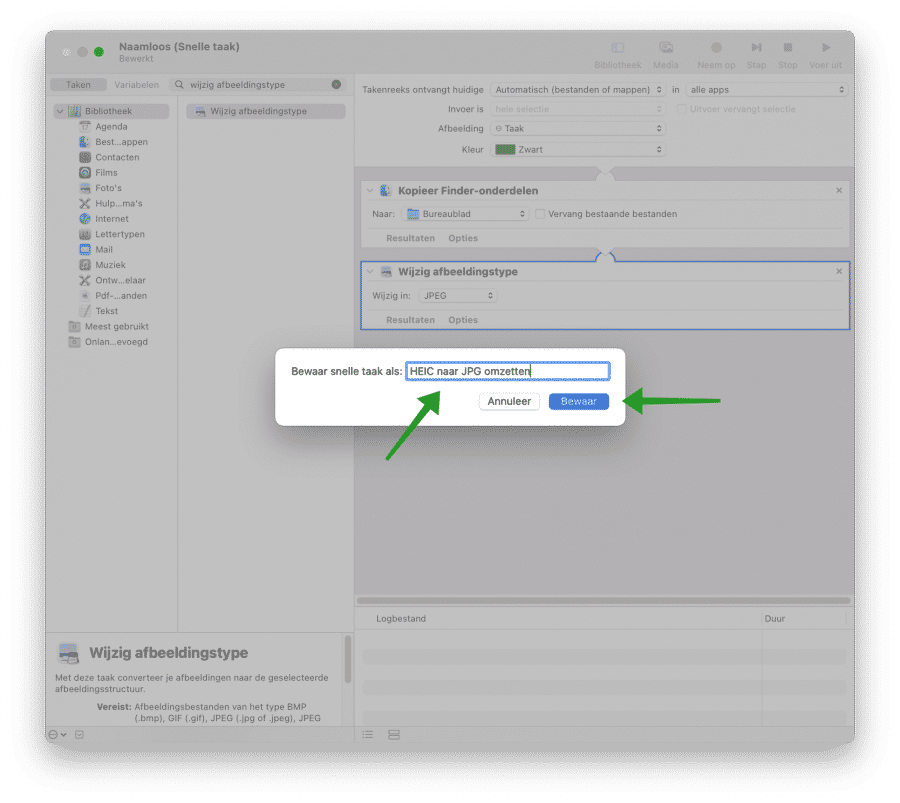
Give the new Automator task a clear name and click Save.
Locate the HEIC image(s) on your Mac. Right-click the HEIC file and click Quick Tasks, then click the task name. You now have a Quick Finder task right-click in the Quick Tasks menu.
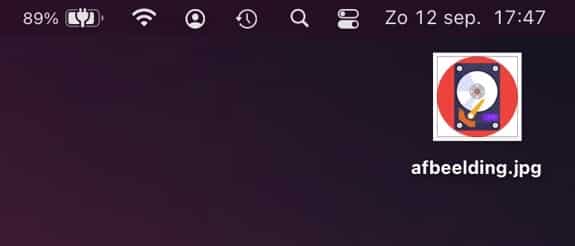
The converted HEIC file is now placed on the Desktop or the location set in the task.
Read more to get your Make Mac faster by removing unnecessary photos and more from your Mac.
I hope this helped you. Thank you for reading!
I know that in IOS there are several ways to convert a HEIC file to a JPEG, for example via the preview. But this overwrites the photo's original creation date with the date of conversion. How can I keep the photo's original creation date during conversion? That makes putting together a photo book a lot easier!
Hello, this is not possible in macOS via preview. You will then need to work with Terminal and use the “touch -mt” command to set a new date and time for the file. (touch -mt YYYYMMDDhmm ). Good luck!
For example: touch -mt 202212141800
Hello! I discovered that many photos now have a HEIC extension. They cannot be downloaded into a photo book. I have managed to convert to JPEG once, but it is tiring and not always successful. It seems as if the conversion is not always successful. I have already corrected some things in my iPhone. but I would suddenly like to convert the HEICs already present in PHOTOS into JPEGS….
I cannot follow all the above instructions. Can it be simpler?
Hello, if you don't care about privacy for your photos, you can search on Google for “heic to jpg”. You will then come across various websites where you can upload, convert and download HEIC photos. Good luck!