

If you want to know when a photo was taken, you can add the “taken on” column to Windows Explorer.
The “Taken on” column gives you immediate insight into when a photo in a particular folder was taken. This makes it easier to identify photos by date to identify a particular series or better organize your digital photos.
Please note that the “taken on” column is not always filled. This column extracts the EXIF data from the photo to determine when it was taken. EXIF data is metadata, which means that the photo contains information such as when the photo was taken, the camera settings and possibly also location information. Depending on which device the photo was taken with, EXIF data is available. If this metadata is not available, the date on which the photo was taken cannot be determined and the “taken on” column in Windows Explorer will remain empty.
“Taken on” is a standard column in Windows Explorer, but it must still be shown. This is how it works.
Add “Taken on” to Windows Photo Explorer
The “taken on” column can only be shown if the “details” view is used in the Windows Explorer.
Open Windows Explorer. Click on “View” in the ribbon and then on “Details”.
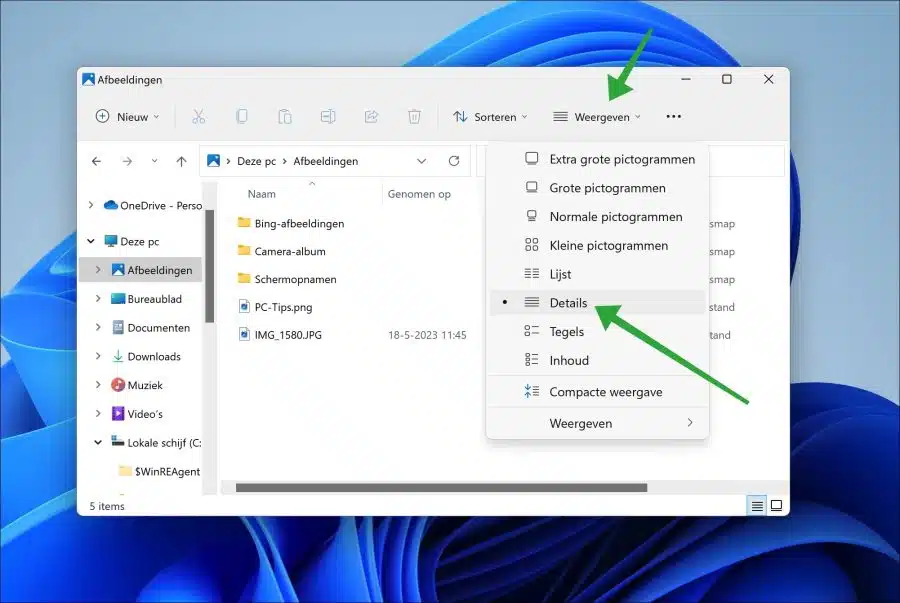
You have now enabled the detail view in Windows Explorer.
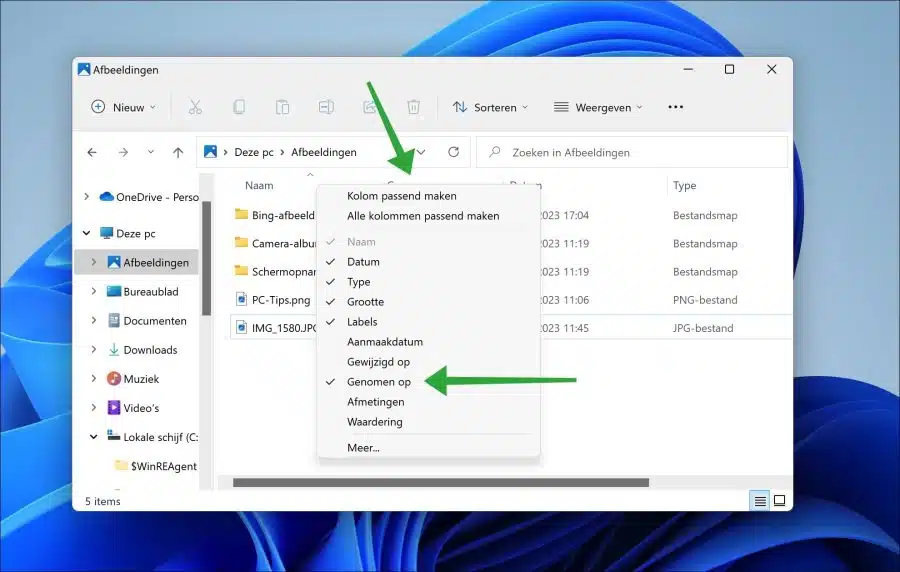
Now click with the right mouse button on one of the columns. Then click on “Taken on” in the menu to add this column to the view.
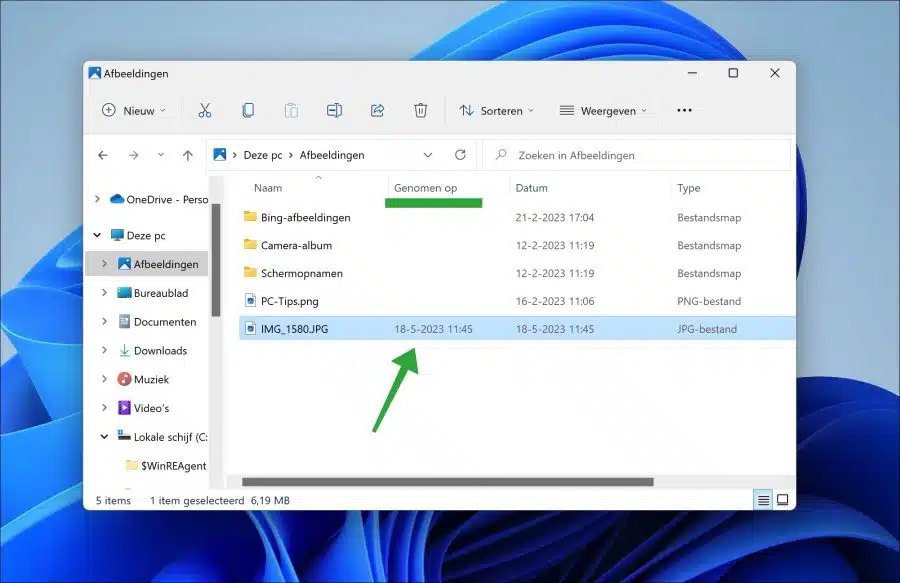
You will now see a new column called “Taken on”. You can move this column by dragging in the desired order. This way you can get into the Windows Explorer Always see when a photo was taken if it contains the necessary EXIF data.
I hope this helped you. Thank you for reading!