
User accounts are an essential part of Windows. A user account offers every computer user the opportunity to log in to Windows and load personal settings.
With a specific setting it is possible to create a user account in Windows that is not immediately visible. A Windows account can be created in Windows itself but also via third-party applications. An account created via an external application does not have to be immediately visible in Windows.
In this article you will find 5 tips to display all users created on the computer.
View accounts in Windows 10
Show user account via the start menu
The first way to view user accounts in Windows is via the start menu.
Click on the Windows Start button. Then click on your logged in username in the menu on the left.
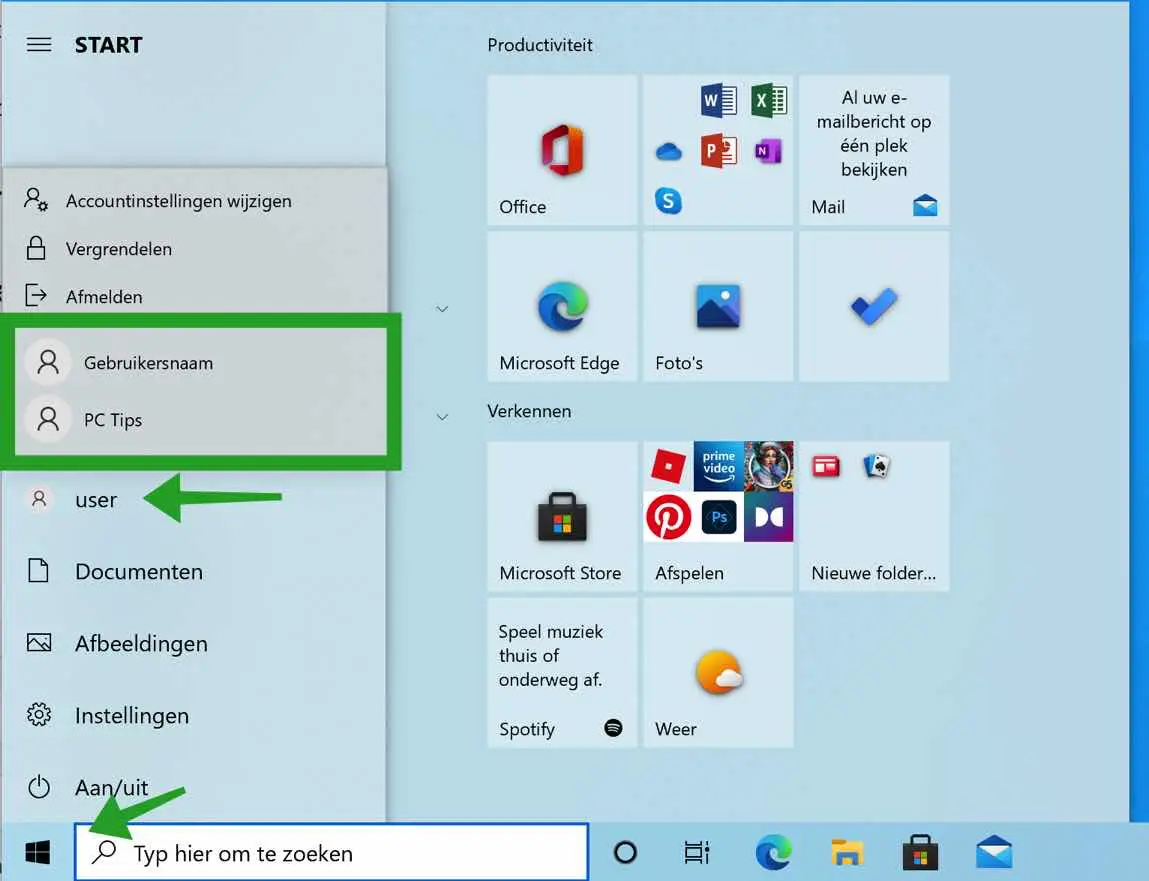
It is now in the Start Menu the other user accounts are also displayed.
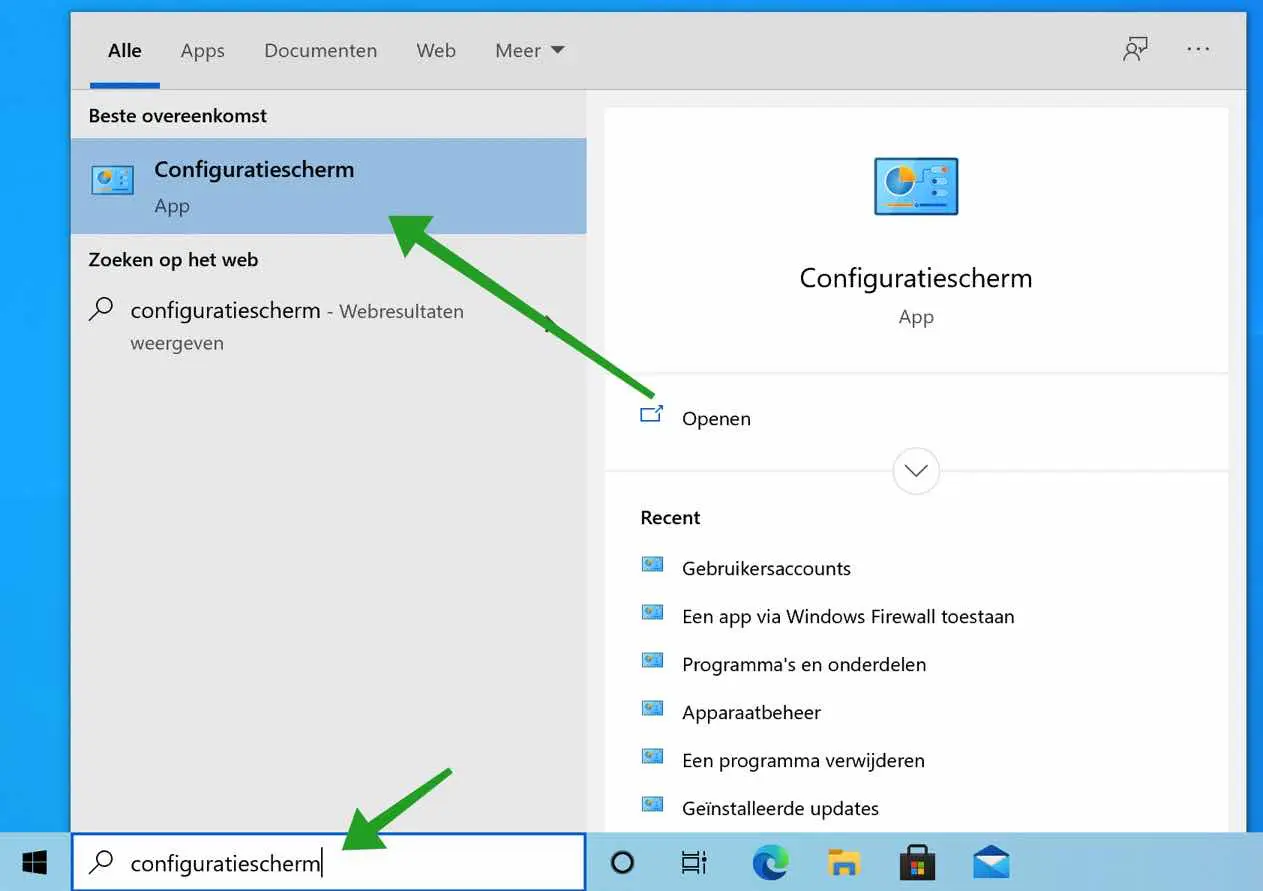
View user accounts via the control panel
The second way to view all user accounts in Windows 10 is through the Control Panel.
In the Windows search bar type: control panel.
In the control panel, click on User Accounts.
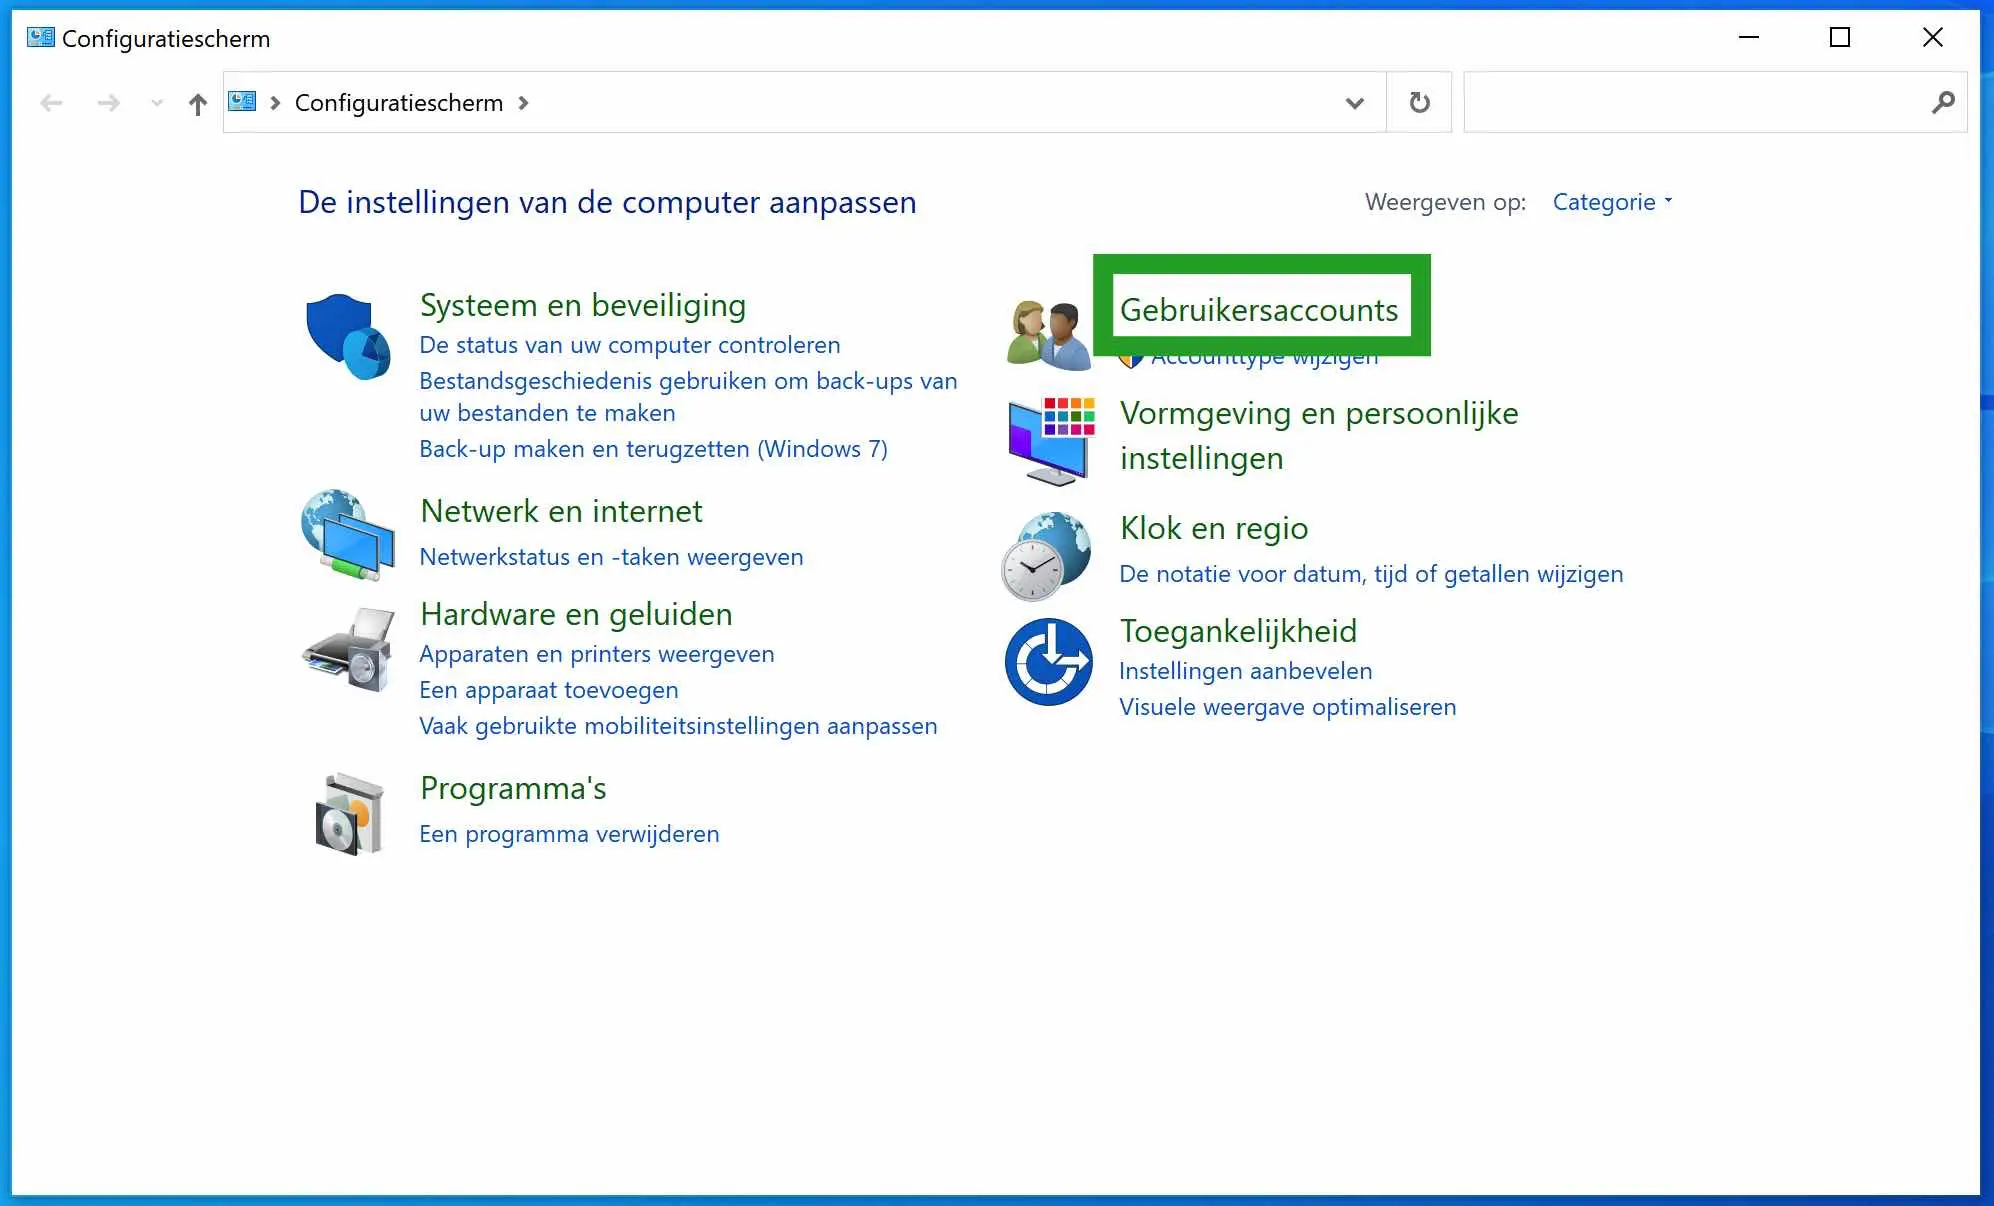
Click User Accounts again.
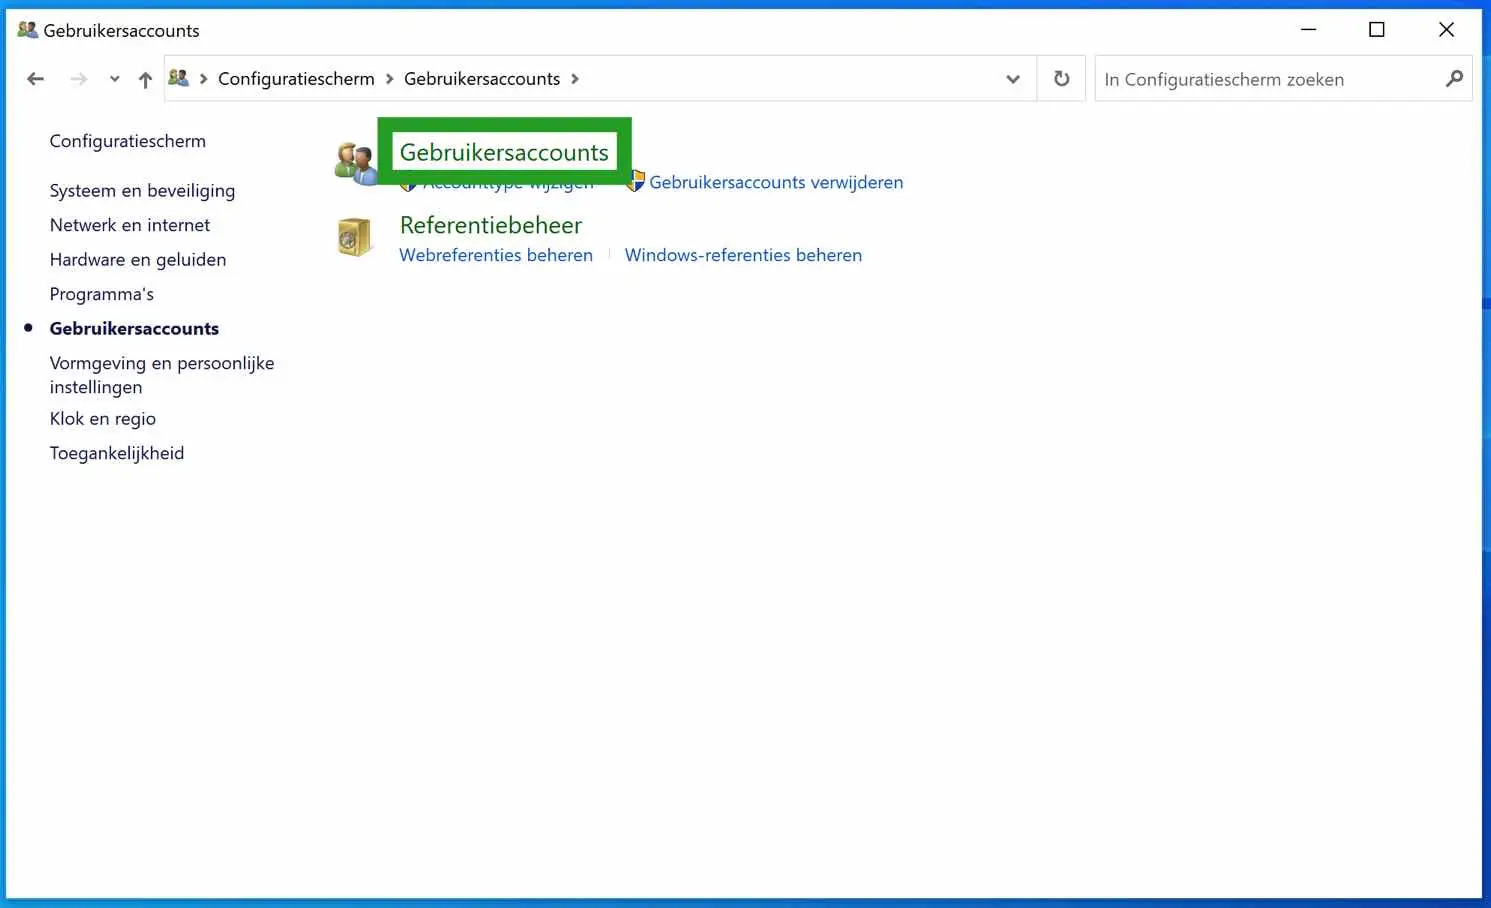
Then click on the text: Manage another account.
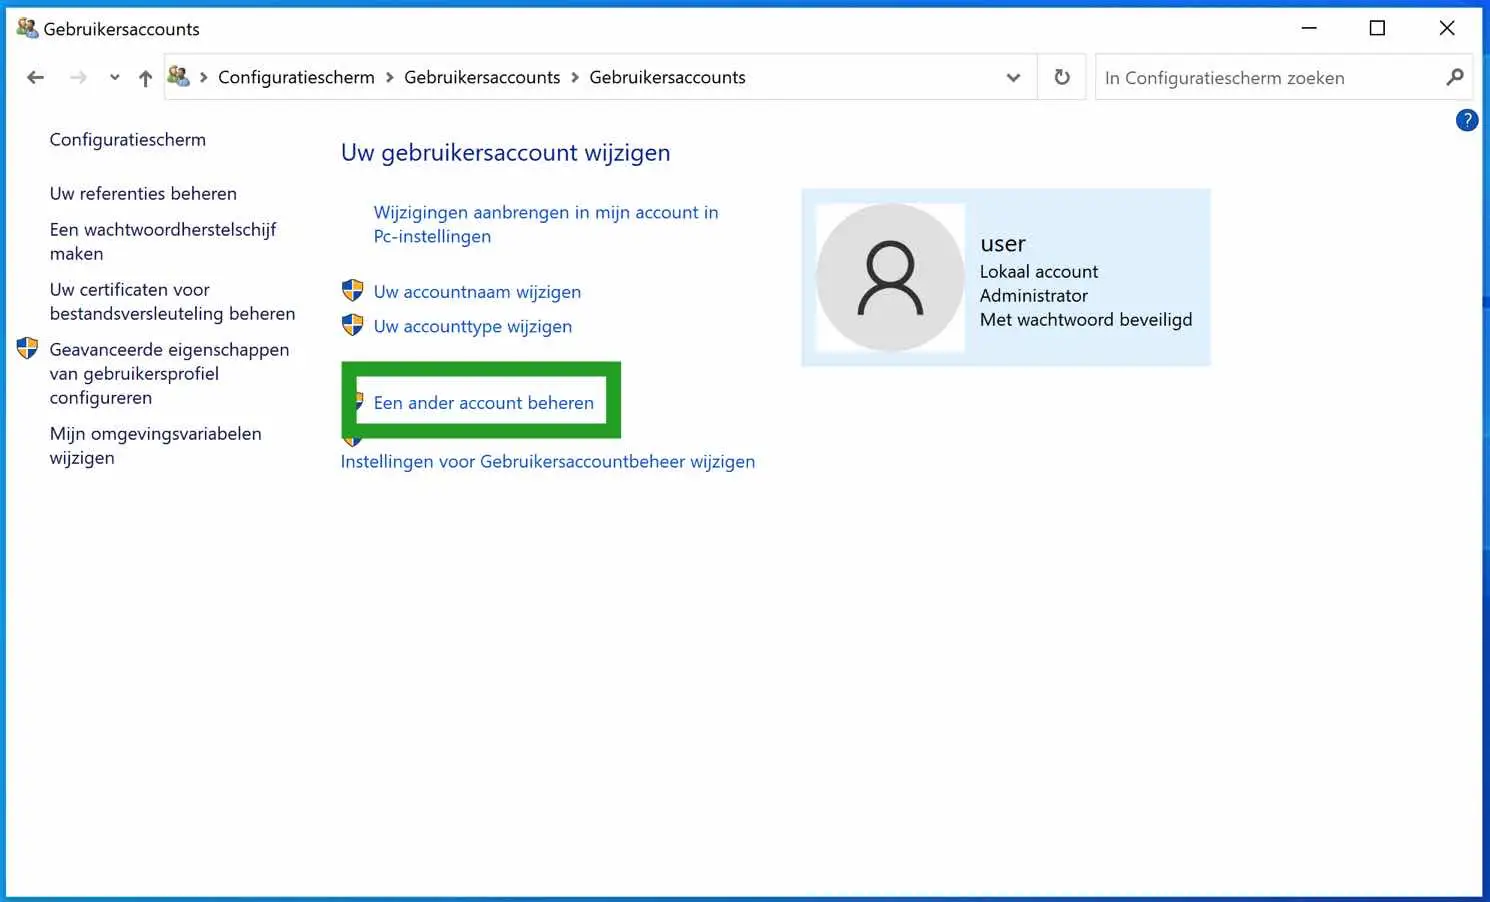
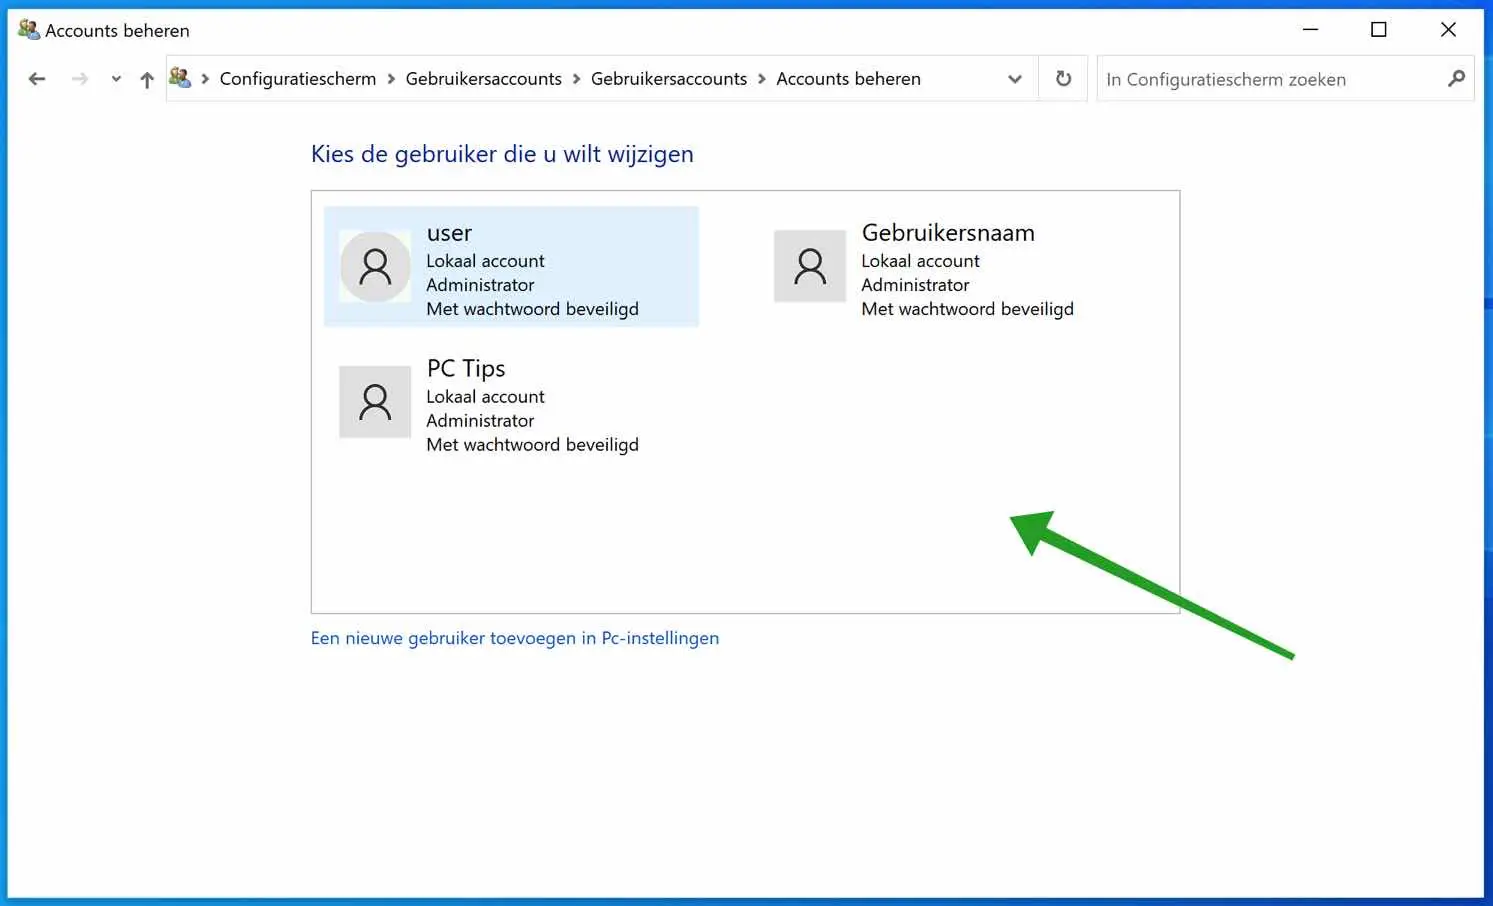
You will now see all user accounts in Windows 10 in the overview.
View user accounts via Command Prompt
You can also list the users through the Command Prompt. A simple command is enough to list all users.
In the Windows search bar type: Command Prompt.
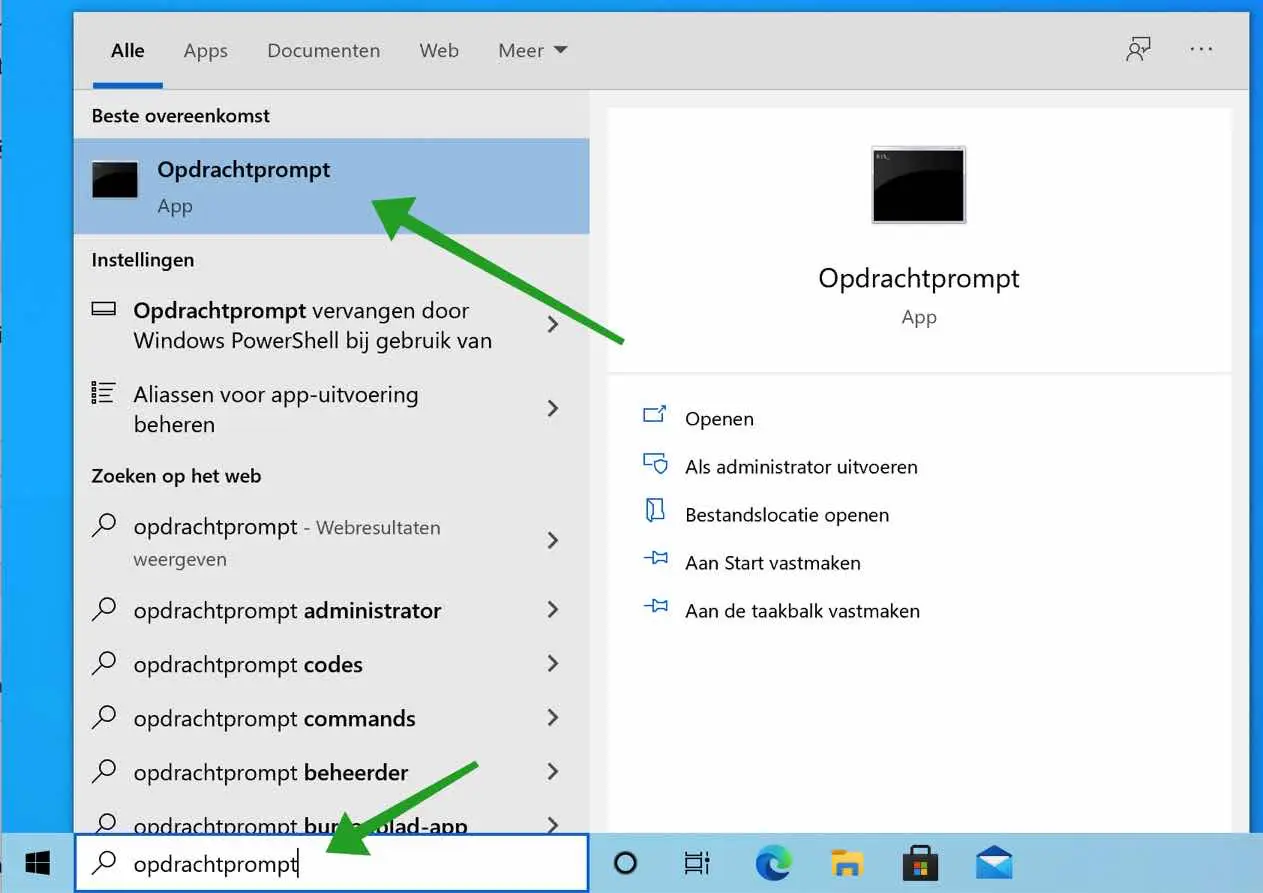
Open it Command Prompt and type the following command below. Press ENTER to confirm.
net user

You will now see all users created in Windows 10 in the overview.
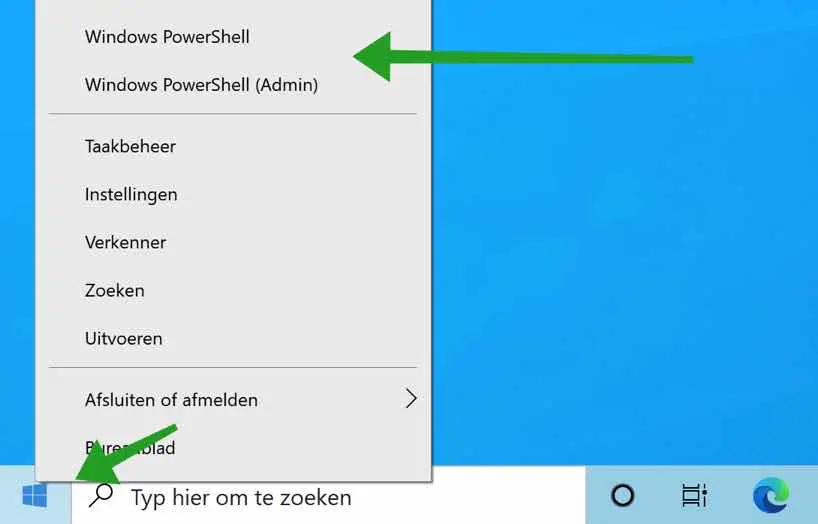
View user accounts via PowerShell
You can also query all user accounts in Windows 10 via a Powershell command-let.
Right-click on the Windows start button. In the menu, click on Powershell or Powershell (Admin).
In the Powershell window type the following command and confirm with ENTER.
Get-LocalUser
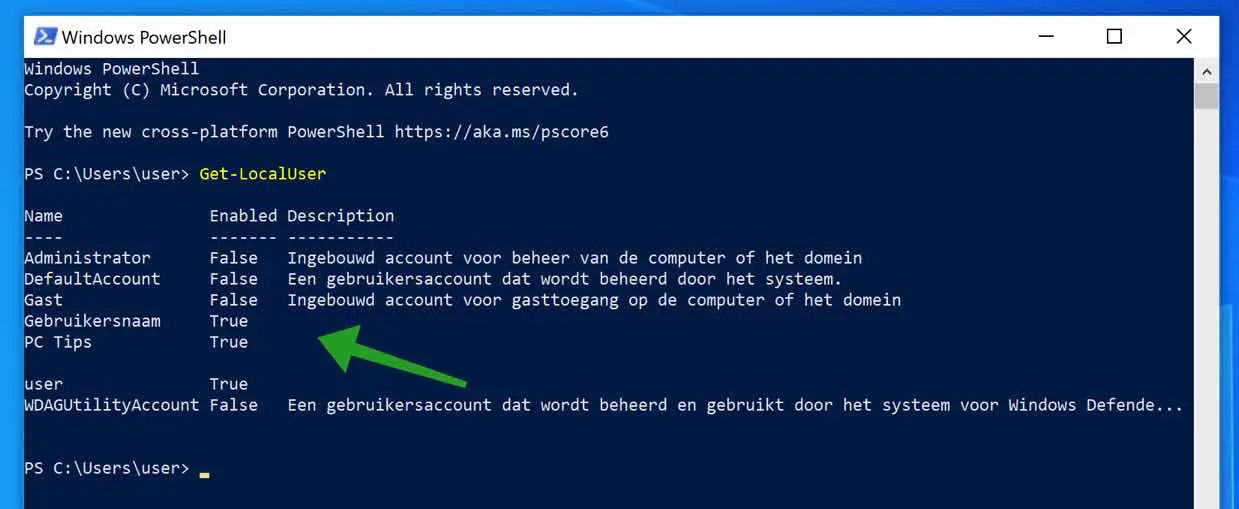
You will now see an overview of all user accounts in Windows. You can also immediately see in the Enabled table whether the account is activated and a description of the account.
I hope this helped you. Thank you for reading!
Hallo,
I have a popup that says I don't have permission to move a file from folder to USB stick.
I am an administrator.
What am I still lacking and how can I achieve that?
Thanks in advance,
Cyril
Hallo,
Check the permissions of the file you are trying to move. Right-click on the file, go to 'Properties', and then go to the 'Security' tab. Here you can see what rights you have for that file. If you do not have the necessary permissions, you can change them as an administrator. In addition, some USB drives have a physical switch for write protection. Make sure it is not enabled.
If your USB drive is formatted with the FAT32 file system, it cannot hold files larger than 4 GB. If the file you are trying to move is larger than this, you will need to reformat the USB to a different file system such as NTFS or exFAT (note: formatting will delete all data on the drive!).
Success!
Dear Stephen,
thank you for your fast response.
The world has now changed under my hands.
I have not found the file again after several attempts to move it. I left it to the experts.
I will keep your recommendations in mind.
Thanks again.
Greetings Cyriel