
If you're looking for a lightweight version of Windows 11, Tiny 11 is a good choice.
Tiny 11 is an unofficial, stripped-down one versie of Windows 11, designed to provide only the essential components needed for use. It is therefore much lighter to work on your computer, uses fewer resources and can be installed on any computer. Even if it does not meet security requirements such as TPM, Secure Boot or the minimum hardware specifications.
Related: Tiny10 – lightweight version for Windows 10.
What is the difference with a normal Windows 11 version
Lower system requirements
The big difference between a regular version of Windows 11 and Tiny 11 is the difference in computer specifications you need to install it. For example, for Tiny 11 you need a computer with at least 2 GB (4 GB recommended) of internal RAM. Unlike Windows 11, this is at least 4 GB with support for TPM and Secure Boot.
Less storage space required
By removing unnecessary files, apps and features, Tiny11 takes up significantly less storage space than the standard version of Windows 11. This is especially useful for computers with limited storage capacity.
Faster
The minimization of background processes and system requirements allows Tiny11 to perform faster, especially on computers with lower specifications. You can expect a faster experience on everyday tasks.
Focus on basic functionality
Tiny11 focuses on the basic functionalities you need, resulting in a simpler and clearer operating system. This may be especially attractive to you if you prefer a minimalist approach or if you only need the basic functionalities for work or personal use.
Privacy
Because Tiny11 removes many of the pre-installed apps and features that can collect data, it can be seen as a more privacy-friendly alternative to the standard Windows 11 installation.
Which apps are present in Tiny 11
There are still essential apps present in Tiny 11. These include the following apps:
- Windows Terminal
- Microsoft Store
- Microsoft Edge
- Calculator
- Notepad
- Paint
In addition to these apps, the standard accessibility features are also present. The remaining apps have been stripped to ensure that all bloatware has been removed which many people often do not use.
Support and updates
Tiny 11 is not supported by Microsoft. It is an external project, therefore support from Microsoft is not possible. Using Tiny11 therefore entails certain risks, especially in terms of security and compatibility with new software or hardware.
If updates are available for Tiny11, you will receive them from the developers behind the project, NTDEV. However, these updates will not have the same frequency or reliability as Microsoft's official updates. Additionally, if you rely on specific Windows features or apps that are not included in Tiny11, you may experience compatibility and functionality issues.
Activation Tiny11
As in other versions of Windows 11, you must install Tiny11 yet to be activated with a valid license code.
Download Tiny11
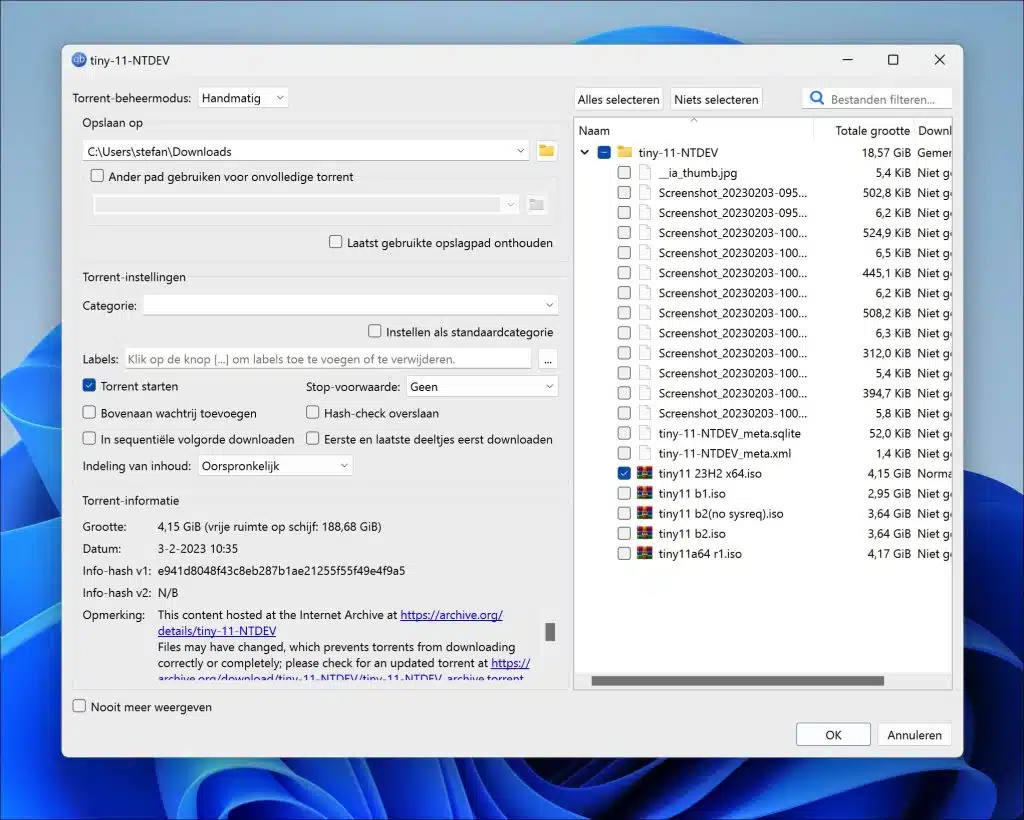
To use Tiny11 you must first download it. I recommend doing it via the official developer NTDEV to download, this way you always have the latest version.
Downloading can sometimes be slow, use the torrent file to download faster.

Select only the ISO file. You can deselect the other files.
Install Tiny11
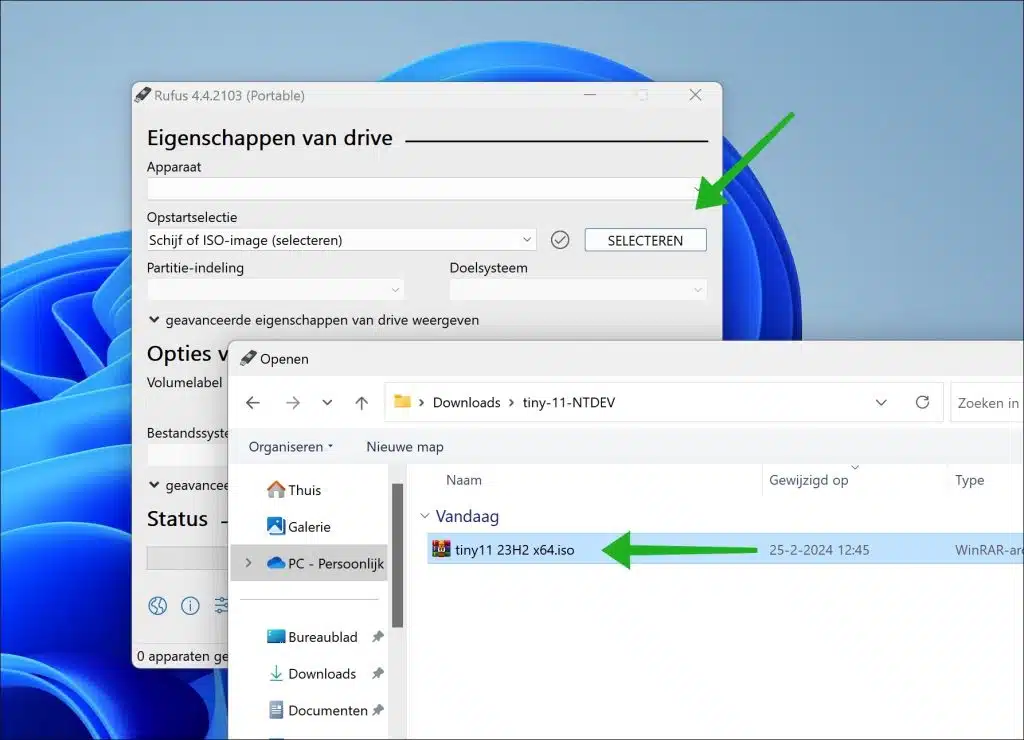
To install Tiny11 you will need the ISO file. You can download this first.
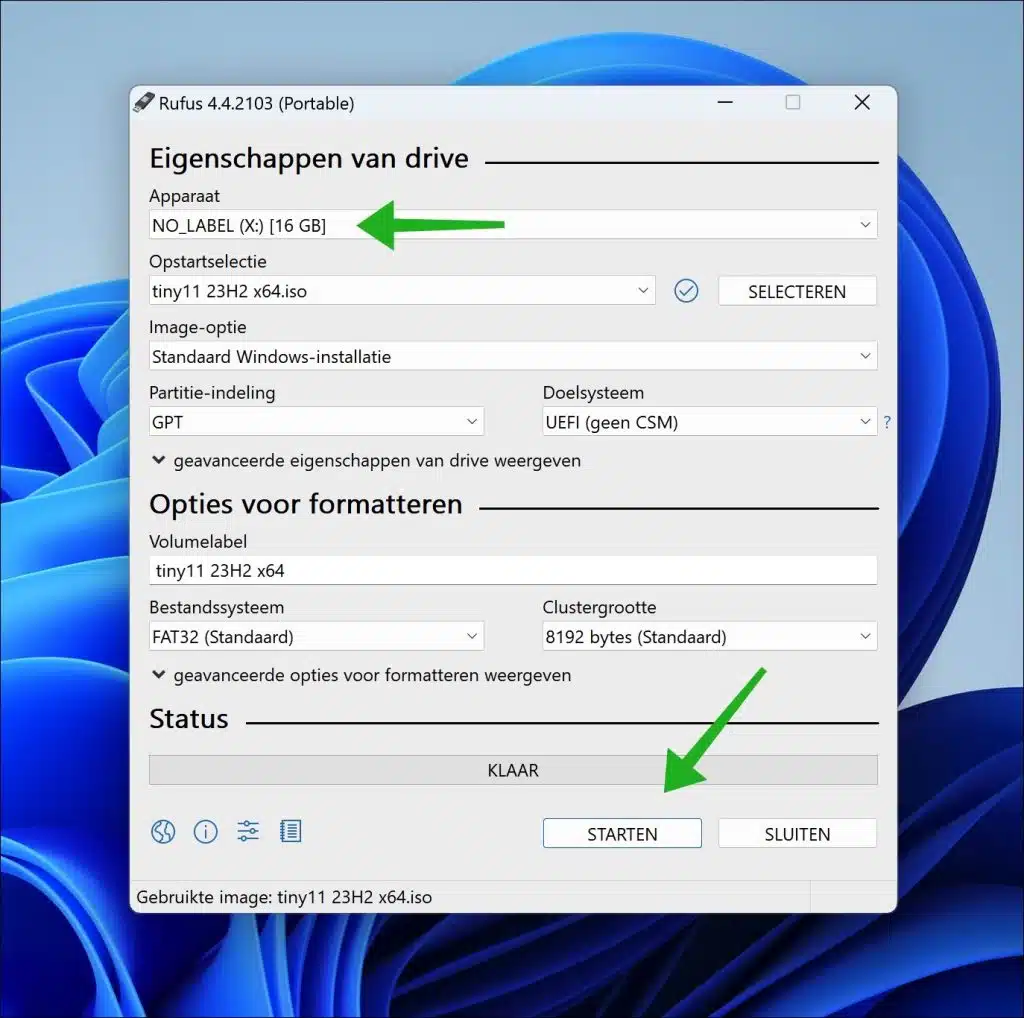
After this, place the ISO file on an empty USB stick with Rufus. In Rufus, click the “Select” button and choose the Tiny11 ISO file.
Then insert an empty USB stick, select the USB stick in “Device” and click “Start” to place Tiny 11 on the USB.
Related: USB stick not found.
After writing the ISO file to the USB, boot your computer from USB and start the installation.
I hope to have informed you with this. Thank you for reading!