

File extensions remain hidden by default on Windows computers. By viewing the file extension you can learn more about the file type.
Different file types have different extensions. For example, audio files have .mp3, .wav, .wma, and more extensions. The file extensions help the operating system identify the associated program to open that specific file.
If you are a regular Windows user, then you should have no problem identifying the file type. However, some people prefer to display the file extensions.
There are several ways to show or hide file extensions in Windows 11. We're going to look at each of them one by one.
Show or hide file extension via Control Panel
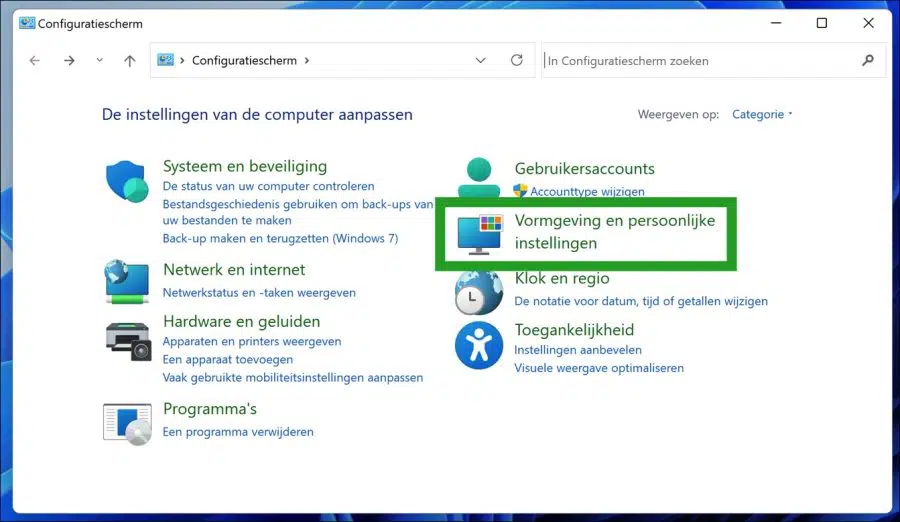
Open Control Panel. Click on “Appearance and personalization”.
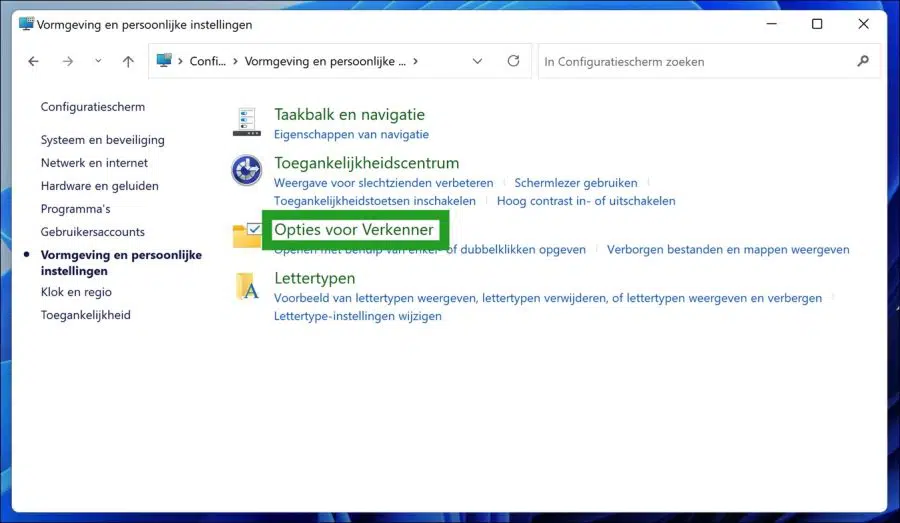
Then click on “File Explorer Options”.
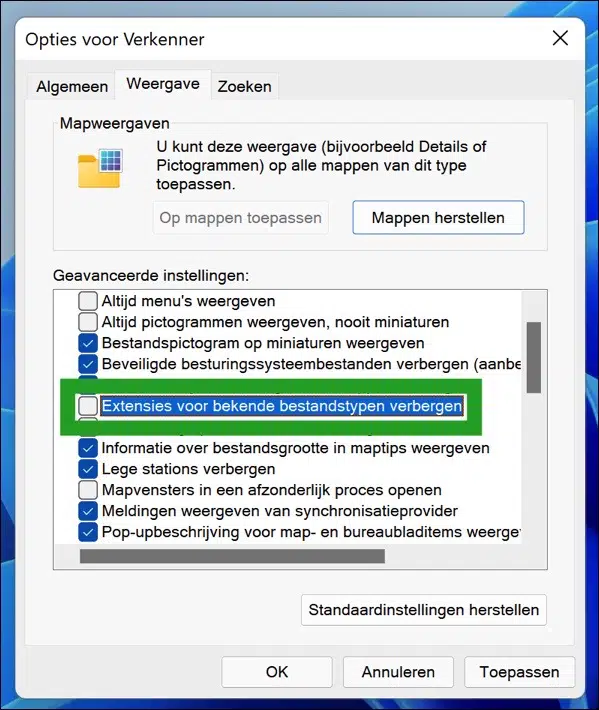
Click the “View” tab and enable or disable the “Hide extensions for known file types” option.
If you enable the “Hide extension for known file types” option, the file type extensions will be hidden and if you disable the option, the file type extensions will be displayed. Make your selection, click Apply and then OK.
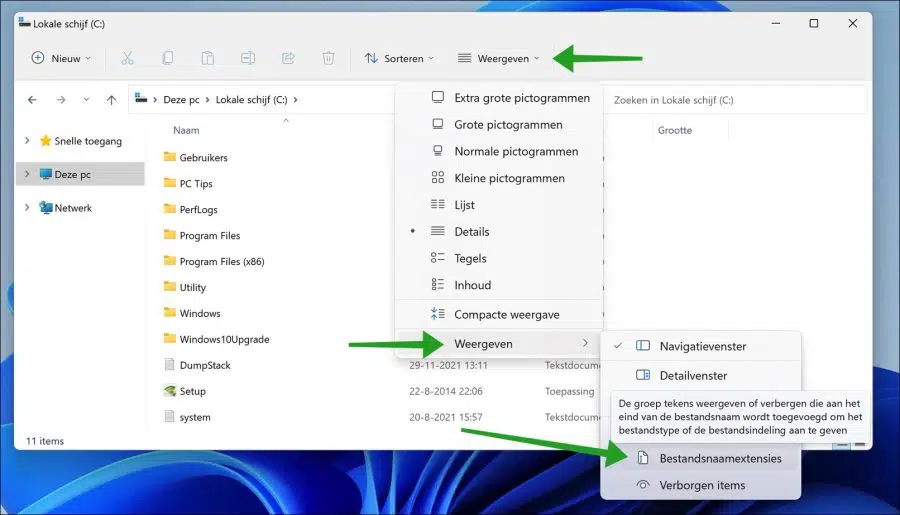
Show or hide file extension via Windows Explorer
Open Windows Explorer. In the menu go to “display” and click “display” again. Then click on the “File name extensions” option to enable the file name extensions, click again to disable the file name extensions. You will immediately see the adjustment in the file names.
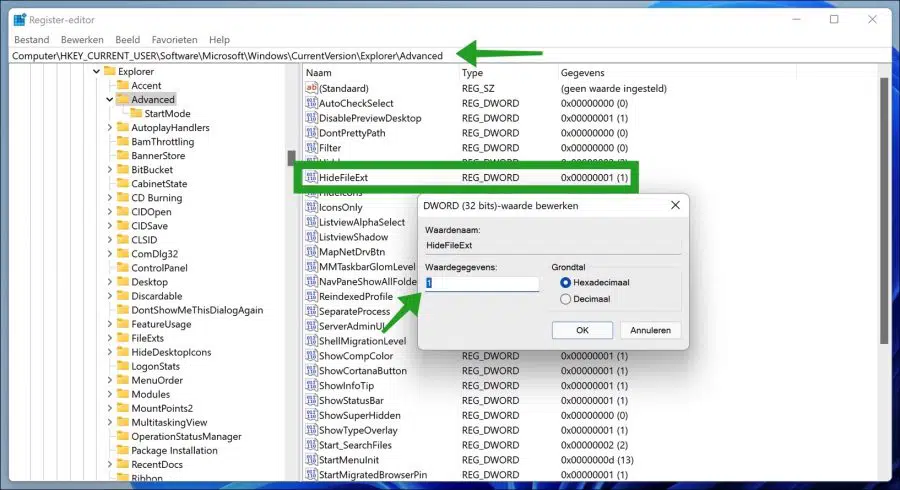
Show or hide file extension via the Windows registry
Open the Windows registry. And go via the left to the next key:
Computer\HKEY_CURRENT_USER\Software\Microsoft\Windows\CurrentVersion\Explorer\Advanced
Look for a DWORD value called “HideFileExt”. Double-click the DWORD value and change the value to
0 – to hide file extensions in Windows 11.
1 – to show file extensions in Windows 11.
Click OK and close the Windows registry.
I hope this helped you. Thank you for reading!
Great, this is what I was looking for
Glad it worked! Thanks for your comment 🙂