
Elke app van derden of systeemproces in Windows verbruikt CPU capaciteit. Hoewel de meeste apps of processen goed zijn in het bepalen of ze wel of niet teveel CPU capaciteit verbruiken, kunt u deze apps nog wel limiteren.
Het limiteren van een app biedt enkele voordelen. U kunt hiermee zelf bepalen of de app niet te veel CPU processen mag verbruiken. Het is niet meer de app die dat zelf mag prioriteren. Dit heeft als voordeel dat u zeker weet dat deze app niet al de CPU processen verbruikt als u daar niet zeker van bent.
Naast de prioriteit aanpassen voor een bepaalde app, kunt u ook het aantal CPU cores limiteren voor een app. Hiermee kunt u zelf bepalen hoeveel cores de app mag aanspreken in Windows. Het limiteren van het aantal CPU cores voor deze app helpt bij het prioriteit geven aan andere processen die wel alle CPU cores mogen gebruiken. Dit is hoe u per app het CPU verbruik kunt beperken.
Meld u dan aan voor onze nieuwsbrief.
CPU verbruik per app limiteren in Windows 10 of Windows 11
In Windows kunt u per proces en prioriteit instellen via taakbeheer. Het instellen van een nieuwe prioriteit voor een proces wijzigt zijn plaats in de verwerkingswachtrij. Taken met een hogere prioriteit krijgen voorrang bij de toewijzing van systeembronnen zoals CPU tijd en geheugen.
Als u het vermoeden heeft dat een bepaald proces teveel CPU tijd en/of geheugen verbruikt dan kunt u de prioriteit verlagen.
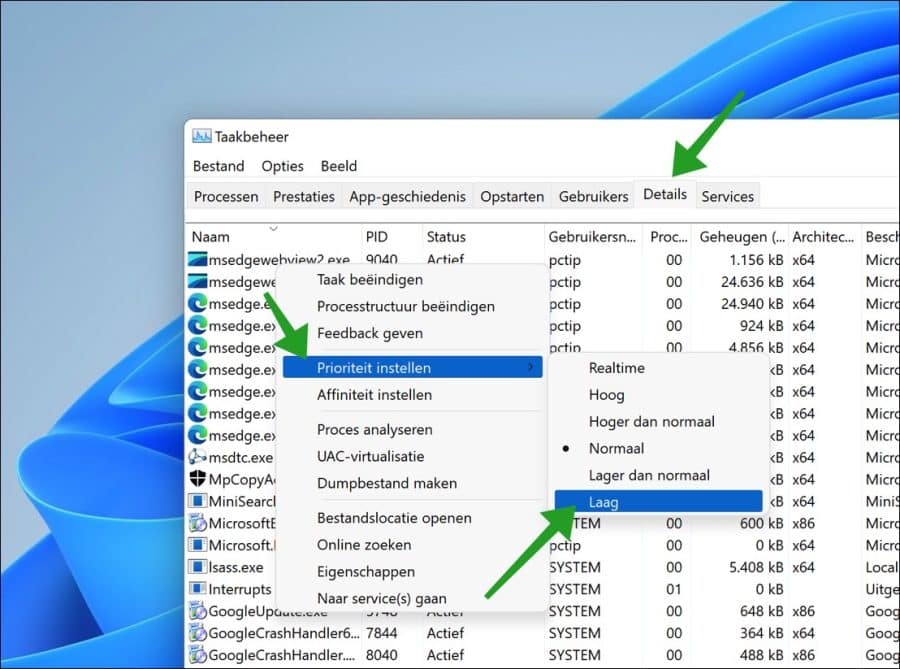
Open Taakbeheer. Klik links onderin op “meer details”. Klik op tabblad “Details” om alle actieve processen weer te geven. Klik vervolgens met de rechtermuisknop op het proces en klik op “prioriteit instellen” en selecteer de gewenste prioriteit.
Het is niet aan te raden de prioriteit aan te passen voor systeemprocessen. Ik raad u aan dit alleen uit te voeren op processen van derden, zoals app(s) die u heeft geïnstalleerd.
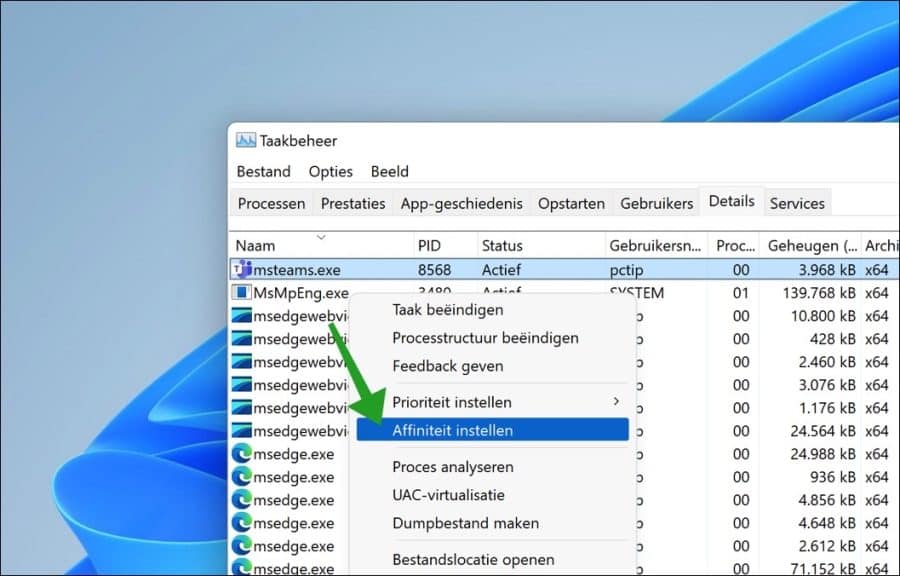
Om nu te bepalen hoeveel CPU cores het proces mag verbruiken, kunt u de affiniteit instellingen aanpassen per proces. Klik met de rechtermuisknop op het proces, en klik vervolgens op “affiniteit instellen”.
Selecteer voor dit proces hoeveel processor(s) het mag gebruiken. Het helpt om een bepaalde core van de CPU te reserveren voor een bepaalde thread die moet worden uitgevoerd. Klik op OK om te bevestigen.
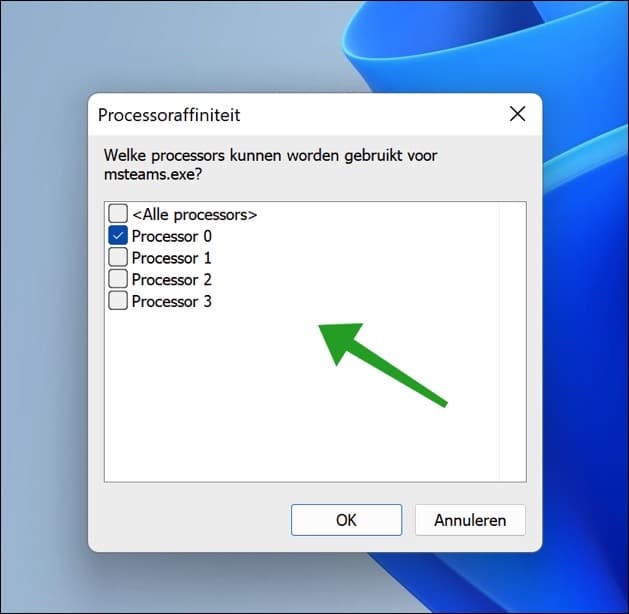
Na deze aanpassing dient u de computer te herstarten om de wijziging te activeren.
Ik hoop u hiermee geholpen te hebben. Bedankt voor het lezen!
Top bedankt Stefan. Je hebt een leek enorm geholpen met dit stuk !