

There are different tools who can help with taking over a computer. It is not always necessary to install third-party software if you need remote assistance for your Windows 11 computer.
In Windows 11 you can grant access to your computer via the “assistance or remote” function. Someone else can then log in to your computer and manage your computer remotely.
If you want to enable remote assistance in Windows 11, you must activate it yourself. The function help or distance is not enabled by default. It is recommended to disable the function after the session because it poses a risk of computer attacks.
Enable remote assistance in Windows 11
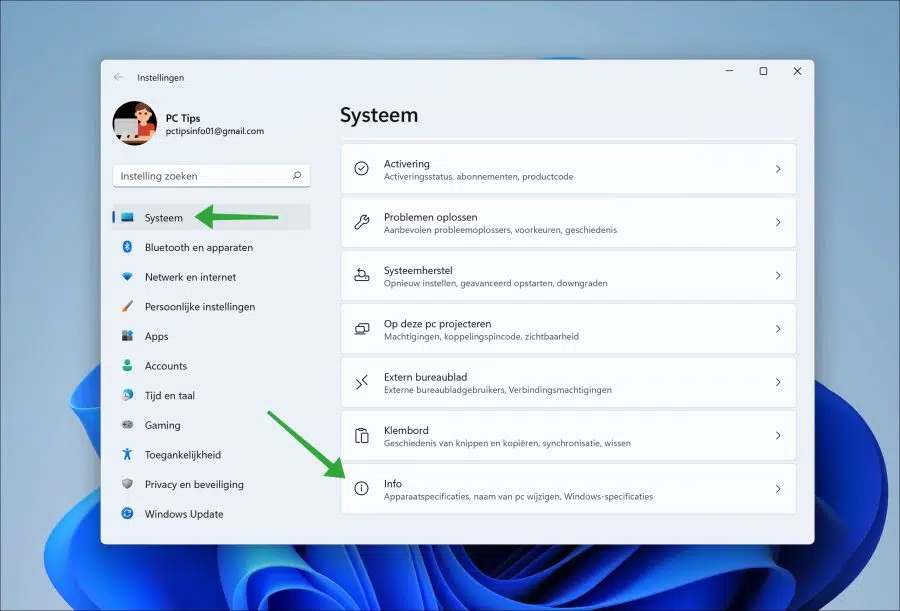
Right-click on the Start button. In the menu click on “Settings”. Click on “System” on the left in the menu and then on “Info” at the bottom right.
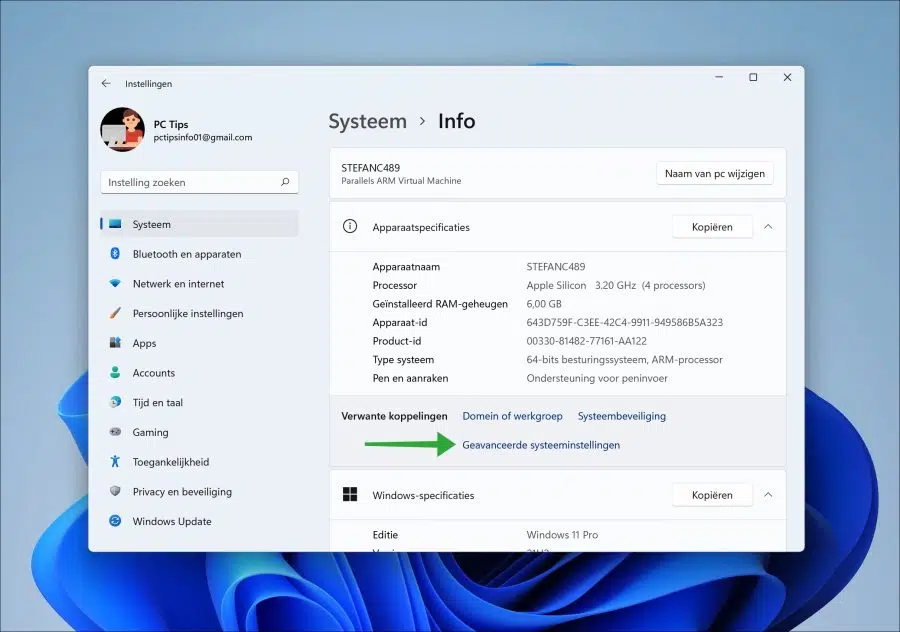
In the “related settings” click on “Advanced system settings”.
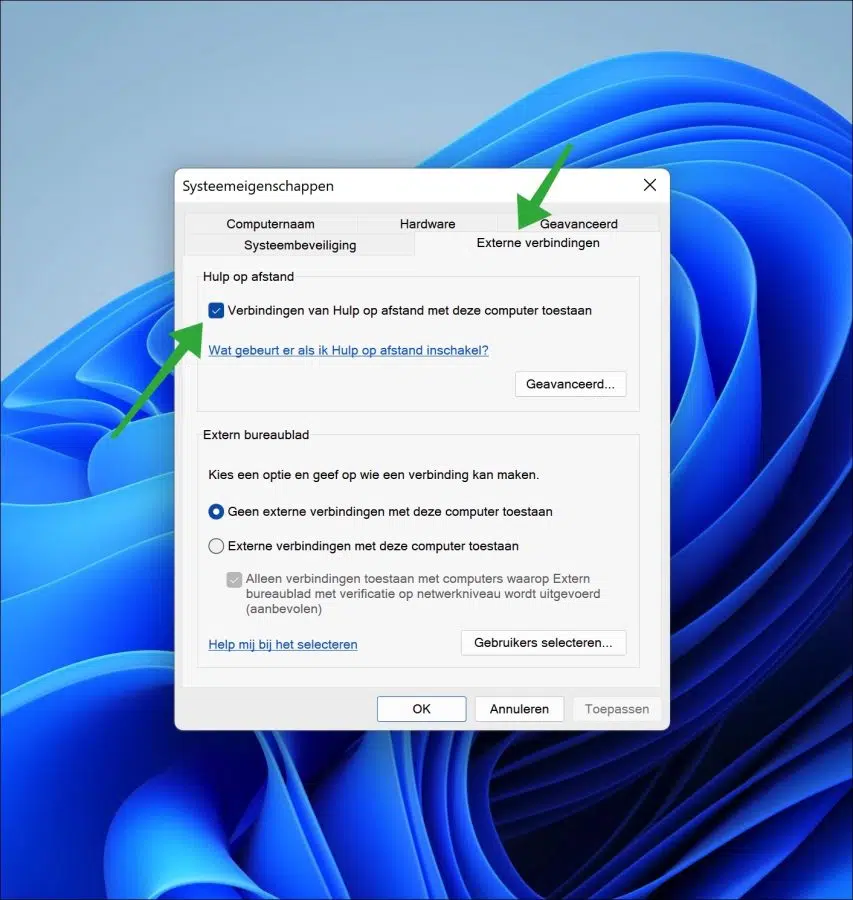
Click on the “Remote Connections” tab and then enable the “Allow remote assistance connections to this computer” feature. Then click Apply and then OK. Now close this window.
If you want to disable remote assistance, disable the “Allow remote assistance connections to this computer” feature.
If you have enabled remote assistance, you must invite someone or respond to an invitation that has already been sent from someone who wants to take over your PC for remote assistance.
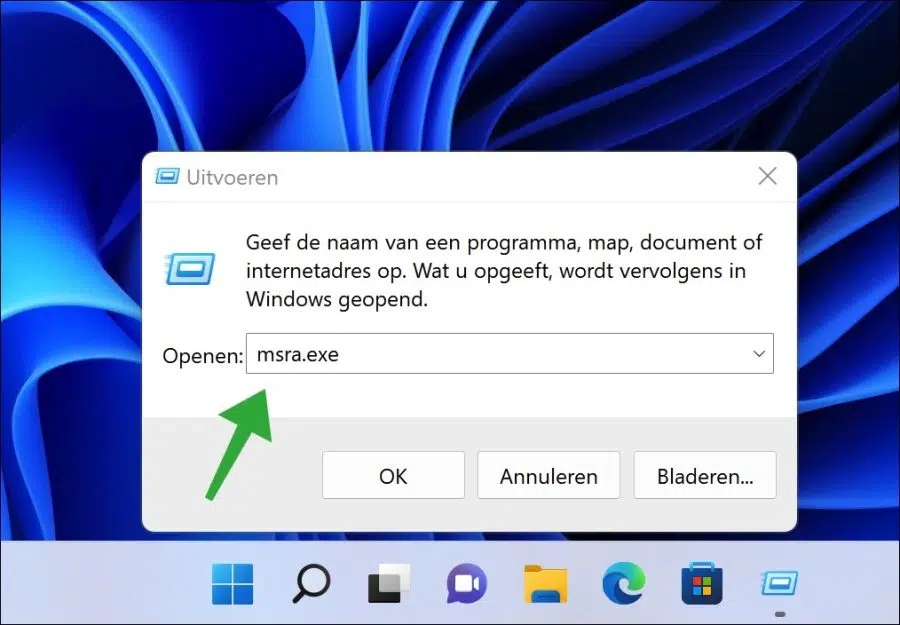
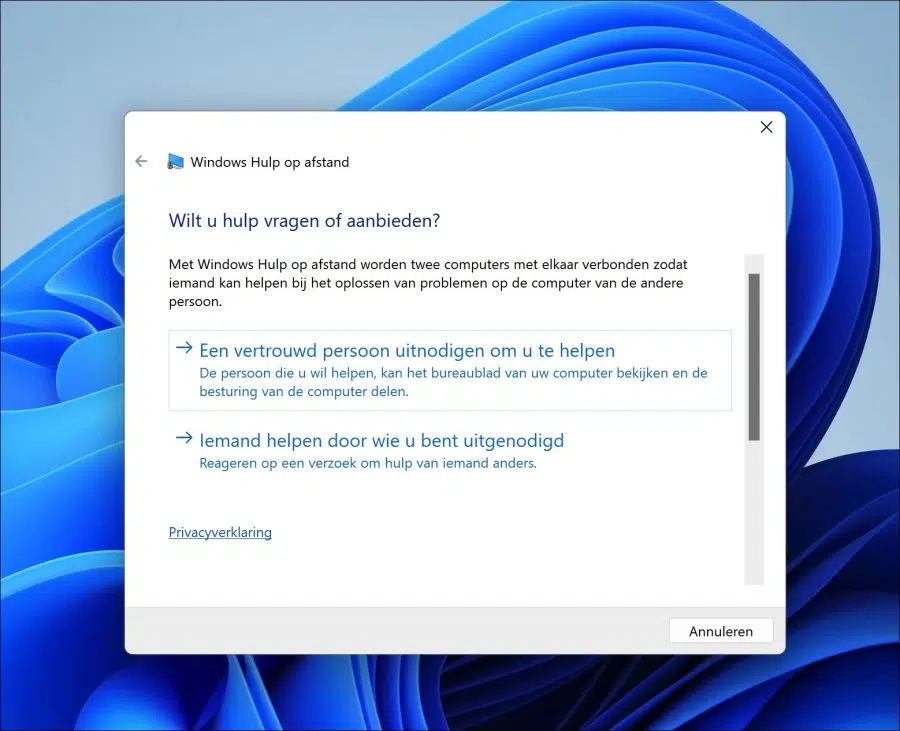
To send or accept a remote assistance invitation, right-click the Start button. In the menu click on Run. In the run window type: msra.exe
Msra.exe is part of the Windows Remote Administration.
Windows Remote Assistance will now start. Windows Remote Assistance connects two computers so that someone can help troubleshoot problems on the other person's computer.
You can now invite a trusted person to help you or respond to someone else's request for help. Depending on what you want to achieve, you can choose remote assistance here.
I hope this helped you. Thank you for reading!
Also read: Enable Remote Desktop in Windows 11.