
U kunt in Windows 10 op een simpele manier de netwerkinstellingen resetten. Het resetten van de netwerkinstellingen is bijvoorbeeld handig bij interne netwerkproblemen, een hardware-wissel en bij problemen met de internetverbinding.
Als u ervoor kiest om de netwerkinstellingen te gaan resetten zijn er enkele dingen waar u rekening mee dient te houden. Zo worden na de reset alle opgeslagen Wi-Fi-netwerken, inclusief hun wachtwoorden en verbindingsgeschiedenis verwijderd. Na de reset moet u opnieuw verbinding maken met Wi-Fi-netwerken en de bijbehorende wachtwoorden opnieuw invoeren.
Alle netwerkadapters (zoals Wi-Fi, Ethernet, Bluetooth) worden teruggezet naar hun standaardconfiguratie. Dit betekent dat eventuele aangepaste instellingen die u heeft toegepast op deze adapters, zoals statische IP-adressen of DNS-serverinstellingen, verloren gaan.
Meld u dan aan voor onze nieuwsbrief.
Ook als u Virtual Private Network (VPN) of proxy-instellingen hebt geconfigureerd, worden deze verwijderd. U moet deze instellingen opnieuw configureren na de reset. Houdt hier allemaal rekening mee. Zorg dat u de vereiste gegevens die u nodig heeft om verbinding opnieuw aan te maken bij de hand heeft voordat u doorgaat met de reset.
Gerelateerd: Netwerkinstellingen resetten in Windows 11.
Netwerkinstellingen resetten in Windows 10
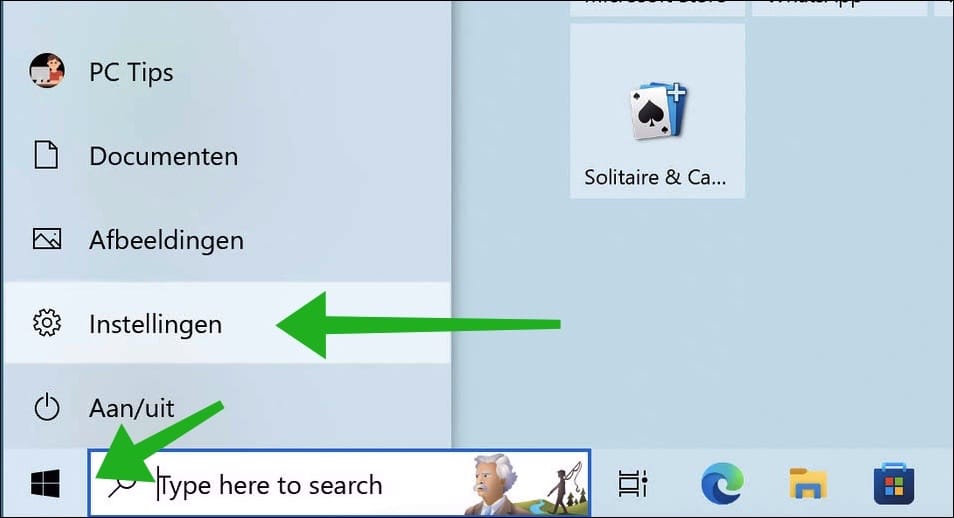
Om te beginnen opent u de instellingen door op de Startknop te klikken en in het Start menu op “Instellingen” te klikken.
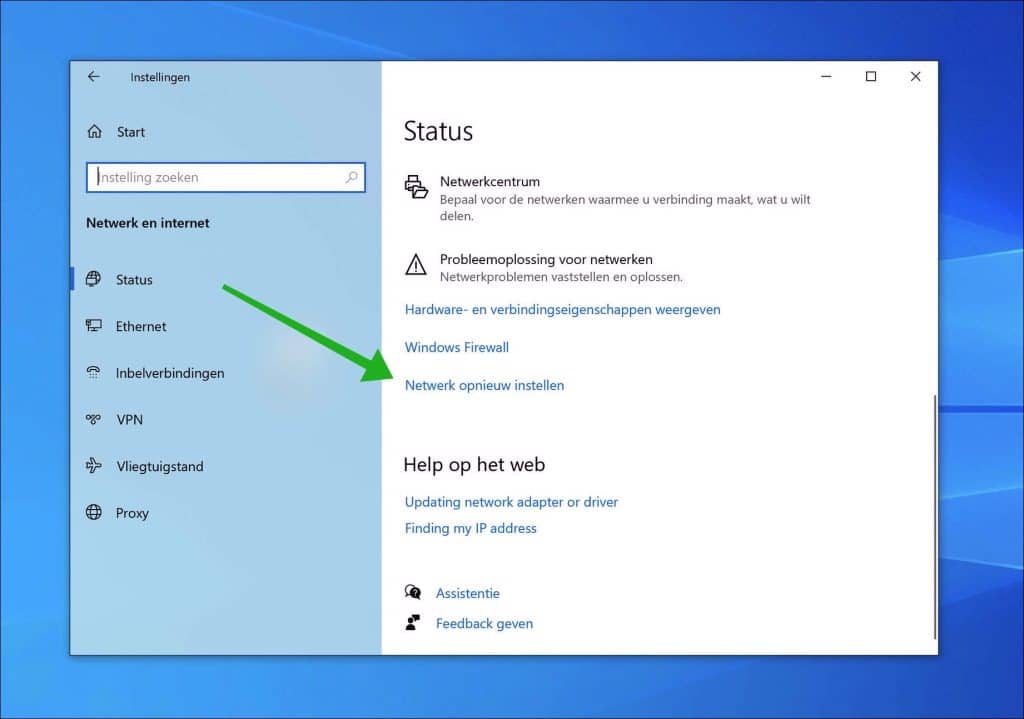
In het Instellingen menu, klik op “Netwerk en Internet”. Navigeer naar beneden in het menu “Netwerk en Internet” en selecteer ‘Netwerk opnieuw instellen’. Deze optie vindt u meestal onderaan de pagina.
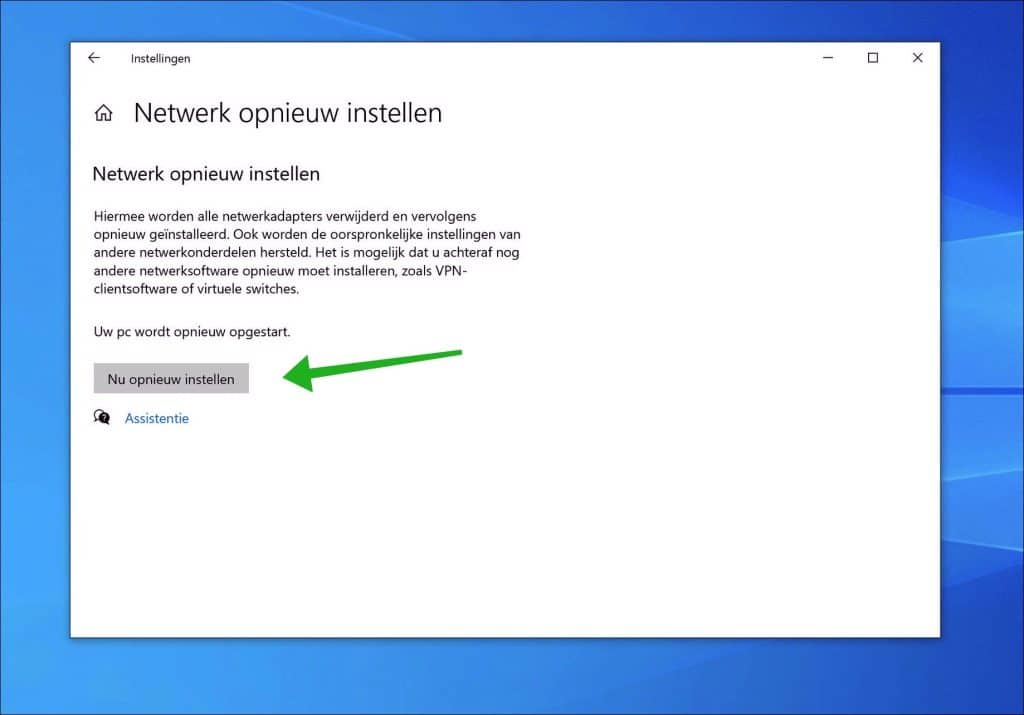
Hiermee worden alle netwerkadapters verwijderd en vervolgens opnieuw geïnstalleerd. Ook worden de oorspronkelijke instellen van andere netwerkonderdelen hersteld. Het is mogelijk dat u achteraf nog andere netwerksoftware opnieuw dient te installeren, zoals VPN software of virtuele switches.
Als u klaar bent om de netwerkinstellingen opnieuw in te stellen, klikt u onderaan op “Nu opnieuw instellen”. Uw computer wordt hiermee opnieuw opgestart.
Ik hoop u hiermee geholpen te hebben. Bedankt voor het lezen!
Lees ook: Onbekend Netwerk, Geen internet? Deze 5 tips helpen!
Help mee
Mijn computertips zijn gratis en bedoeld om andere mensen te helpen. Door deze pc-tip te delen op een website of social media, helpt u mij meer mensen te bereiken.Overzicht met computertips
Bekijk ook mijn uitgebreide overzicht met praktische computertips, overzichtelijk gesorteerd per categorie.Computerhulp nodig?
Loopt u vast met uw pc, laptop of software? Stel uw vraag op ons computerforum en krijg gratis computerhulp van ervaren leden en experts.