

In Windows 11, you can enable Hyper-V to use virtual machines on your Windows 11 computer.
A virtual machine (VM) is a virtual environment that functions as a virtual computer system with its own CPU, memory, network interface and storage, created on a physical hardware system. Software called a hypervisor separates the machine's resources from the hardware and provides them with the appropriate functions so that they can be used by the Hyper-V virtual machine.
To enable Hyper-V in Windows 11, a Windows 11 professional is required by default license or higher are installed. However, you can also enable Hyper-V in Windows 11 with a home license by following the steps in this article. A home license does not support Hyper-V by default.
You can install two components related to Hyper-V in Windows 11. You can install the Hyper-V platform and the Hyper-V management tools.
Install and enable Hyper-V in Windows 11
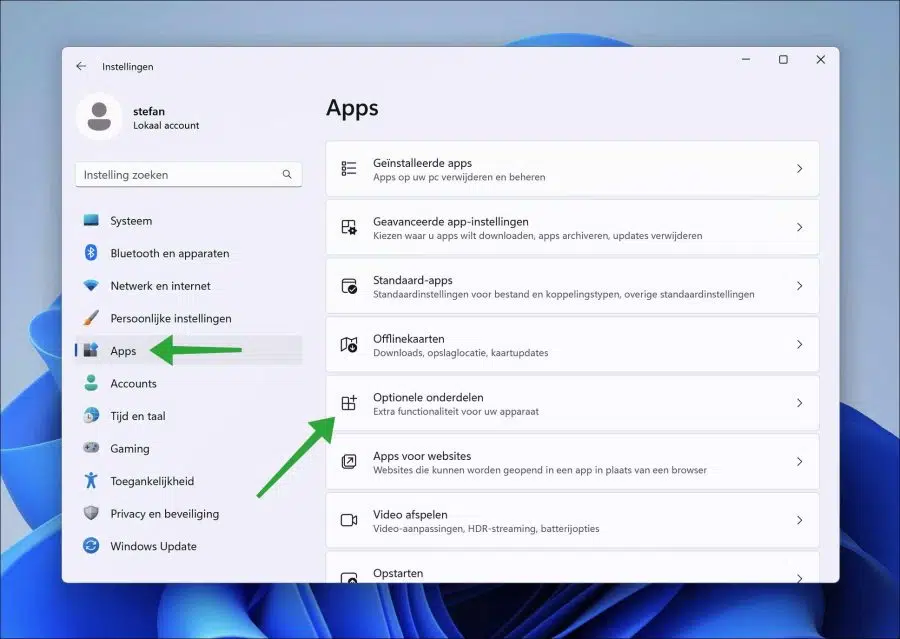
To install Hyper-V in Windows 11, right-click on the Start button. In the menu click on “Settings”. In the settings, first click on “Apps” and then on “Optional parts”.
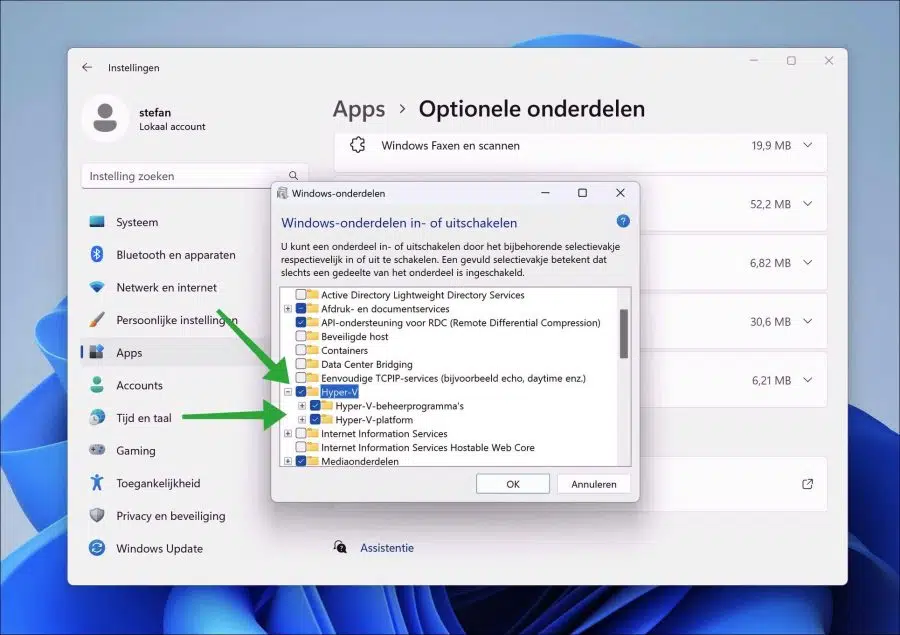
In the “related settings” click on “More Windows features”.

Then click “Hyper-V” to install the Hyper-V management tool and the Hyper-V platform. Click OK to confirm.
If you cannot install Hyper-V then your processor is not supported. Read more here.
Hyper-V is now being installed. This won't take long.
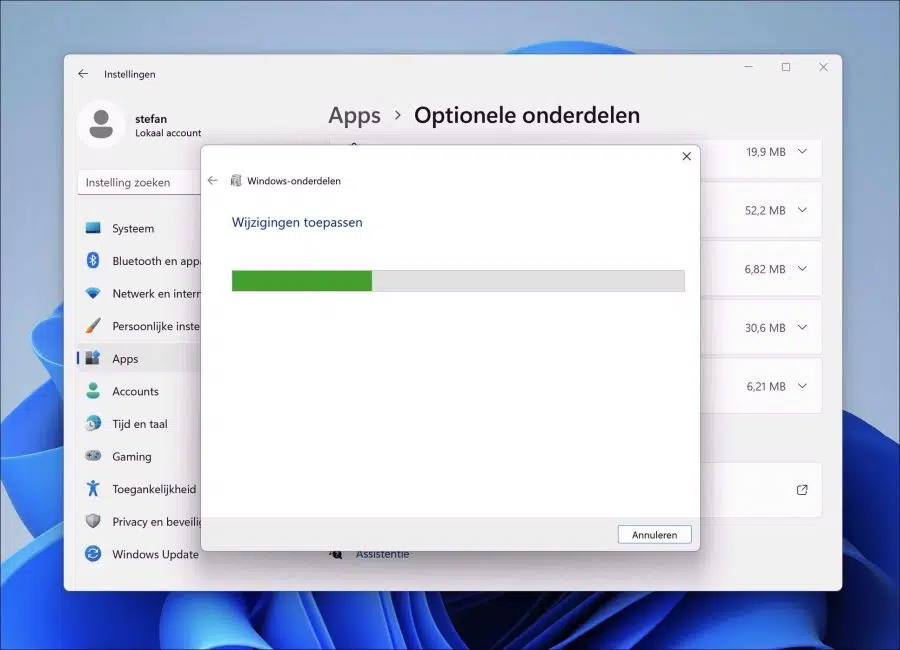
After installing Hyper-V, you must restart the computer to complete the installation of the Hyper-V platform.

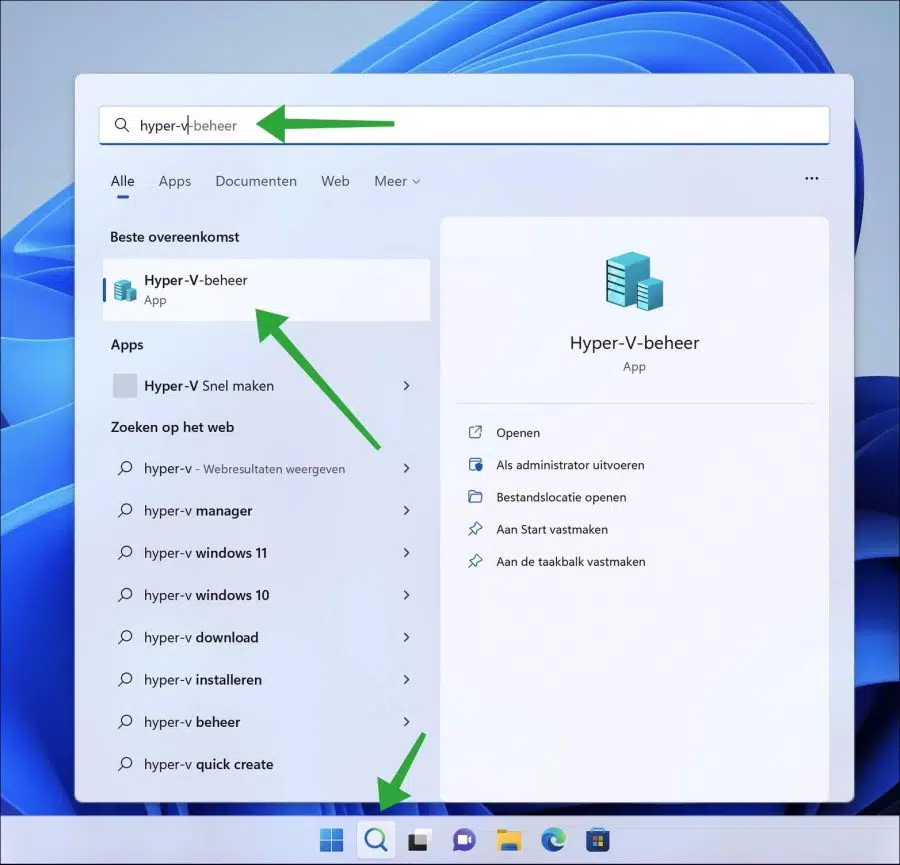
To open Hyper-V Manager, click Search in the taskbar. Then search for “Hyper-V” and click on “Hyper-V management”.
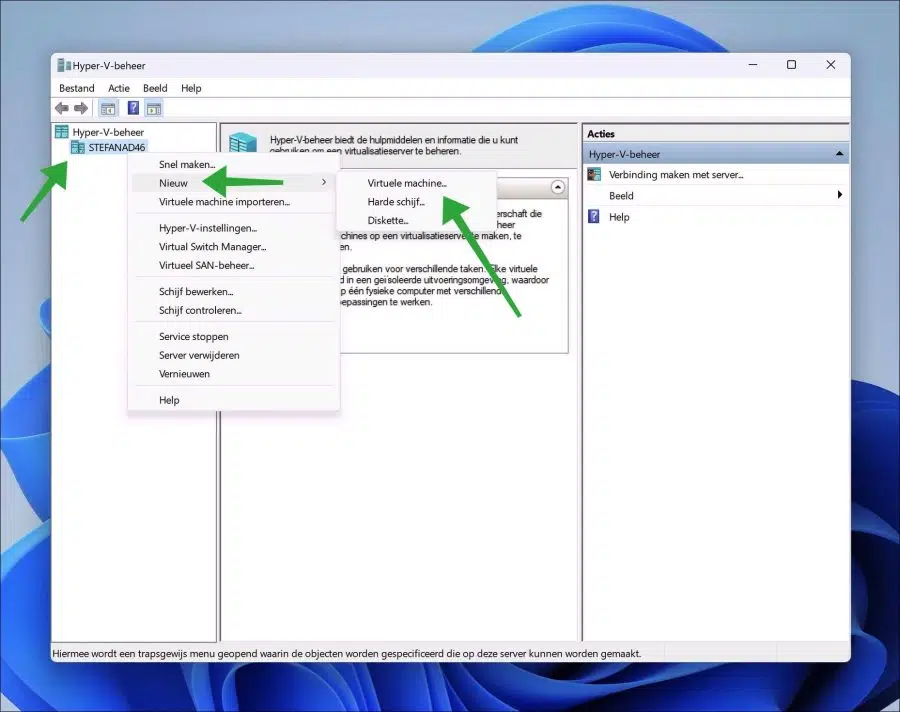
To create a new virtual machine in Windows 11 via Hyper-V, right-click on the computer name in “Hyper-V Management”. Then click on “New” and then on “Virtual machine”.
Also read:
- Install Windows 11 in VirtualBox virtual machine (VM).
- Install Linux in a virtual machine on a Windows PC.
I hope this helped you. Thank you for reading!