

VirtualBox is an open source, cross-platform virtualization software that allows users to run multiple virtual machines simultaneously on a single host computer.
The latest version of VirtualBox has a template for Windows 11. However, when one creates a Windows 11 VM and tries to install Windows 11, one gets an error stating that the machine does not meet the basic requirements of Windows 11.
To be able to install Windows 11 on VirtualBox, you need to add some registry tweaks not to check for TPM, RAM en Secure boot requirements.
The advantage of a virtual machine is that you can test with Windows 11. You can apply settings and make adjustments in Windows 11 that have no effect on your own host computer. If you want to test Windows 11 first, a virtual machine such as VirtualBox is a good option.
In this article I will explain to you step by step how can install Windows 11 in VirtualBox via Windows.
Install Windows 11 in VirtualBox virtual machine (VM)
To begin download VirtualBox to your computer. Then start the installation. Once the installation is complete, open VirtualBox.
Do you already have one Windows 11 ISO file downloaded? You need this file to install Windows 11.
Click on “New” at the top of the menu and then enter a clear name for the virtual machine. I recommend specifying “Windows 11” as the name, VirtualBox will then immediately apply Windows 11 settings.
If you specify a different name, select type “Microsoft Windows” and version “Windows 11 (64-bit)”.
Then click “Next”.

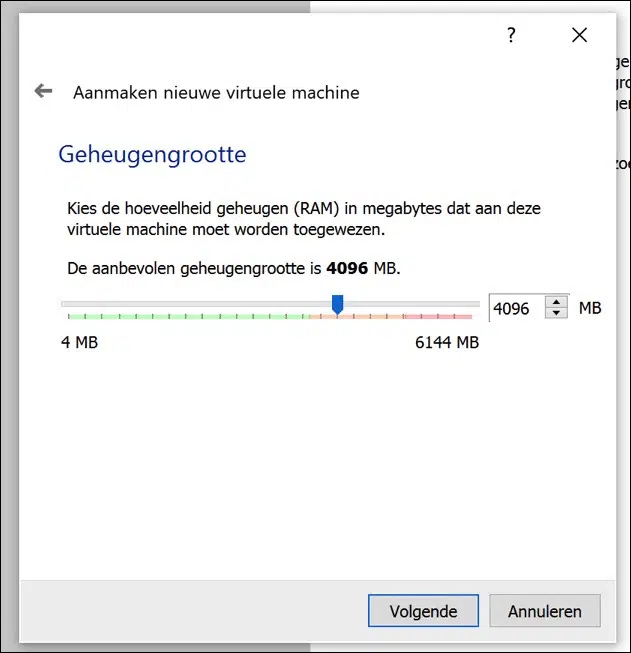
Leave the recommended memory at “4096 MB” or higher. Click Next.
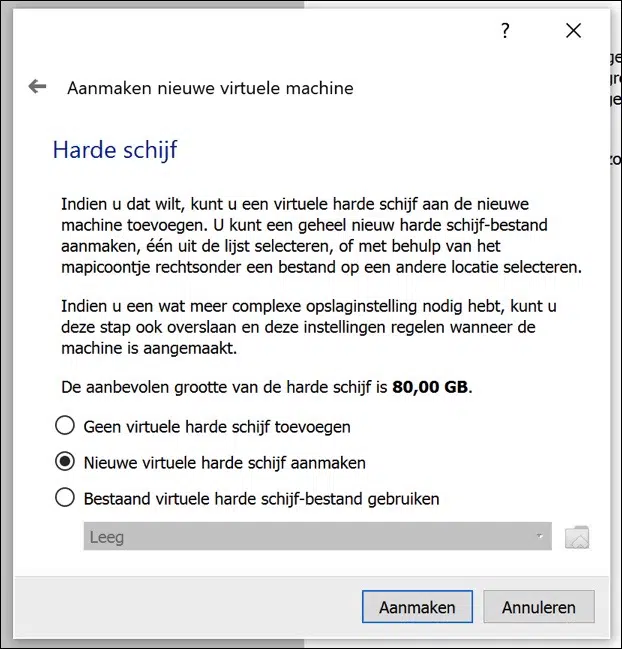
You need to create a virtual hard drive to install Windows 11. Leave the recommended option as it is and click create.
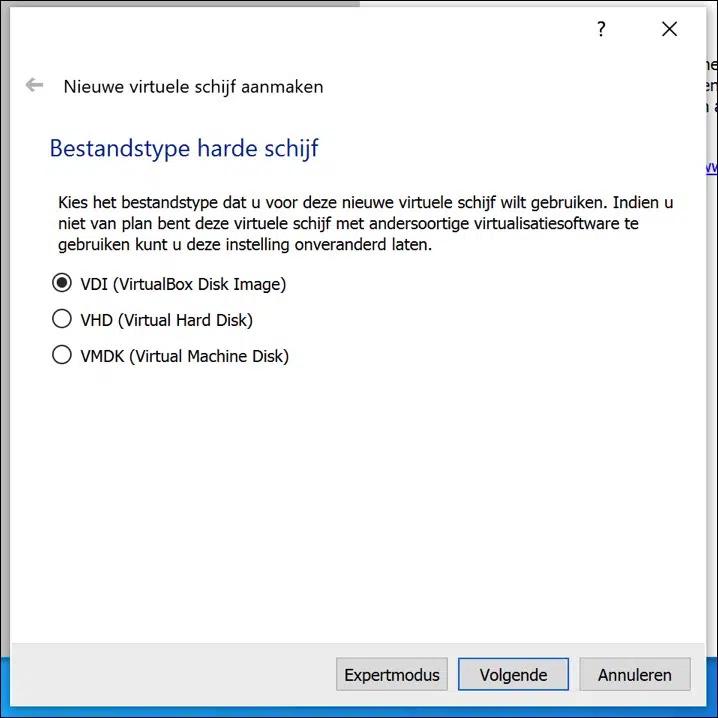
Here you choose the file type you want to use for the virtual hard drive. If you are not going to use the virtual hard disk with other virtualization software, select “VDI (VirtualBox Disk image)”. Click next.
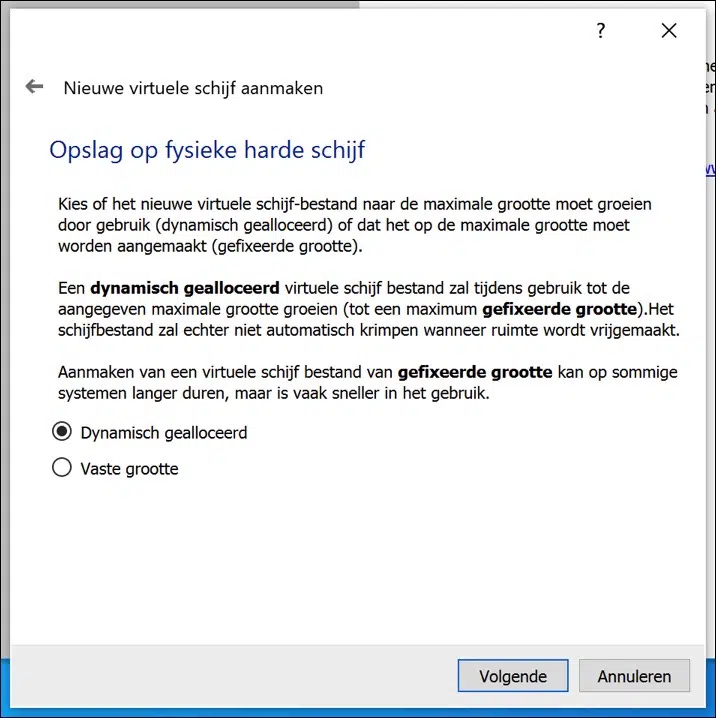
You have the choice to set the storage dynamically or fixedly. If you use dynamic, the virtual hard disk will slowly grow to the maximum size you previously set. If you set it to fixed, the disk space is already allocated and the maximum number of GBs is immediately allocated on your physical hard or SSD drive.
I recommend selecting Dynamically allocated, click next.
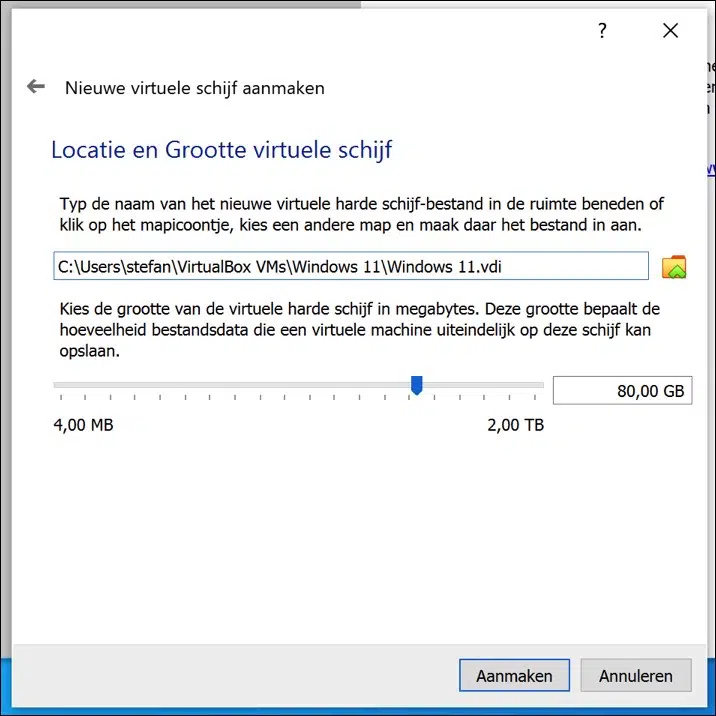
By default, the virtual hard drive is stored in the Users folder on the primary drive. If you want to change the location, you can do so here. You can also adjust the size of the virtual disk if necessary.
Click Create to start creating the virtual hard drive.
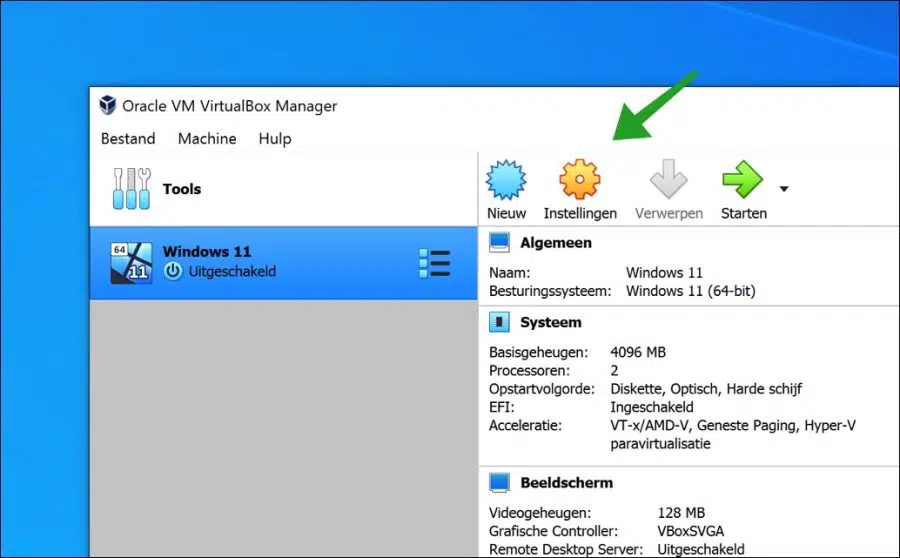
Now that the virtual machine has been created, let's set the Windows 11 requirements on the virtual machine.
Click Settings in the virtual machine menu.
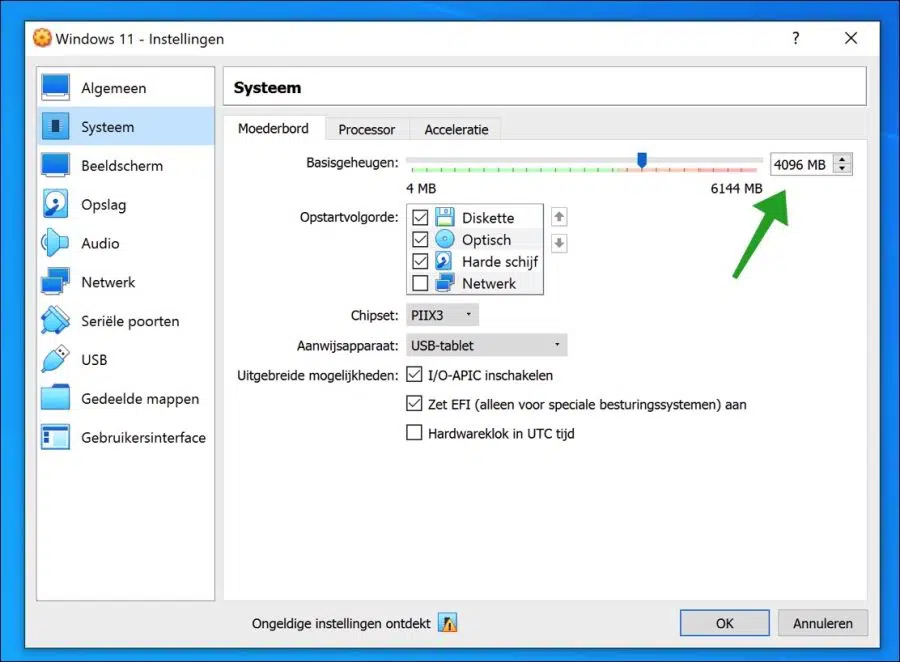
Click on System and then on Motherboard. Check that the base memory is set to 4096 MB.
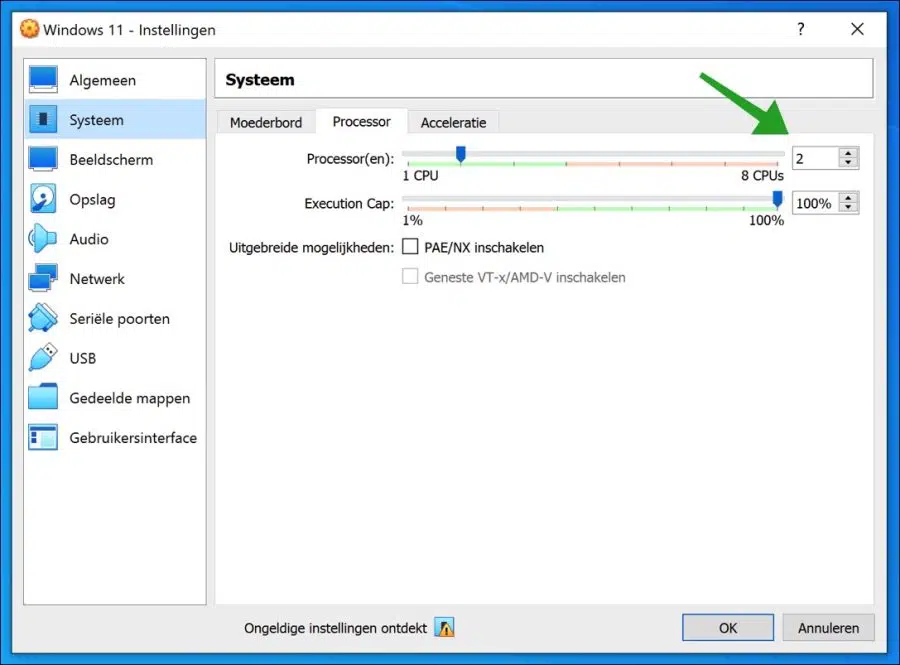
Then click on tab Processor and make sure 2 processors are assigned.
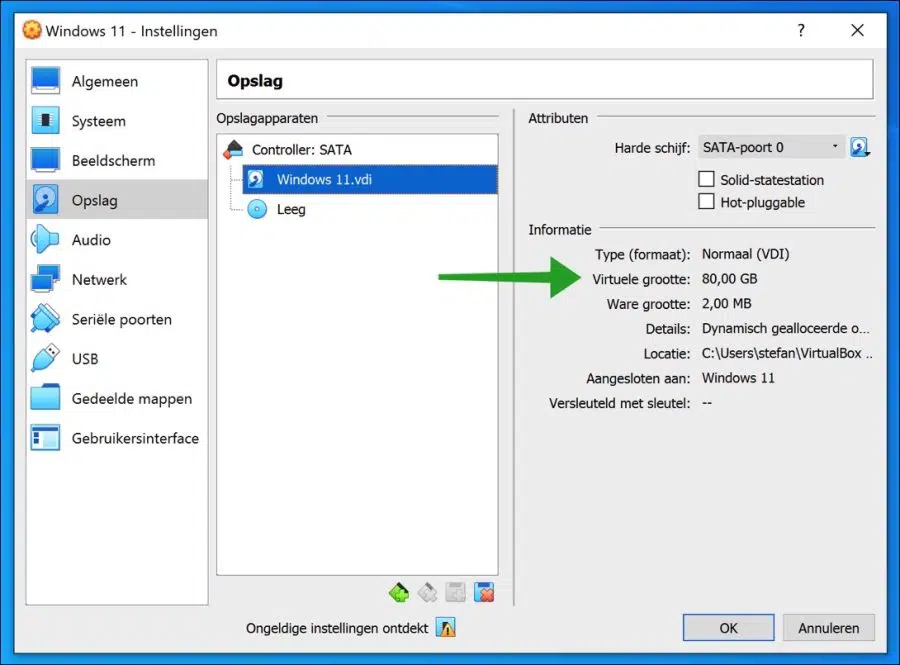
Click on Storage on the left and then on the created virtual hard drive. Check that the minimum size is 64 GB, more is better.
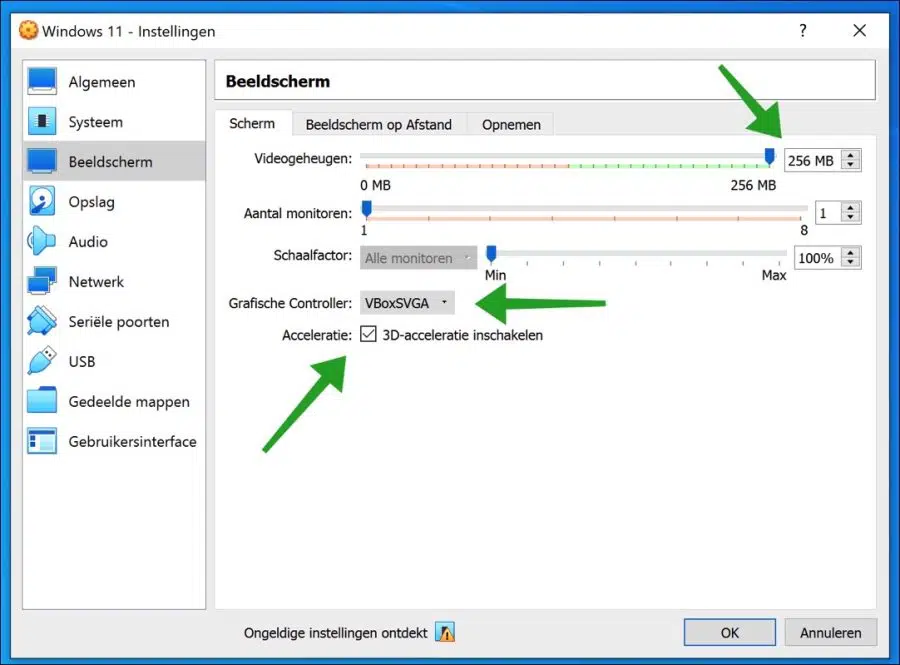
Then click on Display on the left and set the Video memory to 256MB or higher. Change the graphics controller to VboxSVGA and enable the Enable 3D acceleration option.
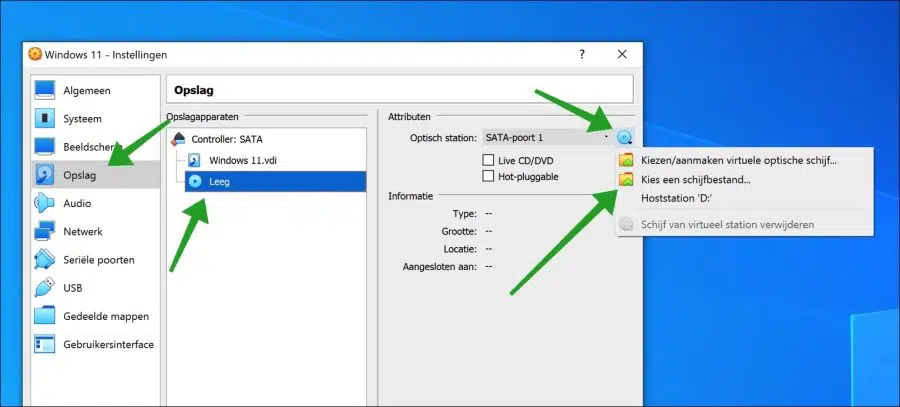
Now it's time to do it Windows 11 iso file to assign for installation. Click on Storage on the left, in storage devices click on “Empty” and then on the disk icon. In the menu, click on “Choose a disk file” and select the Windows 11 ISO file.
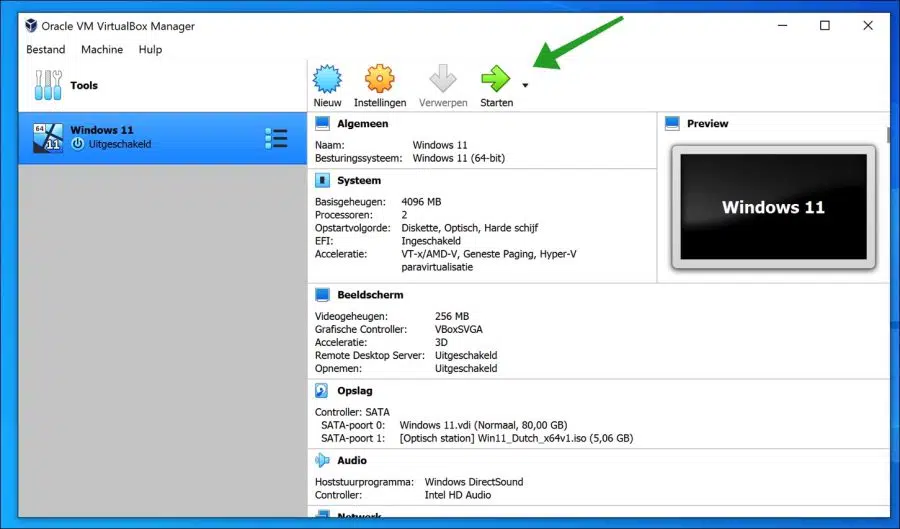
Click OK to exit the settings.
Then click “Start” on the menu to launch the created Windows 11 virtual machine.
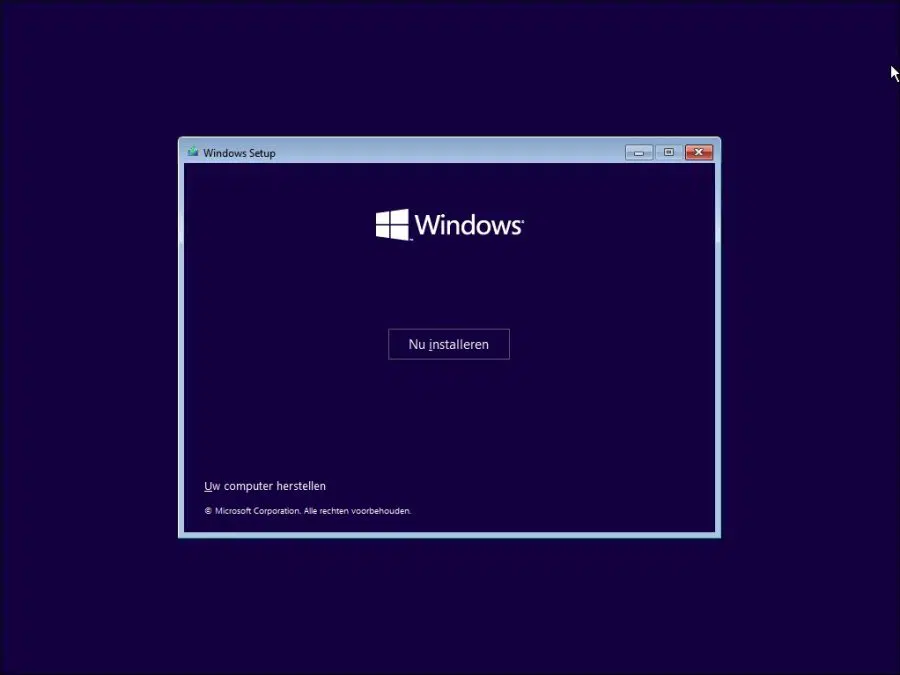
If it says “Press any key to start installation,” press any key. The Windows 11 virtual machine installation will start.
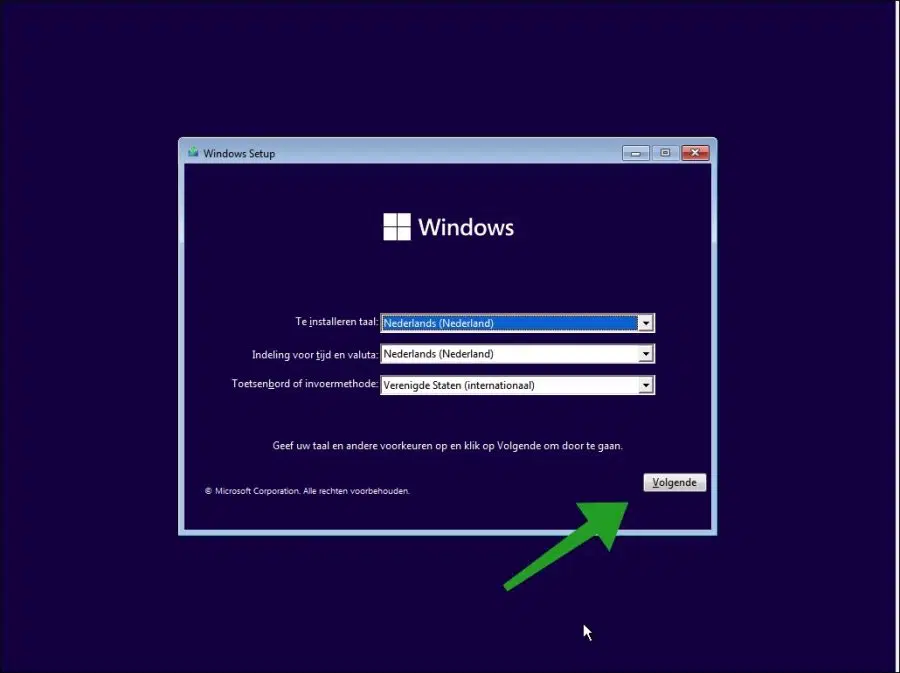
Click next.
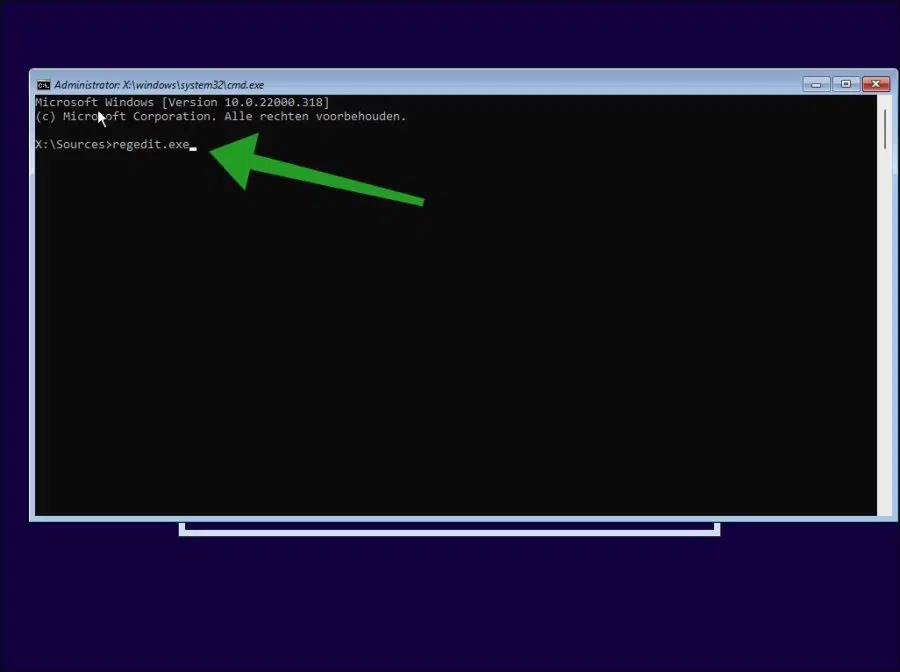
When you get to the “Install Now” screen below, press SHIFT + F10 on your keyboard.
The Command Prompt will now open. In the Command Prompt type: regedit.exe
Now we will add adjustments to the registry to use Windows 11 on VirtualBox. Actually, VirtualBox as a computer does not meet the requirements for Windows 11, we can circumvent these Windows 11 requirements with a registry adjustment.
Open the next structure on the left.
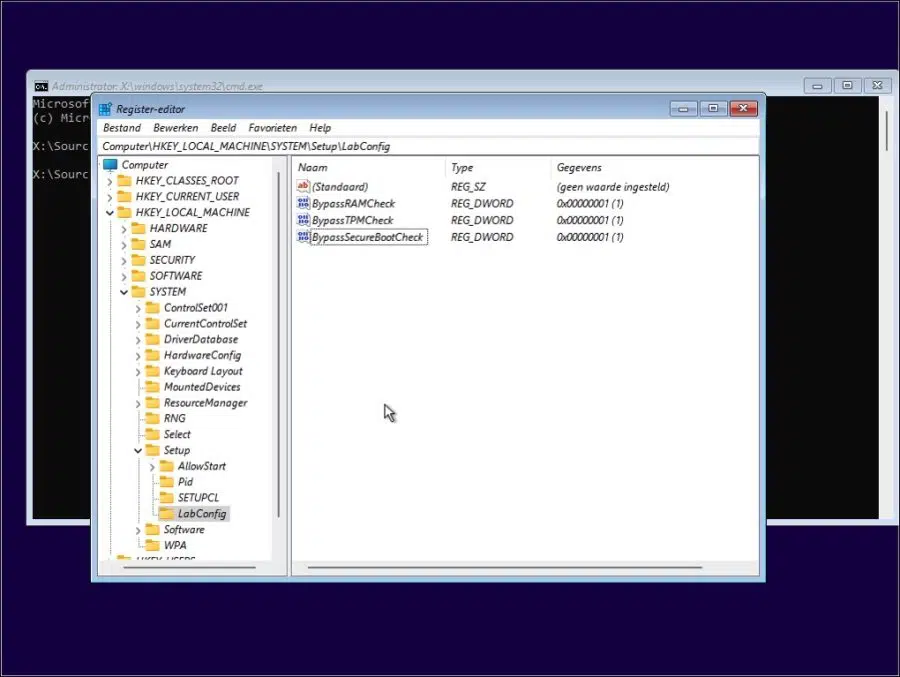
HKEY_LOCAL_MACHINE > SYSTEM > Setup
Then right-click on the Setup folder and click New and then Key. Name this key “LabConfig” without quotes.
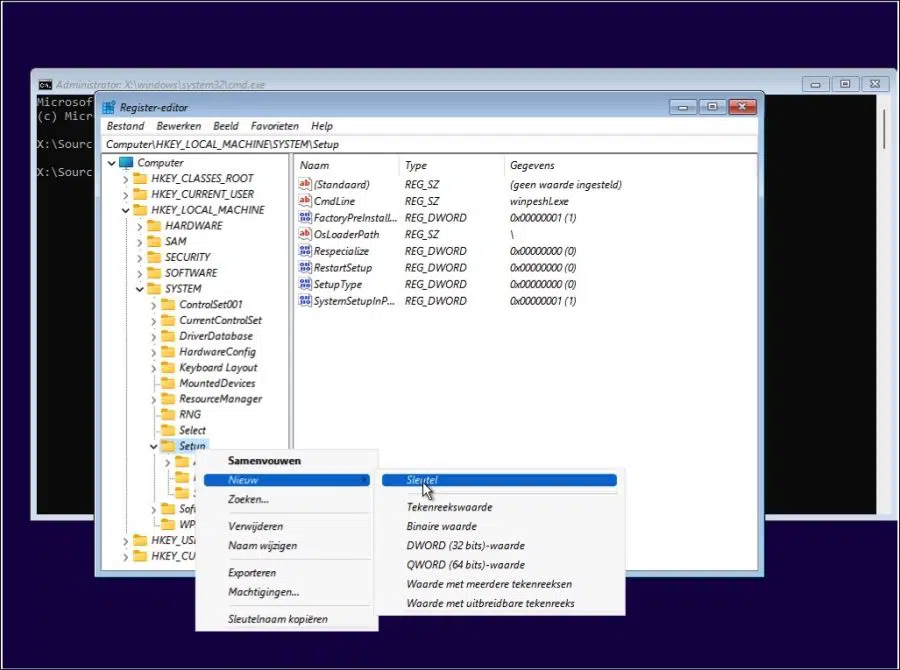
Right-click the LabConfig folder again and click New, then DWORD (32-bit) Value.

Name this value “BypassTPMCheck” and set the value to “1”, everything without quotes. Do this two more times, but then with the name “BypassRAMCheck” set the value to “1” and “BypassSecureBootCheck” also set the value to “1”.
You can see the final result below.
Now close the Windows registry and the Command Prompt window by clicking on the cross in the top right corner.
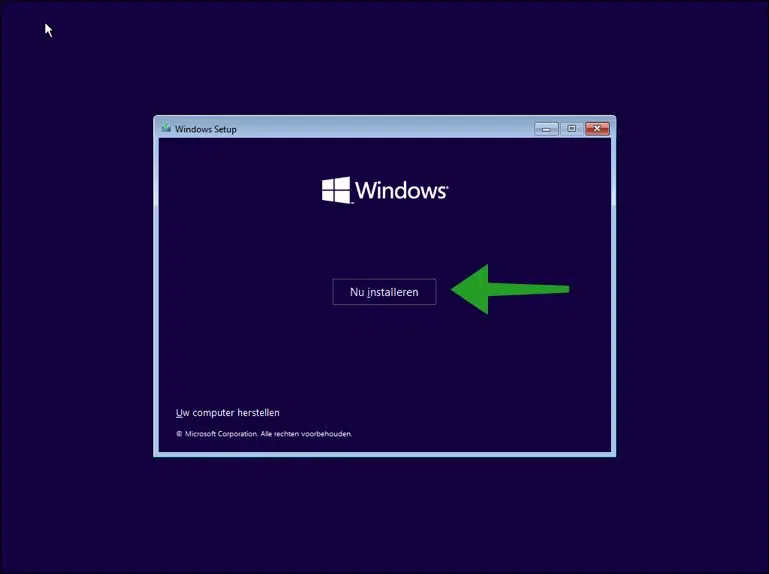
Click on “Install now” to actually start the installation.
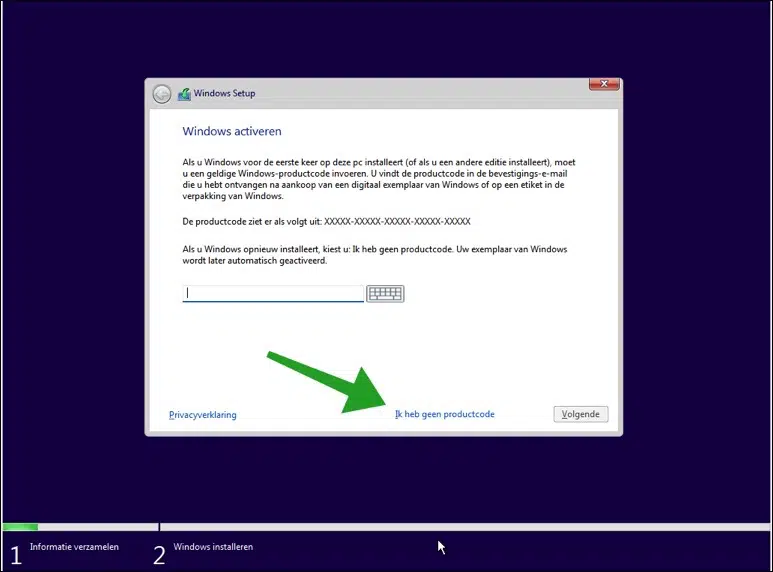
If you have a product code, you can enter it here. If you do not have a product key for Windows 11, click on “I do not have a product key” at the bottom.
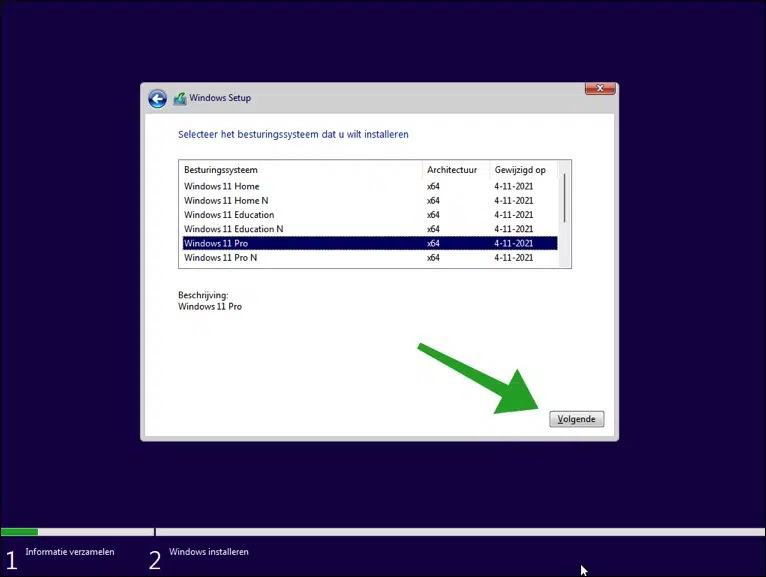
Select the Windows 11 version you wish to install here. Are you going to test? Then select Windows 11 Pro. If it is for home use, then select Windows 11 Home. Click next.
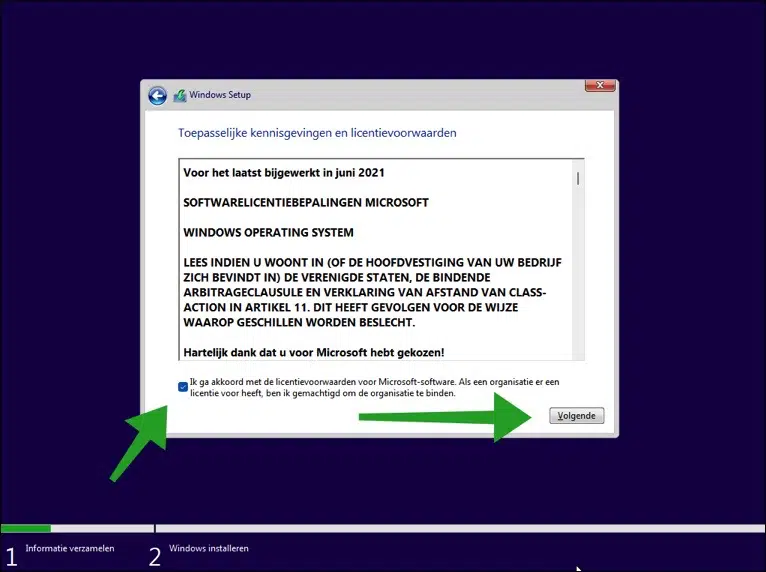
Agree to the Microsoft terms and click next.
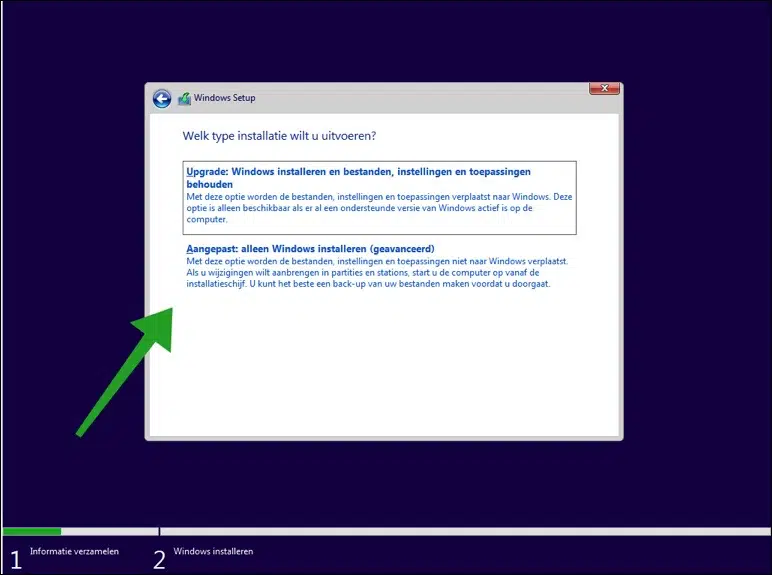
We are going to install Windows 11 without ever having an operating system installed, so click on Custom: Install Windows only (advanced).
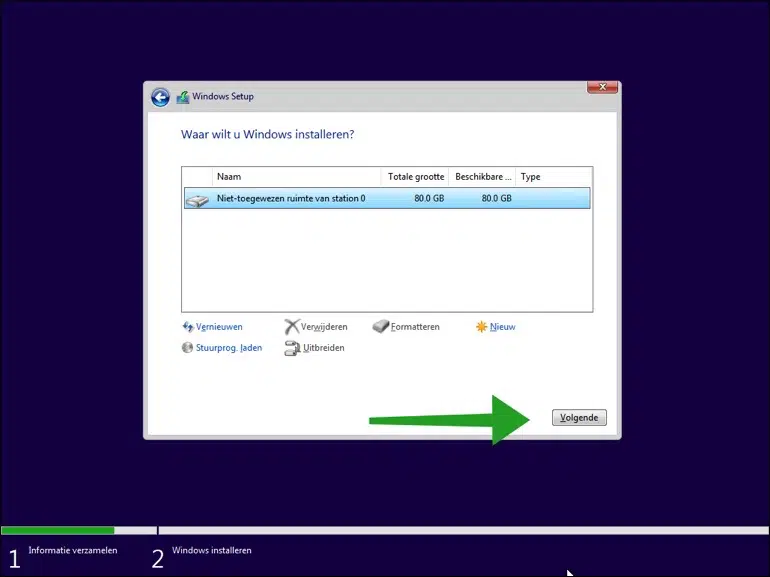
Here you will see the unallocated disk space of the previously created virtual disk drive in VirtualBox, click next.
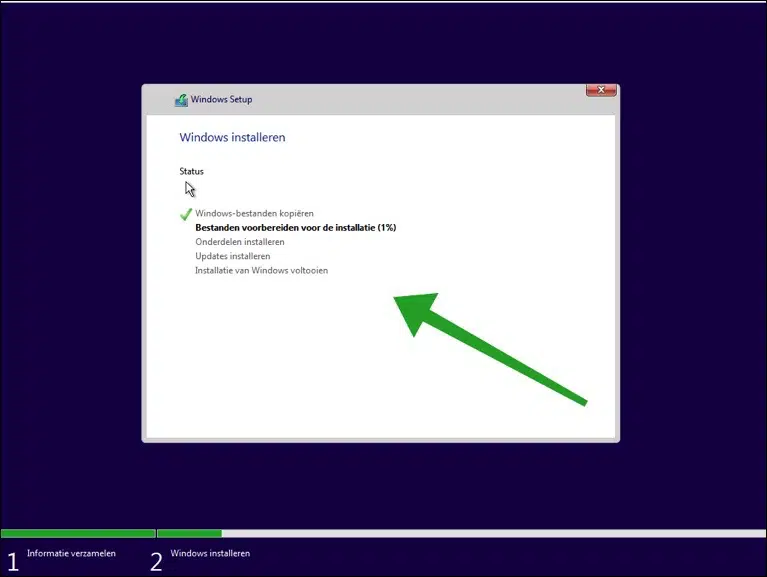
The installation of Windows 11 will start. This may take a while depending on the system specifications of the VirtualBox created virtual machine.
After installation, select the correct region where you are located.

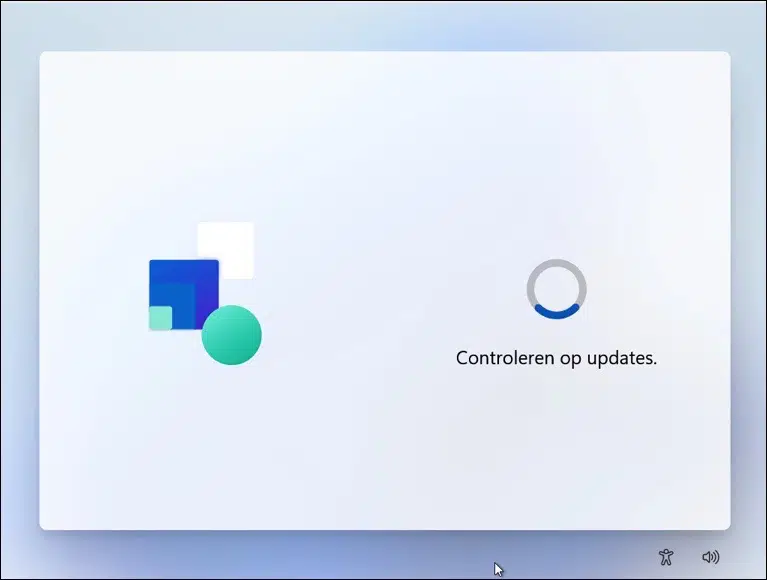
It then checks for Windows 11 updates.
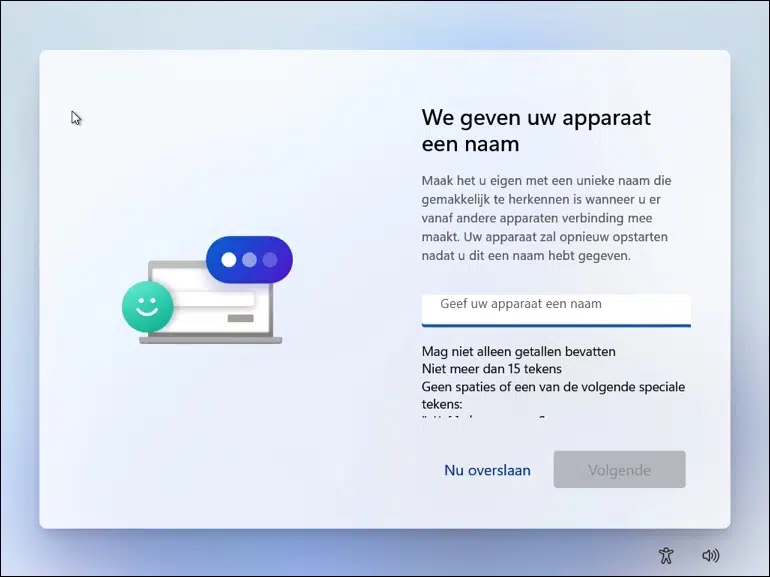
Then give your computer a name. This is the name on which your virtual machine will be recognizable on, for example, the internal network. Your virtual machine will then restart.
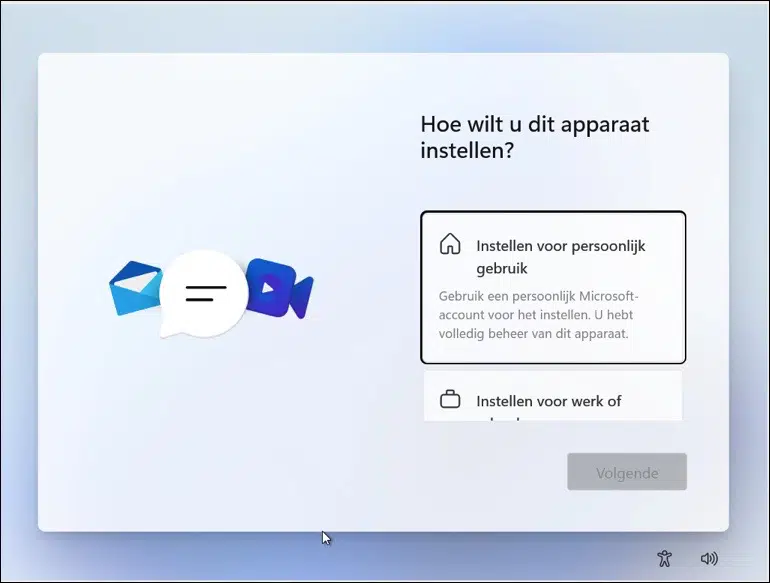
Now you can set up Windows 11 for personal use or for use in a work-business environment.
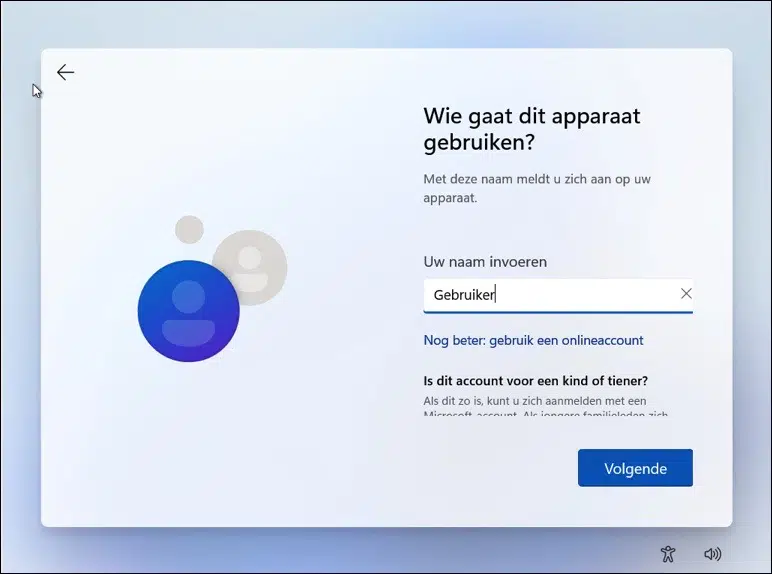
You can now sign in with a Microsoft account or through a local account. In this article I will continue with a local account.
Click on sign-in options and then on offline account. Then click on skip for now.
Enter your name (“username”). User is an example here. Click next.
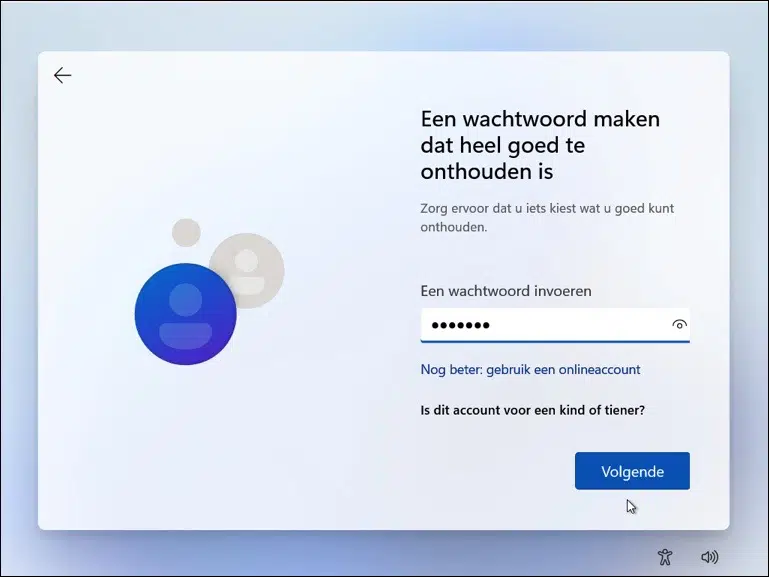
You will then need to enter a password twice to log in to Windows 11 with your local account.
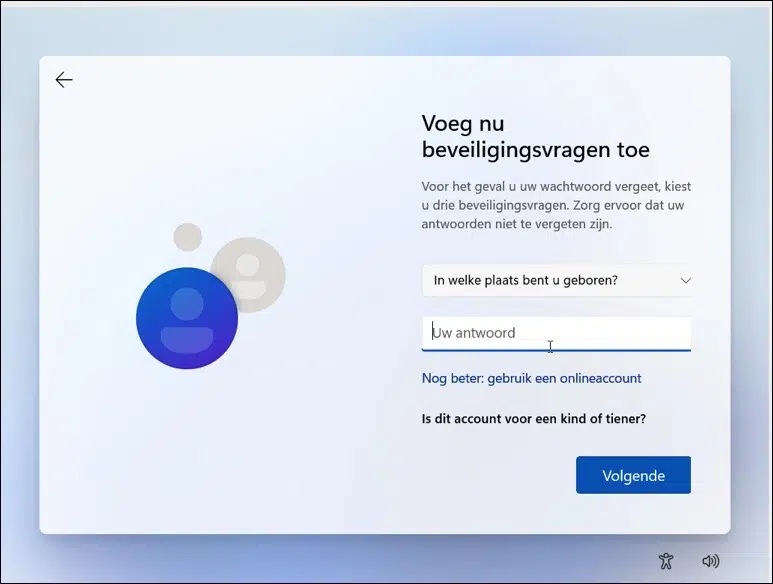
You will now be asked to select a control question three times and enter an answer.
You will then be asked a number of times for permission for various Windows 11 components such as location data. Give your consent for this or not.
A full check is still being carried out.

Windows 11 is then fully installed on a virtual machine with VirtualBox.

Read additional Windows 11 tips:
- 15 tips for Windows Explorer in Windows 11.
- Clean Windows 11 registry? This is how!
- 8 tips to make Windows 11 faster.
- Customize Windows 11 taskbar.
I hope this helped you. Thank you for reading!