

The speed of the mouse pointer is personal. You can adjust the speed of how the mouse cursor moves across your screen to your liking in Windows 11.
For example, a fast mouse pointer is an advantage in a set-up with multiple or large screens. I can imagine that if you want to work precisely on, for example, a photo editing program or video editing, you would prefer to set a normal to slow mouse pointer.
Whatever your preference, there are two ways to adjust the mouse pointer speed in Windows 11. The first is through the settings and the second is through the control panel. You can read both in this article.
Change mouse pointer speed in Windows 11
Adjust mouse speed via the settings
De Windows 11 settings gives you access to functions of connected hardware such as a mouse. You can also change the mouse speed in the settings.
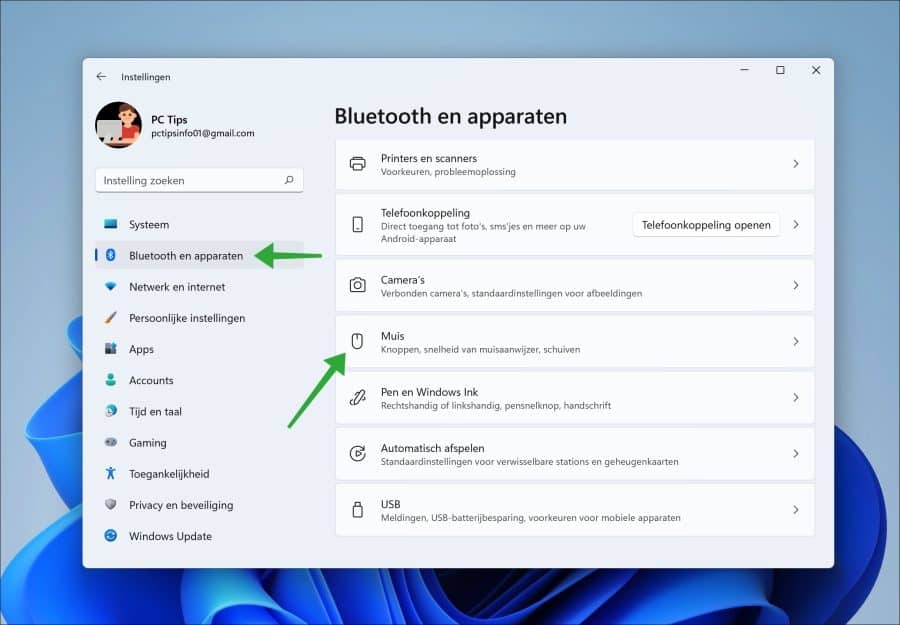
Right-click on the Start button. In the menu click on Settings. On the left in the settings click on “Bluetooth and devices”. After this, click on “Mouse” on the right side to open the mouse settings.
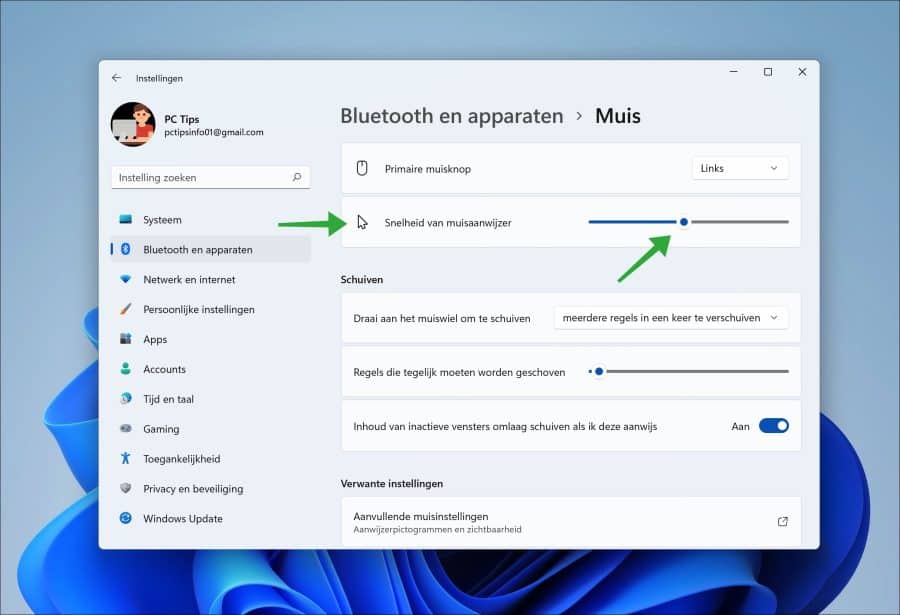
Now change the speed of the mouse pointer via the slider. Moving this slider to the left makes the mouse pointer slower and moving it to the right makes the mouse pointer faster.
Also read: Double-click to change mouse speed.
Adjust mouse speed via the Control Panel
The control panel provides access to various features and settings. You can also adjust the speed of the mouse pointer in Windows 11 via the control panel.
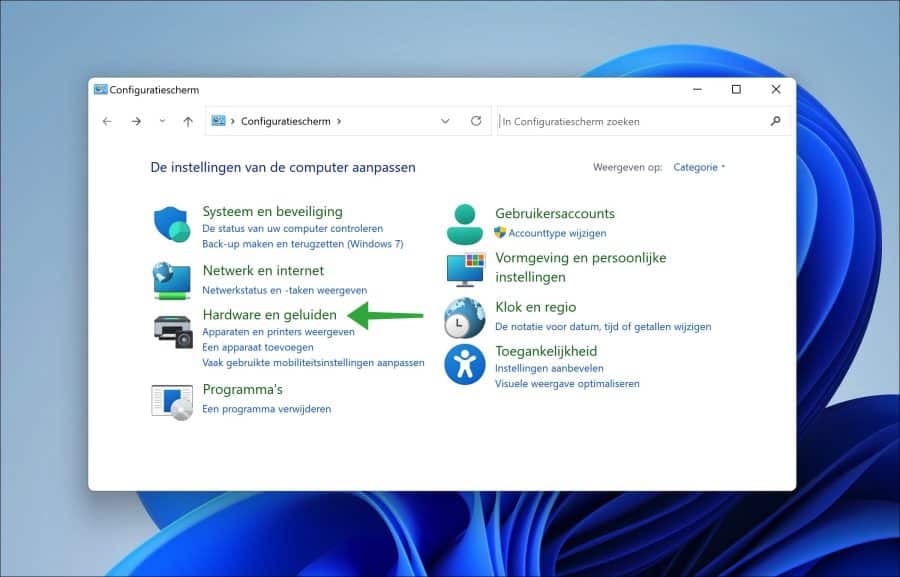
Open Control Panel. Then click on “Hardware and Sound”.
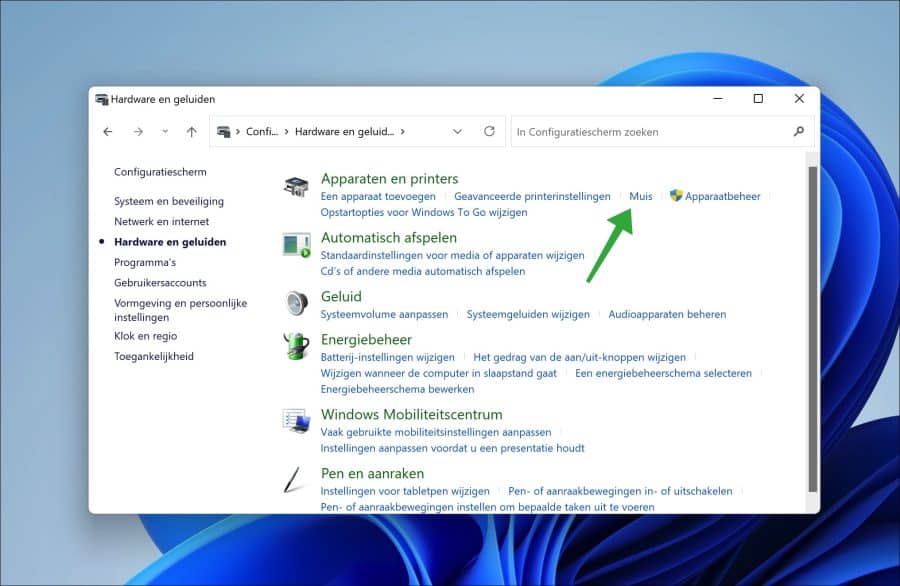
In the “Devices and Printers” settings, click “Mouse”.
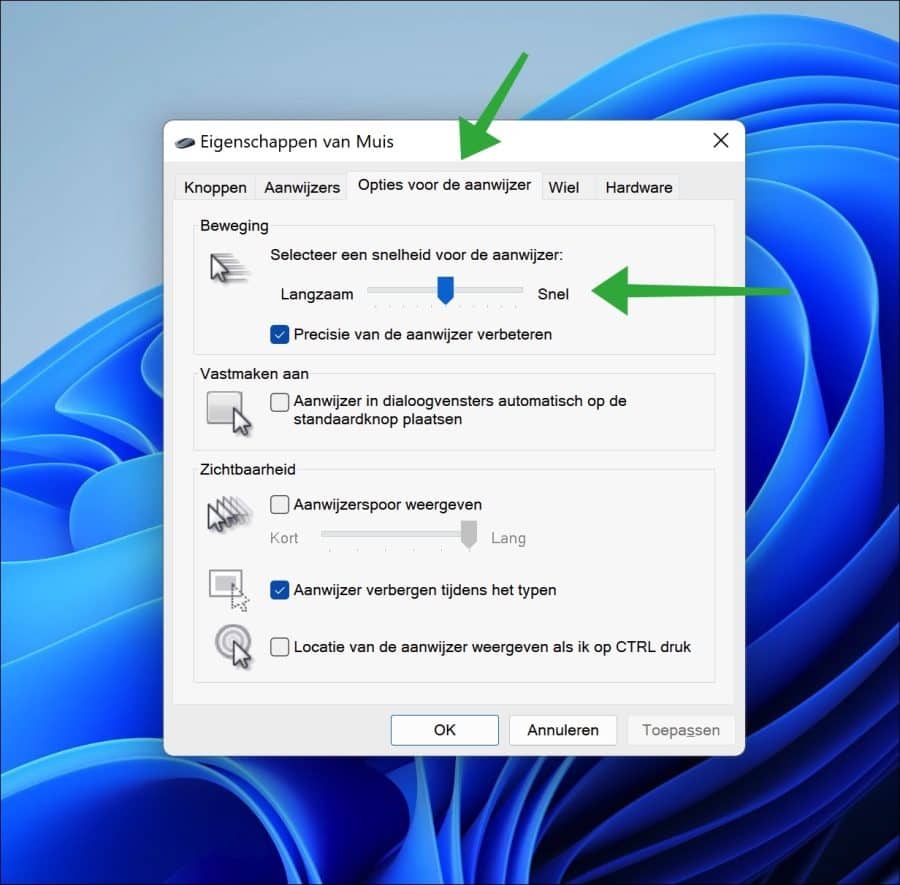
In the mouse properties, click on the “Pointer Options” tab. Then drag the slider to the left to make the mouse pointer slower and to the right to make the mouse pointer faster.
I recommend also enabling the “Improve pointer precision” option. Click Apply and then OK to confirm.
I hope this helped you. Thank you for reading!
Also read: