

Hardware virtualization allows you to install multiple operating systems and apps on a Windows 11 computer.
By virtualizing hardware you can test a new operating system without purchasing new hardware, for example with Hyper-V. Enabling hardware virtualization in Windows 11 is not very difficult, you can enable it via the EUFI/BIOS.
If you have enabled virtualization, then you can then enable Hyper-V install virtual machine. Not only via Hyper-V, but also via VirtualBox or others virtual machine software.
There are some requirements that the computer must meet to enable virtualization. For example, the computer must have the Windows 64 bit operating system and a Professional or Enterprise license (to use Hyper-V). There must be support for hardware virtualization in the BIOS, and there must be sufficient disk space available to install the operating system you want to virtualize.
Enable virtualization in windows 11
Before you enable virtualization, I recommend checking to see if your computer supports hardware virtualization. You can check this in the following way.
Open task management. Then click on the “Performance” tab. In the performance settings check whether “Virtualization” is enabled.

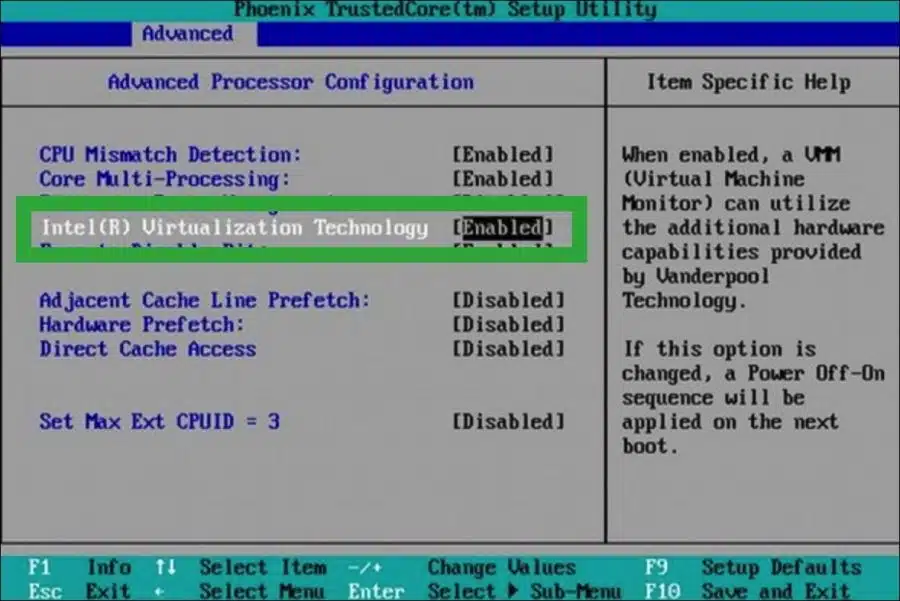
To enable virtualization in the EUFI/BIOS boot the computer to the BIOS. In the BIOS settings In the “advanced” or “configuration” settings, look for the following settings to enable hardware virtualization. This completely depends BIOS version, brand or model of computer or laptop.
Intel(R) virtualization technology, AMD-V, VT-X, Hyper-V, SVM or VanderPool. Then enable the option by changing the setting to “Enabled”.
Below is an example:
If you have successfully enabled hardware virtualization in the EUFI or BIOS, please read the following article How to enable and use Hyper-V in Windows 11.
I hope this helped you. Thank you for reading!