

If you want to perform remote administration or a want to take over your computer remotely, then you can use Teamviewer.
Teamviewer is one of the most popular programs for taking over a computer and performing remote management on it. It can be used in different settings, for home use, but also for use in a professional environment such as work or school.
For example, via Teamviewer you can collaborate with colleagues or consult files from an external location on your own computer. A major advantage of Teamviewer is that it is free to use in a non-commercial environment. It also offers a clear and easy appearance so that it is suitable for less technical people.
Install and use Teamviewer for Windows 11
Teamviewer is available on various platforms, such as Windows, macOS, Linux, iOS and Android, allowing connections to different devices. The software implements end-to-end encryption and two-factor authentication to protect sensitive data. In addition, TeamViewer offers user management features.
Install Teamviewer in Windows 11
In this article I explain how you can install and use Teamviewer in Windows 11. This also works in almost the same way in Windows 10. Please note that the minimum recommended system requirements. These are not strict requirements, lower specifications are also possible but not recommended.
The minimum system requirements for TeamViewer are:
- Operating system: Windows 7 (32/64 bit)
- Processor: 1 GHz single core
- RAM: 2 GB
- Storage space: 250 MB free disk space
- Internet Bandwidth: minimum 20 Mbps
- Graphics card: 256 MB VRAM
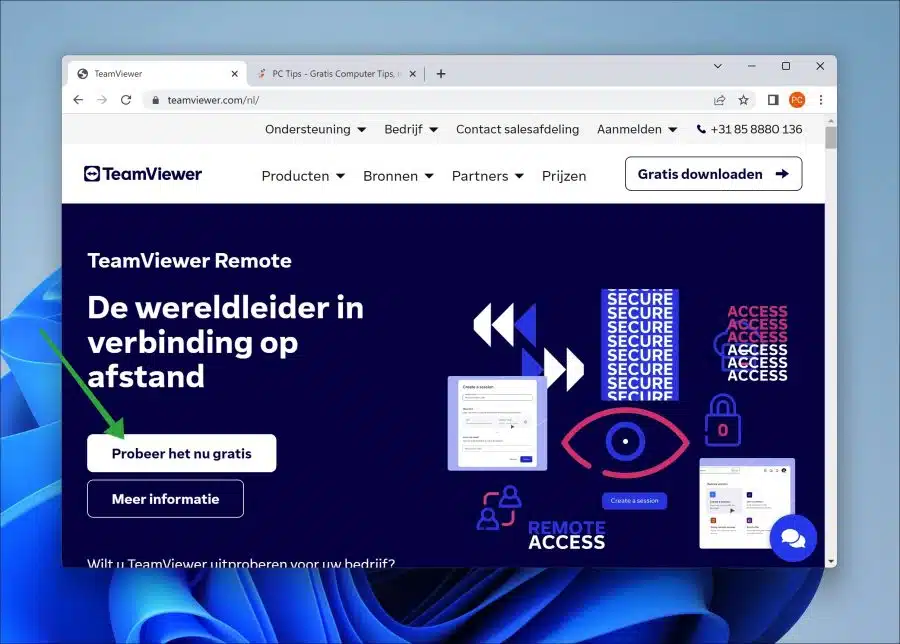
For starters, you can Download Teamviewer for free from the official website. Click “try it free now” to start the download.
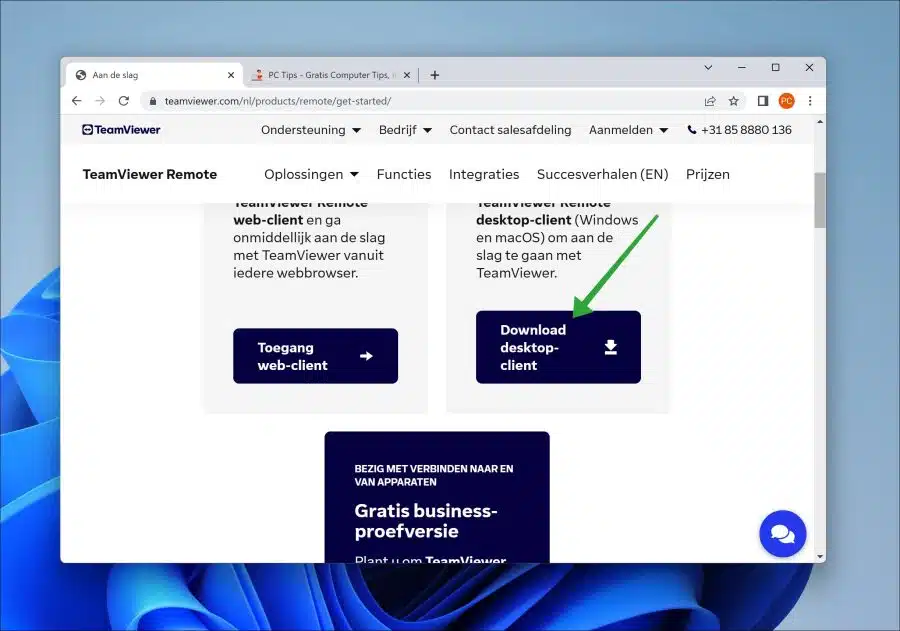
To install Teamviewer you must download the desktop client. Click on the “Download desktop client” link.
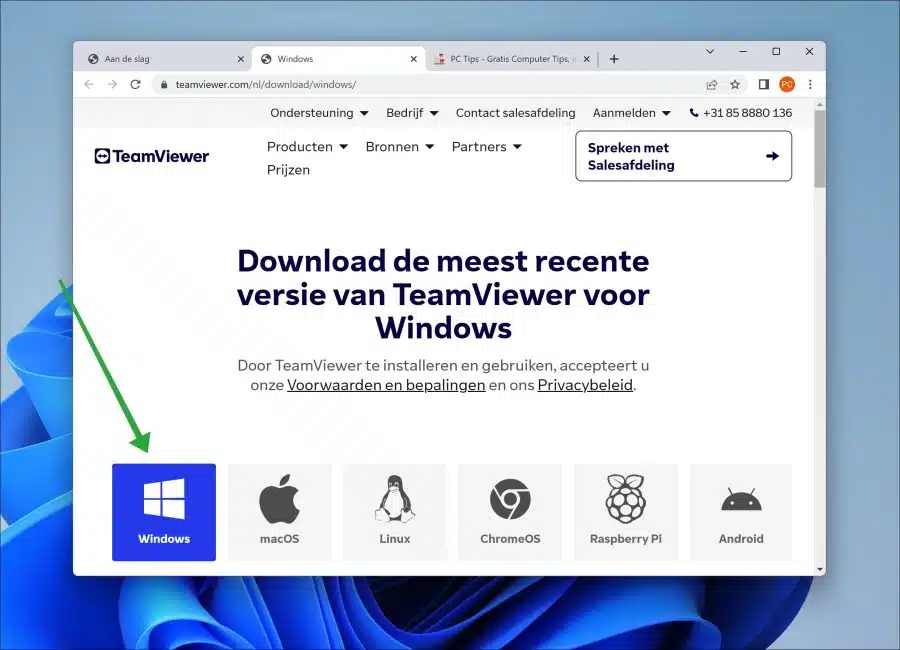
Click “Windows” to download the desktop client for Windows 11.
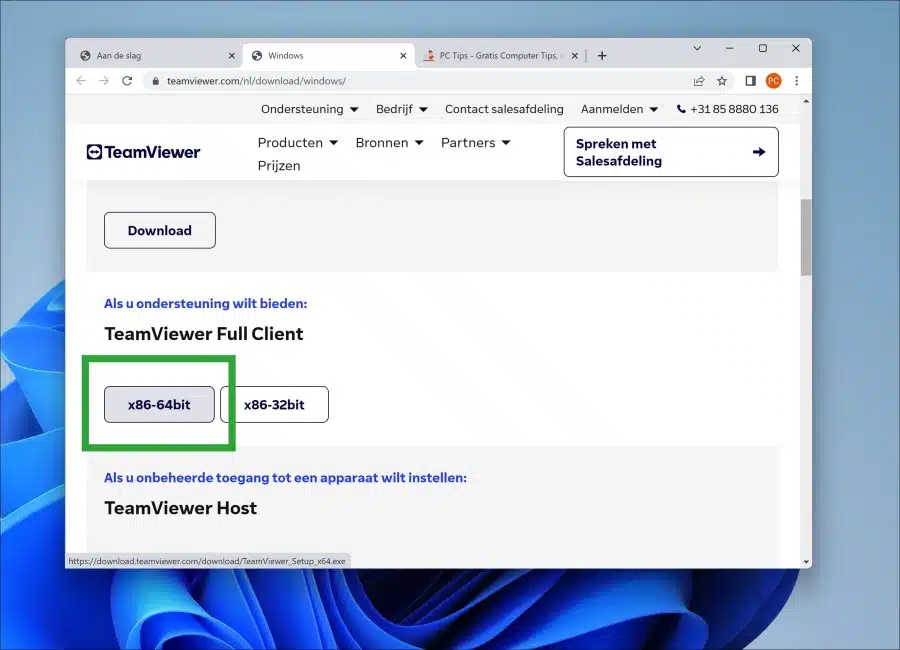
We want the Teamviewer Full Client to be able to use all the features and options. So click on “Teamviewer Full client x86-64bit” to start downloading. If you use Windows 11, you can only use the 64-bit version.
Also read: Which Windows version do I have?
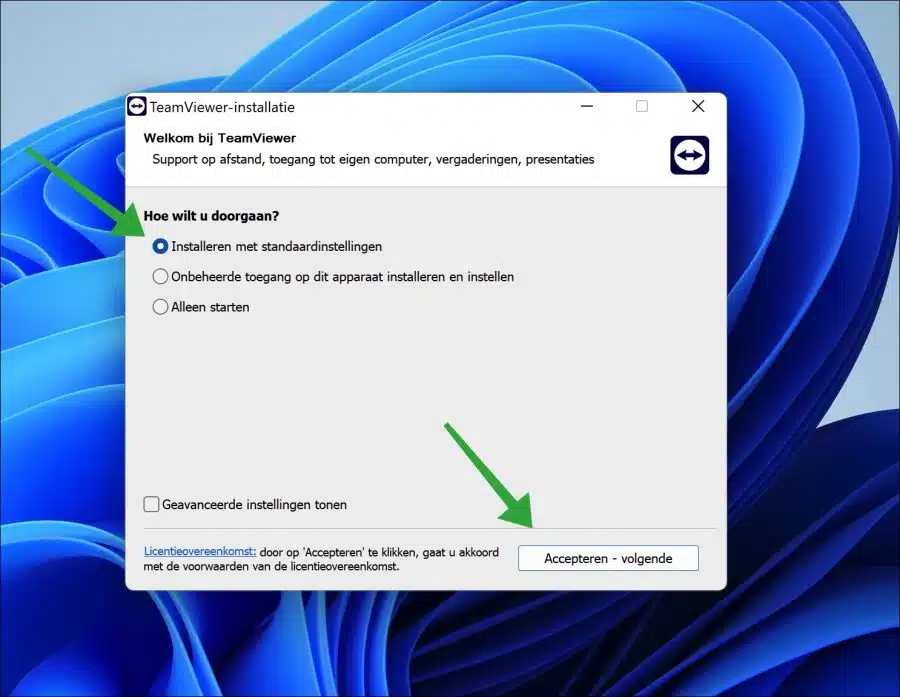
Install Teamviewer with the default settings.
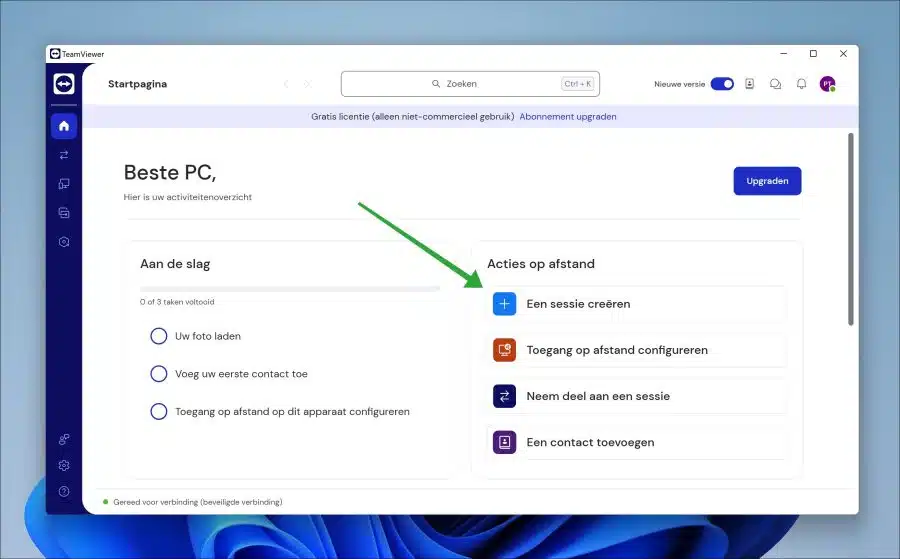
When the installation is complete, the Teamviewer window will open. Click on the link “create a new account” to use all functions. When creating the account, you must also create an encryption key. Once you have set all this up, you will see the following screen with which you can start a session.
Using Teamviewer in Windows 11
Create a session
You can create a session in Teamviewer. This way you can control someone else's computer if permission is given.
Click on the “Create Session” link.
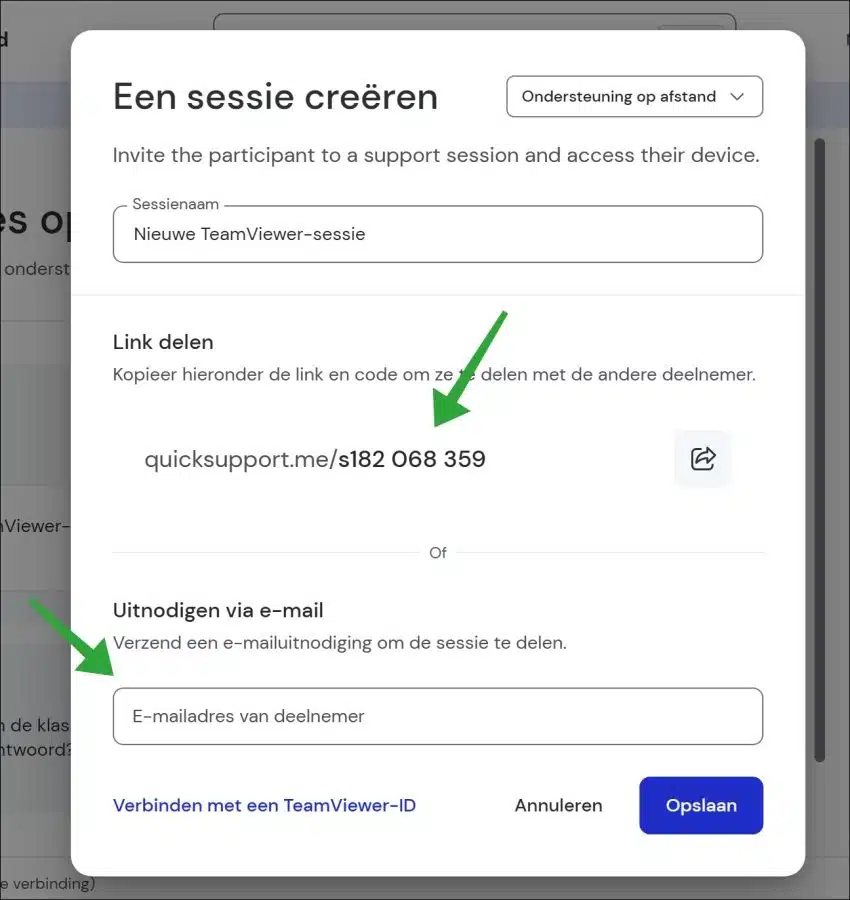
You now need to invite the other participant to start the session. You can share a link or enter an email address to send the invitation via email.
It is not necessary that the other party also has Teamviewer installed. This is recommended because several functions are then available. If this is not the case, a “quick support” application will be installed.
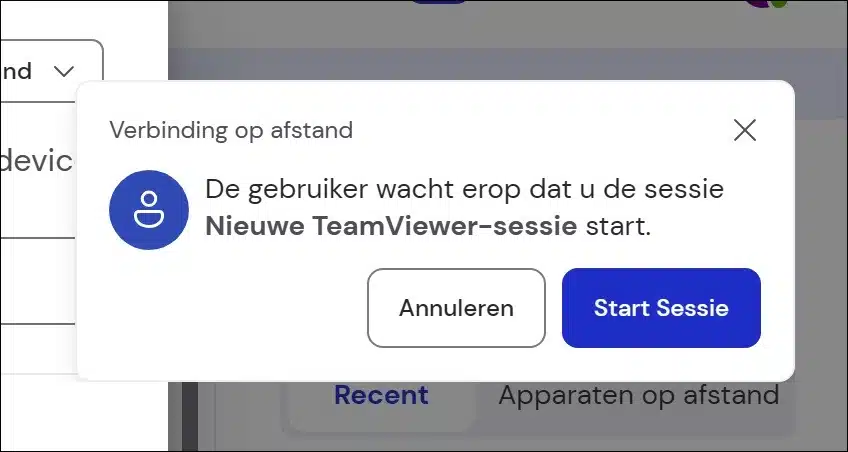
Once you have invited the other participant and the invitation has been accepted, you can start the session by clicking “Start session”.
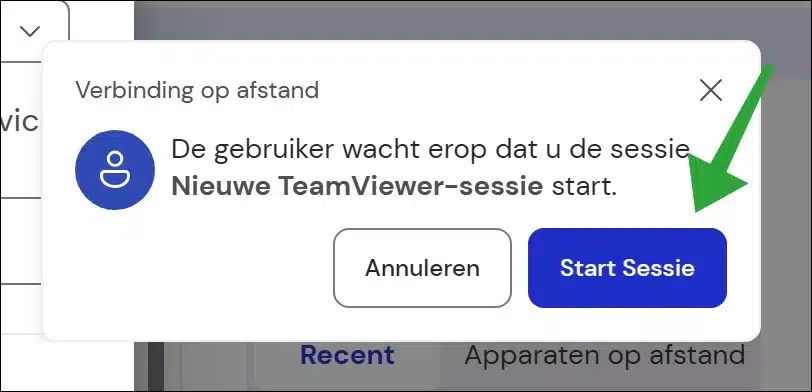
The other participant will then receive a notification that you have started the session and can participate in the session by clicking on “join session”.

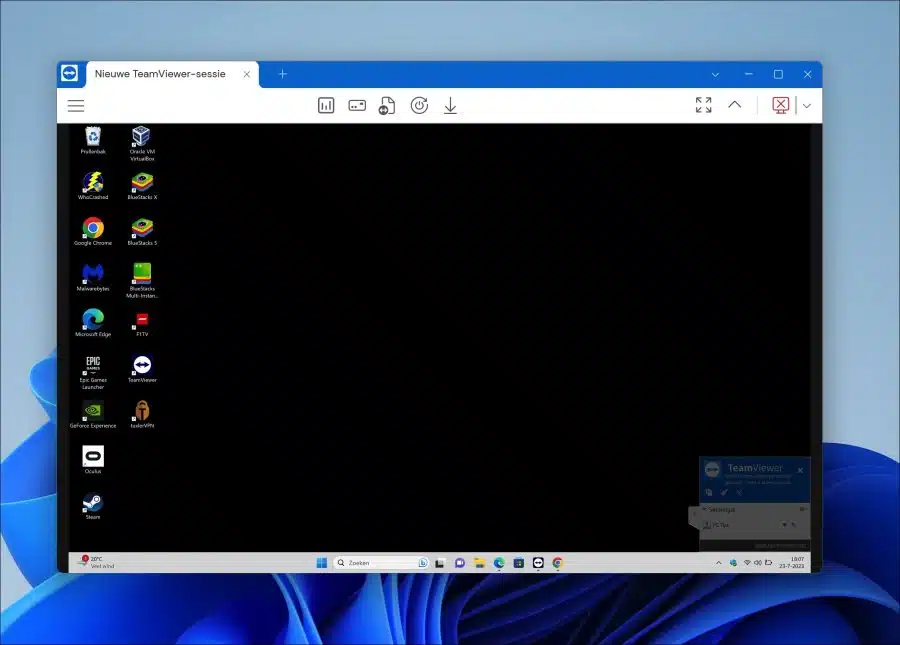
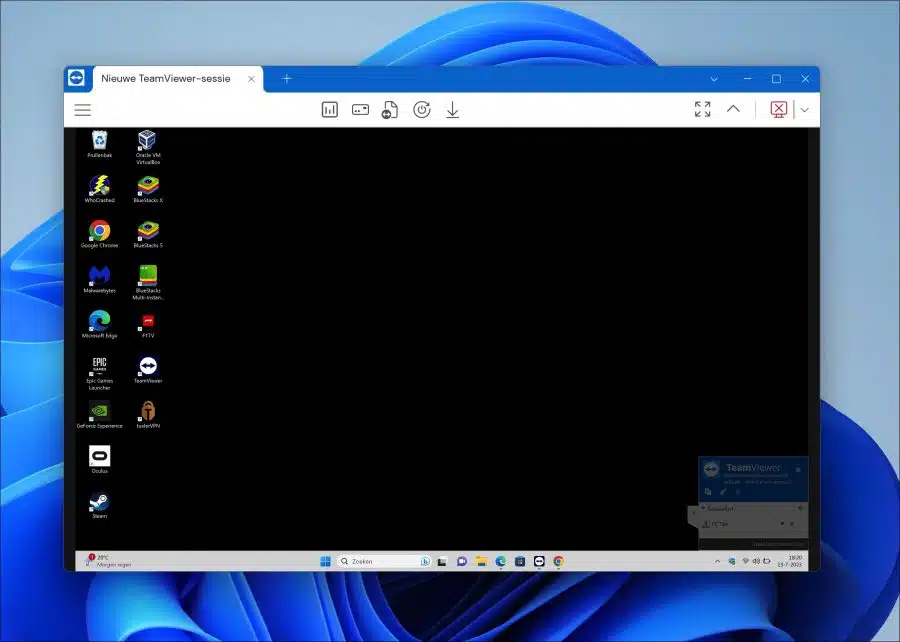
As a session starter, you will then see the participant's screen and can manage it.
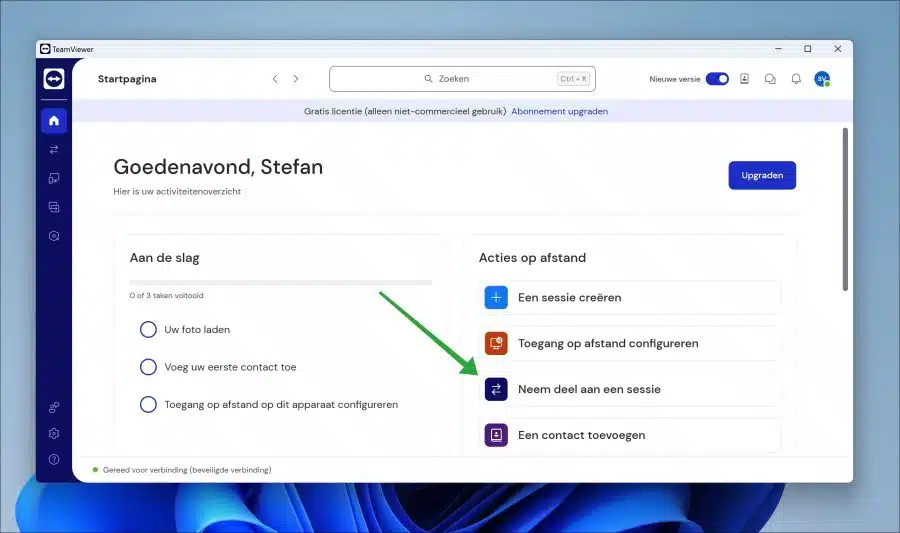
Join a session
If you want your computer to be taken over via Teamviewer, you must participate in a session. The other party must then start a session and invite you.
To participate in a session, click on “join session”.
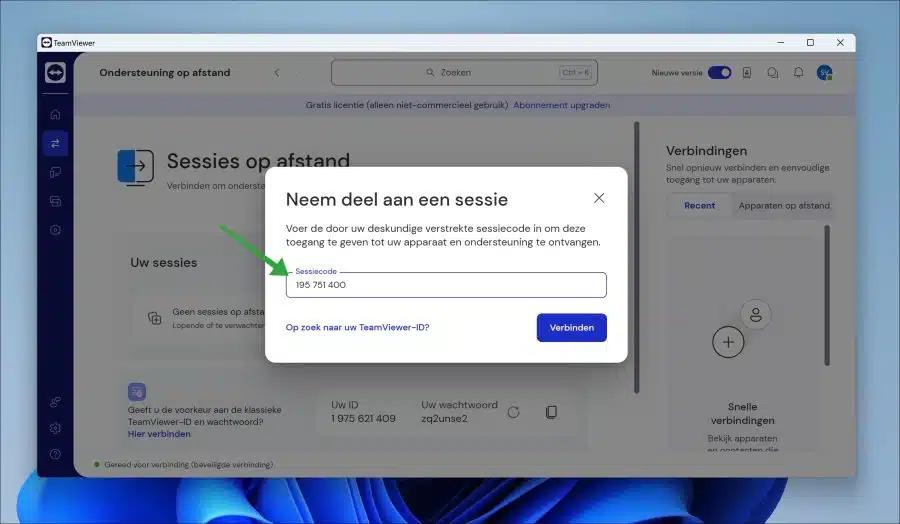
You now need a session code or an invitation via a link or email. You will receive this from the session starter.
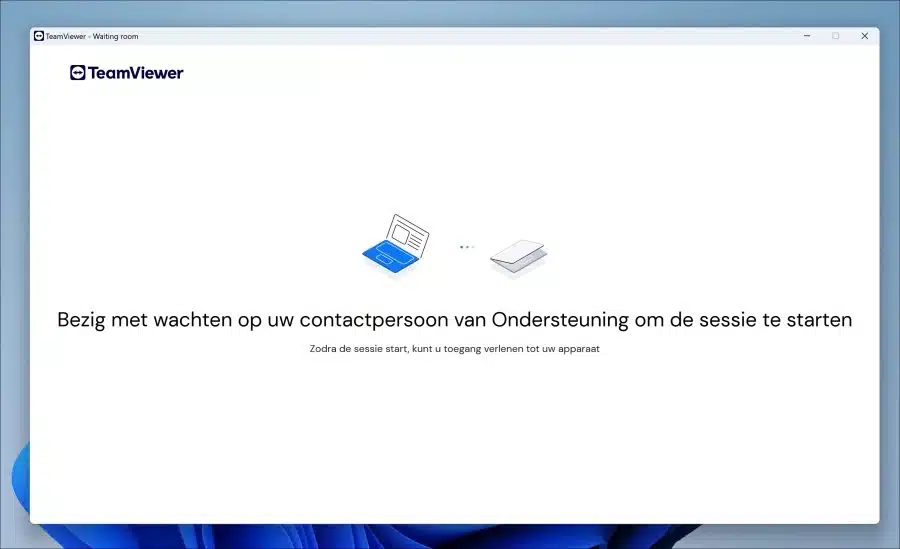
You will then receive a message that the session is being waited for the other contact person to start the session.
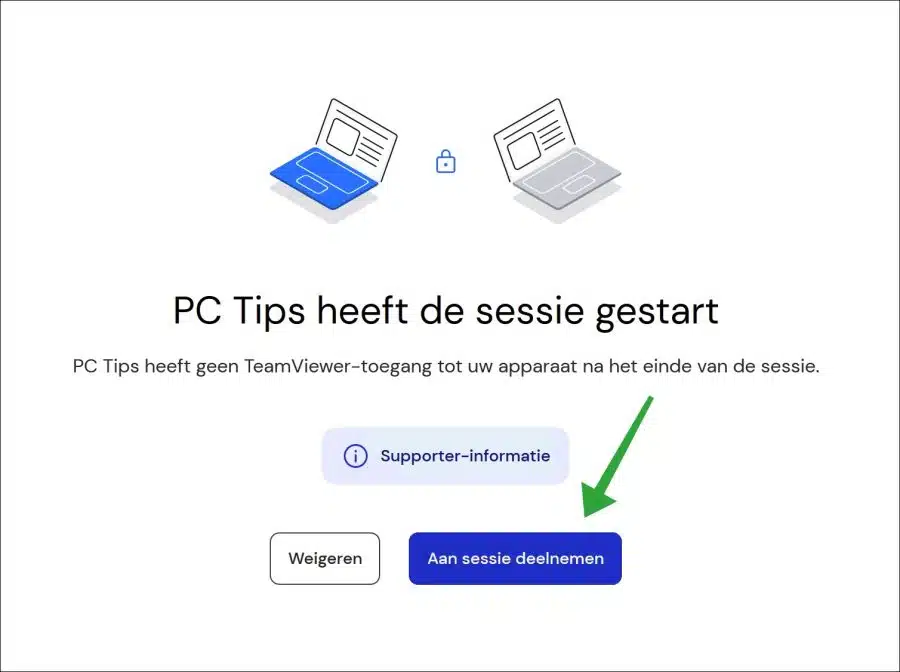
When the session is started by the other contact by clicking “Start Session”.
You can then participate in the session by clicking on “join session”.
Your screen is then shared with the contact and they can manage your computer remotely.
I hope this has helped you. Thank you for reading!