

If you have Windows 10 or Windows 11 used, the PC will be updated via Windows Update. Windows update is the service that Windows uses to download and install new versions of the operating system and related ones.
Downloading update(s) consumes disk space. On average there would be on the primary Hard Drive, the C drive in most cases, approximately 10 Gigabytes of free disk space should be available. Then you're in the right place download and install mainly major updates.
Should the C drive now do not have enough disk space, or for whatever reason want to have Windows updates downloaded to a different location, this is possible.
For example, you can have the Windows updates downloaded to a other partition on another drive, or even an external hard drive. If you have updates downloaded to another disk, this disk must always be available.
All updates are downloaded to your computer before they are installed in Windows. The Windows updates are downloaded to the “SoftwareDistribution” folder by default. This is a sub-folder in the c:\windows\ folder. So the default locations for Windows updates is c:\windows\softwaredistribution.
By connecting the SoftwareDistribution folder to a new location you can move Windows updates to another folder. This can be done via the “mklink” command or (“symbolic links”) or (“symlinks”). This is how it works.
Move Windows Update “SoftwareDistribution” folder
Make one first Windows 11 restore point!
To start with, you should temporarily disable the “Windows update” service. This is necessary to be able to rename the Softwaredistribution folder.
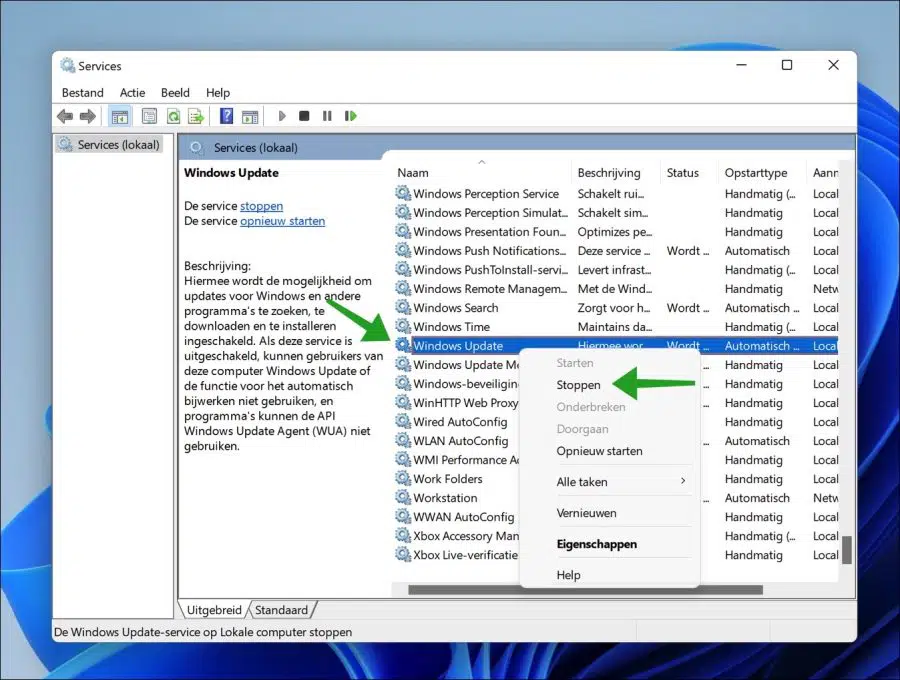
Right-click on the Start button. Then click Run on the menu. In the run window type: services.msc
Then look for the “Windows update” service and right-click on it. In the menu click on “Stop”. The update service is now stopped.
Now open the Windows Explorer and go to the c:\windows\ folder. Right-click on the “Software Distribution” folder and click “Rename”.
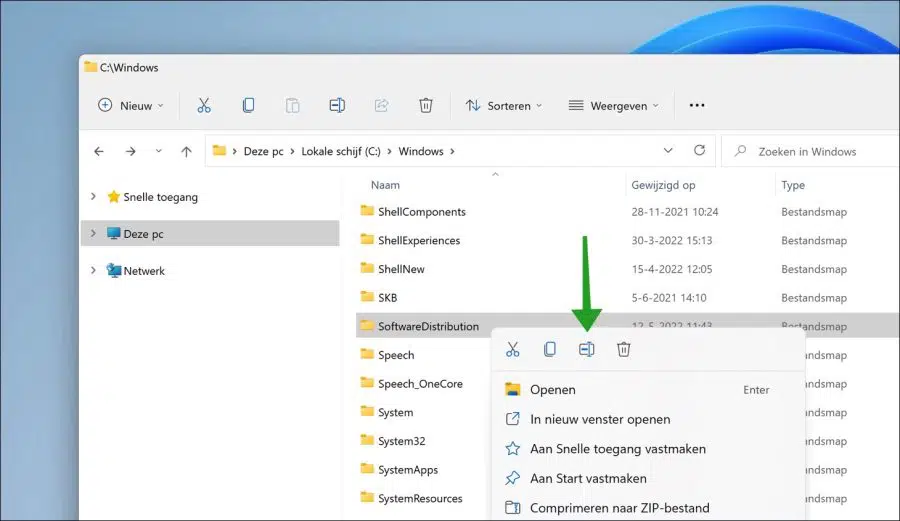
Rename the Softwaredistribution folder to “Softwaredistribution_old”. Doesn't matter what name, just keep it recognizable.
Now open the Command Prompt as Administrator and use “mklink” to replace the old location for the “Softwaredistribution” folder with a new location.
Make sure you already have a new location ready for the Windows updates. This could be a new folder on a d:\ partition on another drive or location.
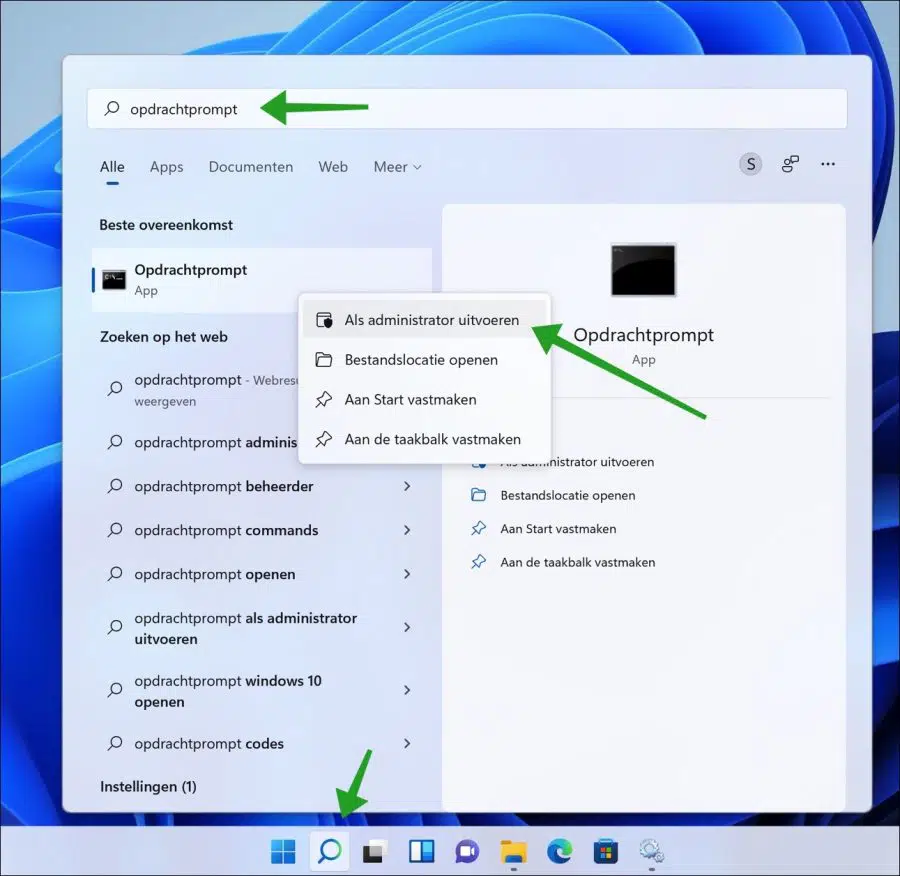
Search your computer for Command Prompt. Right-click on it and click “Run as Administrator”.
Now enter the command to move the Windows updates folder to another location.
Here's an example:
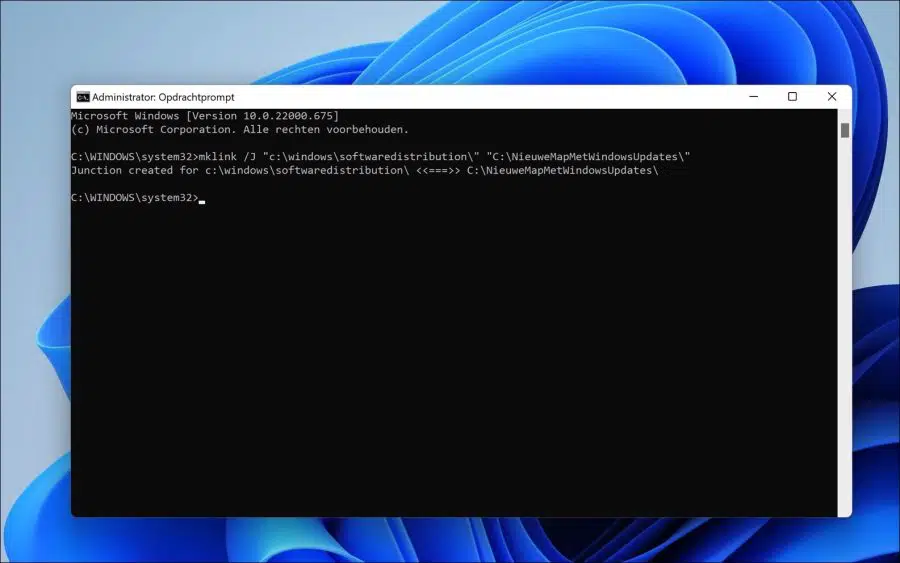
mklink /J "c:\windows\softwaredistribution\" "C:\NieuweMapMetWindowsUpdates\"
Replace the path in bold with the path of your choice. You will now see a message “Junction created for …”.
Now check for Windows updates. Files will now be created in the new Windows update folder.
I hope this helped you. Thank you for reading!
I still have to do it, but I'm glad I found it. I sometimes reinstall the computer and then it is useful if I can put that folder back again if this is possible, of course. Sorry I forgot full stops and commas.
thank you very much! I've been looking for this for years!
Thanks! Glad it all worked out 🙂