

File history in Windows plays a crucial role in an effective backup strategy. By setting up automatic backups with the File History feature, you can easily revert to previous versions of specific files or folders. This is particularly useful for situations where, for example, you have deleted text from a document and later decide you want to restore it.
This option is available once you enable File History. This article explains step-by-step how to back up to external storage devices (such as an external hard drive or USB flash drive) and how to select specific folders to back up. All of this takes advantage of the File History functionality in Windows, which is an important tool for safeguarding your important files.
How to backup and restore file history in Windows
Enable file history
To use File History in Windows, it is necessary to activate this feature first, as it is disabled by default. It is also important to use an external storage medium, such as an external hard drive or USB stick, to store the backups.
Here are the detailed steps to activate File History:
- Click the Windows Start button.
- Select 'Settings' from the menu that appears.
- Then go to 'Update & Security', a section in Settings.
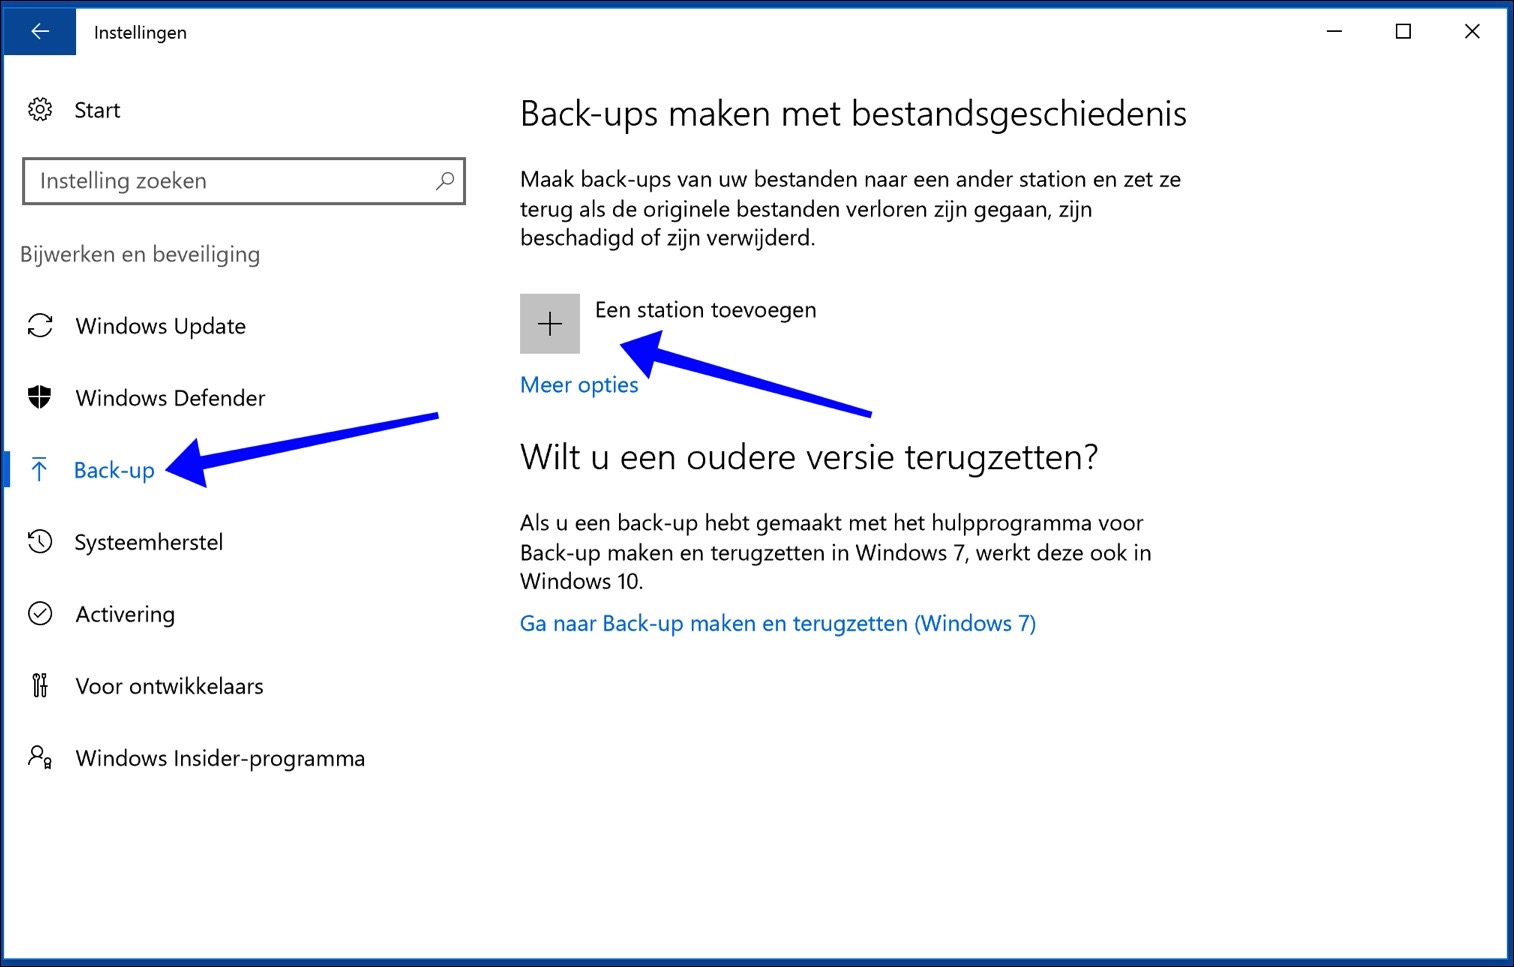
- Select the 'Backup' option in the left menu.
- Now connect your external storage device to your computer. This is necessary to save the File History backups.
- Then click 'Add a drive' to select your external storage media for the backups.
Create file history backup
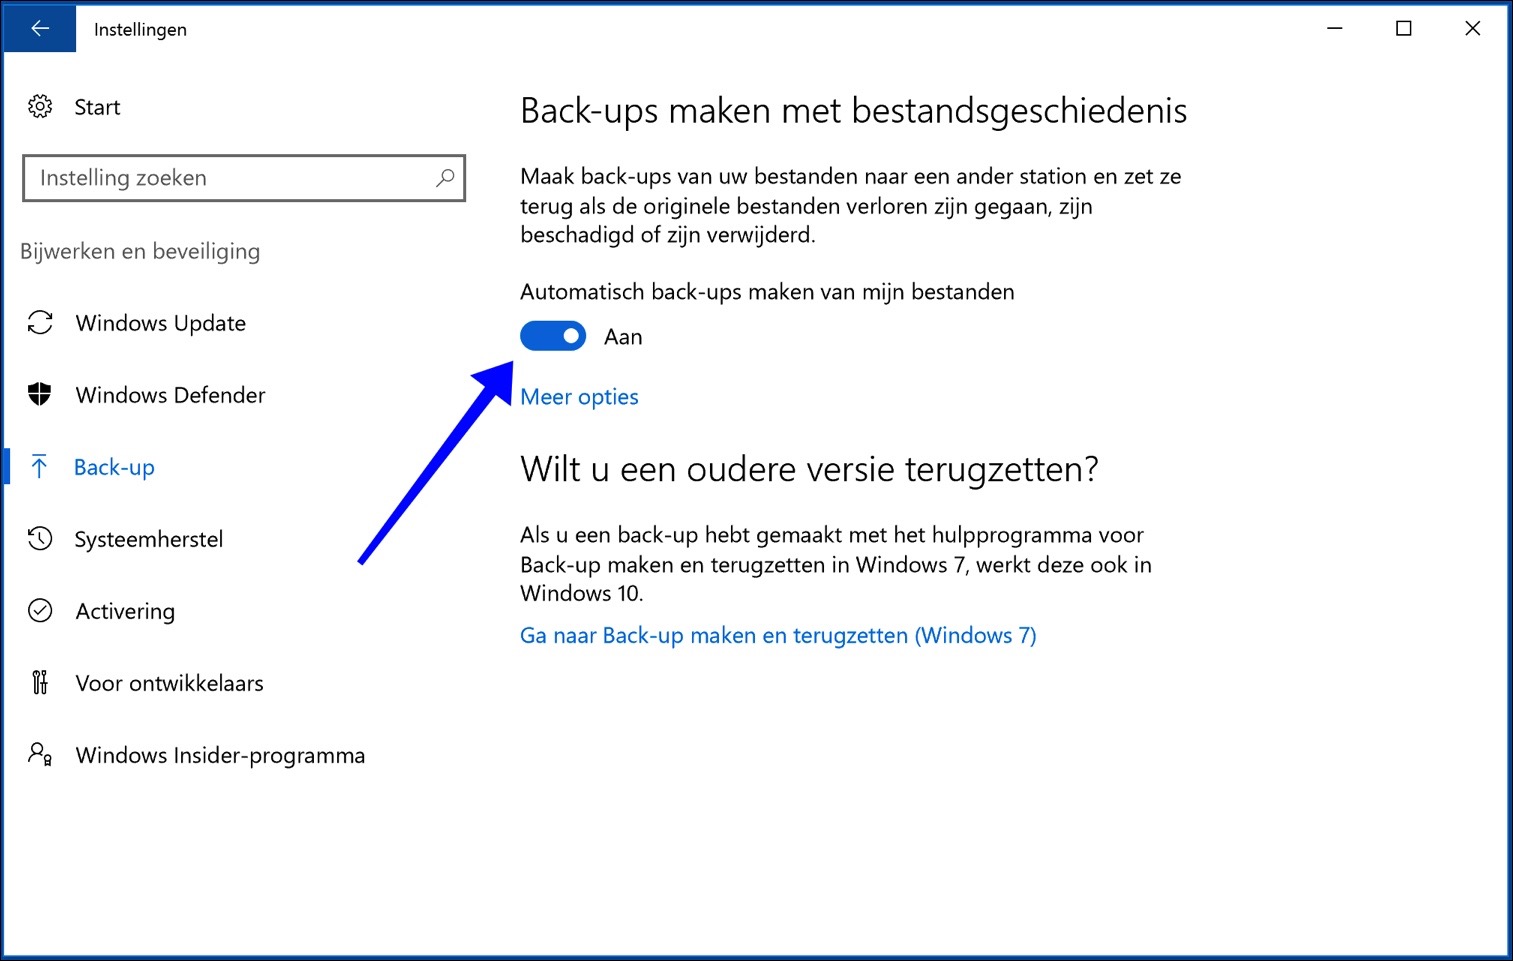
Choose your external storage medium from the list shown. After this selection, a switch (on/off slider) will appear with which you can enable the automatic backup of files to the chosen external medium. It is essential that this external storage device remains consistently connected to the computer to ensure an uninterrupted and reliable backup procedure.
Change file history backup options
By clicking “More Options” you can access various settings related to the file and folder backup process. Here you have the option to immediately start a backup of the files and folders covered by File History by clicking the “Back up now” button.
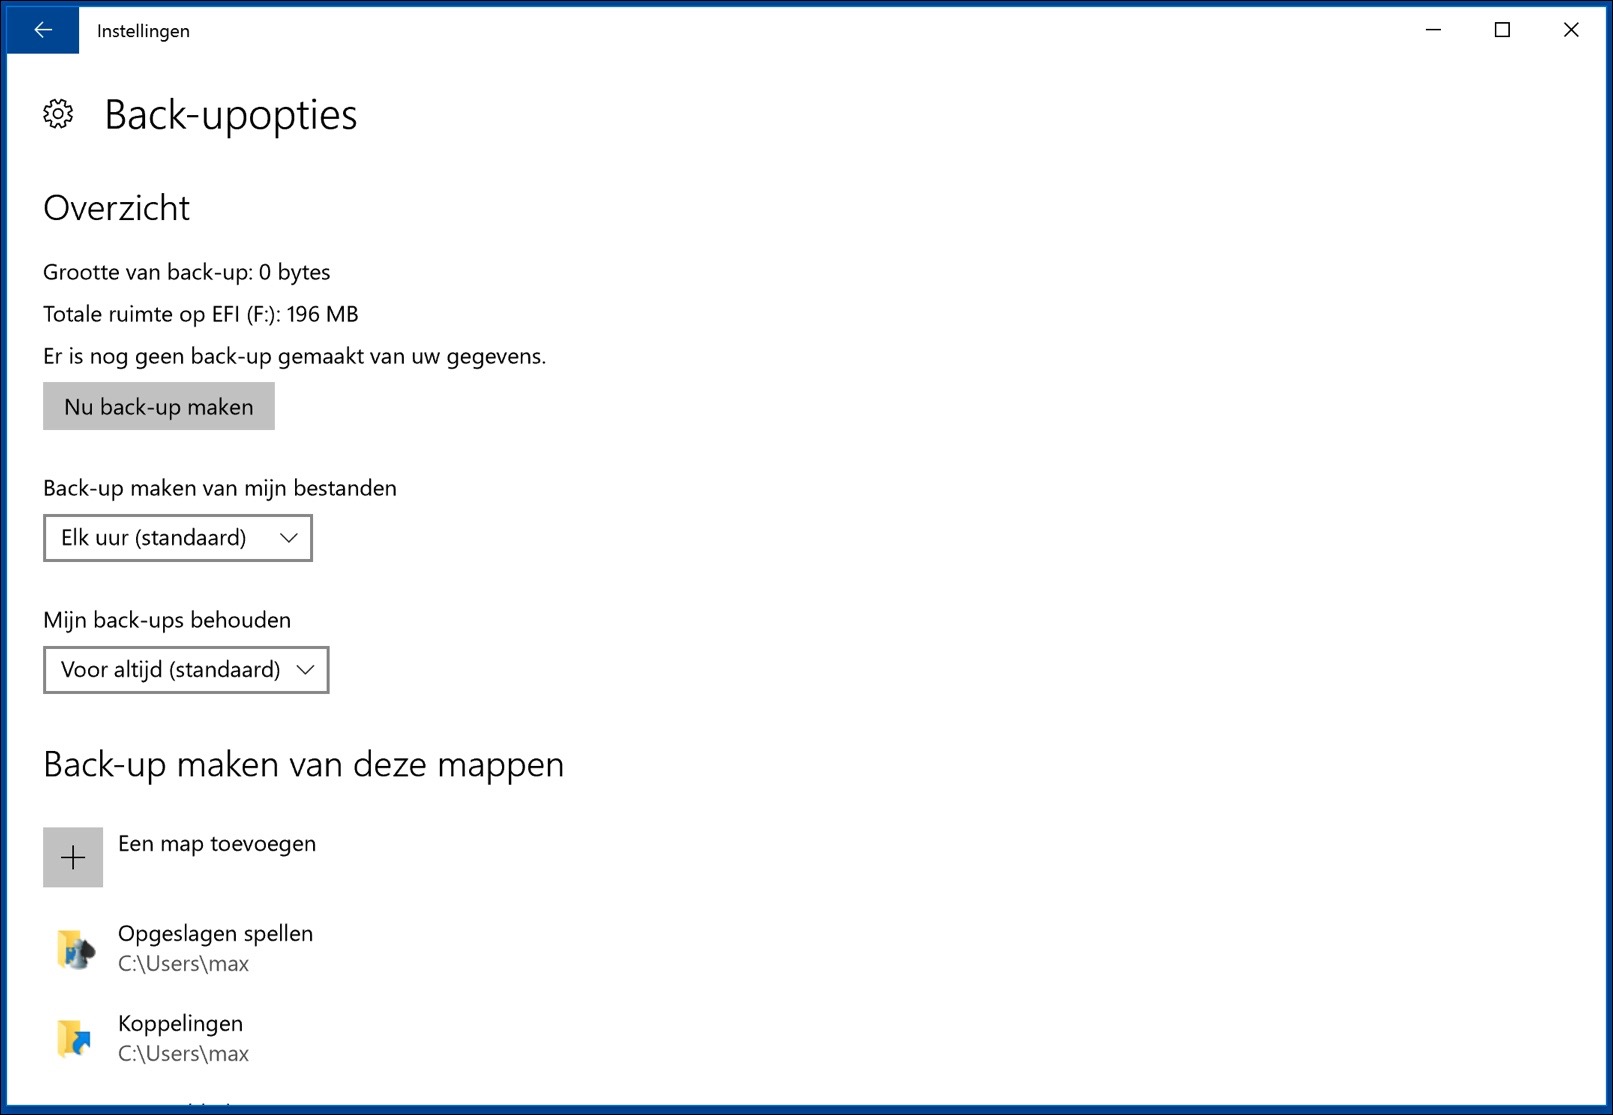
The default settings for File History in Windows are set to back up certain files in specific folders every hour. For a detailed overview of these files and folders, please refer to the table below.
| Name | Location |
|---|---|
| Saved games | C:\Users\Your-User-Name\Saved Games |
| Webshop Linking | C:\Users\Your-User-Name\Links |
| Desktop | C:\Users\Your-User-Name\Desktop |
| Favorites | C:\Users\Your-User-Name\Favorites |
| Contacts | C:\Users\Your-User-Name\Contacts |
| Searches | C:\Users\Your-User-Name\Searches |
| Videos | C:\Users\Your-User-Name\Videos |
| Images | C:\Users\Your-User-Name\Pictures |
| Music | C:\Users\Your-User-Name\Music |
| Downloads | C:\Users\Your-User-Name\Downloads |
| Documents | C:\Users\Your-User-Name\Documents |
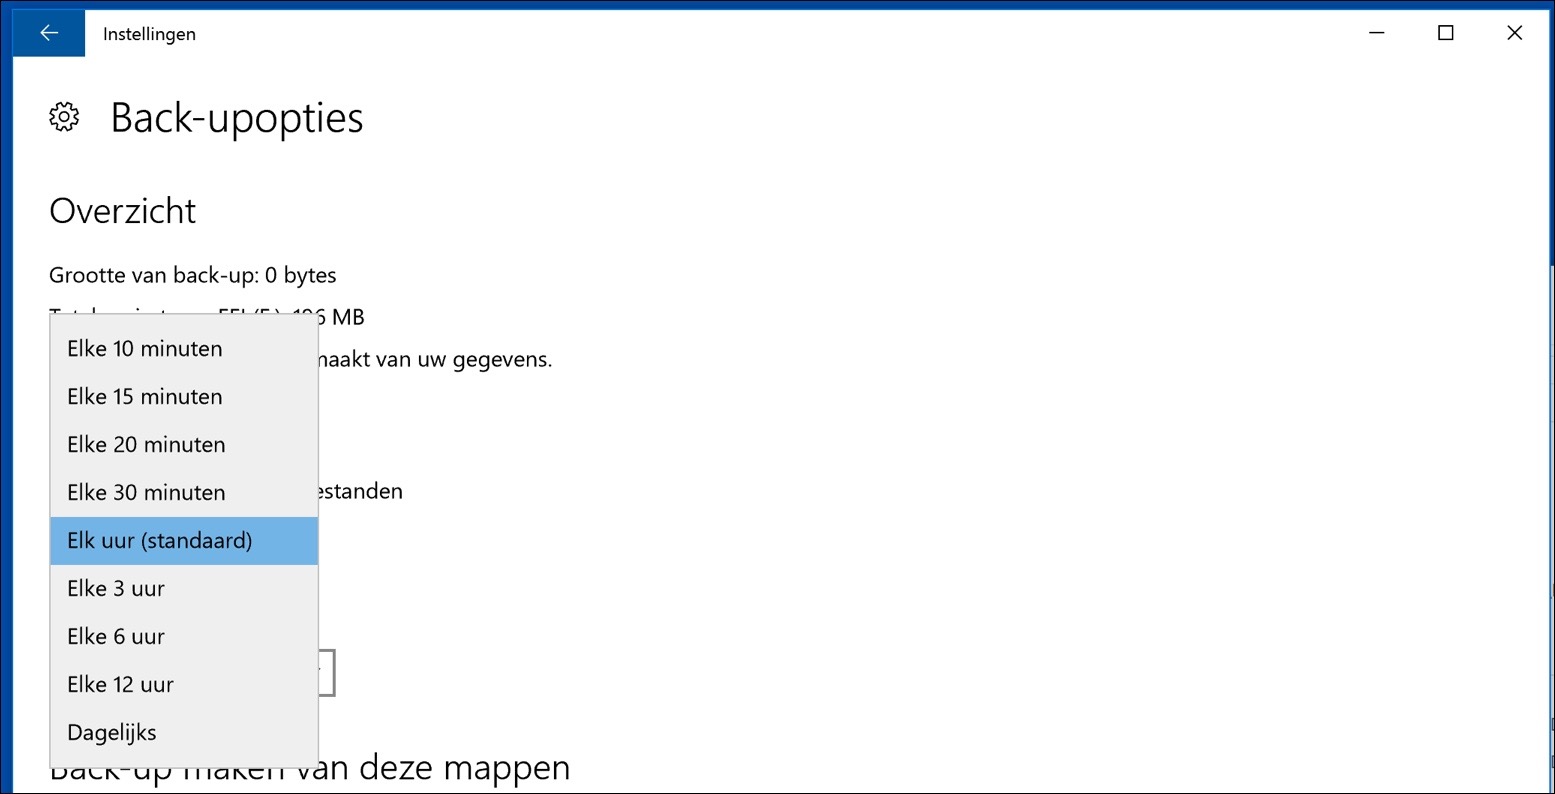
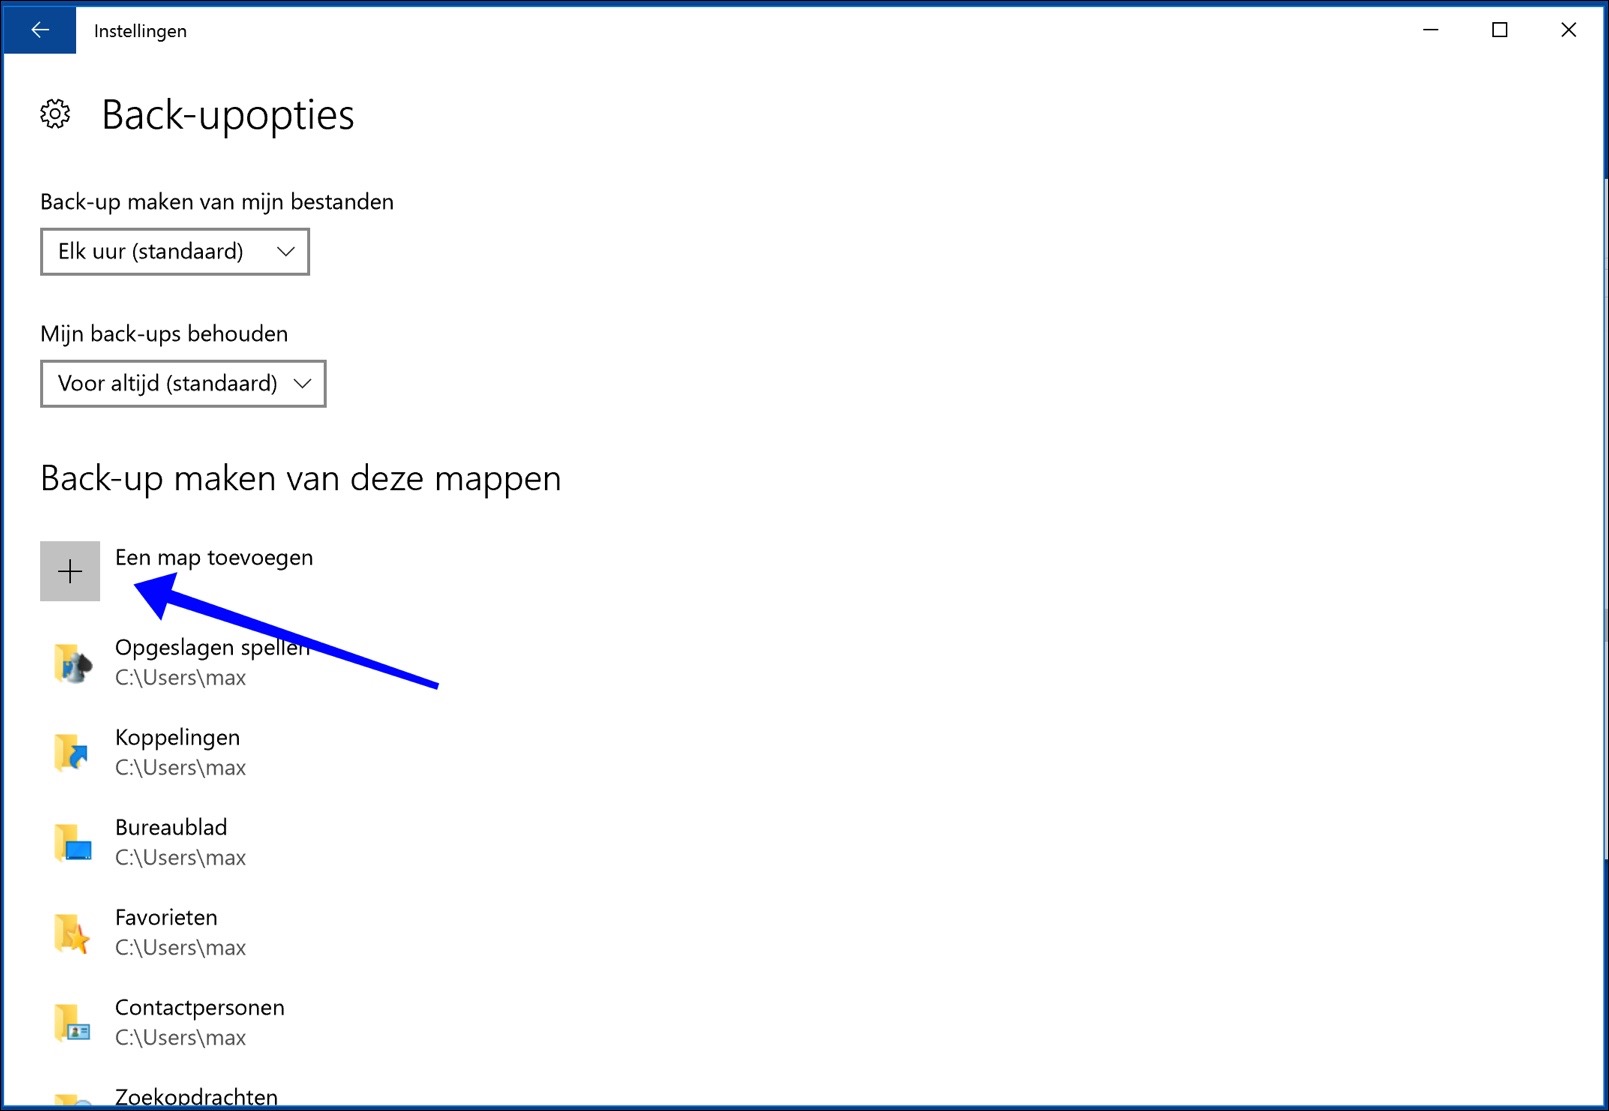
Change backup frequency for file history backup
By default, File History backup frequency in Windows is set to every hour. However, this frequency is adjustable to your preference. You can choose from different intervals: every 10, 15, 20, 30 minutes, every hour (the default setting), 3 hours, 6 hours, 12 hours, or daily (every 24 hours). To make this adjustment, click on the “hourly (default)” option and then select your desired backup frequency from the available options.
Change file history backup retention period
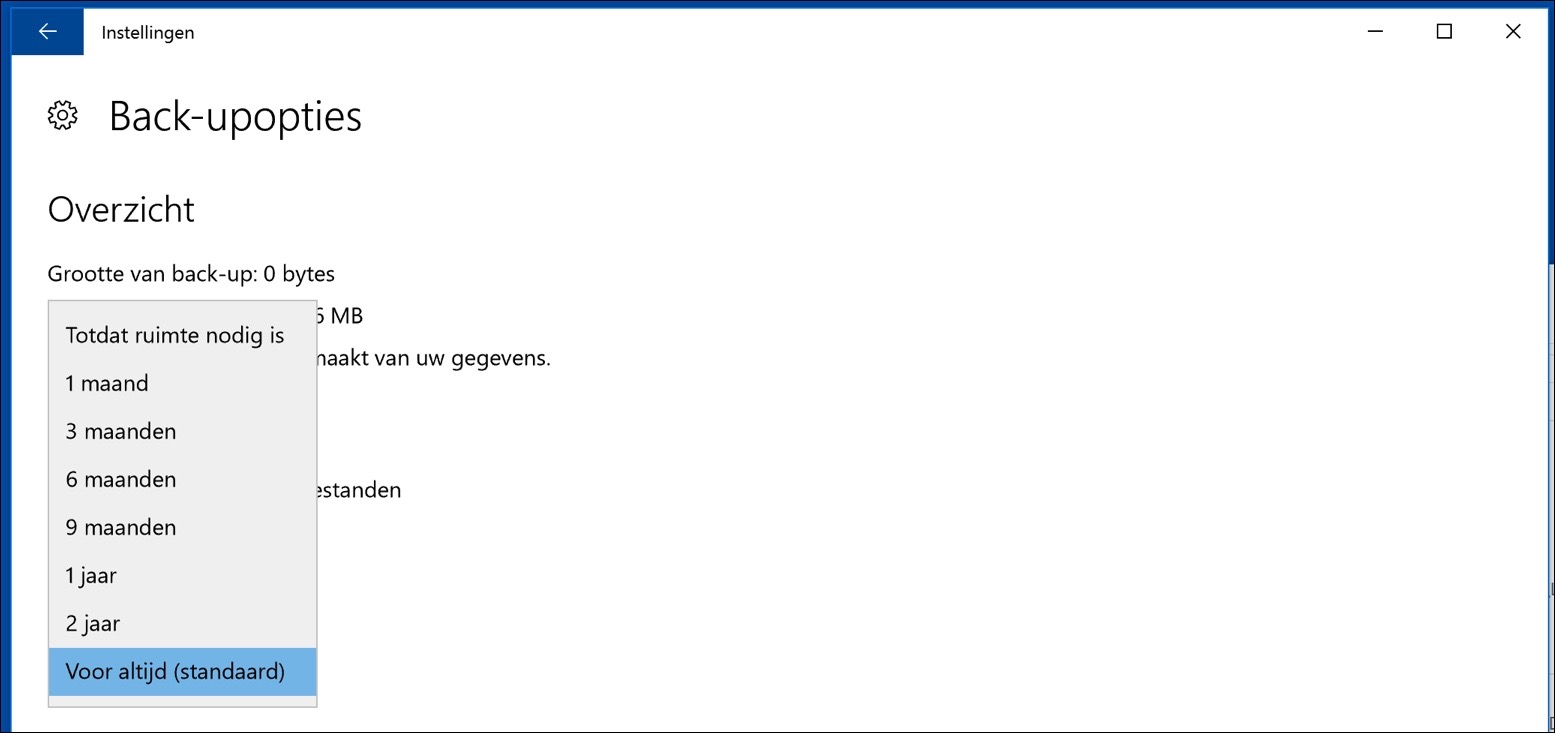
The backups of your files and folders in File History have an adjustable retention period. By default, this period is set to 'unlimited', which means that backups are kept indefinitely. However, you can decide to adjust this period. If you set a specific retention period, Windows will automatically delete File History backups older than this period. This process helps free up space on your external storage media for new backups.
To change the retention period, click on the “forever (default)” option and choose the desired period for storing your backups.
Add folder to file history backup
You have the option to include additional folders in your File History backup. You do this by clicking on the “Add a folder” button. Then select the folder you want to add. Once added, this folder will be automatically backed up to your external storage media every hour, along with the other folders that are already part of the File History backup.
Exclude folders from file history backup
The user folders in Windows, found under C:\Users\, contain various subfolders such as 'Documents', 'Favorites', and more. An interesting detail is that these file-level folders are always named in English, but in the Dutch version of Windows they are displayed in Dutch to make it easier for users. For example, C:\Users\ is shown as C:\Users\.
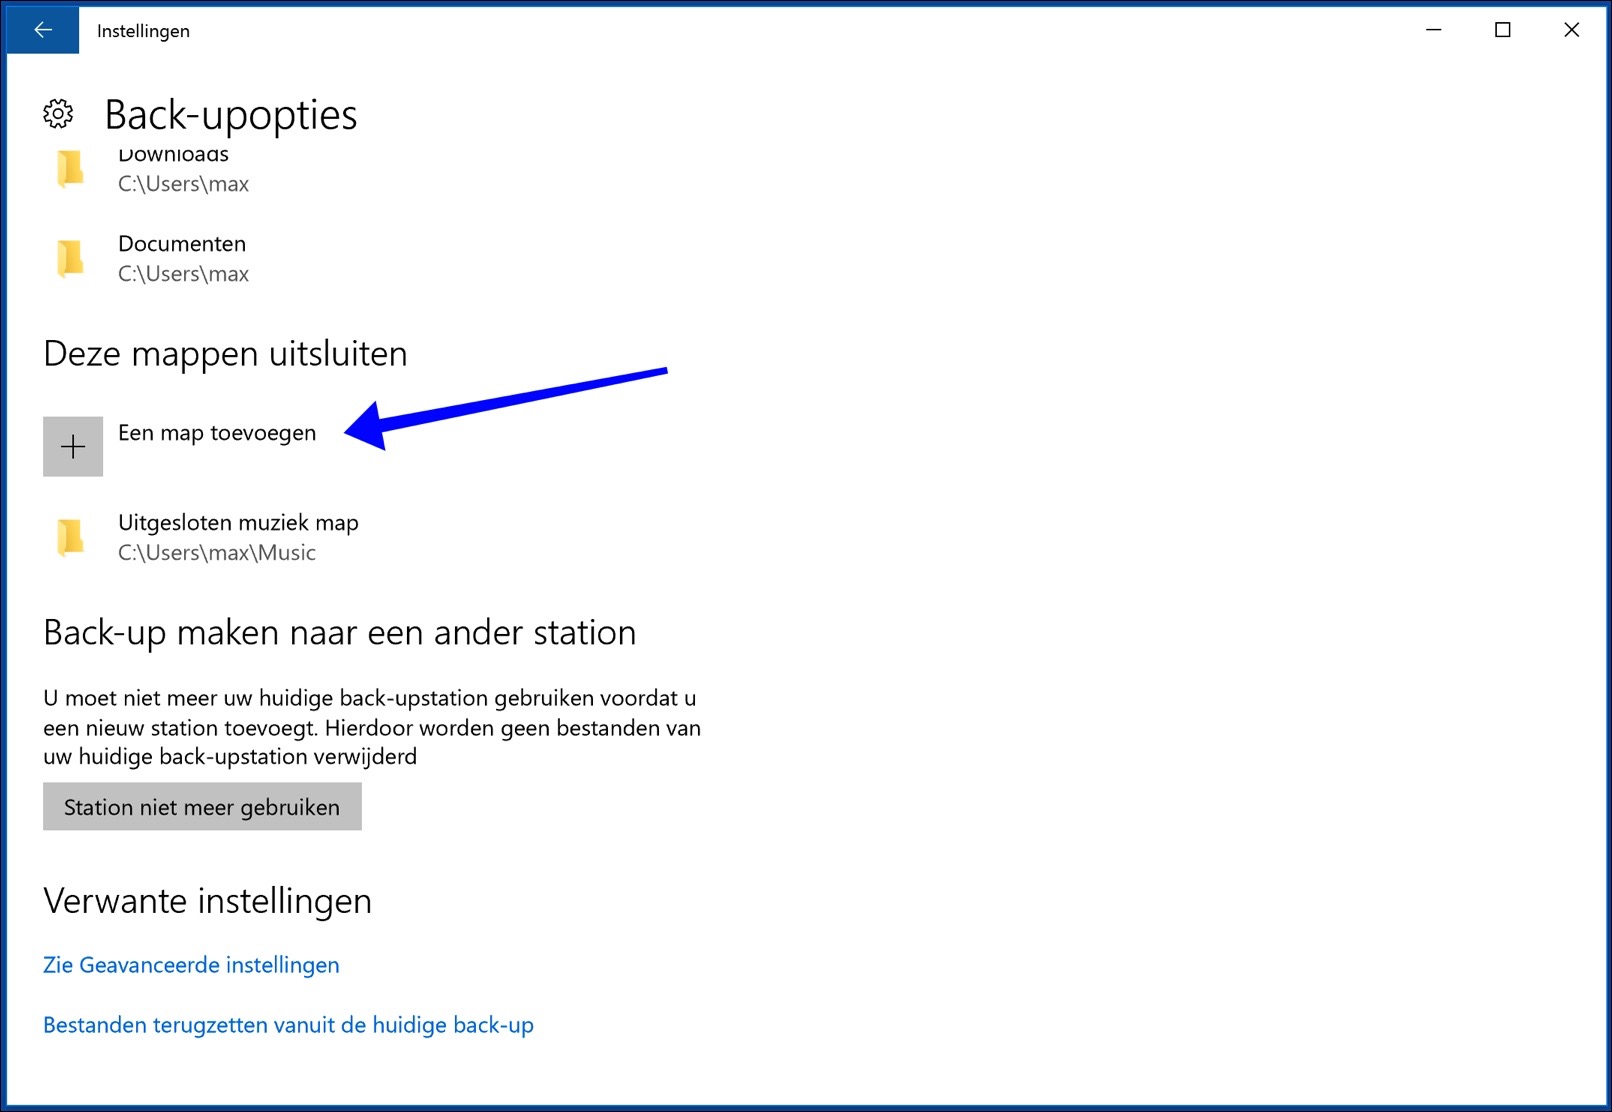
If you would like to exclude specific folders within C:\Users\[Your Username]\Music\ from the backup, you can do so by clicking “Add a folder” under the “Exclude these folders” section.
In this example, the folder “Excluded Music Folder” has been chosen to exclude. This excluded folder will then be listed under “Exclude these folders”. If you want to include a previously excluded folder in the backups, you can select it and choose the 'Delete' option to undo the exclusion.
Backup file history to other external media (hard drive, USB stick)
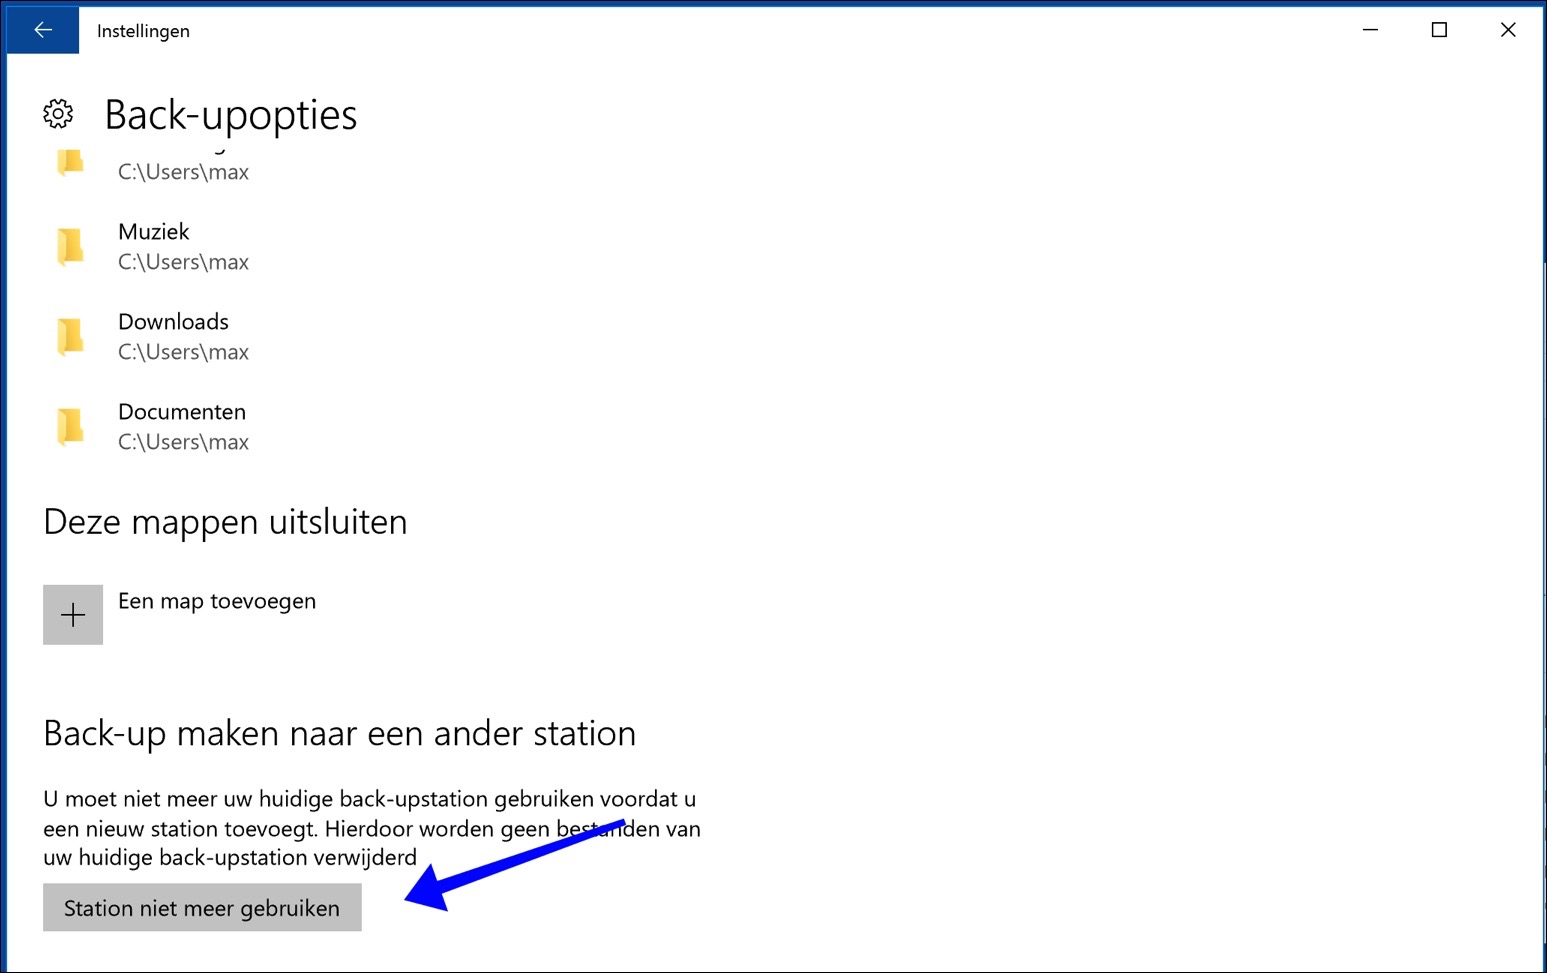
If you've purchased a faster external hard drive, your old drive has failed, or you simply want to switch to a different external storage medium to back up your File History, you can easily switch drives.
To do this, navigate to the File History backup options and select “Stop using drive”. This disconnects the current storage medium from File History.
Then return to the “Add a drive” option as described previously and follow the steps to mount a new external storage device to File History. It is important to know that the backup files on the old external medium are not lost. You can always get the File History files back from the old external storage if necessary.
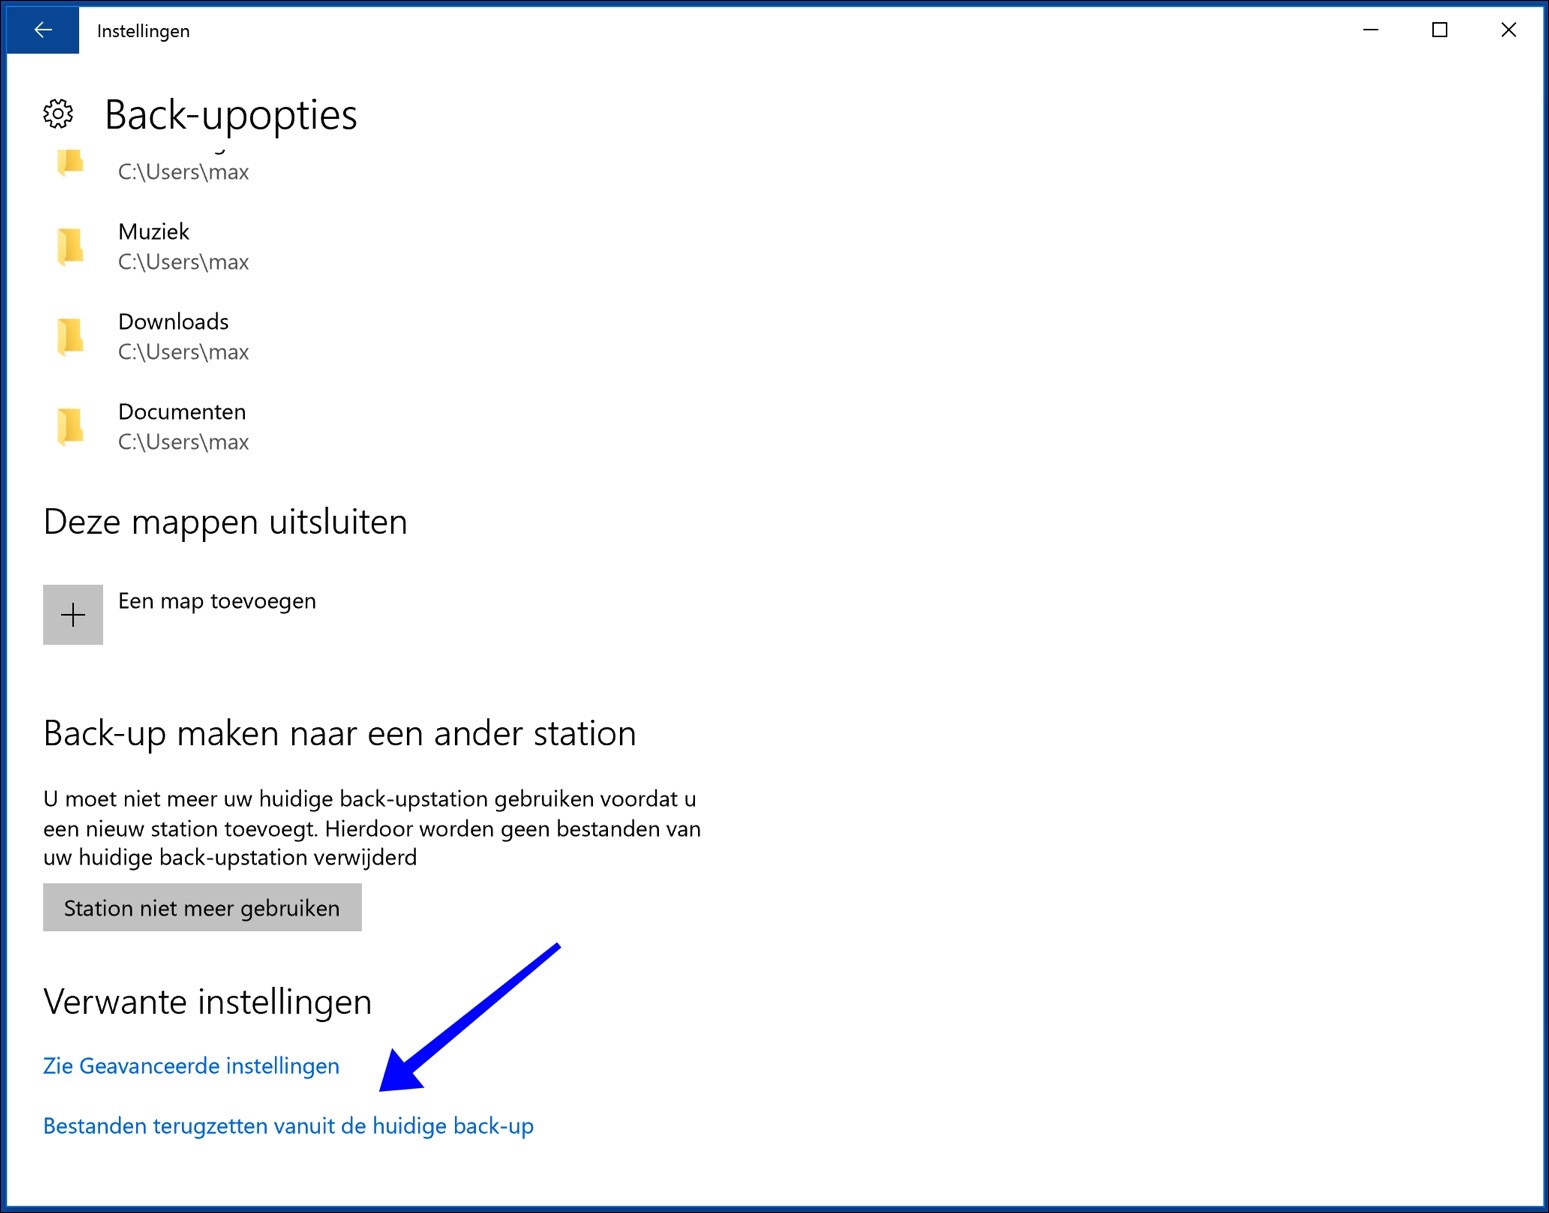
File history backup files restore – restore
It is essential that you not only make backups with File History, but that you are also able to restore these files if necessary. At the bottom of the File History options you will find a link to a feature for restoring files from backup called “Restore files from current backup”.
It is important to remember that the external storage media on which the File History backups are stored must be connected to your computer to access this restore feature. This allows you to easily select the desired files and restore them to your system.
After opening the restore function in File History, the backed up folders and files will be listed, sorted by date of backup on the external storage medium. You can navigate through this data by dragging or swiping, depending on your device, to view various backup data stored on the external media.
To view specific files, open a folder. To restore the entire contents of a folder from a specific date, select the entire folder. Then, to start the recovery process, click on the green button, usually at the bottom center of the screen. This will initiate the recovery of the selected files or folders from your external storage media to your computer.

You have now successfully been able to restore a file or folder using File History backups in Windows. I hope this article has provided you with useful insights and helped you become familiar with the features of File History in Windows. Thank you for reading!
Hello Stefan, the following I have bought a new HP laptop and had all files transferred from the old laptop. After two weeks my sound is off on the
The task bar shows a red cross on the speakers i-con. I also received a message that your file history needs to be re-entered. I have tried everything but it doesn't work.
Hello, can you please advise why you are unable to set up a file backup? Do you get an error message or something? In the article you will find steps to set this up.
If I read it this way, it seems that a backup of the old laptop has been transferred to the new one with old settings. These settings obviously do not work on a new laptop. So you need to reset file backup on the new HP Laptop.
The sound with an X through it is the same. Windows is probably using old drivers that will not work on the new HP laptop due to different hardware.
You can try the following. Start by creating a restore point: http://www.pc-tips.info/tips/windows-herstelpunt-maken-en-terugzetten-uitgebreide-instructie/ (to possibly reverse the adjustments). Right-click on the Windows start button. Choose Run from the menu. In the run window type: devmgmt.msc. Click on: audio input and output. Right-click on Speakers (High Definition Audio OR Realtek High Definition Audio) and choose Uninstall Device. Restart the computer and let the computer install the new driver. Check if it works now. Note: create a restore point, see above!
Greetings, Stefan
thank you
good morning, I have to go to a station to do history and then do a backup, but I don't know how that will work with switching on
I deleted too many folders in the backup program and now I can't add any more folders.
How can I fix this?
It is not entirely clear to me what exactly you mean. Sorry, please try to be a little more specific.
I connected an external drive via USB as a backup. The backup works. When I start the backup myself, the date and time of the last backup are stated. But when the backup runs for the specified period (e.g. 3 hours), I can view the backup in the history, but the date and time of the last backup are not updated on the home screen. What could be the problem please?
Oops, that's too complicated for me! I better not do what I don't understand.
I thought the following:
If, after making the first backup, I click on “Do not use the drive again” and the next time/month I register the drive again with “Add a drive” (that is again my drive E:), would that work?? ? That looks like a new backup action.
Thank you very much for your thoughts.
Yes, that works fine too, good luck!
Thanks for the clear explanation.
Question: For me the max. repeat frequency is too high. For example, I want to make a backup once a month and not leave the external drive permanently connected (ransomware).
How can that be achieved?
So I just want to connect the external drive at the desired time. If I do that now, after the first backup, nothing happens!!
Do you have a suggestion for this?
Hello, what you could try. Some technical knowledge required. Is to use WBADMIN.
Create a new text file on the Windows desktop. Open the text file with notepad. Place the following text in the text document.
wbadmin start backup -backuptarget:E: -include:C: -allcritical -quiet
Replace -backuptarget:E: with the drive letter of the external hard drive. Choose Save as in notepad, save the file as backup.cmd (or your own name if it ends in .cmd). Open command prompt as ADMINISTRATOR, in cmd go to the location of the .cmd file and run it by typing backup.cmd (or the name of the .cmd file) in command prompt. C will now be backed up with all critical folders in it. What you could do is create a windows task with task scheduler to run this .cmd file as administrator every month. You can also right-click on the file anytime you want to make a backup, choose run as administrator to make a backup. I hope it is somewhat clear. Good luck!
More information (English) about wbadmin: https://docs.microsoft.com/en-us/windows-server/administration/windows-commands/wbadmin-start-backup
Hallo,
I want to back up to an external hard drive.
Followed the above method:
Have you purchased a faster external hard drive, is the old one broken, or do you simply want to switch away from external media to backup your file history folders and files to?
You can easily change this drive by choosing “No longer use drive” in the file history backup options.
Then go back to “Add a drive” as described here and follow the procedure to mount external media to file history again. The file history backup files that are on the old external media are not lost. You can always retrieve this file history backup from the old external media.
Nothing is added to the external hard drive, what am I doing wrong or how should it be done?
Hello, are you getting specific error messages? I can't figure out why at the moment, but I would like some more information.
Hello, I have the same thing: I ran a backup and I don't see the data appearing on my external hard drive (in explorer). But a test with restoring files with restoring 2 files from file history does work. So that backup has indeed been made. I only expected that you would also see the backup data on the external hard drive.
Hello, that's strange. Try showing hidden files via Windows Explorer.
https://support.microsoft.com/nl-nl/help/4028316/windows-view-hidden-files-and-folders-in-windows-10
thanks for the tip. I had already tried that, but it didn't help. I still see a daily backup in the backup history.
Read today and applied immediately. Works so great! Thank you!
Yes indeed, this creates the desired clarity. Thank you!
You're welcome 🙂 I learned something myself!
I have file history enabled, but I still get the option of backup (win7). Is that duplicated and therefore useless or does it make sense to implement it?
BVD,
You can run the backup 🙂
Yes, I know I can do that, but the question is whether that makes sense if I already have file history (Win10) turned on. What is the added value of the backup (Win7)?
You may find what you are looking for here, in English: https://superuser.com/questions/998785/windows-10-difference-between-file-history-and-backup-and-restore