

Memory integrity is a security feature in Windows 11 or 10 that helps protect the system from threats. It prevents malicious code from accessing data in memory, keeping the data safe.
The memory integrity feature works by isolating the system's core memory from user memory. This isolates the kernel from any malicious changes that could be made by unauthorized software, such as drivers.
The feature also helps protect the system from malicious code injected into the kernel. In other words, memory integrity is an important security feature and part of “core isolation” that Windows 11 or 10 helps protect against malicious code and attacks. It ensures that the kernel remains secure and that the data in memory is safe from malicious code.
It happens that certain drivers are not suitable for memory integrity. An issue then arises where memory integrity cannot be enabled in the core isolation settings on your computer. To solve this problem you must use the inappropriate one uninstall or update driver to a new version. The problem often arises from old hardware connected to the computer. This old hardware installs an outdated driver and this driver prevents Memory Integrity from being enabled.
Memory integrity is disabled in Windows 10 or 11
To enable memory integrity, the outdated driver must first be identified. You then have two options. You can uninstall the outdated driver (recommended) or update it with a new version. The update must be supported by the hardware, and this is often not the case.
Removing the outdated driver is then the best option. The disadvantage is that outdated hardware may no longer work on your computer. Please take this into account when applying the information below.
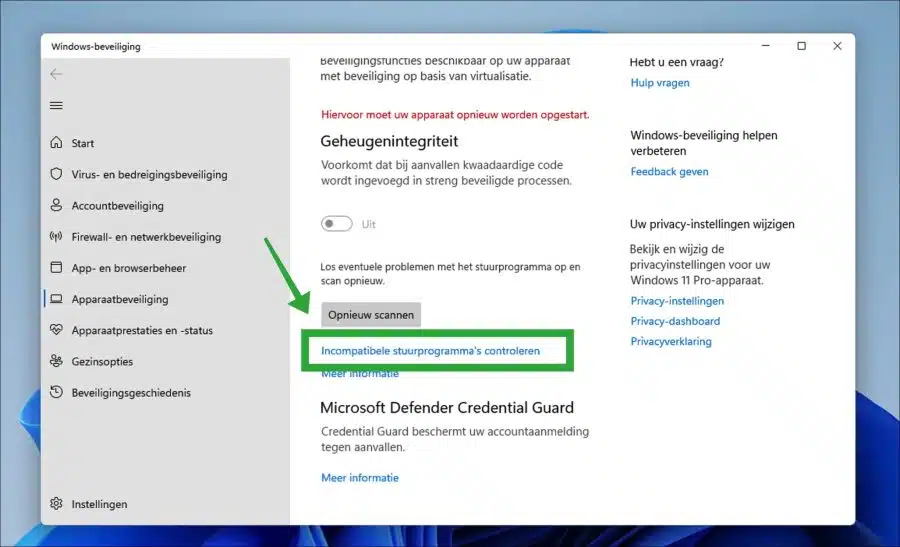
To start, open the core isolation settings. In the “Memory Integrity” settings, click the “Check incompatible drivers” link.
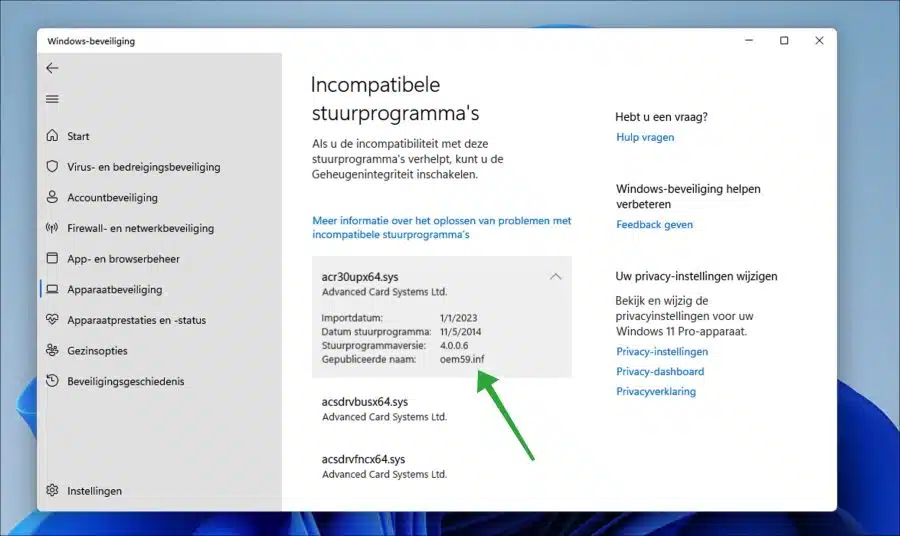
Click on an incompatible driver. In the “published name” you will see an oem .inf file. You need this file name. In the image below you can see “oem59.inf”. This is an example.
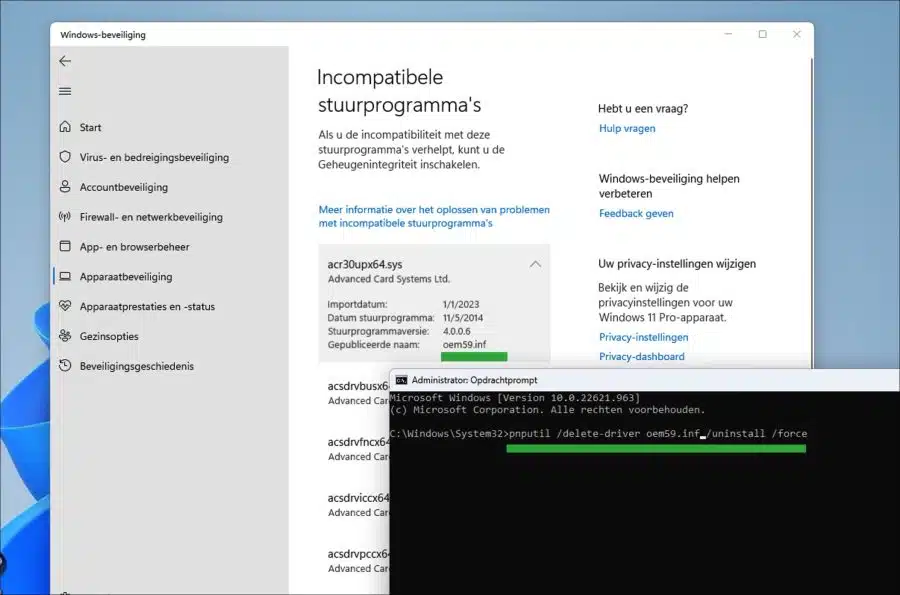
Now open a Command Prompt as administrator. In the Command Prompt, type the following command to remove the faulty driver:
pnputil /delete-driver oem59.inf /uninstall /force
replace oem59.info with the incorrect oem file on your computer.
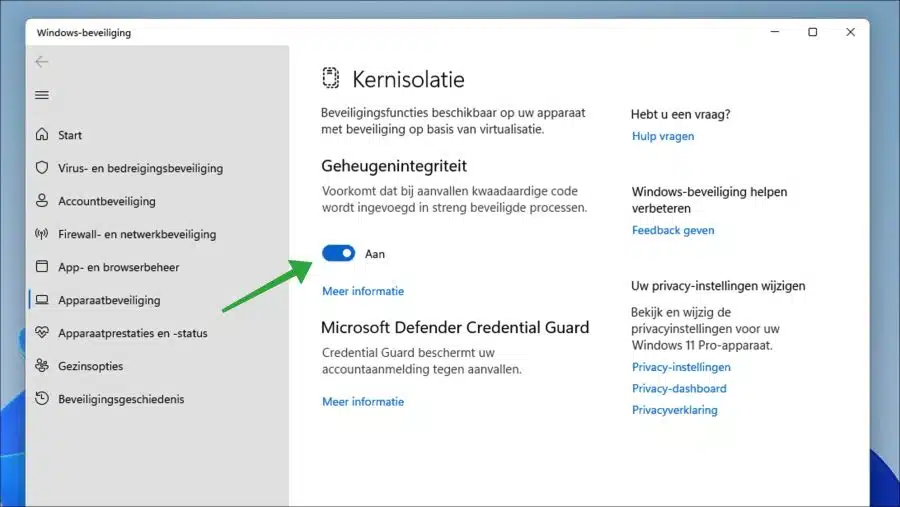
Click the “Rescan” button again. Notice that you can now enable “memory integrity” in the core isolation settings.

Then restart your computer. You will now see that memory integrity has been successfully enabled.
I hope this helped you. Thank you for reading!
When I enter that code in the command prompt and then click enter, it says "failed to delete driver package: access denied", does anyone know how to solve this?
Hello, have you run Command Prompt as administrator?
Read how: https://www.pc-tips.info/tips/windows-tips/opdrachtprompt-openen-in-windows-11/
Success!
I'm trying to enable memory integrity. Click on 'on', I get the command to 'reboot', but then the memory integrity is turned off again as it was.
W11 desktop
Hello, make sure TPM, secure boot and virtualization are enabled in the UEFI. If you installed Windows 11 in an unofficial way, this is probably not possible. Another reason is that certain drivers prevent memory integrity from being enabled. Also make sure that Windows 11 is fully updated with the latest updates.
Success!