

If you want to record your own voice or record spatial audio, you can do so in Windows 11 via the voice recorder app.
The voice recorder app is an app with basic functionality. There are hardly any functions available to edit the audio, all you can do is record audio, such as audio from the room you are in or your own voice. To record this audio you will need one microphone needed, connected to your Windows 11 computer.
In addition to your microphone being connected, microphone access must also be enabled to record your voice via the voice recorder app. This is how the voice recorder app works in Windows 11.
Record Sound or Voice in Windows 11
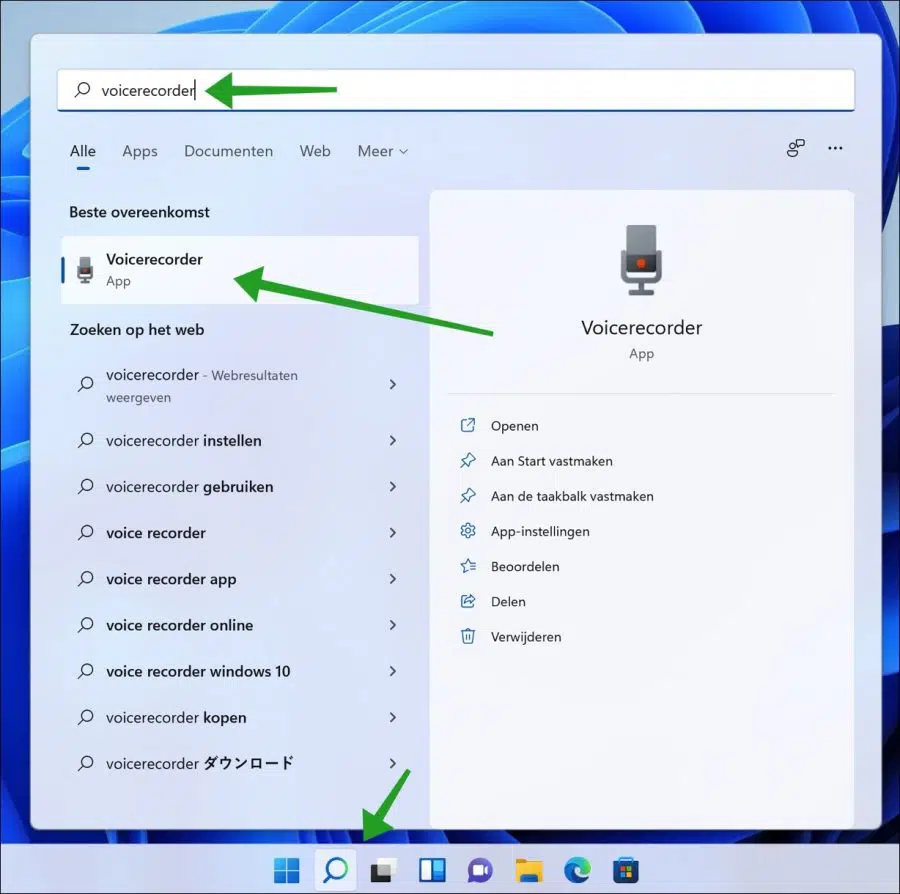
Click on the magnifying glass in the taskbar. In the search window, search for “voice recorder”. Click on the voice recorder result to open the app.
You will now need to connect your microphone to your Windows 11 computer if you have not already done so. After connecting, check whether microphone access is enabled. You can do this as follows via the voice recorder app.
Click on the three horizontal dots at the bottom right of the voice recorder app and click on Microphone settings.
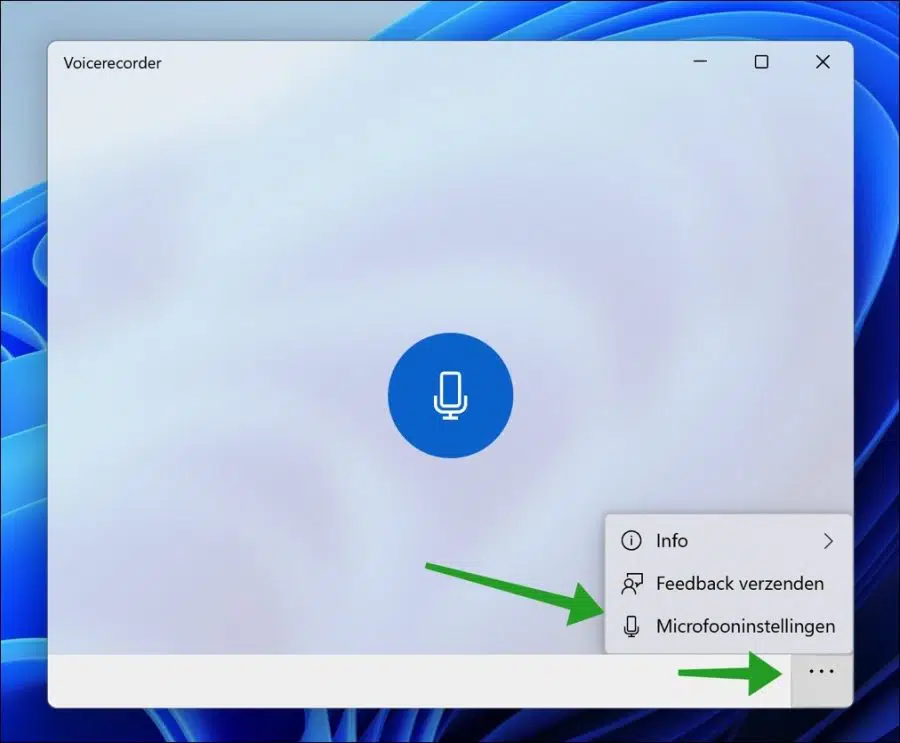
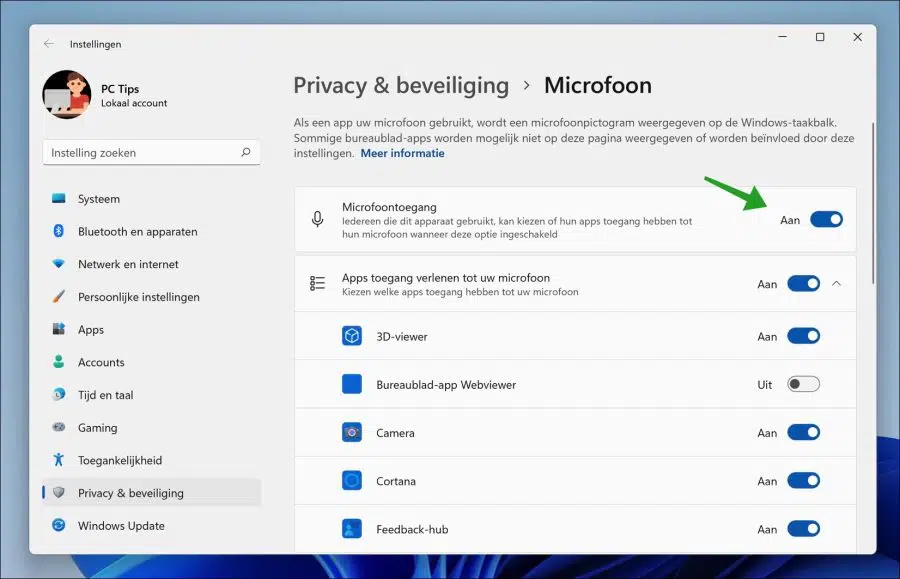
Check whether the “Microphone access” option is enabled.
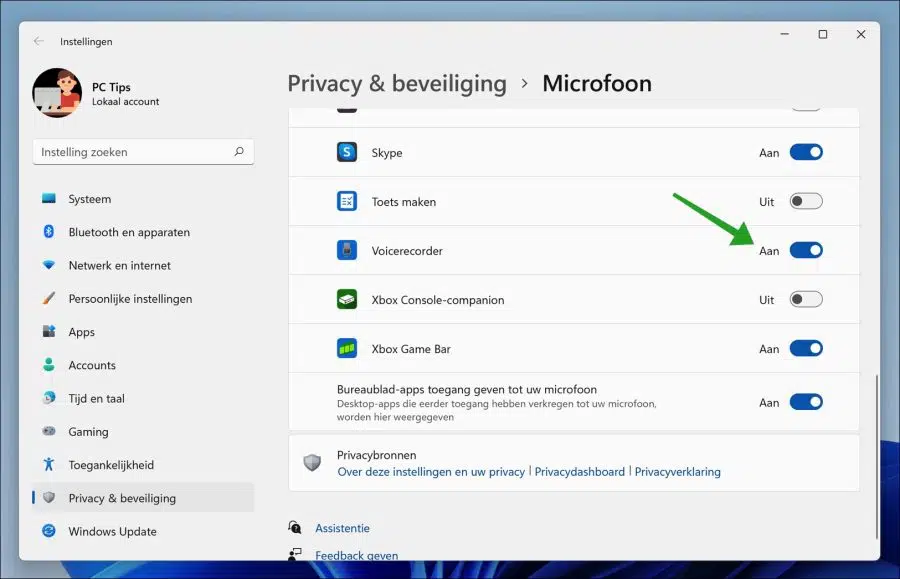
Navigate a bit down until you reach “voice recorder” in the “Allow apps to access your microphone” settings.
Check whether microphone access is enabled for the voice recorder app.
Once you have checked all this, you can record audio via the voice recorder app.
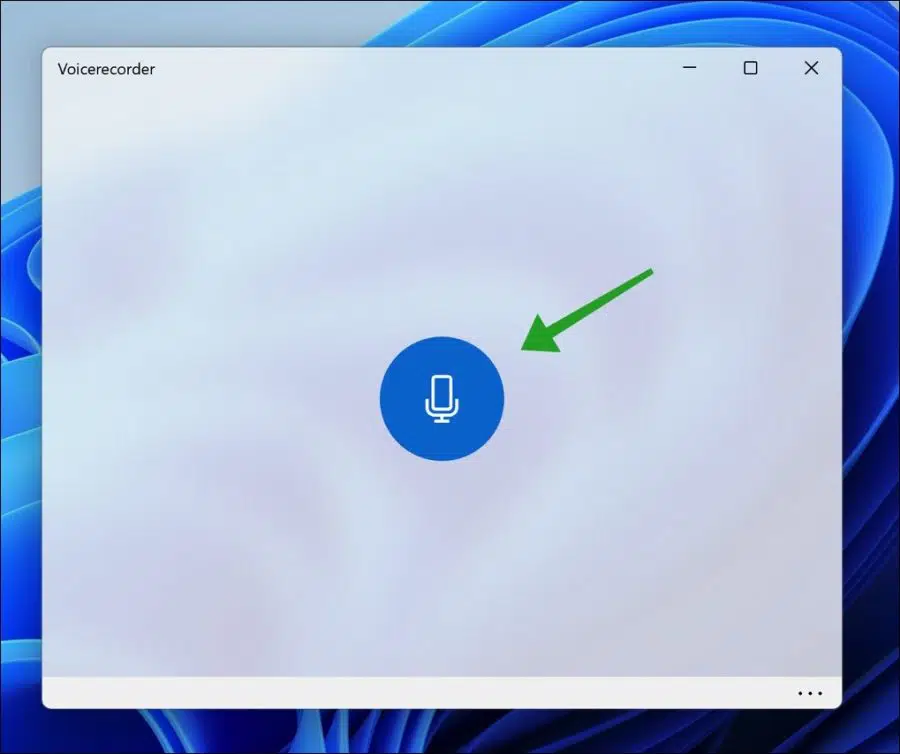
You can use the voice recorder app to make various recordings, sound, lectures, interviews, etc. All you have to do is click on the blue button to start recording.
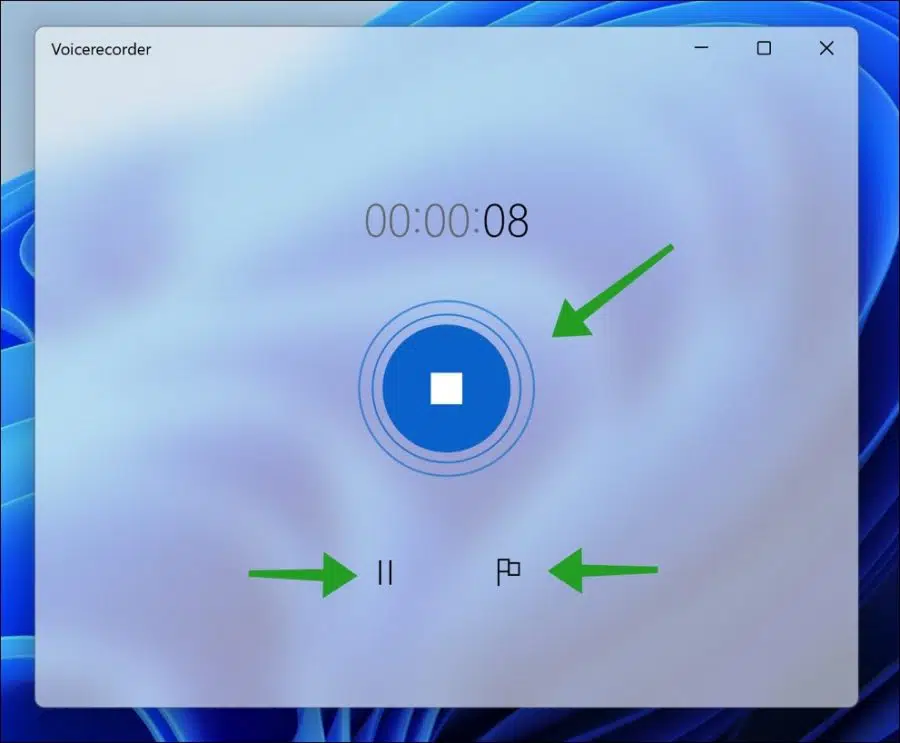
If you are recording audio you can stop the recording, pause it or add a mark.
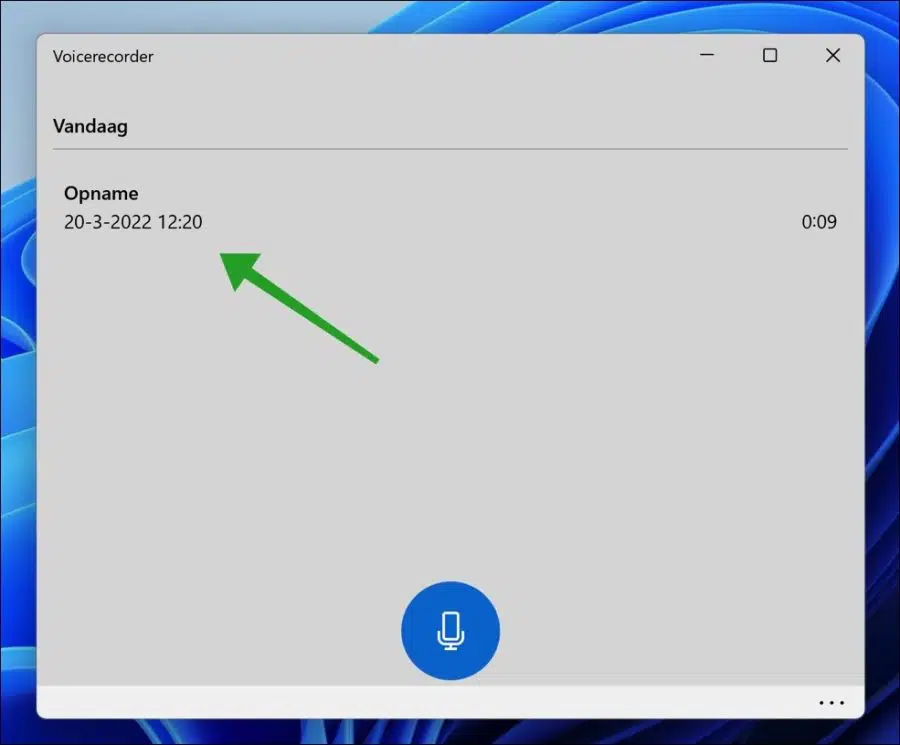
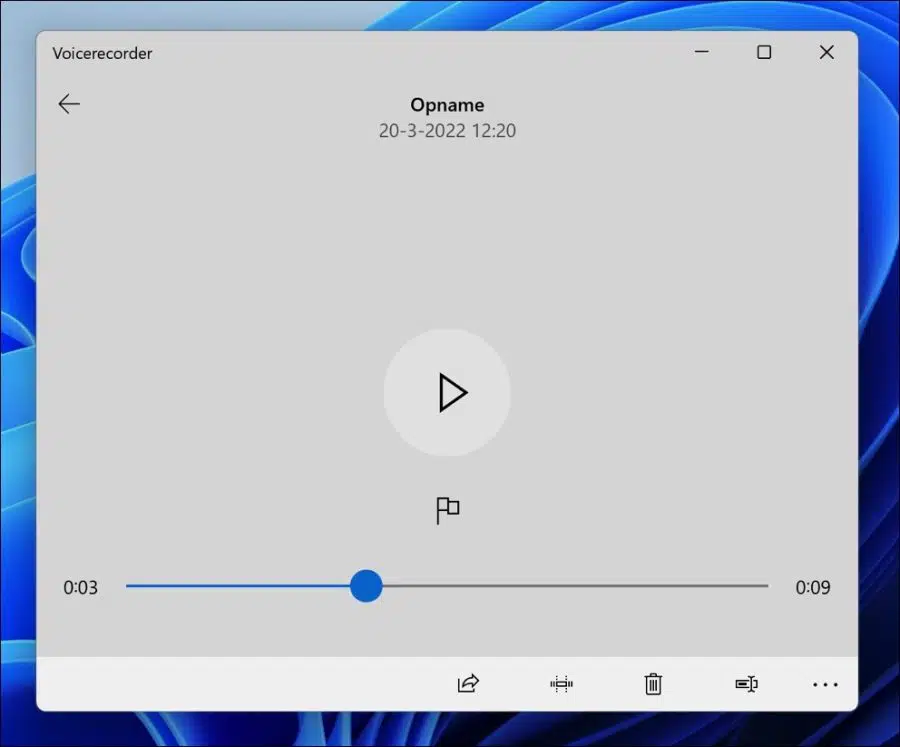
After stopping, you will see all recordings in a list. You will see the name, date, time and length of the sound recording(s).
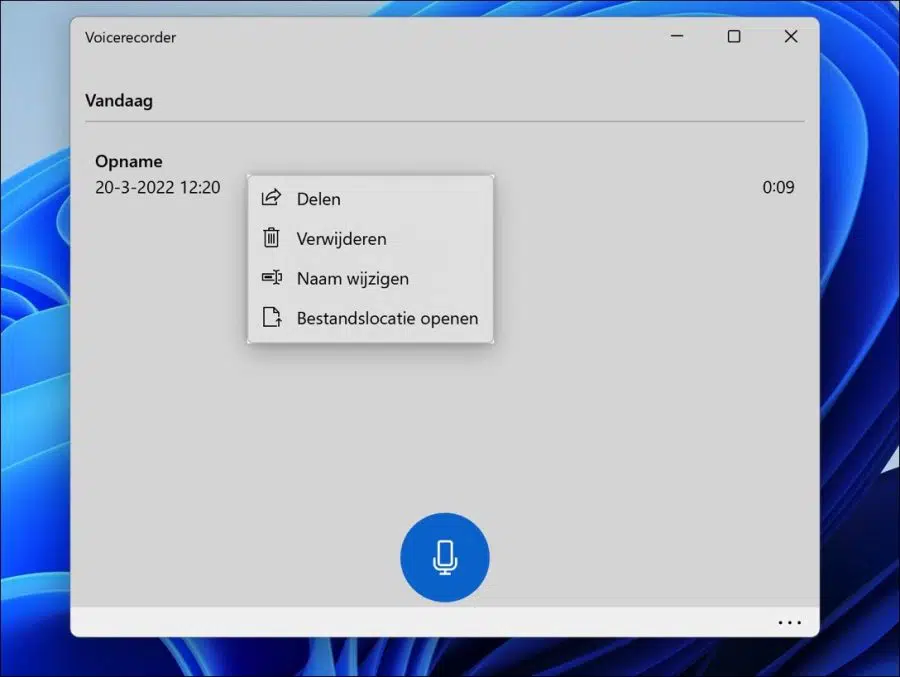
By right-clicking on the recording you can change the name, share the recording, delete the recording or open the file location.
Clicking on the recording will play the recording again. Here you will again see the various options at the bottom to share the recording, edit it or view the file location.
The Default file location for all audio recordings via the voice recorder app is C:\Users\USERNAME\Documents\Audio Recordings\. The sound recording via the voice recorder app is saved in (“m4a”) audio format on your computer by default.
I hope this helped you. Thank you for reading!
Also read:
Thank you!! This helped me