
In Windows 11 kunt u een printer delen voor andere computers of apparaten in hetzelfde computer netwerk.
Het delen van een printer via een Windows 11 computer in een netwerk maakt het mogelijk om andere computers te laten printen via de gedeelde printer.
Het delen van de printer is handig als de printer die u wilt toevoegen niet over een netwerk- of draadloos netwerkfunctie beschikt. Mocht de printer dus alleen over een USB of DB-25 kabel beschikken dan kunt u de printer alsnog delen over het lokaal netwerk.
Meld u dan aan voor onze nieuwsbrief.
In dit artikel leest u hoe u een printer kunt delen via Windows 11 in een netwerk. Ook leest u hoe u een gedeelde printer kunt toevoegen in Windows 11.
Hoe kan ik een printer delen in Windows 11?
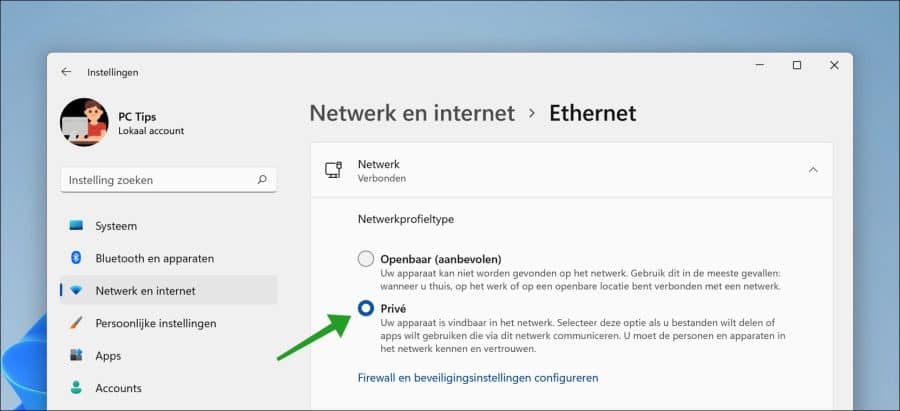
Om te beginnen dient u in Windows 11 de netwerkinstellingen aan te passen naar het “Prive” netwerk.
Klik met de rechtermuisknop op de Startknop. Klik vervolgens op Instellingen in het menu. In de Instellingen klik op Netwerk en internet en daarna op de actieve verbinding “Ethernet” of Wi-Fi”.
Wijzig het “Netwerkprofieltype” naar “Privé”.
Uw apparaat is vindbaar in het netwerk. Selecteer deze optie als u bestanden wilt delen of apps wilt gebruiken die via dit netwerk communiceren. U moet de personen en apparaten in het netwerk kennen en vertrouwen.
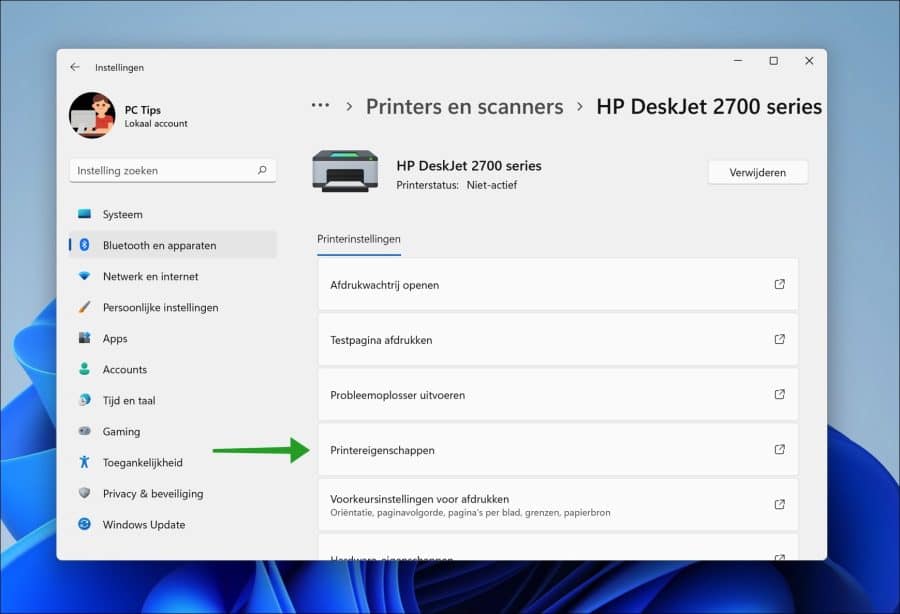
Klik vervolgens in het linker menu op “Bluetooth en apparaten” en daarna op “Printers en scanners”.
Klik op de printer die u wilt delen. In de printerinstellingen klik vervolgens op “Printereigenschappen”.
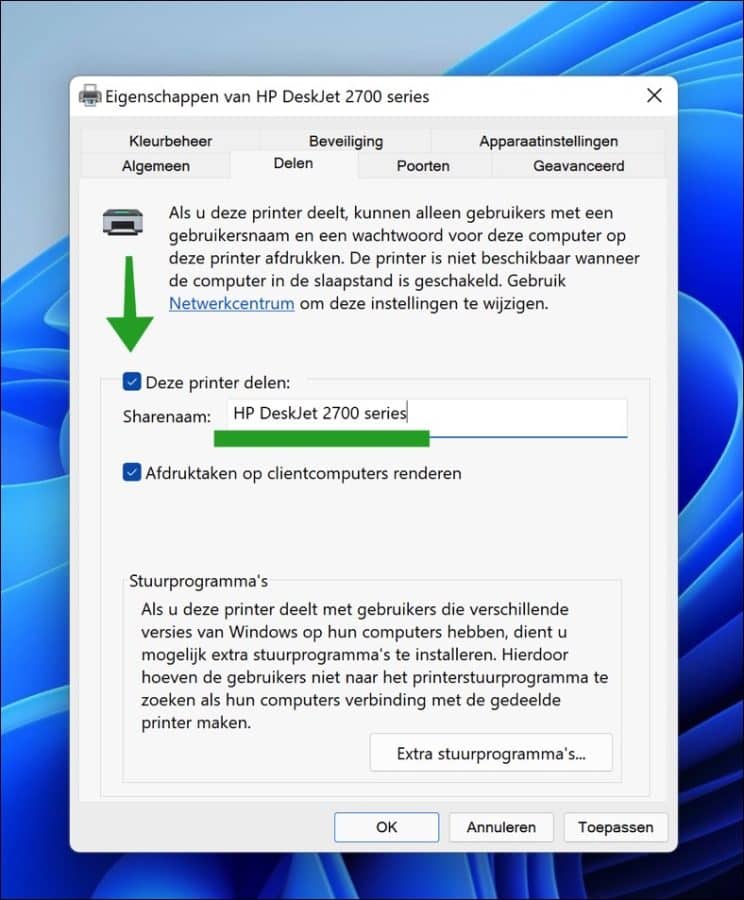
In de eigenschappen voor de printer, klik op het tabblad “Delen”. Klik vervolgens op de “Opties voor delen wijzigen” knop.

Om de printer over het netwerk te delen schakelt u de optie “Deze printer delen” in. Eventueel kunt u de “Sharenaam” wijzigen naar een duidelijk herkenbare naam op het netwerk voor de printer.
Als u deze printer deelt, kunnen alleen gebruikers met een gebruikersnaam en een wachtwoord voor deze computer op deze printer afdrukken. De printer is niet beschikbaar wanneer de computer in de slaapstand is ingeschakeld.
Klik op toepassen en daarna op OK. U heeft nu de printer met succes gedeelt over het netwerk via een Windows 11 PC.
Hoe kan ik een gedeelte printer toevoegen in Windows 11?
Om een gedeelde printer (“netwerkprinter”) toe te voegen in Windows 11 volgt u onderstaande stappen.
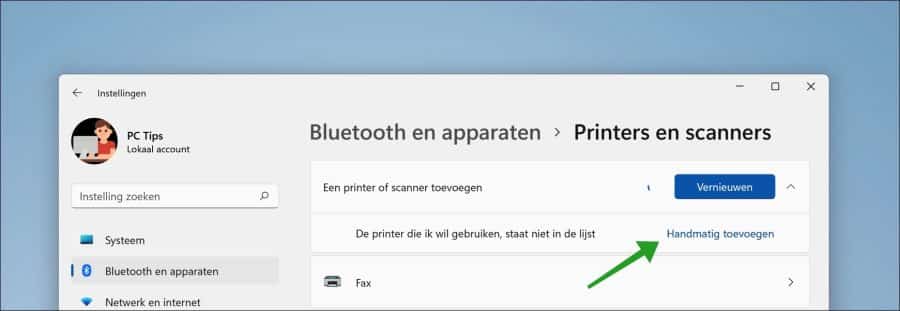
Klik met de rechtermuisknop op de Startknop. Klik op Instellingen in het menu. In het linkermenu klik op “Bluetooth en apparaten” en daarna op “Printers en scanners”.
In de printers en scanners instellingen klik op de blauwe “Apparaat toevoegen” knop om een netwerkprinter toe te voegen. Wacht even tot er staat “Handmatig toevoegen” en klik erop.
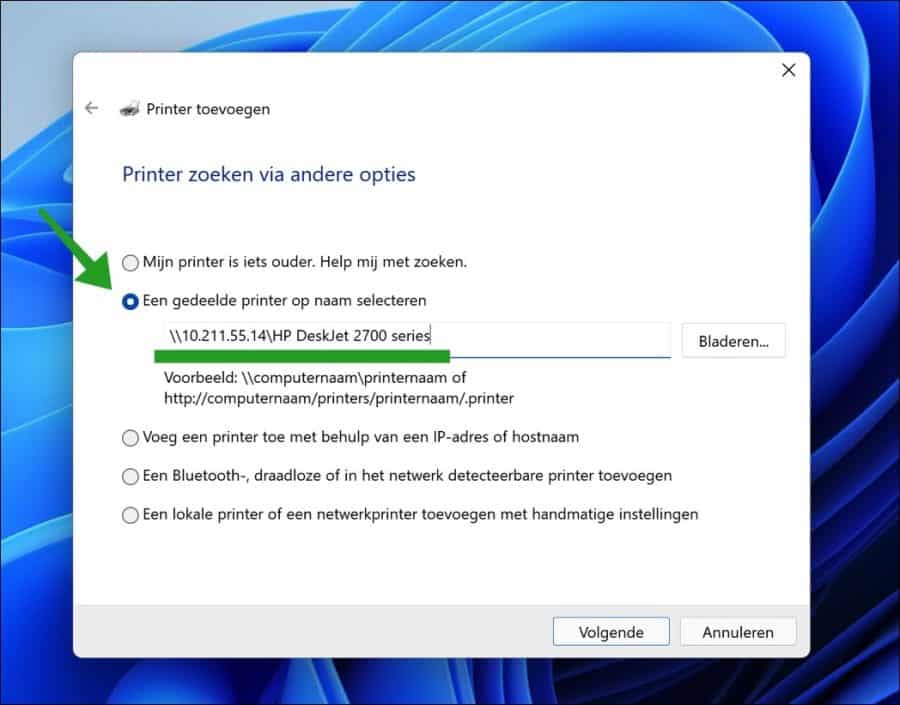
Selecteer de optie “Een gedeelde printer op naam selecteren”. Klik op Bladeren om de printer te zoeken of geef het IP-adres en de gedeelde printernaam in.
Klik op volgende.
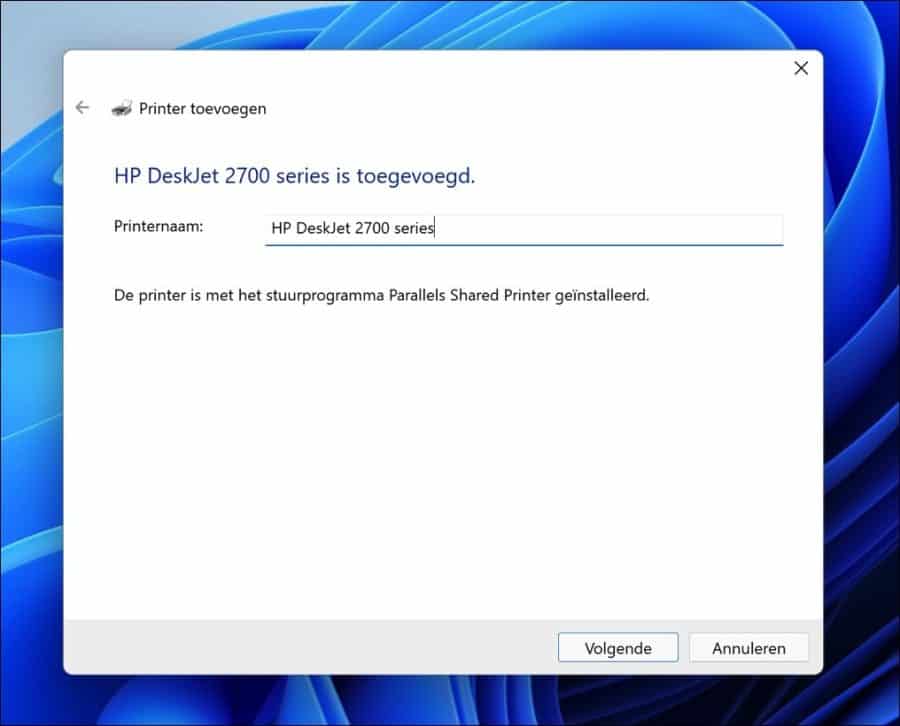
Geef de toegevoegde netwerkprinter een duidelijke naam en klik op “volgende” om af te ronden.
Ik hoop dat het deze informatie is gelukt om een printer te delen over het netwerk via een Windows 11 computer. Bedankt voor het lezen!
Lees ook:
Help mee
Mijn computertips zijn gratis en bedoeld om andere mensen te helpen. Door deze pc-tip te delen op een website of social media, helpt u mij meer mensen te bereiken.Overzicht met computertips
Bekijk ook mijn uitgebreide overzicht met praktische computertips, overzichtelijk gesorteerd per categorie.Computerhulp nodig?
Loopt u vast met uw pc, laptop of software? Stel uw vraag op ons computerforum en krijg gratis computerhulp van ervaren leden en experts.