

If you want to encrypt data on an external hard drive, there are a number of options. You can choose to encrypt the data via BitLocker or via a third-party app.
If you want to use BitLocker, you don't need a third-party tool. You just have one professional or higher version of Windows required. By default, Windows home edition does not support BitLocker encryption.
If you have Windows 10 or Windows 11 home edition, you can use a third-party tool to data on an external hard drive encrypt disk. There are several tools available, but in this article I'll focus on free software.
How do I encrypt data on an external hard drive?
To start, download VeraCrypt to your computer. VeraCrypt is based on TrueCrypt 7.1a, only improved and available for multiple operating systems.
The reason I recommend VeraCrypt is because it is free, supports many different encryption techniques, is open-source and continues to be supported to this day.
Please note that if you use VeraCrypt to encrypt data on the external hard drive or USB, you must always use VeraCrypt from now on to decrypt the data.
So you use VeraCrypt to decrypt the data before you can access and edit the data on the volume. Some technical knowledge is a plus, but I try to explain it as clearly as possible so that everyone can implement it.
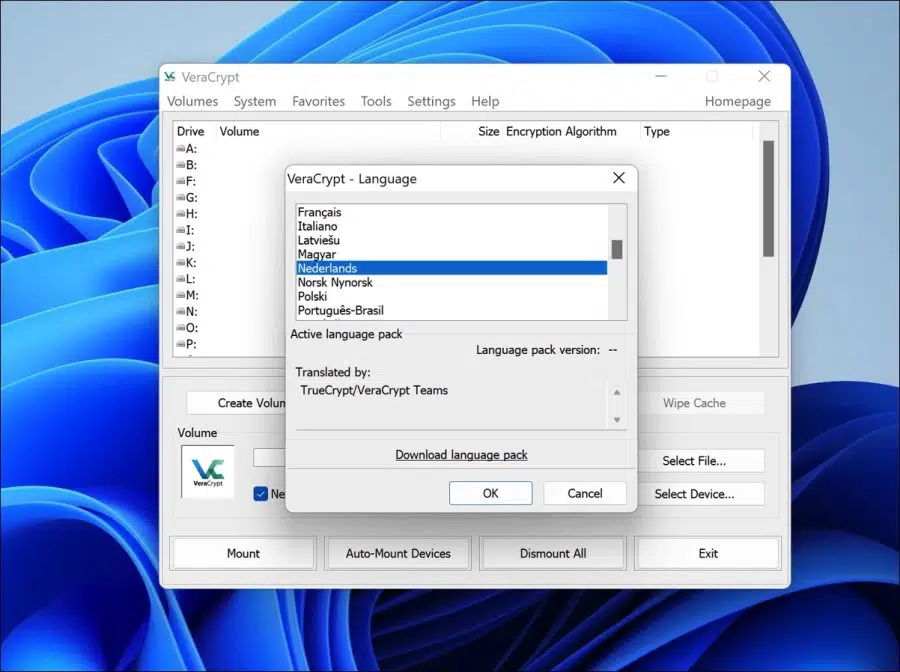
To start, open VeraCrypt. In the menu, first click on Settings and then on Languages. Select the Dutch language and click OK.
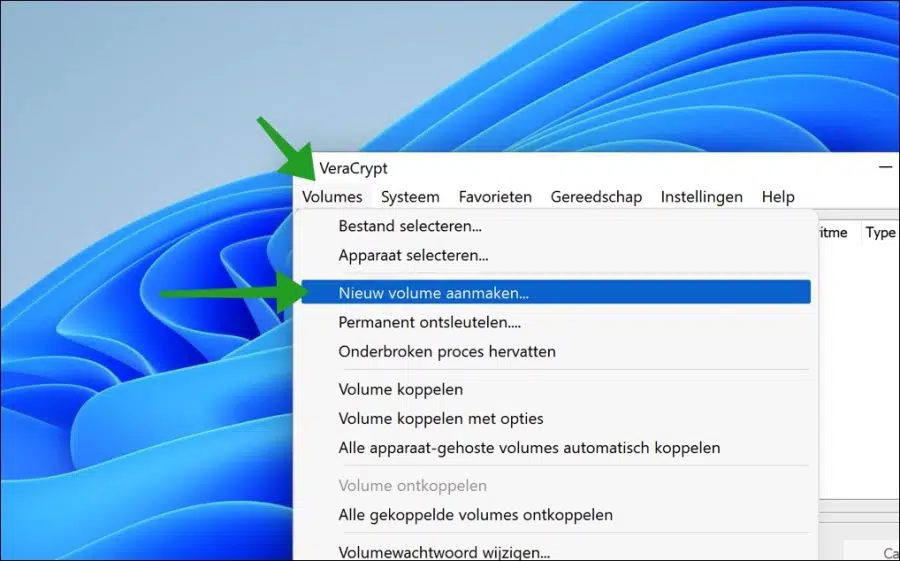
In the menu, click on Volumes and then on Create new volume.
In this case we are going to encrypt data on an external hard drive or USB stick. Therefore, choose the option “Encrypt a non-system partition/drive” and click next.

User account control now asks for permission. Give this permission, without it it won't work.
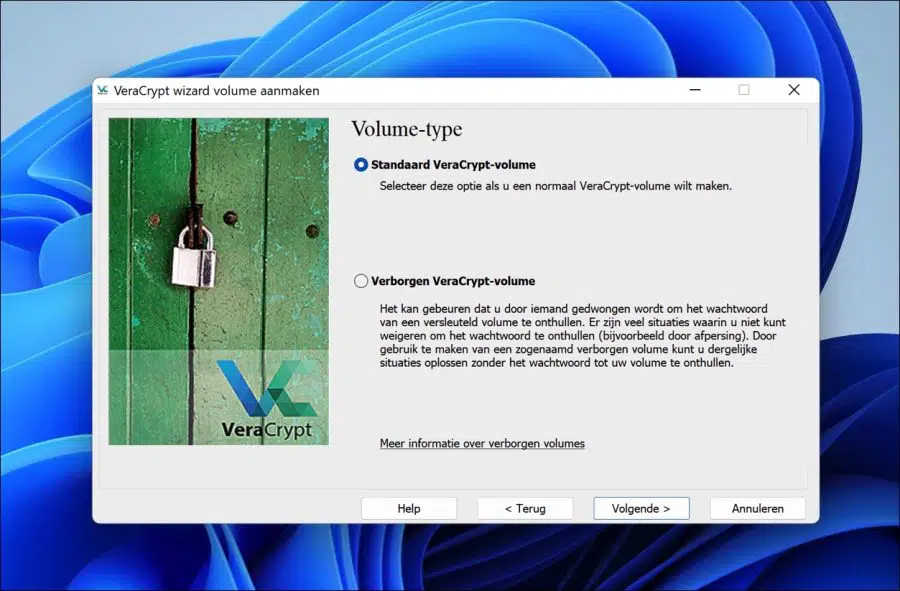
You can choose from two types of volume type. The first is a standard encrypted volume and the second is a hidden encrypted volume. A hidden volume has the advantage that it is hidden, which means that the volume is not visible by default in Windows.
In this case we go for a standard encrypted volume. We only want to encrypt the data and not hide it. If you choose a hidden encrypted volume, the next steps in the article will differ.
Click next.
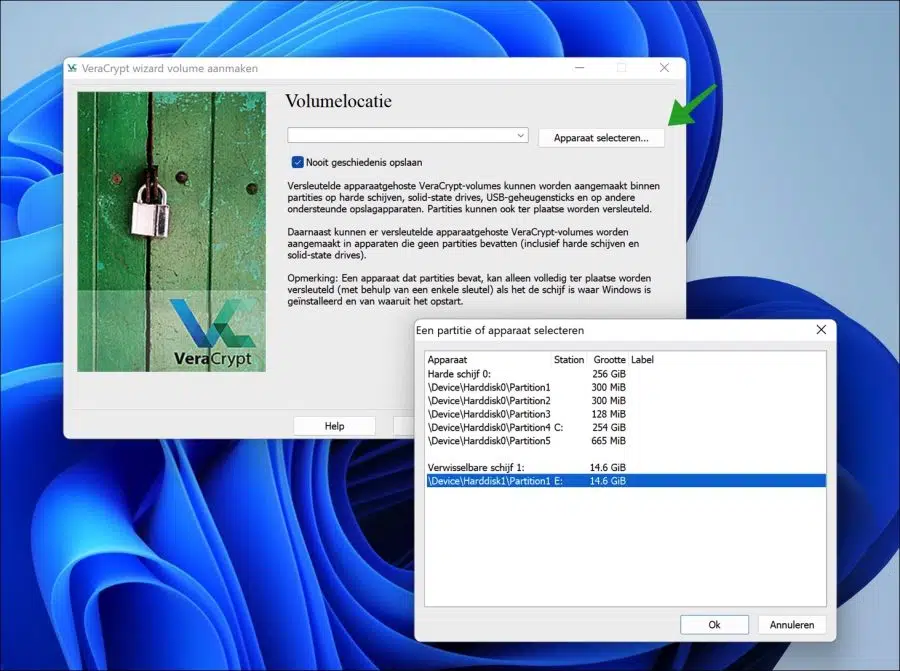
You can now select the device you want to encrypt. This can be an external hard drive, a flash drive (USB stick) or other attached drives such as an HDD or an SSD. Click Select Device.
Then select the device, recognizable by, for example, “removable disk 1”. Make sure you select the right device! Click OK and then click Next.
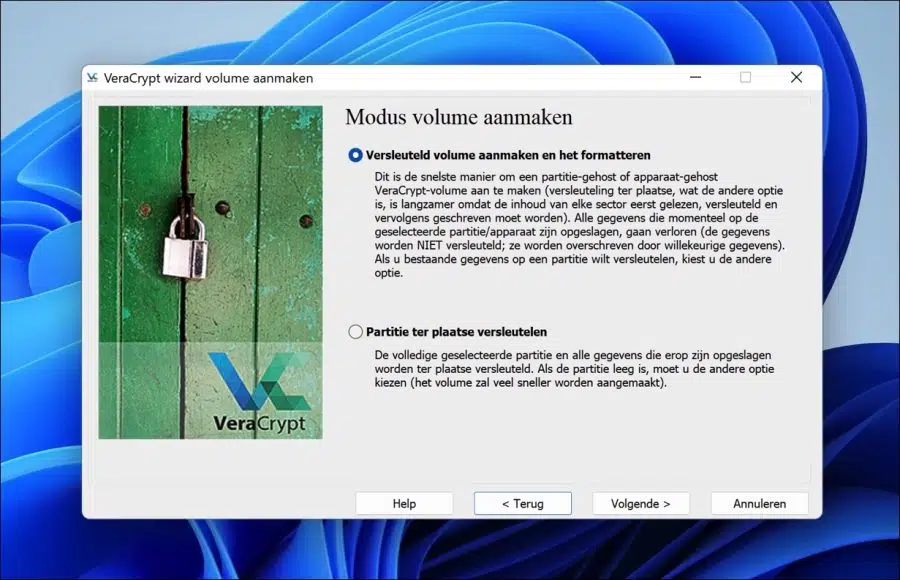
You can now create a new encrypted volume and format it by choosing the first option. If you want to encrypt the existing data on the external hard drive or USB directly, choose “Encrypt partition on site”. This only works if the external hard drive or USB is already formatted as the NTFS file system.
Please note: If you want to save the data on the external hard drive or USB, first secure this data by copying the data and removing it from the external hard drive or USB! If you do not secure the current data, everything on the external hard drive or USB will be lost.
In this article, we are going to “Create encrypted volume and format it”. Click next.
You can select and test the encryption algorithm here. I would leave “AES” as default and continue by clicking next. If you know what you are doing, you may make a different choice.

You previously selected a device to encrypt. Verify that the total size of the volume you selected matches what VeraCrypt detected.
Click next if it is correct.

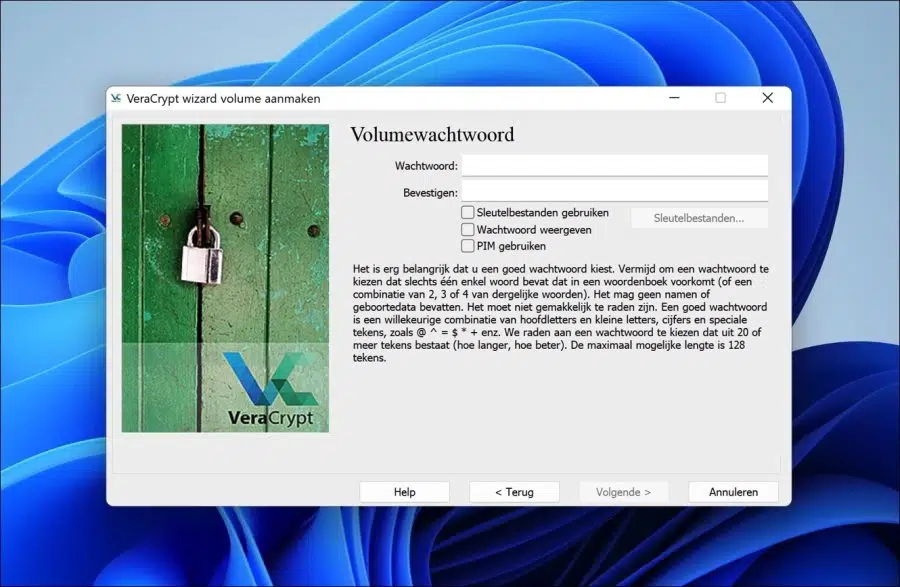
You now need to enter a password for encryption. You must remember or write down this password. You need this password to regain access to the encrypted volume containing your data (the encrypted external hard drive or USB).
Use a password of at least 20 characters and follow the advice in the accompanying text in the window. To a To generate a password, read this article.
Click next when a password has been created. Save this password somewhere, preferably a password manager. Without this password you will no longer be able to access the encrypted volume.
Do you plan to store files larger than 4GB on the encrypted volume? Make your choice and click next.
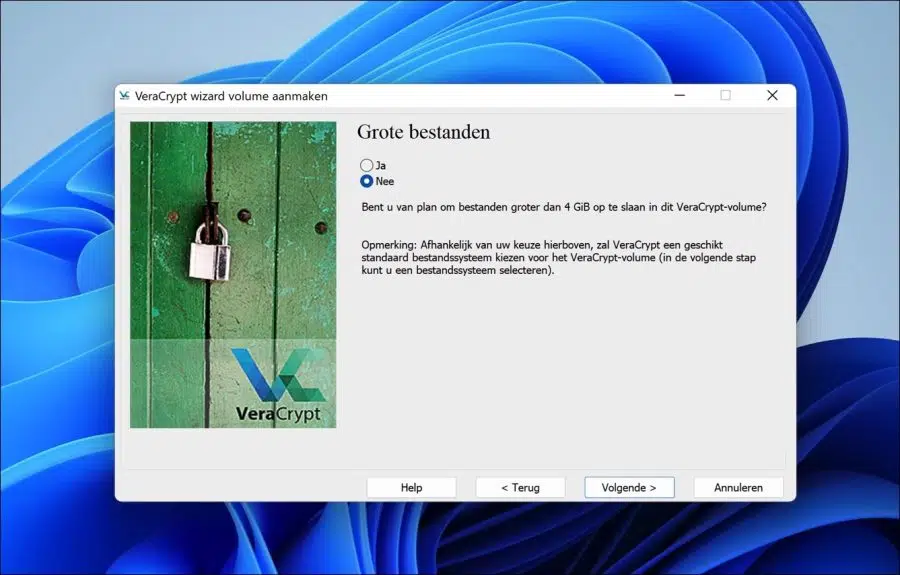
Based on the selection or you large files want to save or not, VeraCrypt has selected a file system. You will see this under “File system” in options. You can still change this if you want.
You will format the external hard drive or USB in this file system. So check it first.
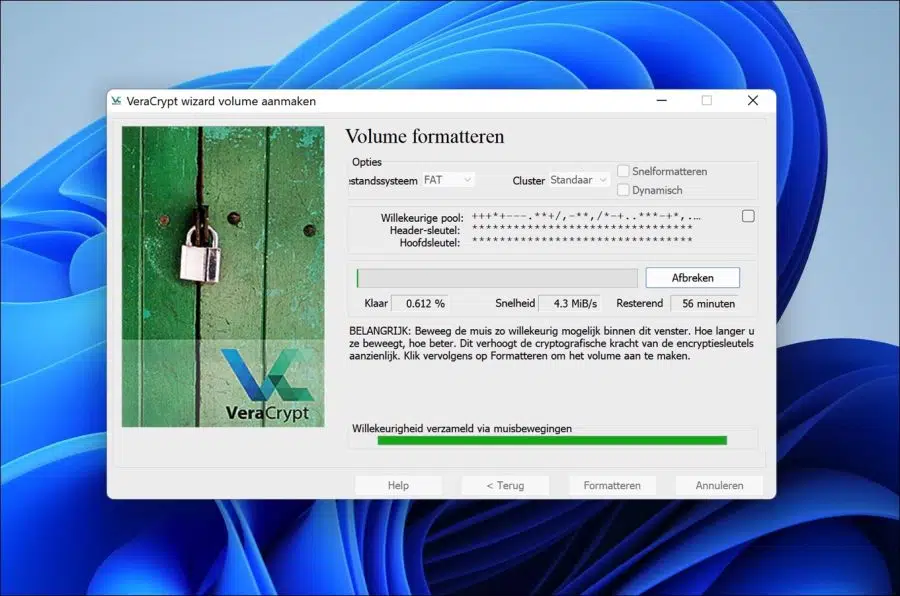
To then make the encryption keys as strong as possible, move your mouse randomly in the window. These random movements encrypt the data. Make sure the bar at the bottom is green and then click format.
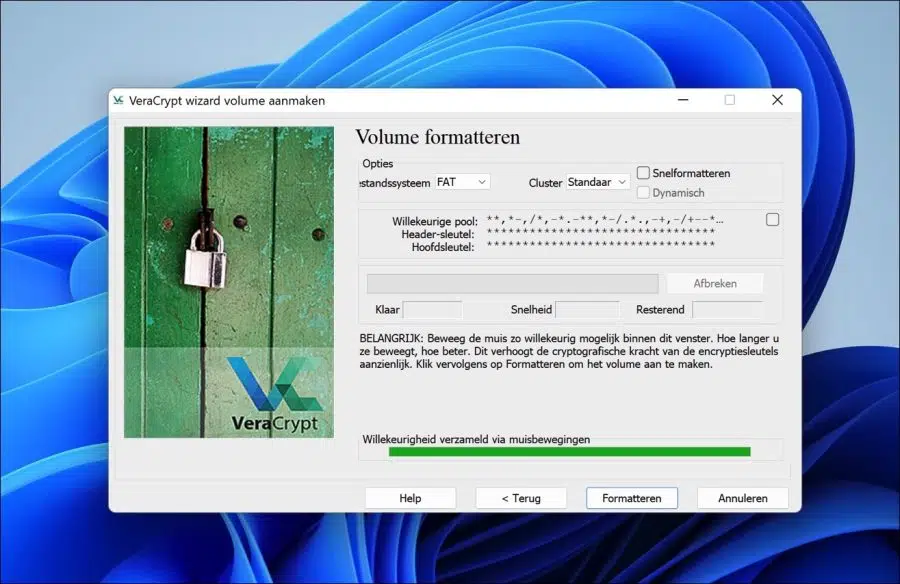
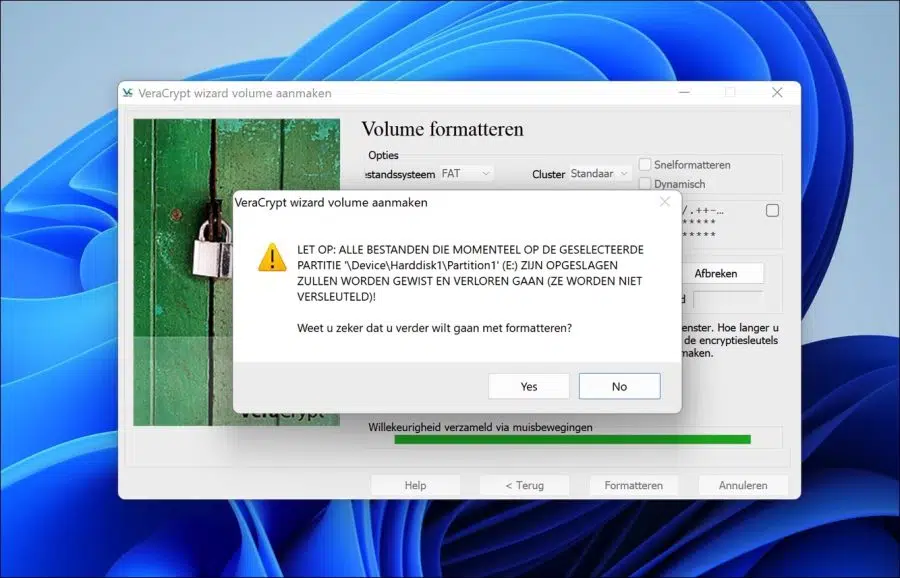
All data on the selected volume will be lost if you format and encrypt it. If there is any data on the external hard drive or USB that you need, secure it by copying this data to a safe location on your PC.
Click Yes if you are sure you want to continue.
The volume is formatted and encrypted. This may take a while, usually an hour or more. The remaining time is shown under “Remaining” and depends on the size of the total volume.
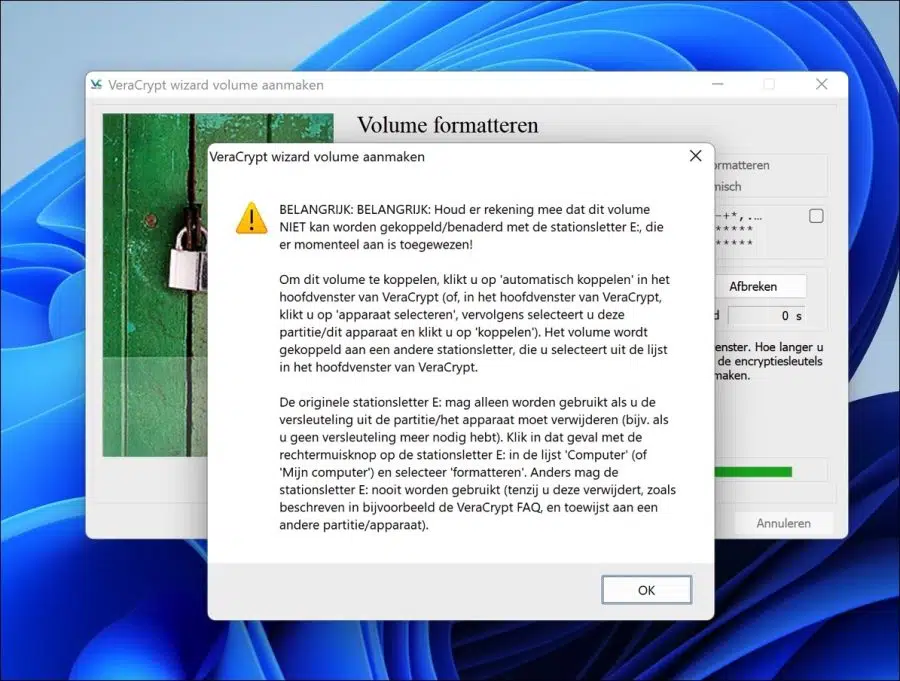
After the encryption is complete, you will see the following message. Read this message carefully.
Please note that this volume CANNOT be mounted/accessed using the drive letter currently assigned to it!
To mount this volume, click 'auto-mount' in the main VeraCrypt window (or, in the main VeraCrypt window, click 'select device', then select this partition/device and click 'mount' The volume will be mounted to another drive letter that you select from the list in the main VeraCrypt window.
The original drive letter should only be used if you need to remove encryption from the partition/device. For example, if you no longer need encryption. In this case, right-click on the drive letter in the 'This PC' list and select format. Otherwise, this drive letter should never be used.
I will come back to this later in this article. Click OK.
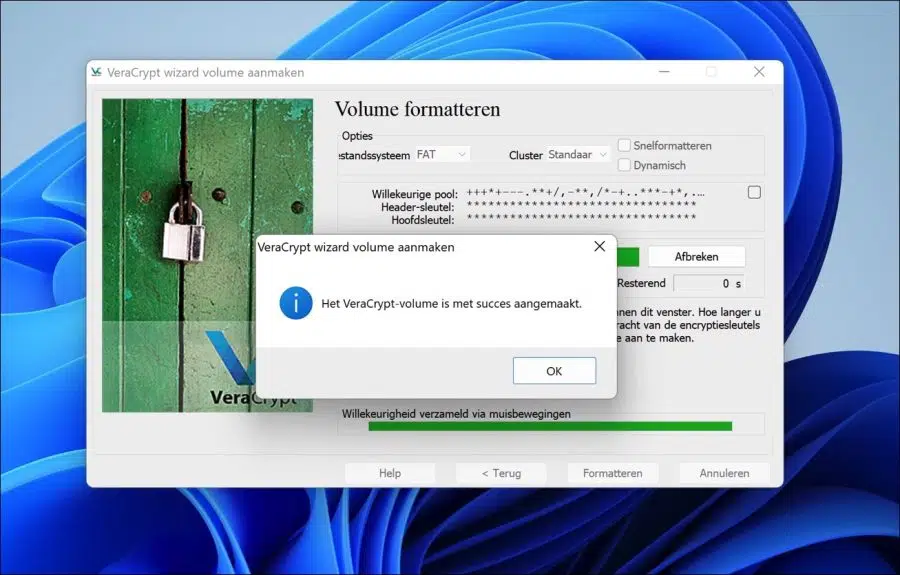
The VeraCrypt volume has been successfully created.
VeraCrypt closes after clicking the Close button. To consult the encrypted volume, you must always first open VeraCrypt after connecting the external hard drive or USB device. So make sure the encrypted volume is mounted to the PC before opening VeraCrypt.
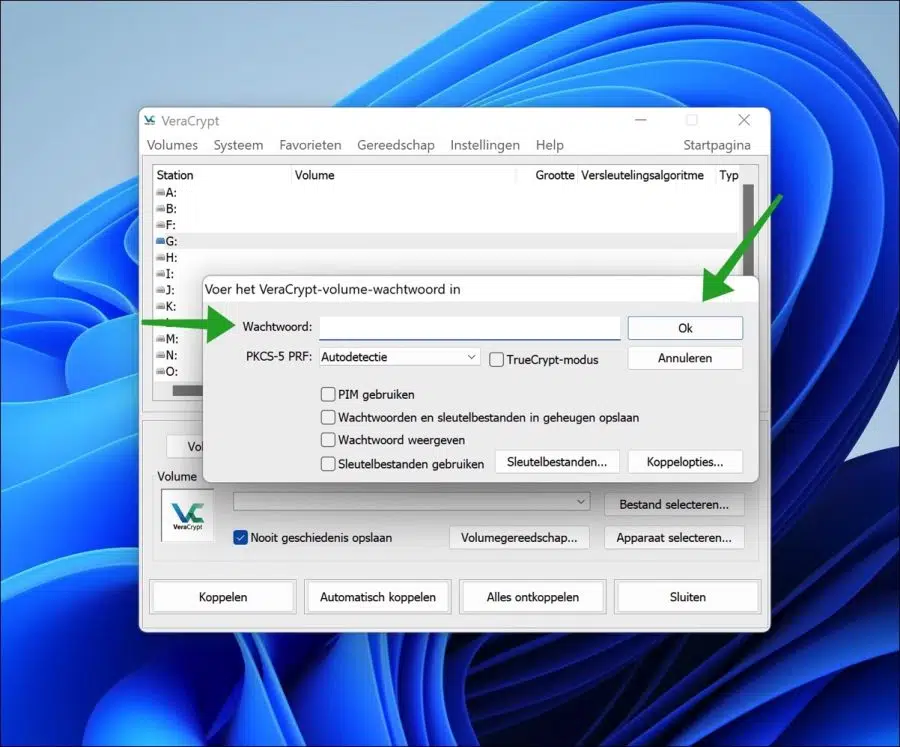
If VeraCrypt is open and you want to access the encrypted drive, first select a drive from the list. Use a drive letter that you are sure is not already in use. Then click on the Auto-link button.

Then enter the password for the encrypted external hard drive or USB and click OK.
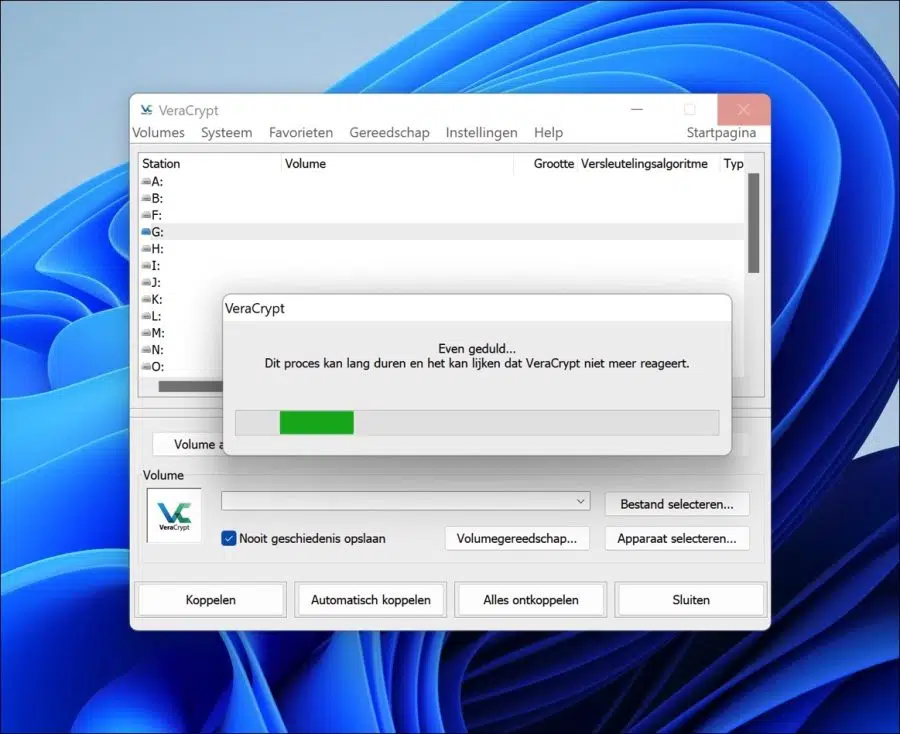
The data is now being read and decrypted so you can access it. This may take a while and VeraCrypt may appear to be unresponsive, so wait a while.
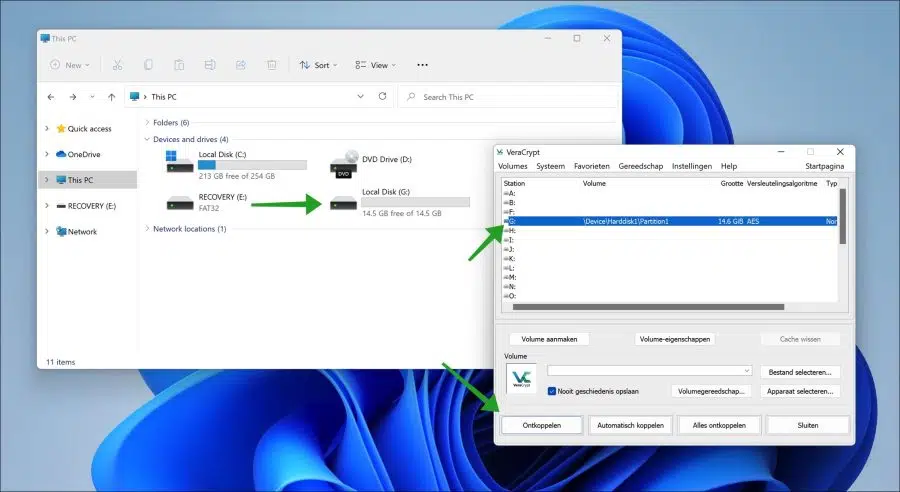
Once VeraCrypt has finished decrypting, you can access the selected drive letter on your PC. To do this, open Windows Explorer and click on “This PC”. You will now see the previously selected drive letter. Open it and you can now read data, write etc on the encrypted drive.
When you are done, always click on “Disconnect” in VeraCrypt.
If you want to view or edit the data again in the future, perform the automatic linking again, enter the password again and only then can you access the encrypted data on the external drive again. All this always happens via VeraCrypt.
I hope this helped you. Thank you for reading!
Nice site. Use it a lot for problems or things I want to know, such as encrypting my hard drive.
Great to read that the information helps! Thanks for your comment 🙂