U kunt in Windows 11 een accountafbeelding of profielfoto instellen. Hiermee kunt u uw account personaliseren en makkelijker identificeren.
Een accountafbeelding geeft u dus de mogelijkheid om uw profiel te personaliseren en een visuele weergave van uzelf of iets dat u leuk vindt te tonen. Het voegt een vleugje individualiteit toe aan een gebruikersaccount.
Er zijn twee manieren om een accountafbeelding te maken. U heeft de keuze om een accountafbeelding te maken via een camera of door zelf een afbeelding in te stellen via een afbeeldingsbestand. Dit afbeeldingsbestand kunt u zelf selecteren op uw computer en instellen als profielfoto voor een gebruikersaccount.
Meld u dan aan voor onze nieuwsbrief.
Accountafbeelding instellen of wijzigen in Windows 11
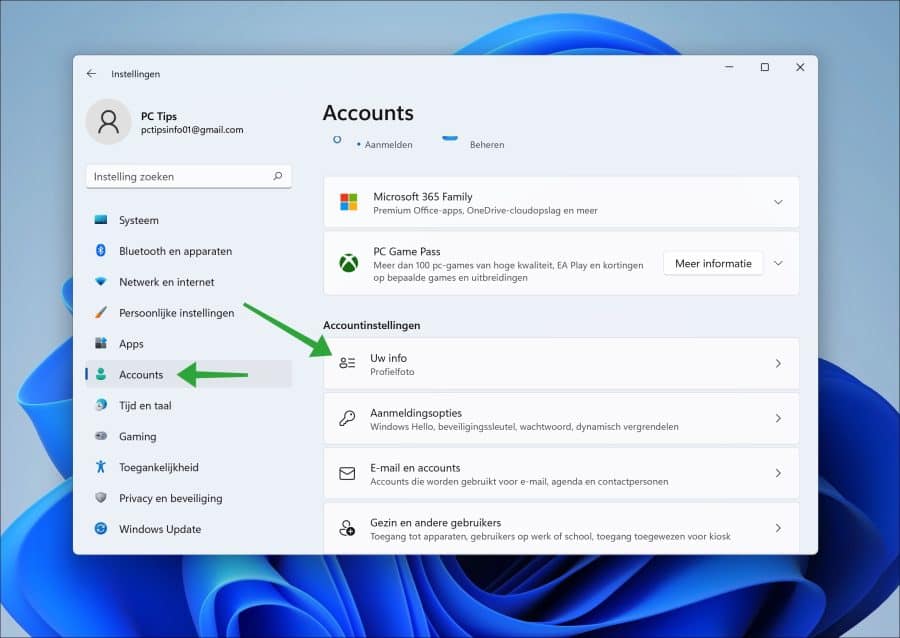
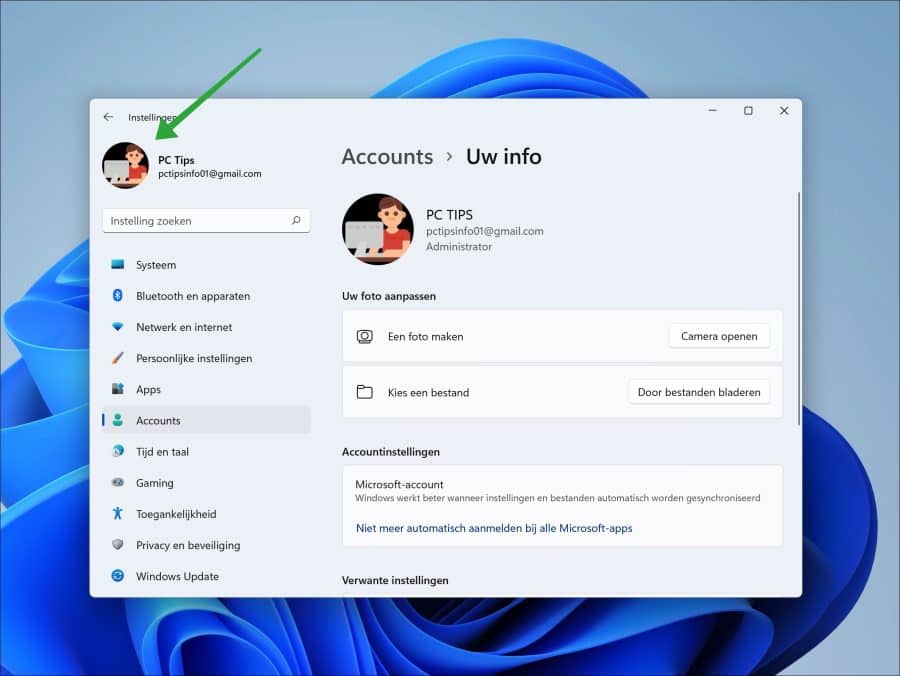
Om te beginnen opent u de instellingen. In de instellingen klikt u links op “accounts” en vervolgens in de accountinstellingen op “uw info”.
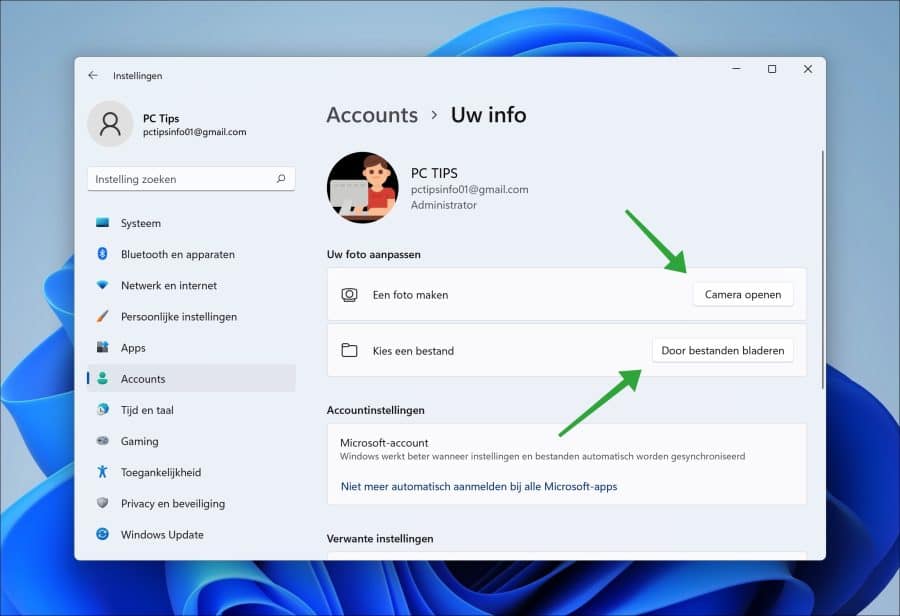
Er zijn, zoals eerder aangegeven, twee manieren om een profielfoto of accountafbeelding in te stellen. De eerste manier is via de camera. Hiermee kunt u een foto maken van uzelf via de camera. Deze foto wordt vervolgens automatisch ingesteld als profielfoto.
De tweede manier is door een afbeeldingsbestand te selecteren op uw computer. Dit kan een foto zijn maar ook een illustratie of iets anders. Zolang het maar een afbeeldingsbestandstype betreft, kunt u het instellen als profielfoto. Houd er rekening mee dat deze profielfoto zichtbaar is het op het aanmeld- en vergrendelscherm in Windows 11.
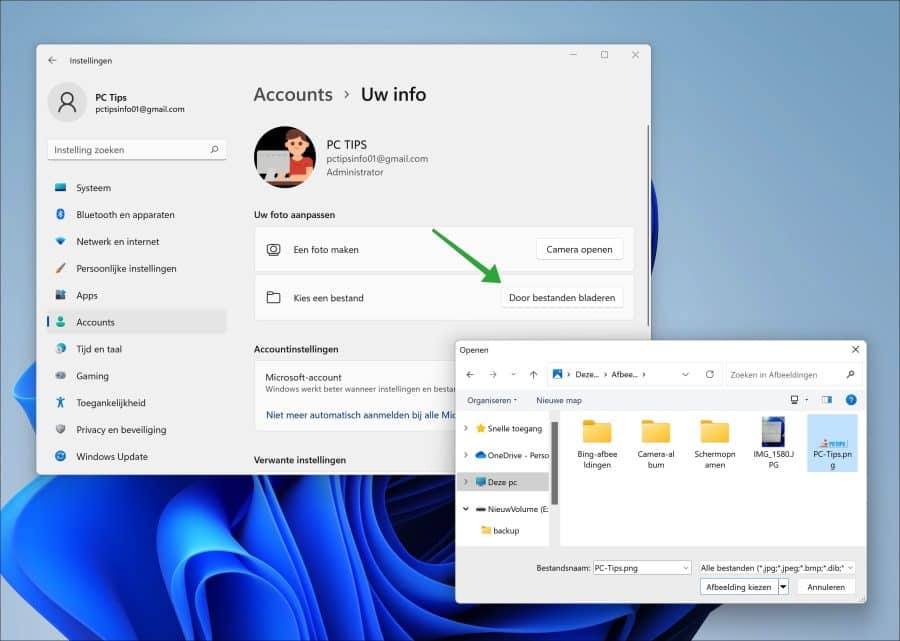
Klik op de knop “door bestanden bladeren”. Ga vervolgens naar de map waar de afbeelding voor het gebruikersprofiel zich bevindt en klik op “afbeelding kiezen”.
U ziet nu de ingestelde afbeelding voor het gebruikersaccount of profielfoto terug in de instellingen. Herstart de computer om de afbeelding door te voeren op andere onderdelen in Windows 11, bijvoorbeeld het aanmeld- en vergrendelscherm.
Ik hoop u hiermee geholpen te hebben. Bedankt voor het lezen!
Help mee
Mijn computertips zijn gratis en bedoeld om andere mensen te helpen. Door deze pc-tip te delen op een website of social media, helpt u mij meer mensen te bereiken.Overzicht met computertips
Bekijk ook mijn uitgebreide overzicht met praktische computertips, overzichtelijk gesorteerd per categorie.Computerhulp nodig?
Loopt u vast met uw pc, laptop of software? Stel uw vraag op ons computerforum en krijg gratis computerhulp van ervaren leden en experts.