
An IMG file is the same as an ISO file. The difference is that IMG is not used as often as an ISO file. An IMG file stores data in a file for later use as an installation file.
Complete copies of an operating system can be stored in an IMG file. However, the IMG file is most commonly used for computer games. If you are a gamer, you have probably seen the IMG file before.
An IMG like one ISO file can be used in Windows be opened. You can open an IMG file and then see the contents of the file, an ISO file is opened in Windows as a new drive letter.
In some cases it is better to convert an IMG file to an ISO file. In this tip I will explain to you step by step how you can convert an IMG file to ISO without data loss or error messages.
Convert IMG to ISO
To get started, download the free software OSFMount tool. Click on the installation file to start the installation. Install the software by following the installation process, no adjustments etc. required.
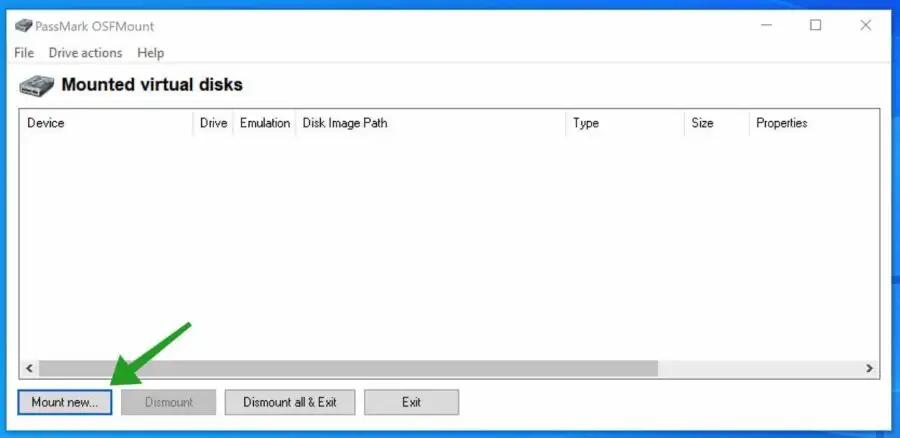
Open the OSFMount tool. Click on the button: Mount new.
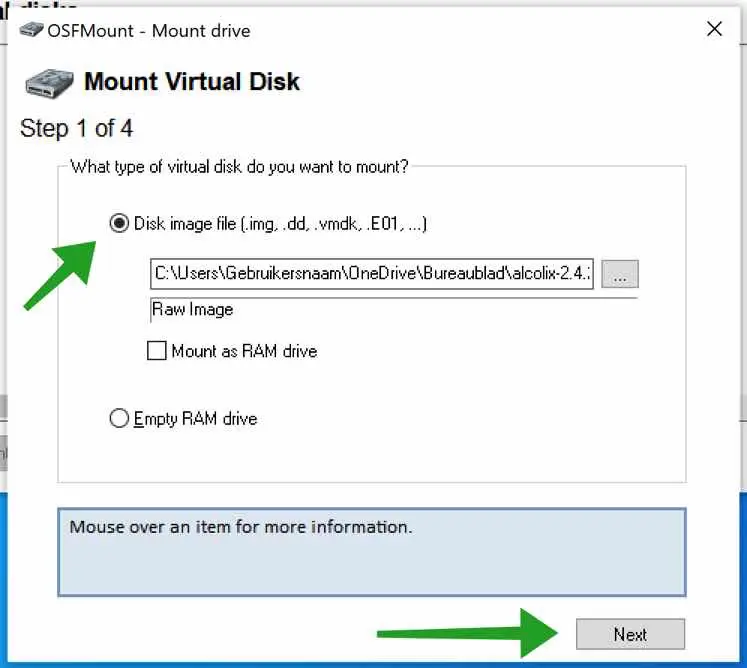
Click on Disk image file and select the IMG file on your computer. Then click Next to continue.
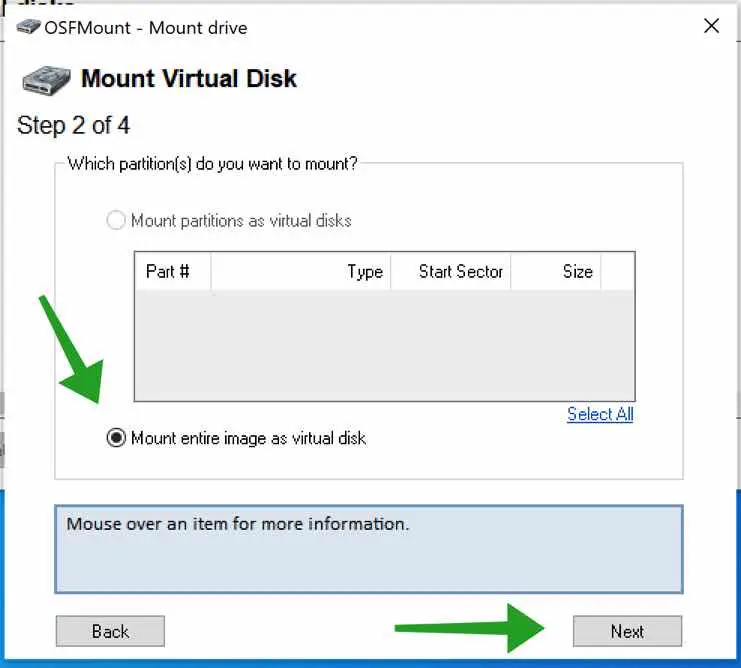
Then click Mount entire image as virtual disk. Click Next to continue.
OSFMount tool reads the best settings for the IMG file. Leave the settings as OSFMount tool sets them and click Mount to continue.

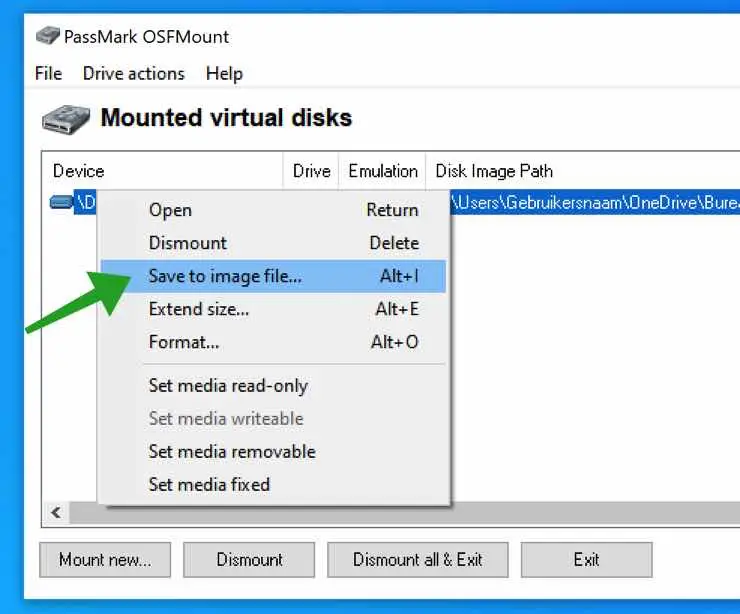
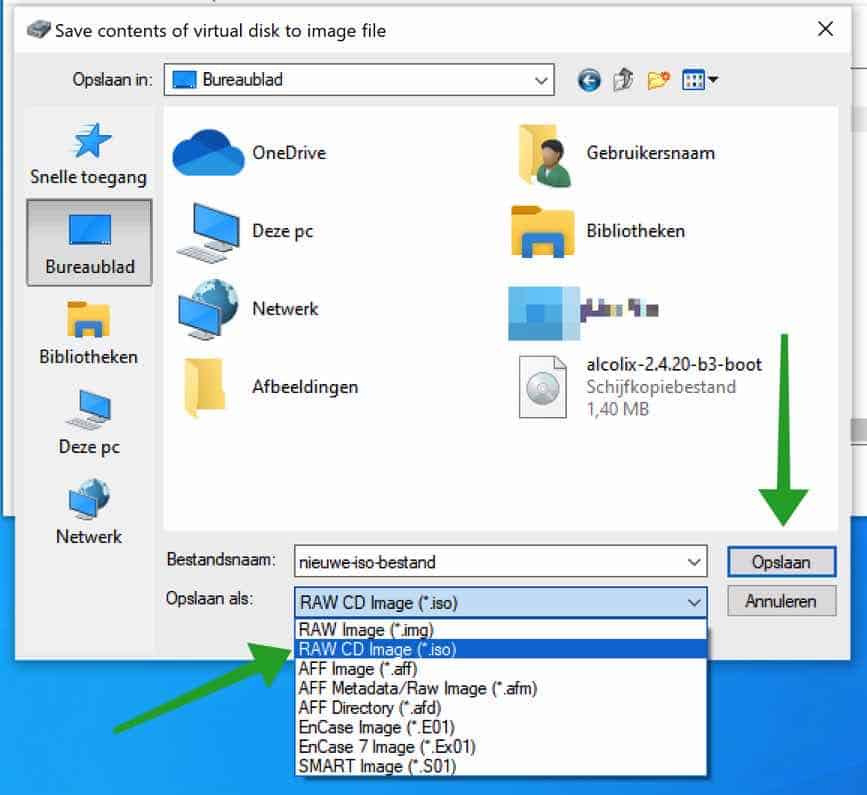
Once the virtual disk has been created, right-click on the virtual disk in the overview and choose: Save to image file.
Select a location for the ISO file. Give a file name and change the setting: Save As to “RAW CD Image *.iso. Then click on the Save button.
You have now successfully converted an IMG file to an ISO file on your computer.
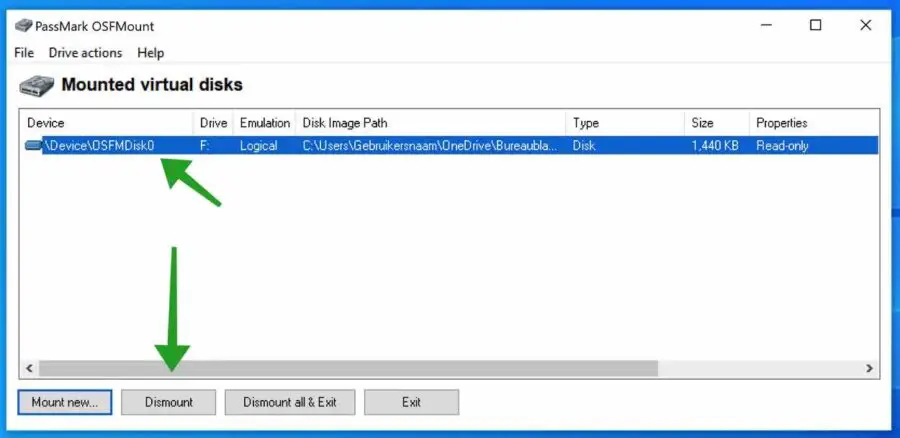
Finally, it is important that you dismount the virtual disk to free up a drive letter and disk space.
Click on the virtual disk and then click on the Dismount button.
I hope this helped you. Thank you for reading!