
Als u een Minecraft server wilt installeren dan kunt u andere Minecraft spelers uitnodigen om op uw server te spelen.
Om een Minecraft server te hosten moet u enkele stappen doorlopen. Deze stappen doorlopen we in dit artikel. De stappen om een Minecraft server op te zetten zijn voor ieder besturingssysteem net iets anders. Echter, er zijn enkele stappen die gelijk zijn.
Om te beginnen moet u ervoor zorgen dat uw computer bereikbaar is vanaf het netwerk of via het internet. U moet om Minecraft gebruikers op uw server te laten spelen een bepaalde poort openzetten in de router.
Meld u dan aan voor onze nieuwsbrief.
Als deze poort 25565 al openstaat dan kunnen gebruikers na het installeren van de Minecraft server meteen spelen. Is dit niet het geval dan moet u inloggen op uw router en via “port forwarding” de poort 25565 (TCP) voor Minecraft Java editie of 19132 en 19133 (TCP en UDP) openzetten.
Houdt er ook rekening mee dat als u Minecraft met een paar vrienden wilt spelen en heel geavanceerde server vaak niet nodig is. Een thuiscomputer is voor minder dan 10 spelers ook geschikt om een server op te starten. Hoe meer spelers er gaan spelen hoe meer RAM geheugen de computer nodig heeft. Als het even kan is een kabelverbinding naar het netwerk- of internet sneller en stabieler dan een draadloze wifi verbinding. Enige vertraging kan voorkomen op een Minecraft server opgezet via wifi en dit is niet goed voor de kwaliteit voor het spel.
Minecraft server installeren in Windows 11 of 10
Om te beginnen moet u Java installeren. Minecraft is namelijk in Java geprogrammeerd. Standaard Java runtime voldoet niet, hiermee krijgt u een foutmelding dat Minecraft server in een andere (nieuwere) versie geprogrammeerd.
Exception in thread "main" java.lang.UnsupportedClassVersionError: net/minecraft/bundler/Main has been compiled by a more recent version of the Java Runtime (class file version 61.0), this version of the Java Runtime only recognizes class file versions up to 52.0
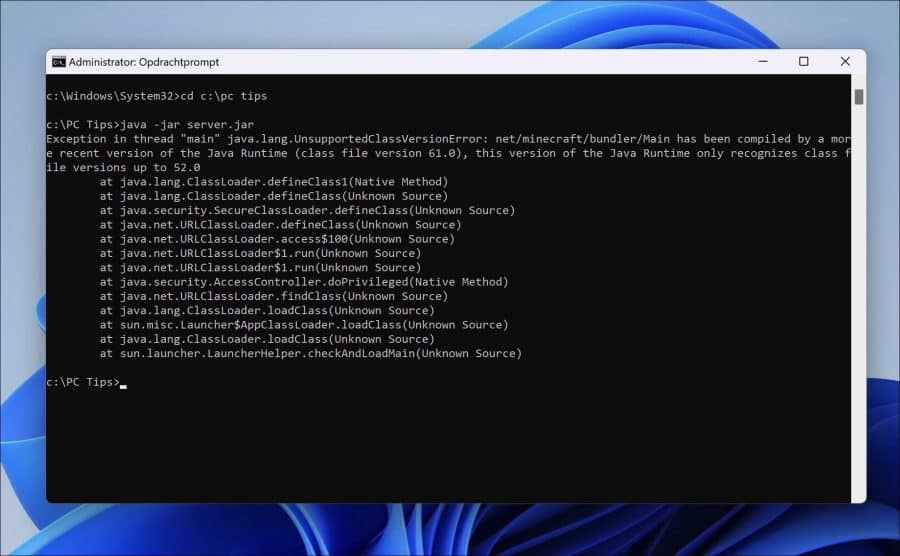
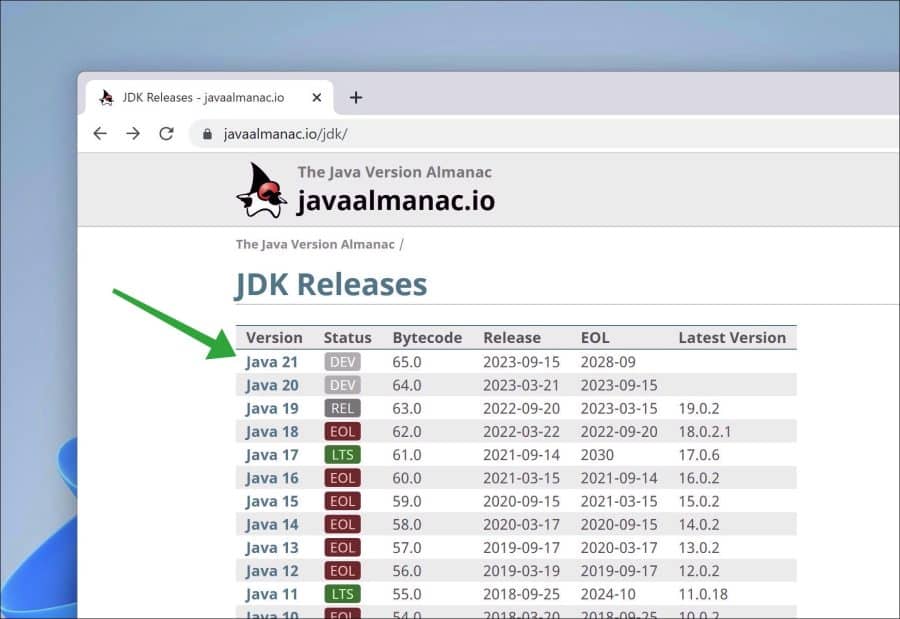
Download OpenJDK om dit probleem op te lossen. Download de laatste JDK versie.
Klik op “Oracle OpenJDK” voor Windows-(x64) versie.
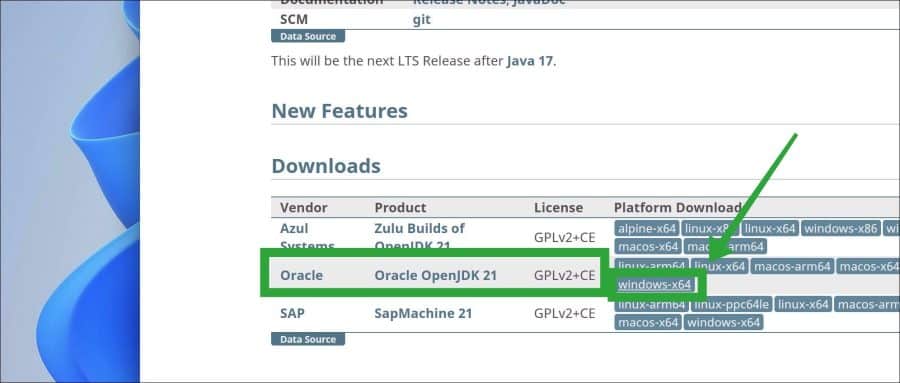
Download “Oracle OpenJDK” voor Windows-(x64) versie.
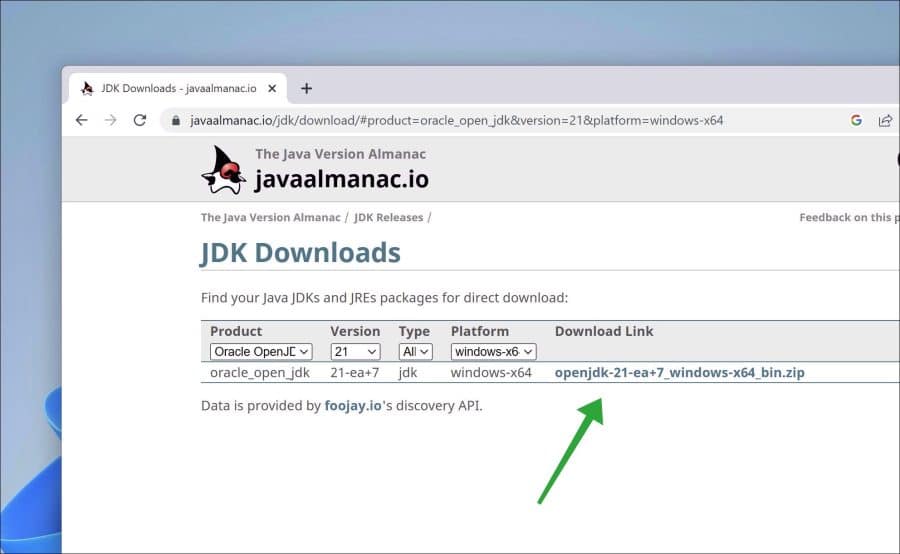
Pak dit ZIP bestand uit. Plaats de inhoud in een map waarvan u de server gaat starten. Open vervolgens de map “jdk-21” (in dit geval versie 21 maar dit kan ook een andere versie zijn) vervolgens de map “bin”.
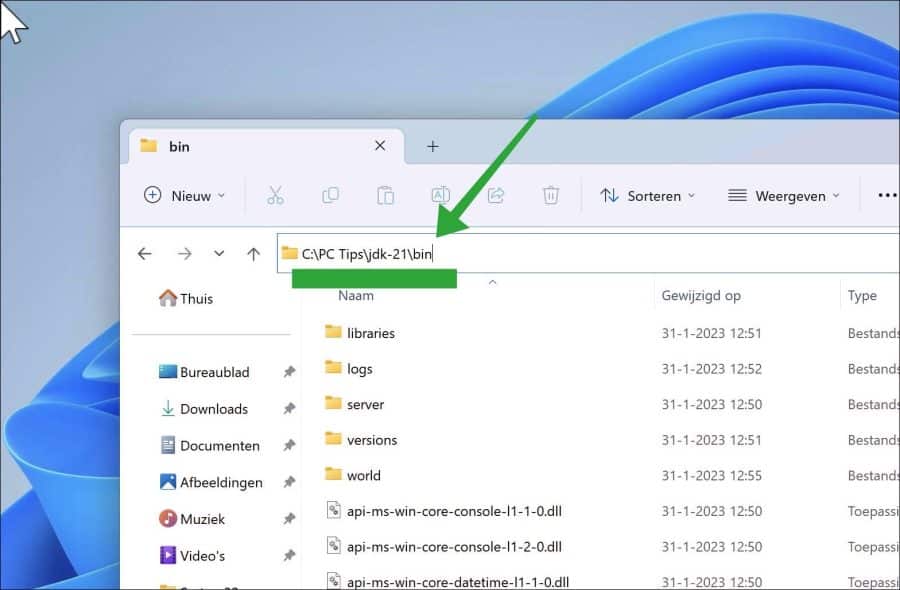
Download het Minecraft server bestand. Dit in dit geval “server.jar”. Plaats “server.jar” in de “bin” map die u zojuist heeft geopend.
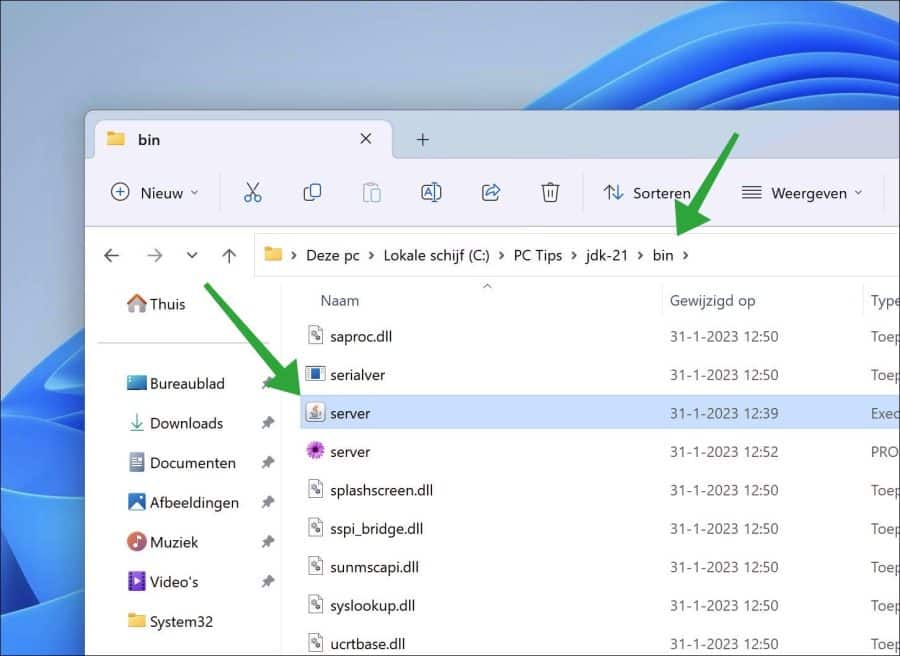
Open nu een Opdrachtprompt als administrator. Ga met het “cd” commando naar de “bin” map.
Geef vervolgens het commando:
java -jar server.jar
in om Minecraft server te starten.
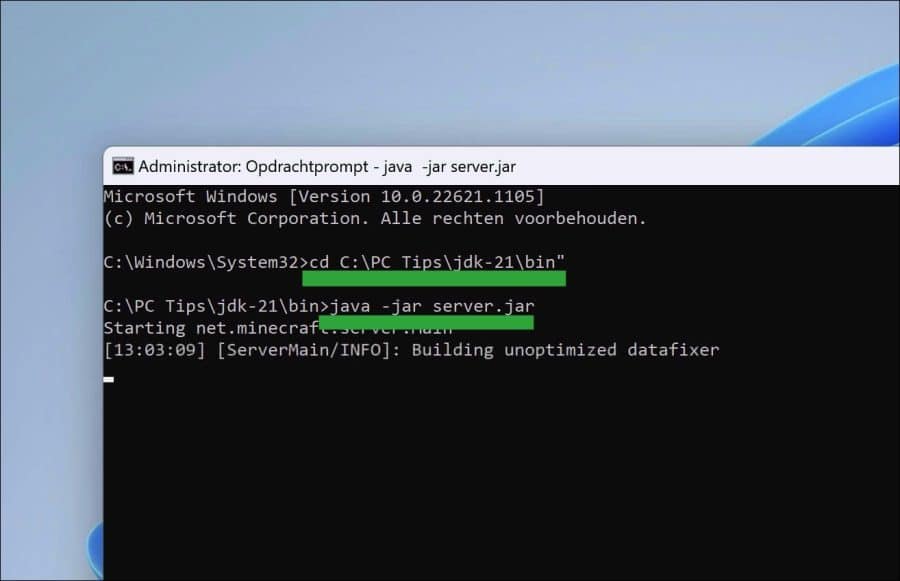
Minecraft server wordt nu gestart. Als u een foutmelding krijgt over “eula.txt”. Open dan “eula.txt” in de “bin” map en wijzig “eula=false” naar “eula=true”. Start de Minecraft server opnieuw.
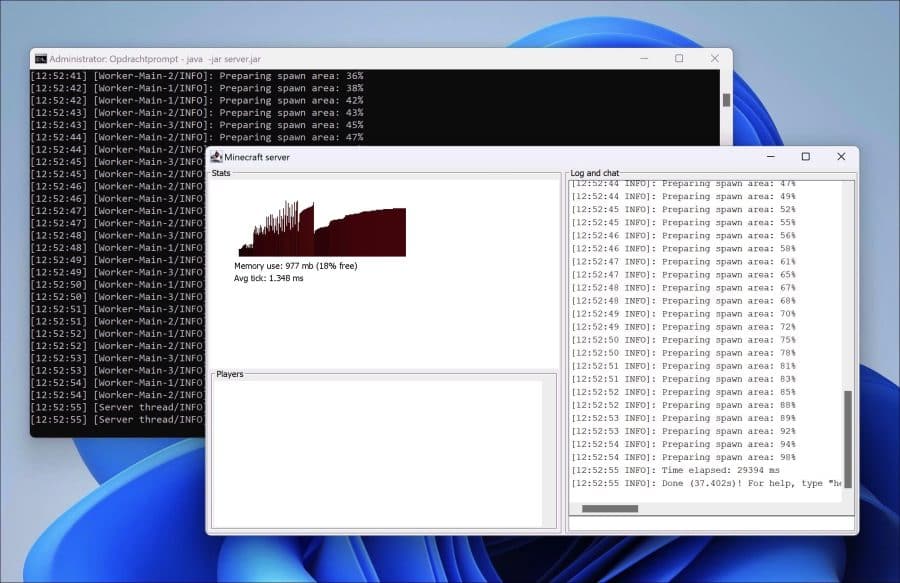
Om alle server commando’s weer te geven typt u in het Opdrachtprompt venster:
help
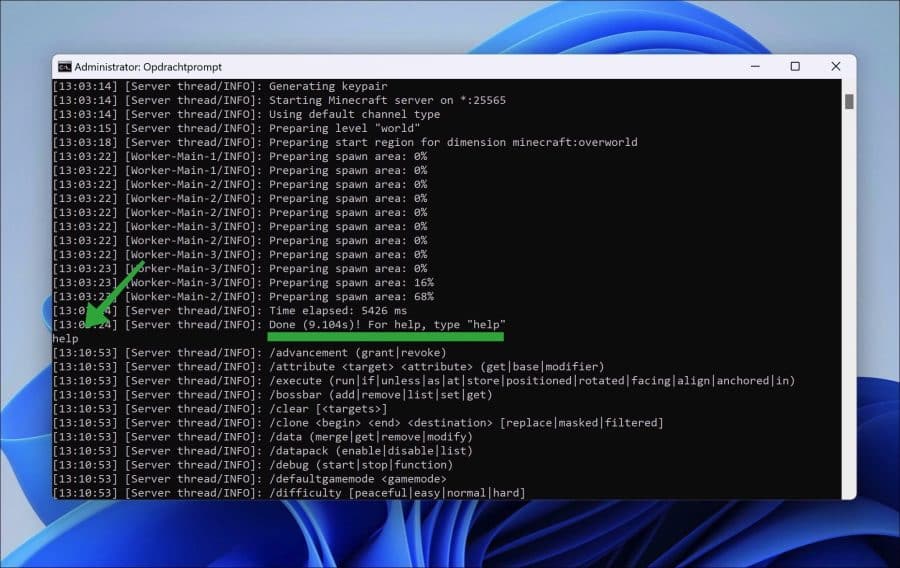
U ziet nu alle commando’s. Om de server te stoppen typt u “/stop” maar er zijn er nog veel meer. Ik hoop u hiermee geholpen te hebben. Bedankt voor het lezen!
Help mee
Mijn computertips zijn gratis en bedoeld om andere mensen te helpen. Door deze pc-tip te delen op een website of social media, helpt u mij meer mensen te bereiken.Overzicht met computertips
Bekijk ook mijn uitgebreide overzicht met praktische computertips, overzichtelijk gesorteerd per categorie.Computerhulp nodig?
Loopt u vast met uw pc, laptop of software? Stel uw vraag op ons computerforum en krijg gratis computerhulp van ervaren leden en experts.