

You may need .NET Framework for Windows 11 if you run software apps created in Microsoft Visual Studio. .NET Framework 2.0 and 3.5 are outdated versions of the framework, but are still necessary for applications built in these frameworks.
In Windows 11, Microsoft added the installation of the .NET Framework as an optional Windows feature. You will need to download the offline installer and install it separately if you are using earlier versions of Windows, such as Windows 7 or earlier.
Install .NET Framework in Windows 11
.NET Framework 2.0 and 3.5 are not installed by default. This can be enabled in Windows 11 via the optional parts, via Command Prompt, via PowerShell or via an installation program.
Install .NET Framework via Windows components
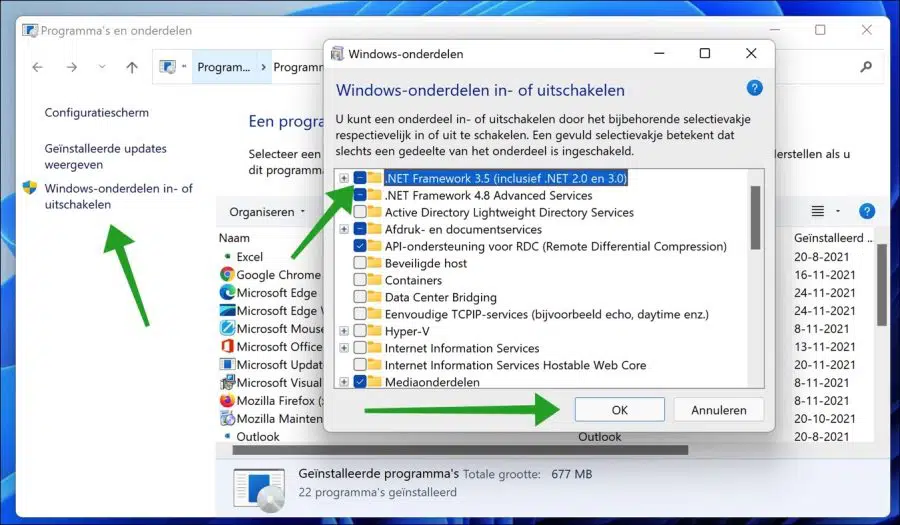
Right-click on the start menu. Click Run in the menu. In the run window type: appwiz.cpl to get it Control Panel Open “Programs and Features”.
Click on “Turn Windows features on or off” on the left. Then enable the component: .NET Framework 3.5 (Including .NET 2.0 and 3.0) and click OK.
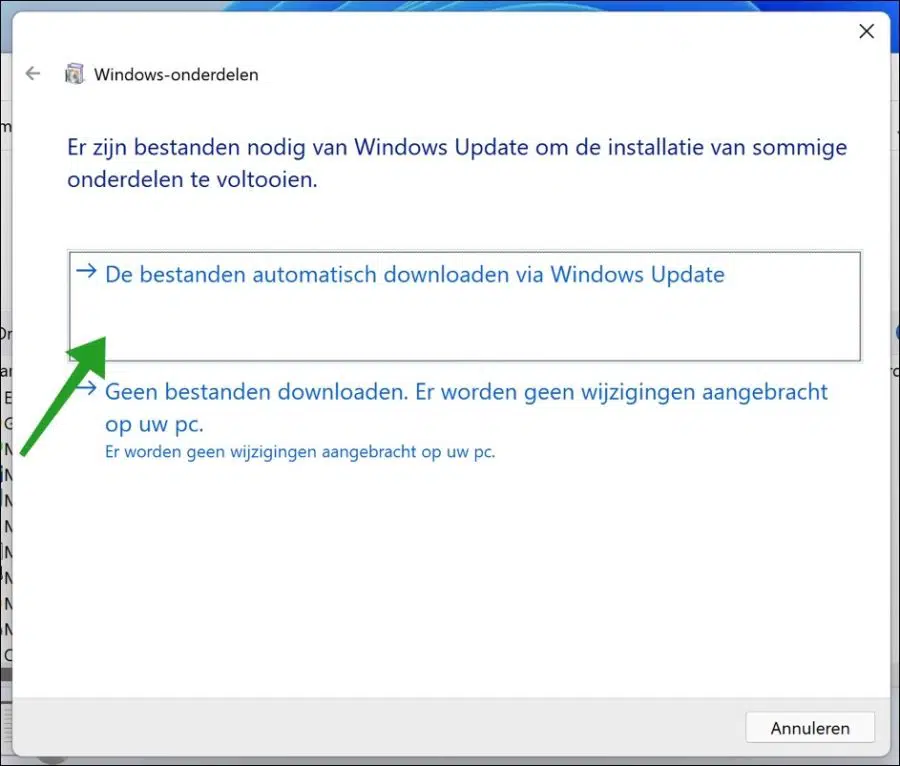
Then click “Download the files automatically via Windows Update” to install the .NET Framework.
Then restart your computer. The framework is now installed in Windows 11.
Install .NET Framework via Command Prompt
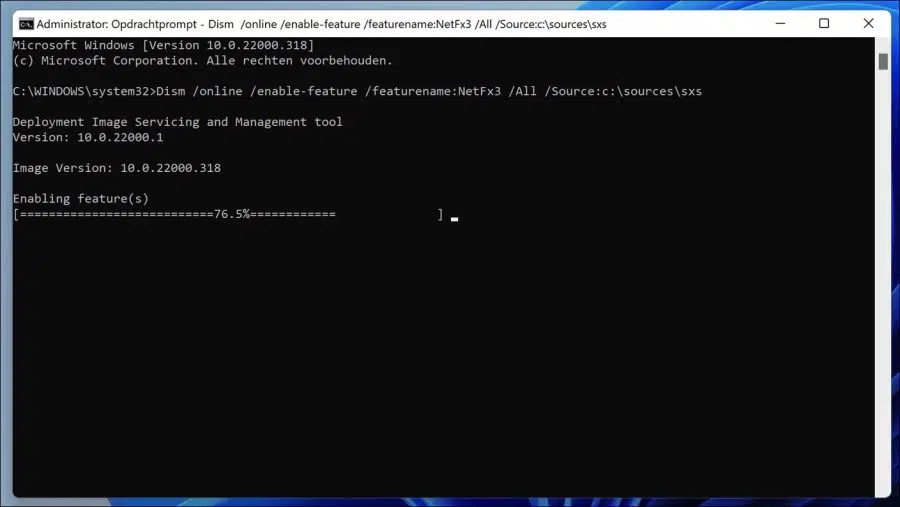
You can also install the .NET Framework via Command Prompt.
Click the start button and search for: Command Prompt. Right-click on the Command Prompt result and click “Run as Administrator”.
In the Command Prompt copy and paste the following command. An active internet connection is required.
Dism /online /enable-feature /featurename:NetFx3 /All /Source:c:\sources\sxs
The .NET Framework is now installed via the Command Prompt.
Install .NET Framework via PowerShell
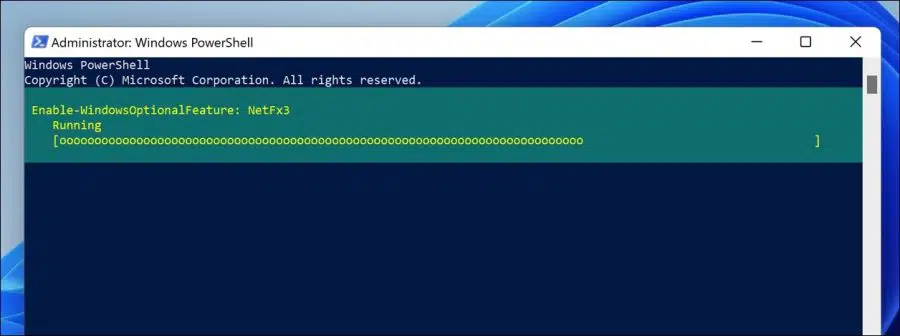
You can also install the .NET Framework via a PowerShell cmdlet.
Click the start button and search for: PowerShell. Right-click on the Windows PowerShell result and click “Run as Administrator”.
In PowerShell copy and paste the following command.
Enable-WindowsOptionalFeature -Online -FeatureName "NetFx3"
The .NET Framework is now installed via PowerShell.
Download and install the .NET Framework
You can also install .NET Framework 3.5 via a web installer. This means that an internet connection is still required. Download the web installation program via the link below.
Download .NET Framework 3.5 SP1 Runtime
Once downloaded, right-click on the .exe file and click Run as administrator. The installation is now running. Click “Download and install this feature”.
I hope this helped you. Thank you for reading!