In alle Windows-versies is de standaard Remote Desktop Poort (RDP) 3389 (TCP/UDP). Maar als u uw computer beter wilt veiligen tegen aanvallen, dan raad ik u aan om het standaard RDP-poortnummer 3389 te wijzigen in een ander nummer.
Microsoft Remote Desktop is een app waarmee u via een internetverbinding toegang kunt krijgen tot de bronnen en gegevens van een computer op afstand (hostcomputer) en deze kunt beheren. Het is, in essentie, software voor afstandsbediening. Met Remote Desktop kunt u van thuis uit toegang krijgen tot een werkcomputer, ongeacht of de werkcomputer verbinding maakt met een netwerk of niet.
Wanneer u een extern bureaubladsessie begint, stuurt de clientcomputer via een standaard “luisterende” poort 3389 over het Internet een signaal naar de hostcomputer met de vraag om toestemming om verbinding te maken en in te loggen. De hostcomputer antwoordt met een verzoek om uw aanmeldingsgegevens, die worden gecontroleerd aan de hand van een lijst van Remote Desktop-gebruikers met behulp van een intern verificatieproces.
Zodra u zich hebt aangemeld, worden beeldschermgegevens en toetsenbordaanslagen van de host naar de clientcomputer verzonden, zodat u de hostcomputer kunt bekijken en ermee kunt werken alsof u er direct voor zit.
Poort nummer van Remote Desktop wijzigen
Om de standaard Remote Desktop poort (3389) te wijzigen in een ander poort-nummer dient u de register editor te openen. In de zoekbalk of via het vergrootglas zoek naar: regedit. Open de register editor.
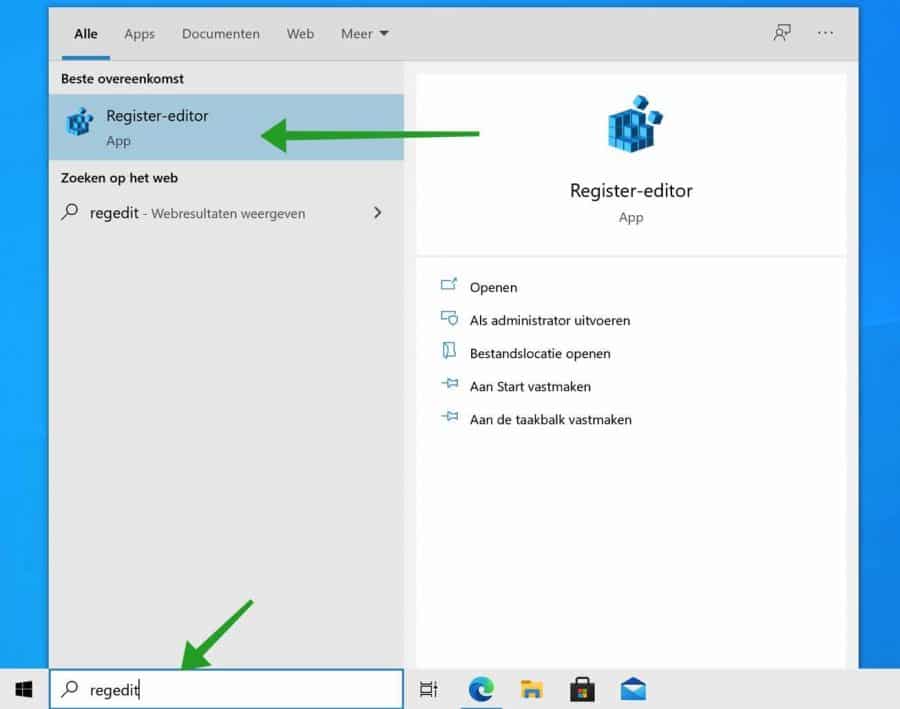
In de register editor navigeer naar de volgende sleutel:
HKEY_LOCAL_MACHINE\System\CurrentControlSet\Control\Terminal Server\WinStations\RDP-Tcp
Dubbelklik op “PortNumber”. Klik daarna op Decimaal. Geef een nieuw poort nummer in voor Remote Desktop.
Sluit de Windows register editor af.
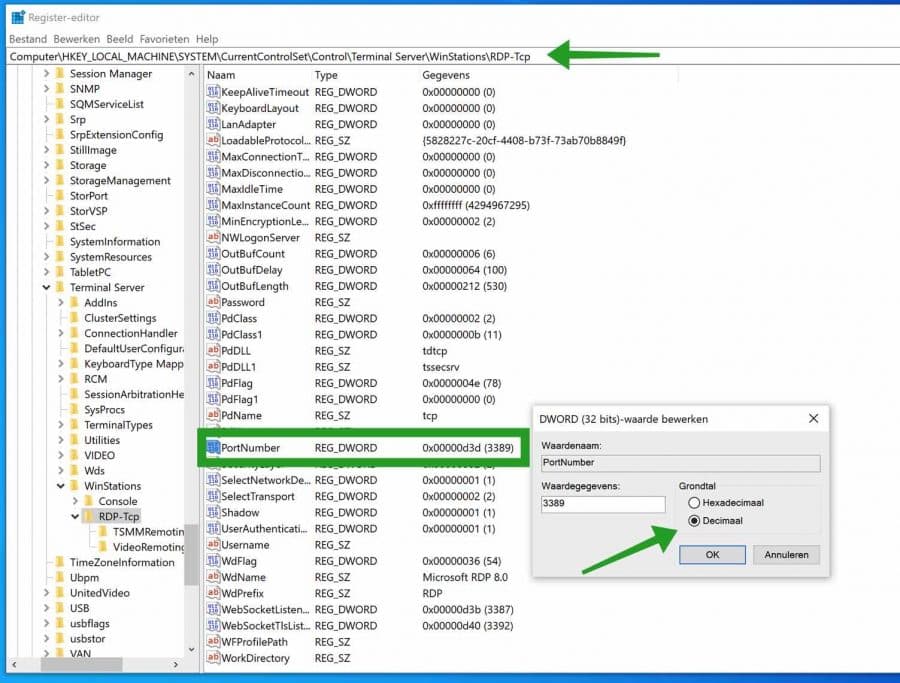
Nadat u de poort voor Remote Desktop in het Windows-register hebt gewijzigd, moet u het inkomende verkeer op de nieuwe RDP-poort toestaan in Windows Firewall.
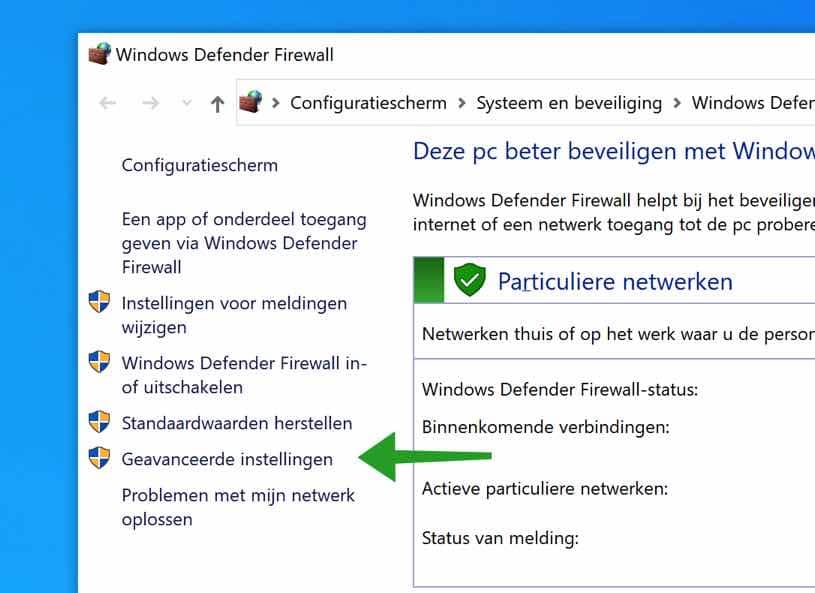
In de Windows zoekbalk op via het vergrootglas. Zoek op: Firewall. Klik op het Windows Defender Firewall resultaat.
Klik links in het menu op Geavanceerde instellingen.
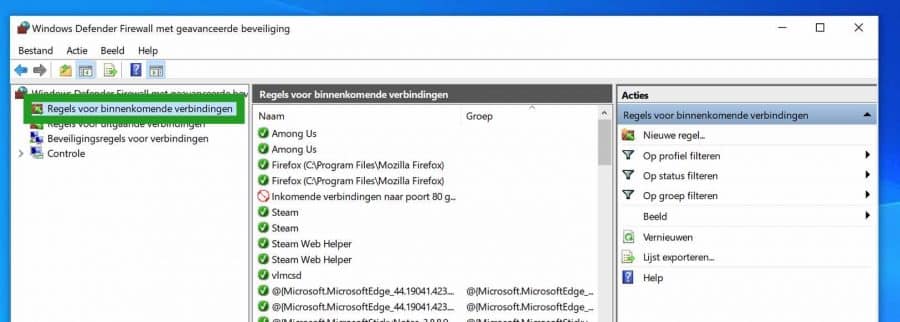
Klik op Regels voor binnenkomende verbindingen en klik daarna rechts op: Nieuwe regel.
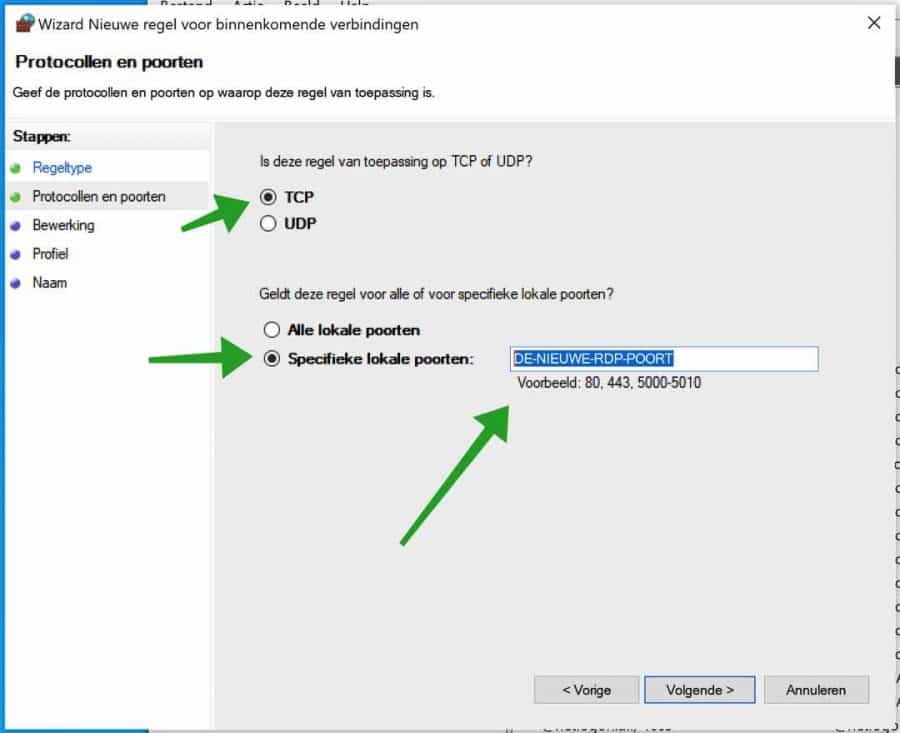
Het regeltype klikt u op Poort.

Klik daarna op TCP of UDP (eerst TCP daarna herhaalt u de stap nogmaals voor UDP) en klik op Specifieke poorten. Geef het nieuwe Remote Desktop poort nummer in.
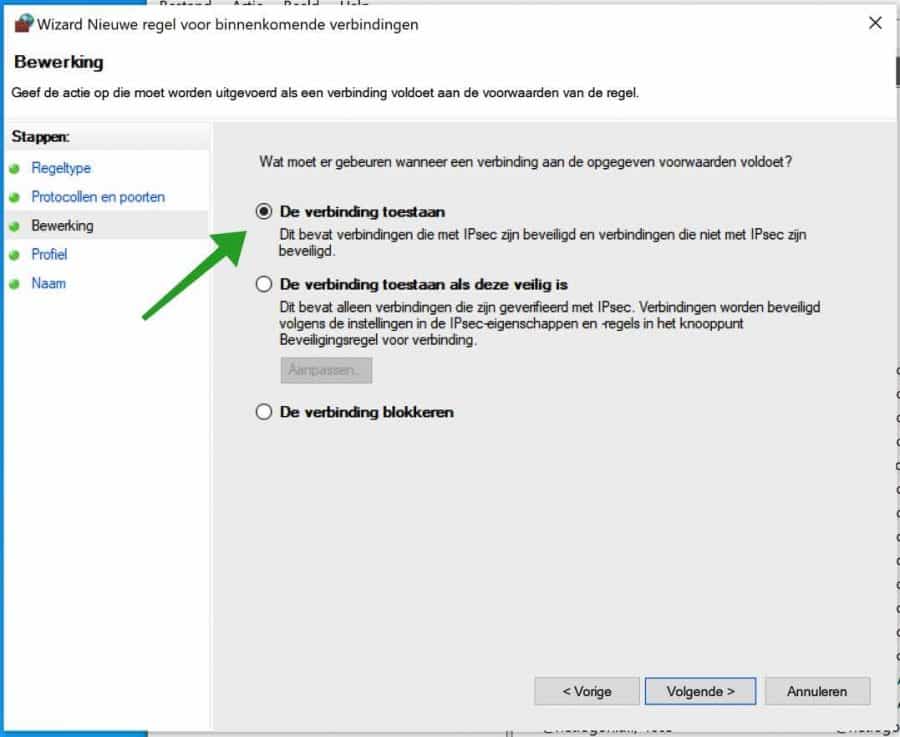
Klik op de verbinding toestaan.
Klik alle drie de opties aan, domein, prive en openbaar.

Geef de nieuwe regel voor Windows Firewall een duidelijke naam.
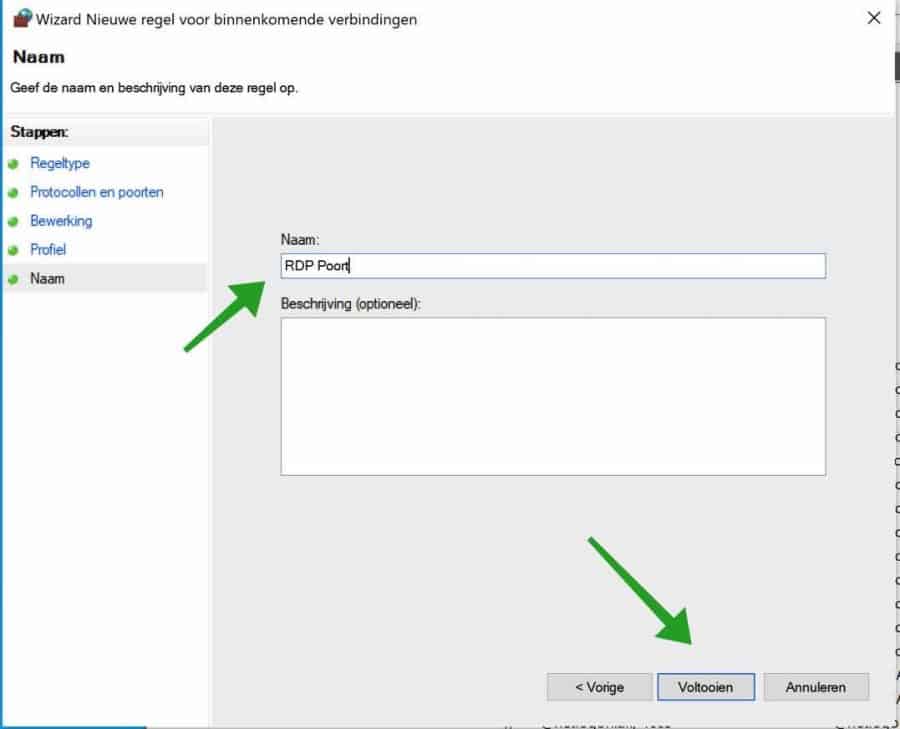
Klik op voltooien.
U heeft nu met succes het poort-nummer van Windows Remote Desktop gewijzigd. U dient de computer te herstarten. De volgende keer dat u vanaf een andere computer een verbinding via externe verbindingen probeert te maken dan vult u in: IP-nummer:NIEUW-POORT-NUMMER.
Bijvoorbeeld: 192.168.178.1:3399.
Ik hoop u hiermee geholpen te hebben. Bedankt voor het lezen!
❤️ Help mee en deel
Voordat u verdergaat, zou ik het waarderen als u overweegt mijn werk te steunen. In tegenstelling tot veel grote websites is er op PC Tips geen betaalmuur die lezers blokkeert, maar daardoor is uw steun des te belangrijker.Als u onafhankelijke initiatieven zoals deze waardeert, overweeg dan alstublieft om mij te steunen, zodat ik kan blijven doen wat ik met plezier doe. Deel mijn website PC Tips op andere websites, social media of binnen uw eigen netwerk. Hartelijk dank.
🙂 Overzicht met computertips
Bekijk ook mijn uitgebreide overzicht met praktische computertips, overzichtelijk gesorteerd per categorie.