
Als u een printer koopt en vervolgens installeert dan wordt de informatie van de printer verkregen via het stuurprogramma.
Na installatie van het stuurprogramma wordt er een naam aangemaakt die meestal het merk en type model van de printer bevatten. Deze standaard naam is niet altijd even duidelijk en kan reden zijn om de naam van de printer te wijzigen.
Het wijzigen van de printernaam maakt de printer op een thuisnetwerk of bedrijfsomgeving herkenbaar. Zo kunt u bijvoorbeeld de locatie van de printer toevoegen aan de naam om duidelijk te maken waar de printer zich bevindt als er meerdere printers beschikbaar zijn op een netwerk.
Meld u dan aan voor onze nieuwsbrief.
Lees ook: Standaardprinter wijzigen in Windows 11.
In deze gids leg ik uit hoe u de naam van de printer kunt wijzigen via de instellingen of via een PowerShell commando.
Printernaam wijzigen in Windows 11 of Windows 10
Via instellingen
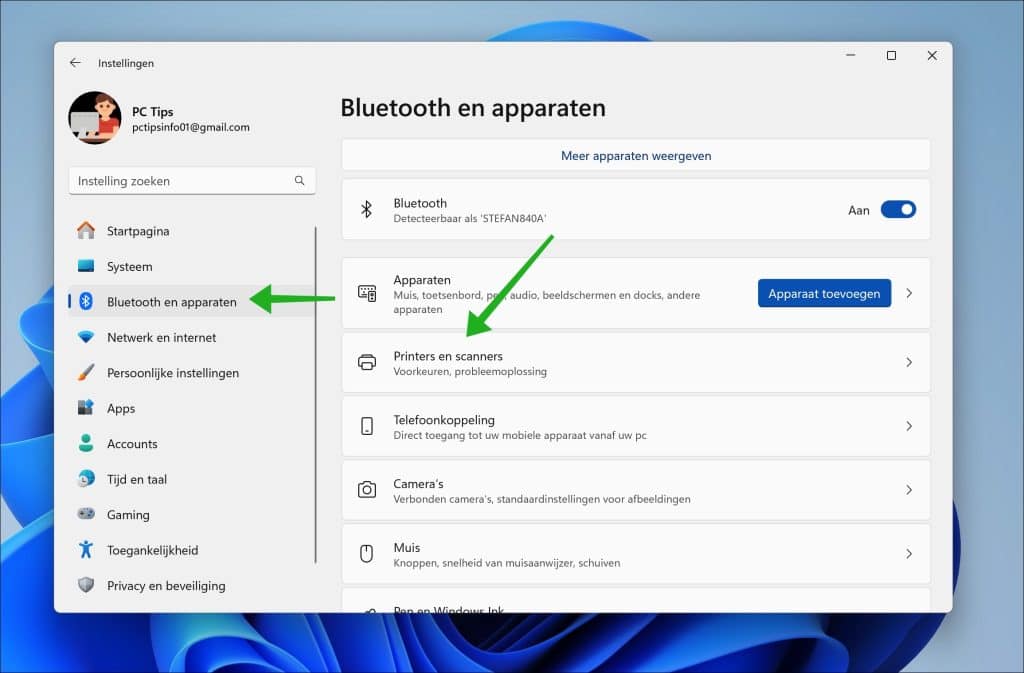
Om te beginnen opent u de instellingen door met de rechtermuisknop op de Startknop te klikken. Klik vervolgens op “Instellingen” in het menu.
Klik aan de linkerzijde in de instellingen op “Bluetooth en Apparaten” en vervolgens op “Printers en scanners”.
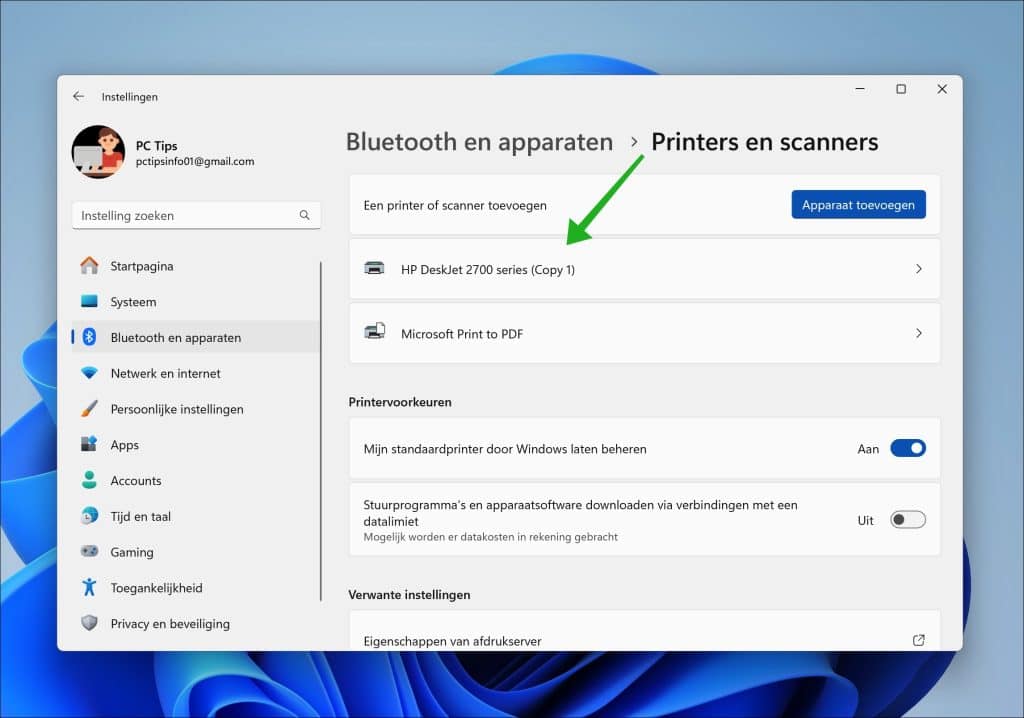
Klik op de printer waarvan u de naam wilt wijzigen in de lijst van geïnstalleerde printers. Staat de printer er niet tussen dan dient u ervoor te zorgen dat u de juist printerstuurprogramma’s heeft geïnstalleerd zodat Windows de printer kan detecteren en installeren.
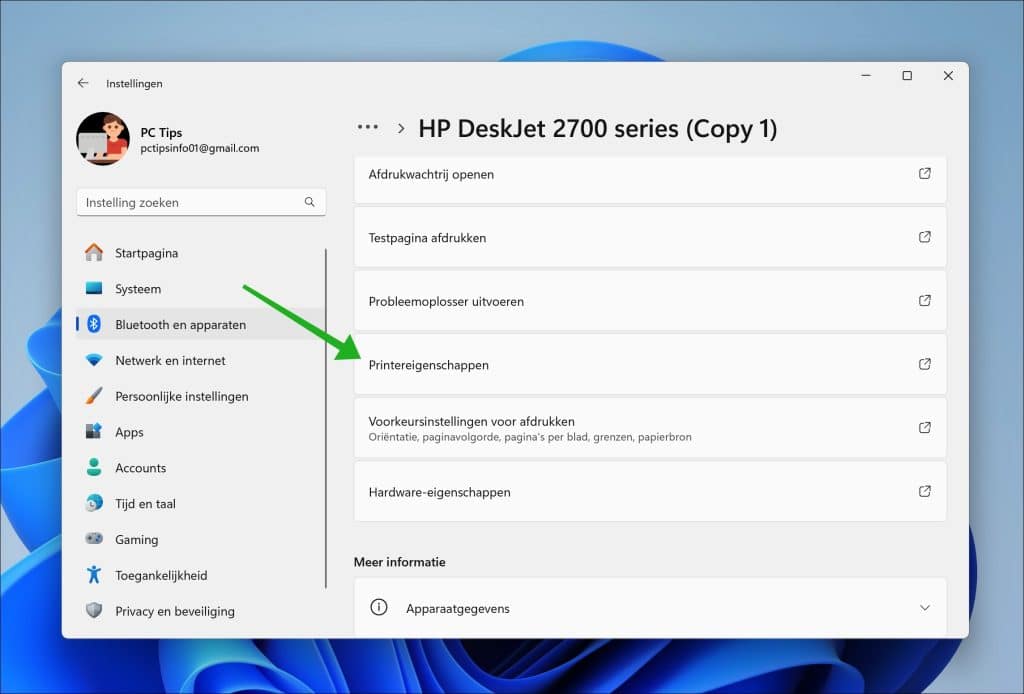
Klik vervolgens op “Printereigenschappen” om de eigenschappen van deze printer te wijzigen.
In tabblad “Algemeen” ziet u de printernaam. Klik erop om de naam van de printer te wijzigen. Geef vervolgens een nieuwe naam voor de printer in en klik op “OK” om te bevestigen.
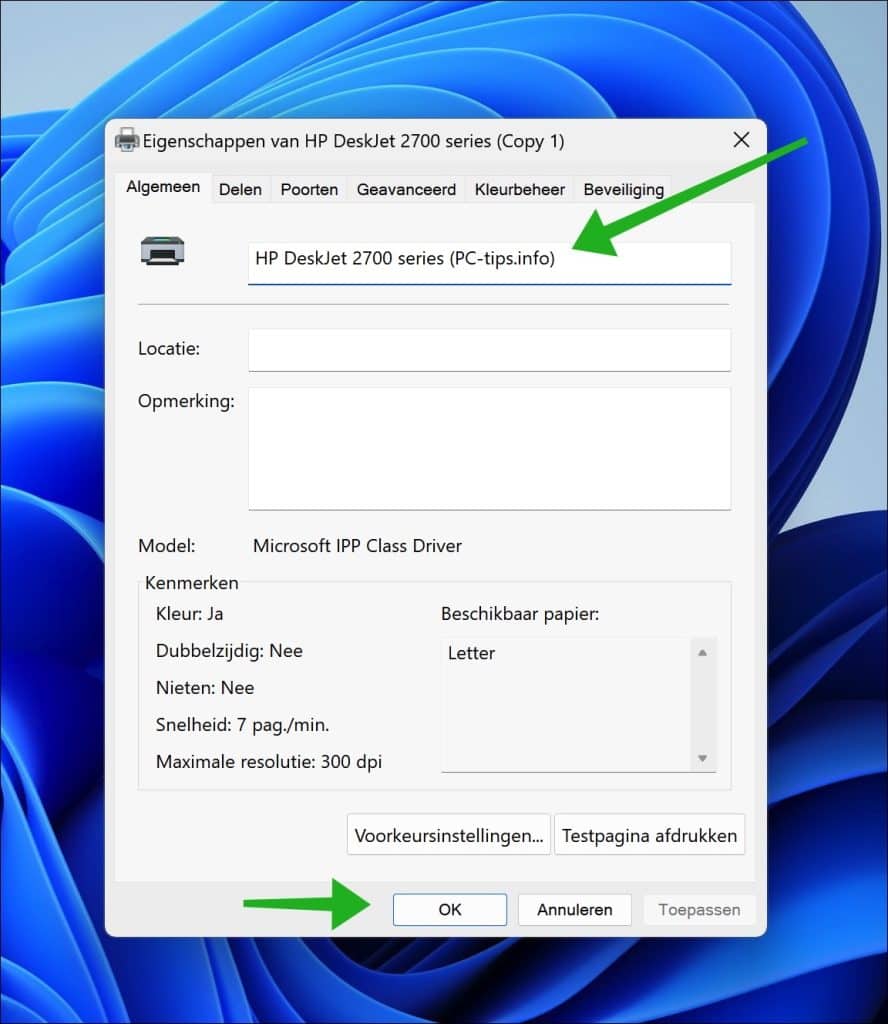
U heeft nu de naam van de printer gewijzigd. Eventueel kunt u de computer herstarten om de nieuwe printernaam actief te maken.
Via PowerShell
Voor degenen die dieper in de technische kant willen duiken of meer controle over het proces willen hebben, heb ik een tweede methode die gebruik maakt van de Windows Terminal of PowerShell:
Druk op de Windows-toets en ‘X’ om het menu voor gevorderde gebruikers te openen. Kies daar voor ‘Terminal (Admin)’. Op Windows 10 kun je ‘Windows PowerShell (Admin)’ selecteren.
Zorg ervoor dat het PowerShell tabblad geopend is binnen de Terminal. Om een lijst van aangesloten printers te bekijken, typt u het commando:
Get-Printer | Format-List Name
Identificeer de printer die u wilt hernoemen uit de lijst die verschijnt. Het hernoemen van de printer is net zo eenvoudig als het invoeren van een commando zoals dit:
Rename-Printer -Name "HUIDIGE_PRINTERNAAM" -NewName "NIEUWE_PRINTERNAAM"
Vervang “HUIDIGE_PRINTERNAAM” en “NIEUWE_PRINTERNAAM” met de daadwerkelijke oude en nieuwe namen. Voer het commando uit en u heeft de printernaam via PowerShell gewijzigd. Om te controleren, ga terug naar het gedeelte ‘Printers & Scanners’ in de Instellingen.
Ik hoop u hiermee geïnformeerd te hebben. Bedankt voor het lezen!
Help mee
Mijn computertips zijn gratis en bedoeld om andere mensen te helpen. Door deze pc-tip te delen op een website of social media, helpt u mij meer mensen te bereiken.Overzicht met computertips
Bekijk ook mijn uitgebreide overzicht met praktische computertips, overzichtelijk gesorteerd per categorie.Computerhulp nodig?
Loopt u vast met uw pc, laptop of software? Stel uw vraag op ons computerforum en krijg gratis computerhulp van ervaren leden en experts.