
De rechtermuisklik is een van de vele manieren om door een besturingssysteem zoals Windows 11 te navigeren. We gebruiken de rechtermuisklik vooral voor het openen van menu’s, diverse functies en acties.
Als de rechtermuisklik niet meer werkt dan bent u beperkt in het gebruik van een computer. Omdat een aangesloten muis hardware betreft, hoeft dit probleem niet direct aan instellingen te liggen.
Ik raad u aan om de volgende controles uit te voeren aan uw muis voordat u verder gaat het uitvoeren van de tips in dit artikel.
Als eerste probeert u de muis eens aan te sluiten aan een andere computer. Controleer of dan de rechtermuisklik wel werkt. Daarnaast, maak de muis eens schoon, haal de muis eventueel uit elkaar en ontdoe de behuizing van vet en stof.
Als u een draadloze muis gebruikt dan koppelt u de muis los via Bluetooth, maak hierna opnieuw verbinding. Als u een muis via USB gebruikt dan haalt u de USB-aansluiting los, wacht u even en sluit u de muis opnieuw aan.
Als laatste raad ik aan om de computer te herstarten als u dit nog niet had geprobeerd. Bij een herstart wordt alle aangesloten hardware opnieuw gedetecteerd en dit kan eventuele problemen met de rechtermuisklik oplossen.
Rechtermuisklik werkt niet meer in Windows 11
Als u alle bovenstaande hardwareoplossingen heeft geprobeerd en ze zijn of niet relevant of ze hebben het rechtermuisklik probleem niet opgelost, dan volgt u onderstaande stappen.
Touchpad rechtermuisklik werkt niet?
Gebruikt u een touchpad als muis, dan kunt u de volgende instellingen controleren of met twee vingers drukken het rechtermuisklik menu opent.
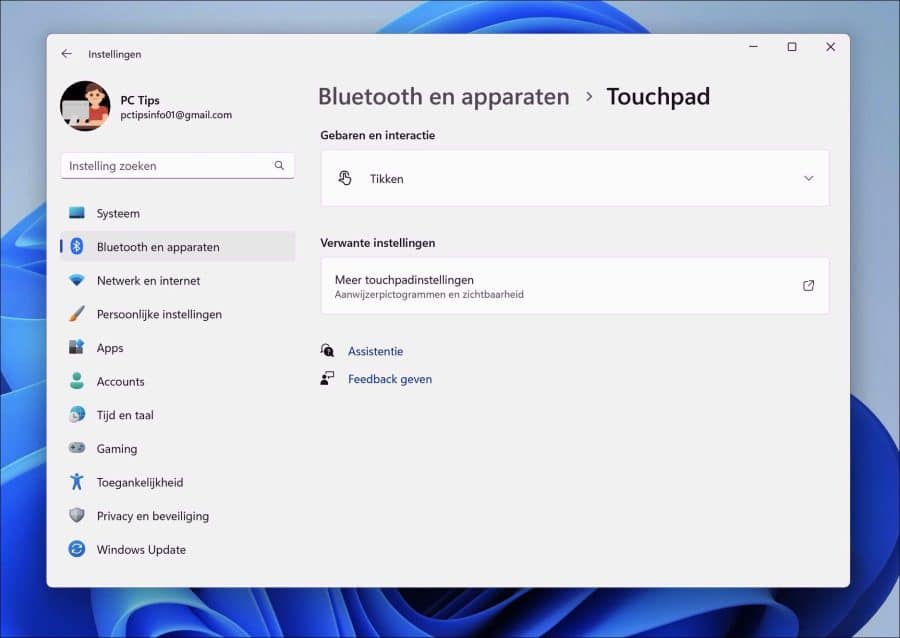
Open de instellingen. Klik links in het menu op “Bluetooth en apparaten”. Klik vervolgens op “touchpad” om de touchpad instellingen te openen.
Klik in de gebaren en interactie instellingen op “tikken” en zorg dat de optie “tikken met twee vingers voor rechtermuisklik” is ingeschakeld.
Stuurprogramma voor de muis installeren
Als u een geavanceerde muis gebruikt, ééntje die specifieke stuurprogramma’s nodig heeft om te kunnen werken, dan installeert u deze. Raadpleeg voor deze informatie het merk en model van de muis via de officiële website.
De meeste muizen hebben geen specifieke stuurprogramma’s nodig, Windows 11 detecteert en installeert zelf de goede stuurprogramma’s. Echter, er zijn muizen die wel specifieke stuurprogramma’s nodig hebben, als u dit type muis heeft, installeer dan de stuurprogramma’s.
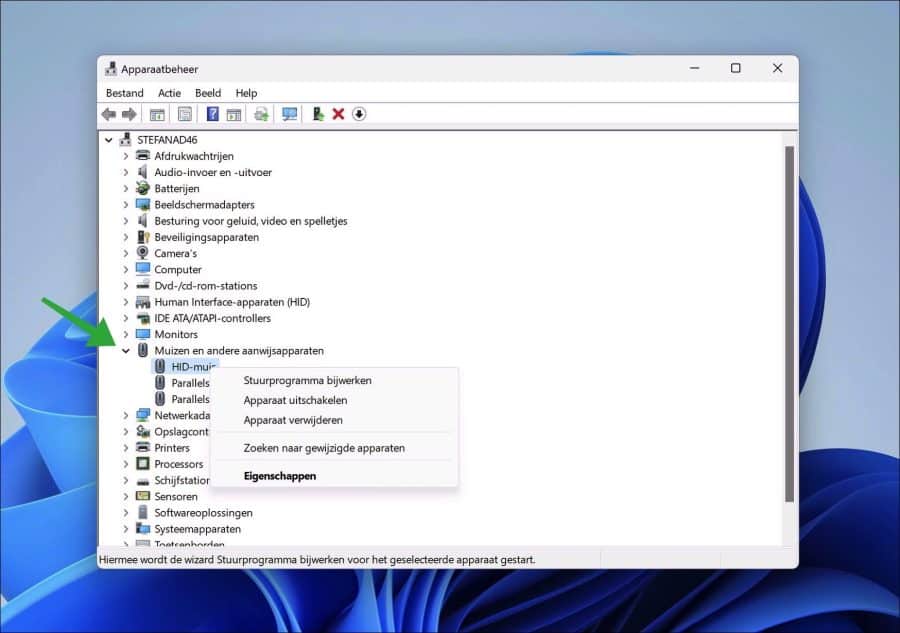
Open apparaatbeheer. Klik op “muizen en andere aanwijsapparaten”. Als er een uitroepteken bijstaat dan is er geen correct stuurprogramma geïnstalleerd waardoor mogelijk bepaalde functionaliteit van de muis of het aanwijsapparaat niet goed werkt.
Lees ook: Alle Windows stuurprogramma’s updaten naar de laatste versie.
Bluetooth probleemoplosser uitvoeren
Als uw muis via Bluetooth is verbonden dan kan het helpen om de Bluetooth probleemoplosser uit te voeren om eventuele Bluetooth problemen op te lossen.
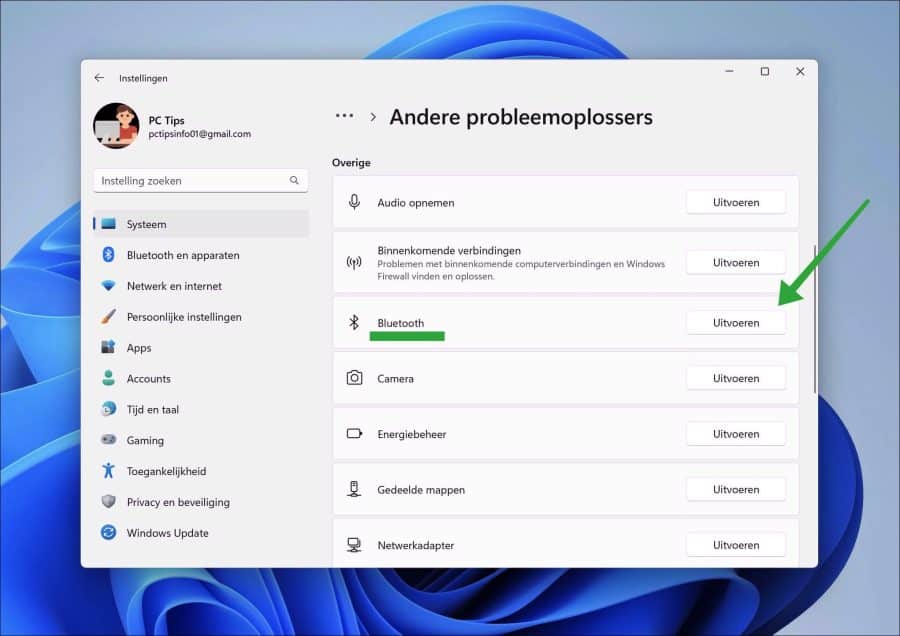
Open instellingen. Klik links in het menu op “Systeem” en vervolgens onderin op “problemen oplossen”. Klik hierna op “Andere probleemoplossers”.
Klik rechts naast “Bluetooth” op de knop “uitvoeren” om de Bluetooth probleemoplosser te starten. Deze probleemoplosser kan zelf problemen detecteren en oplossen.
Lees ook: Bluetooth muis werkt niet.
USB Root hub energie instellingen wijzigen
Een USB Root Hub is een onderdeel van de USB (Universal Serial Bus) interface waarmee meerdere USB-apparaten op een computer kunnen worden aangesloten. In Windows 11 is de USB Root Hub een stuurprogramma dat de stroom beheert tussen de computer en de USB-apparaten die erop zijn aangesloten.
Wanneer u een bedrade muis gebruikt (met USB kabel) dan kan het helpen om de USB Root hub instellingen zo aan te passen dat de computer dit type apparaat niet uit mag schakelen.
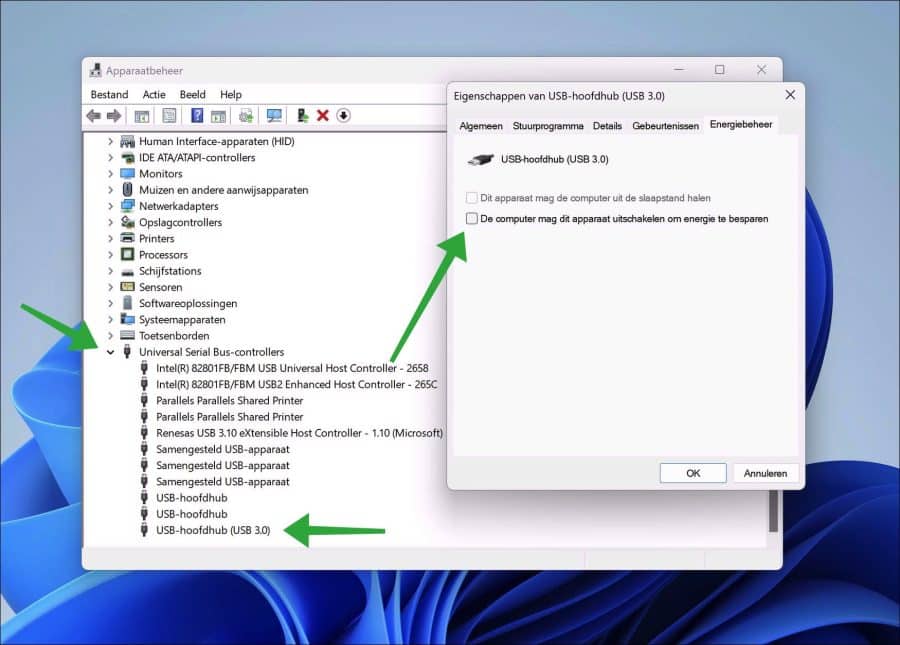
Klik met de rechtermuisknop op de Startknop. In het menu klik op “Apparaatbeheer”. In Apparaatbeheer opent u de “Universal Serial bus-controllers”.
Klik hierna dubbel op “USB-hoofdhub (USB 3.0)”. Klik vervolgens op tabblad “Energiebeheer” en schakel de optie “De computer mag dit apparaat uitschakelen om energie te besparen” uit.
SFC en DISM uitvoeren
SFC en DISM zijn twee ingebouwde hulpmiddelen in Windows die worden gebruikt om problemen met het besturingssysteem vast te stellen en te repareren.
SFC (System File Checker) is een hulpprogramma in Windows dat beschadigde systeembestanden opspoort en repareert. Het vergelijkt de huidige versies van systeembestanden met de versies die zijn opgeslagen in een cache, en vervangt, beschadigde bestanden door goede kopieën. Het SFC hulpprogramma kan worden uitgevoerd vanaf het Opdrachtprompt, en is handig voor het verhelpen van problemen met ontbrekende of beschadigde systeembestanden die fouten of systeeminstabiliteit kunnen veroorzaken.
SFC uitvoeren
Open het Opdrachtprompt als administrator. Geef het volgende commando in:
SFC /scannow
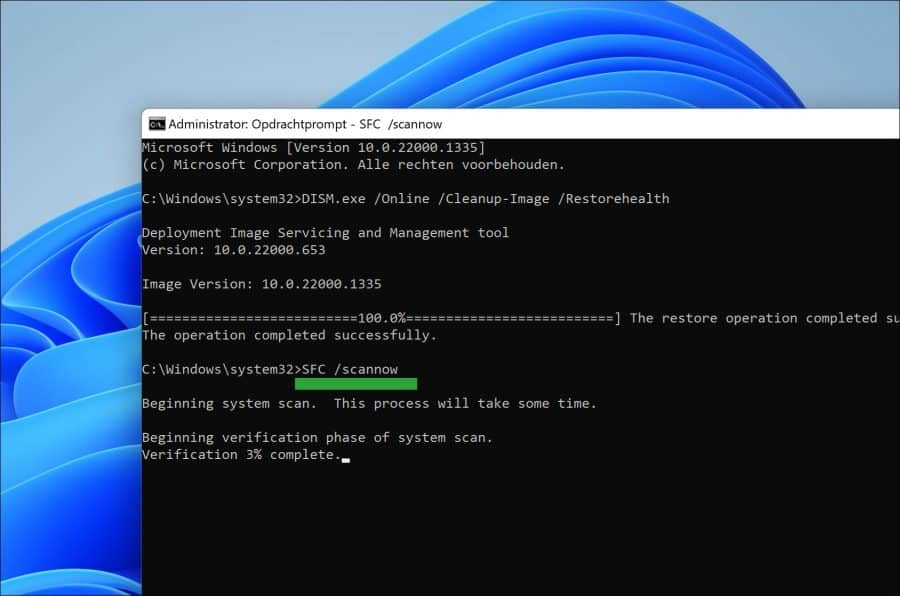
Wacht tot SFC is afgerond.
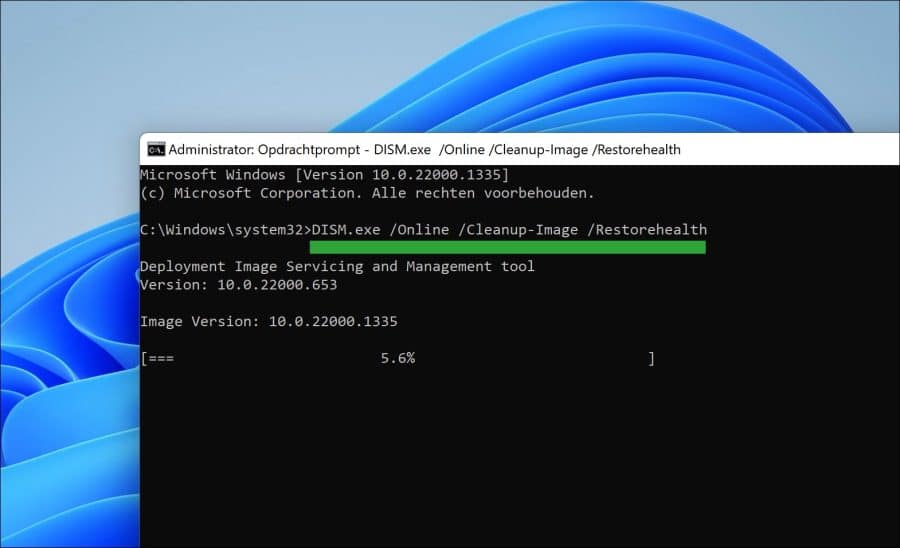
DISM uitvoeren
Open het Opdrachtprompt als administrator. Geef het volgende commando in:
DISM.exe /Online /Cleanup-Image /Restorehealth
Als er problemen worden gedetecteerd dan zal SFC of DISM zelf oplossen.
Ik hoop dat het hiermee is gelukt om de rechtermuisknop in Windows 11 weer te laten werken. Bedankt voor het lezen!
❤️ Help mee en deel
Voordat u verdergaat, zou ik het waarderen als u overweegt mijn werk te steunen. In tegenstelling tot veel grote websites is er op PC Tips geen betaalmuur die lezers blokkeert, maar daardoor is uw steun des te belangrijker.Als u onafhankelijke initiatieven zoals deze waardeert, overweeg dan alstublieft om mij te steunen, zodat ik kan blijven doen wat ik met plezier doe. Deel mijn website PC Tips op andere websites, social media of binnen uw eigen netwerk. Hartelijk dank.
🙂 Overzicht met computertips
Bekijk ook mijn uitgebreide overzicht met praktische computertips, overzichtelijk gesorteerd per categorie.