

A scrolling screenshot allows you to capture content that extends across the screen. Here's how to take a scrolling screenshot in Windows 11.
Just like older versions, Windows 11 also has a screenshot function. To take a screenshot, you need to press the Print Screen button on your keyboard. Windows will then immediately capture the screen and copy it to the clipboard.
You can then paste it and save it using a program like Paint, Photoshop, etc. Of course, you can also use a few other keyboard shortcuts like Win + PrintScreen and Alt + PrintScreen to automatically save screenshots to the Pictures folder.
The built-in screenshot function is good for capturing the entire screen, a specific area or an active window. But what if you want to capture a web page or content that expands the screen window with scroll bars? In that case, you can take a scrolling screenshot in Windows 11.
In Windows 11, there are several ways to take a screenshot of an entire page. All these ways require you to use third-party software. For example, to capture a web page, you can use an extension. To take a long screenshot in an application, you can use Windows software such as ShareX.
Take a screenshot of the entire web page
Google Chrome
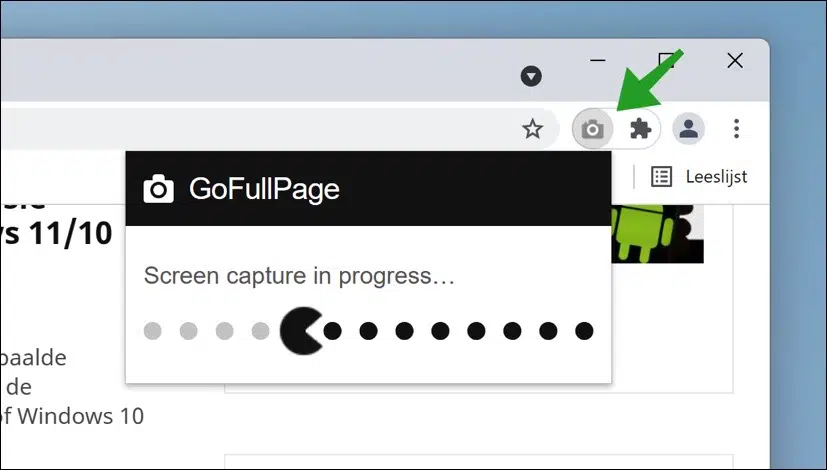
To take a screenshot of an entire web page, you can use the browser extension GoFullPage. Download and install the extension from the Chrome WebStore.
After installation, click on the camera icon at the top right of Google Chrome and the screenshot of the entire web page will be taken.
Then click on the download icon and the full screenshot of the website will be downloaded. You can then edit this image using your favorite photo editing program.
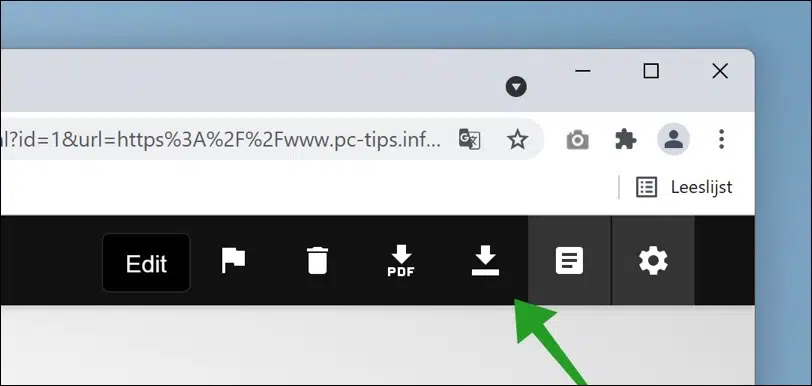
This is a brief explanation of the GoFullPage browser extension, there are even more options and features that this extension has to offer. For example, you can click the “Edit” button to edit the screenshot. You can delete the image directly by clicking on the trash can icon or save the image directly and download it as a PDF file to your computer.
Microsoft Edge
Microsoft Edge users can use the popular “Awesome Screenshot” extension to take an entire website screenshot.
It allows you to take various types of screenshots, record videos, edit them directly in the browser with annotation tools, upload to cloud services, share to popular websites and save files locally.
To take a full screenshot of an entire web page, click the Awesome Screenshot icon in the taskbar in Microsoft Edge. Then click on the Capture tab. You will now see three different options to capture parts, the entire web page or a selection of the website.
It is also advisable to change “Save image to” to what you prefer. You can choose from Cloud and Local. If you choose Cloud, you must create an account, then with each screenshot you will receive a link to the image that you can share. If you choose local, the screenshots will be saved locally on your computer.

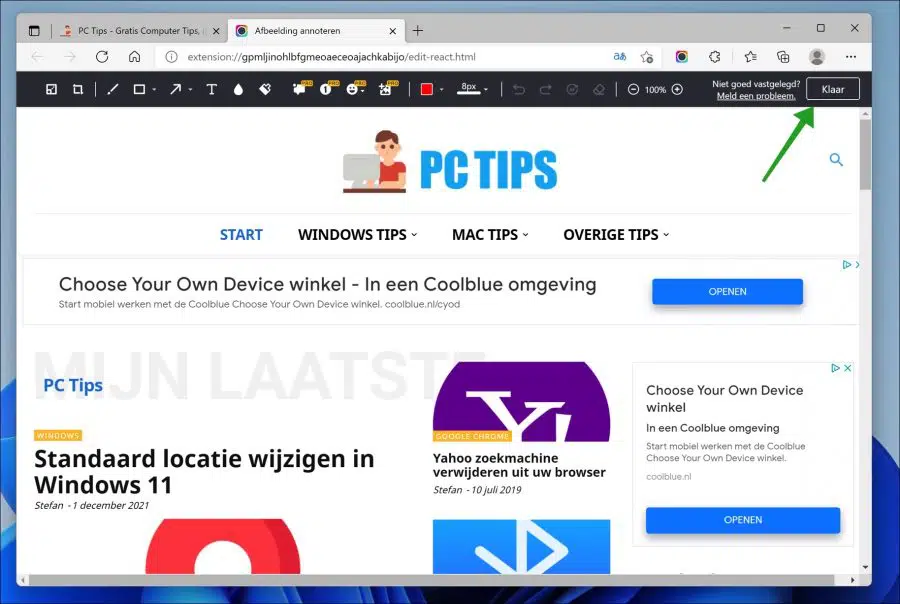
Once you have taken a screenshot, you will then be taken to the editor. There you can make adjustments to the image by using the desired tool at the top to edit the image. When you are ready, click on the “Done” button at the top right.
When you're done, you can save the screenshot to your computer, turn it into a PDF file, print or copy the image. If you wish to download the file to your computer, click on the “Download” icon.
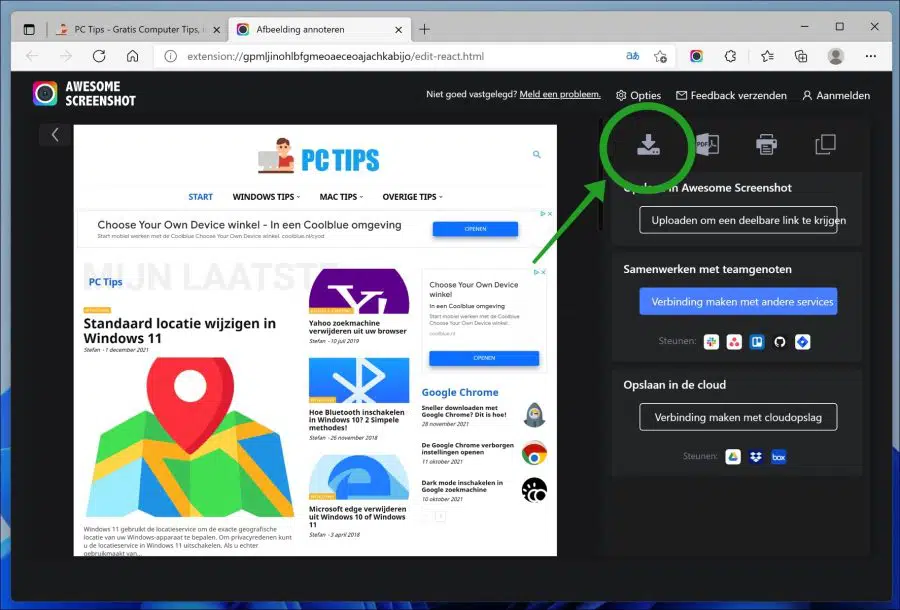
You now have an image of an entire website that you can edit on your computer.
ShareX
If you want to use a Windows application, ShareX offers an easy way to take full screenshots. ShareX is a simple yet powerful open-source screenshot and screen recorder app for Windows.
It is an advanced app with which you can do much more. There are plenty of features you can use. I will now focus solely on the “Scroll Recording” function.
Open ShareX. Click on “Capture” at the top left and then “Scroll recording”.
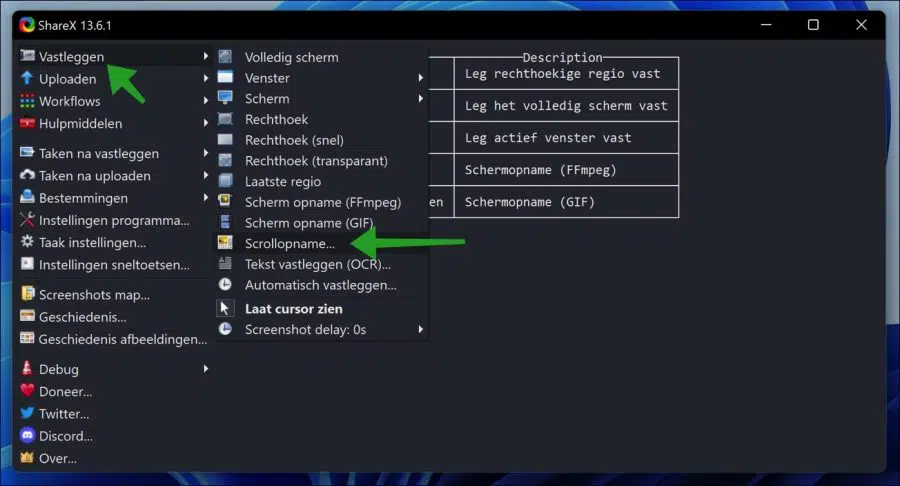
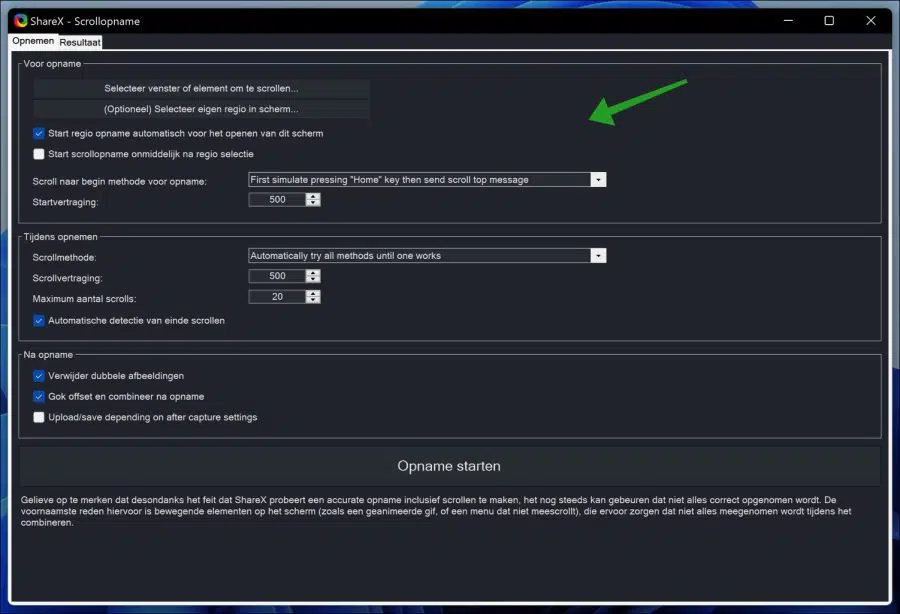
Then you need to select a window or an element that you want to scroll and create an image of. Then a window will be shown with many different adjustments, so you can adjust the scrolling method, the scrolling delay and the maximum number of scrolls. In principle you can leave everything as it is, no immediate adjustment is necessary. Then click Start recording.
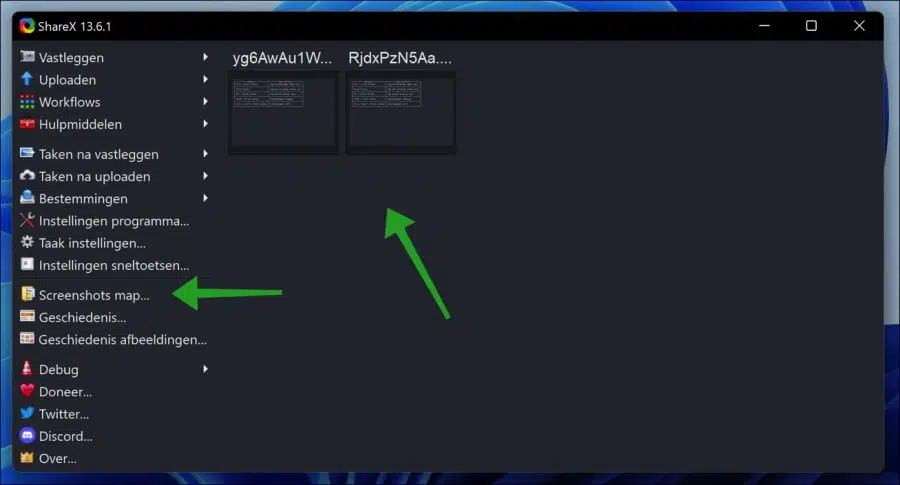
If the recording is successful, you can save the recording. By default, this recording is saved in the ShareX screenshots folder.

You will also see a small preview appear in the system tray, if you are quick enough and click on it, the screenshot you just took will open. If you are not fast enough, close the Scroll Recording window.
Go back to the settings and click on “Screenshots folder”, the screen recordings folder will now open. You will also see the samples appear in the window.
I hope this has succeeded in creating one take screenshot of an entire web page or a part in Windows 11 itself. Thank you for reading!
Lees meer: