

In Windows 11 and Windows 10, apps and some features have services that run in the background, usually without a user interface.
Some of the core functions of the Windows operating system run on services. File management, printing, Windows Updates, Windows Search and others are all powered and controlled by services.
Some services start automatically when Windows starts. Others are also designed to start only on request. Some services start when they are started or are delayed until after all other services have started.
Some services also have dependent services. When you stop a parent service, the child or dependent service will also be stopped. Enabling a service will not necessarily enable a dependent service.
These are some basic facts you need to know about Services in Windows.
Different startup type of services
As mentioned above, services are important for the smooth functioning of Windows. However, there may be times when you need to manually enable or disable a service on request.
These are the different ways services are started in Windows:
- Automatic – A service in this state is always started during Windows startup.
- Automatic (delayed start) – A service in this state starts just after startup when other important services are starting.
- Manual – Manual status allows Windows to start a service only on request or when it is started manually by a user or a service that specifically handles user interactions.
- Disabled – This setting prevents a service from starting even if necessary.
Enable service in Windows
Now that you know the different startup types for a service in Windows, let's see how that works.
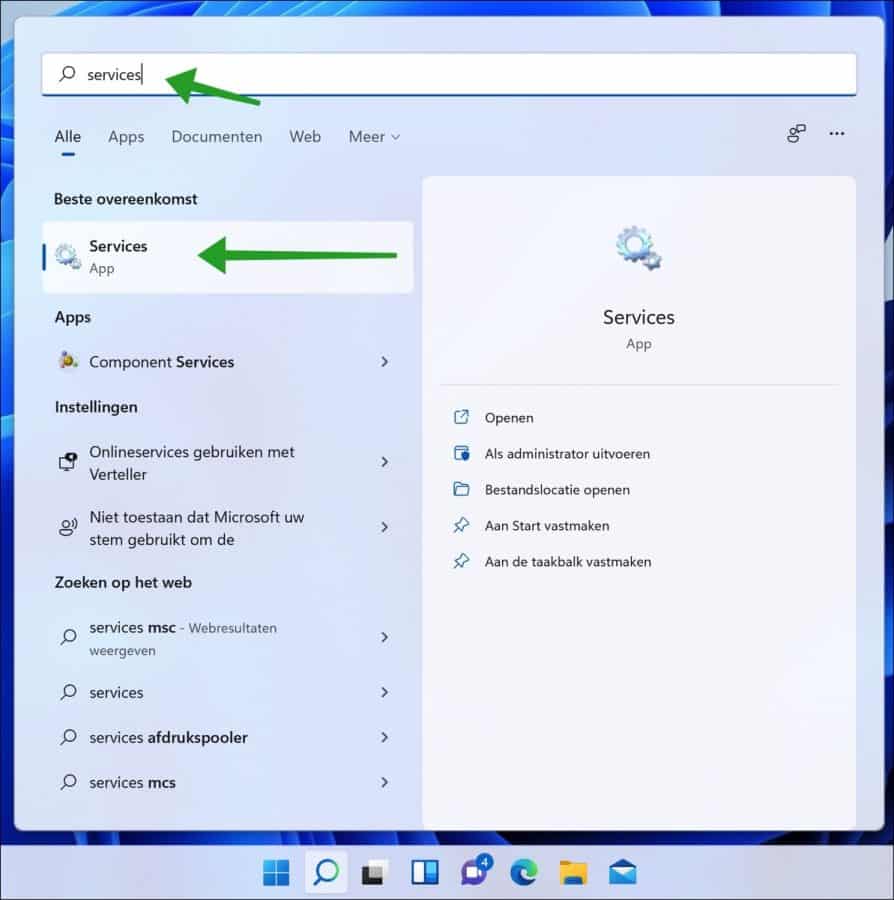
First start the services app. You can do that in several ways: One way is to click the Start button, then search for Services, under Best Match, select Services App.
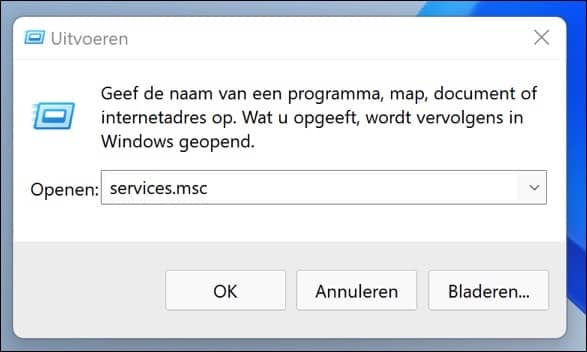
Alternatively, you can press the Windows key + R on your keyboard to open the Run window. In the run window type: services.msc and confirm with the enter key.
You must be logged in as an administrator to enable and disable services.
To change the startup type of a service, double-click the service you want to enable or disable to open the properties of a specific service.
In the service properties window, you can change the service startup type to Automatic or Automatic (delayed start).
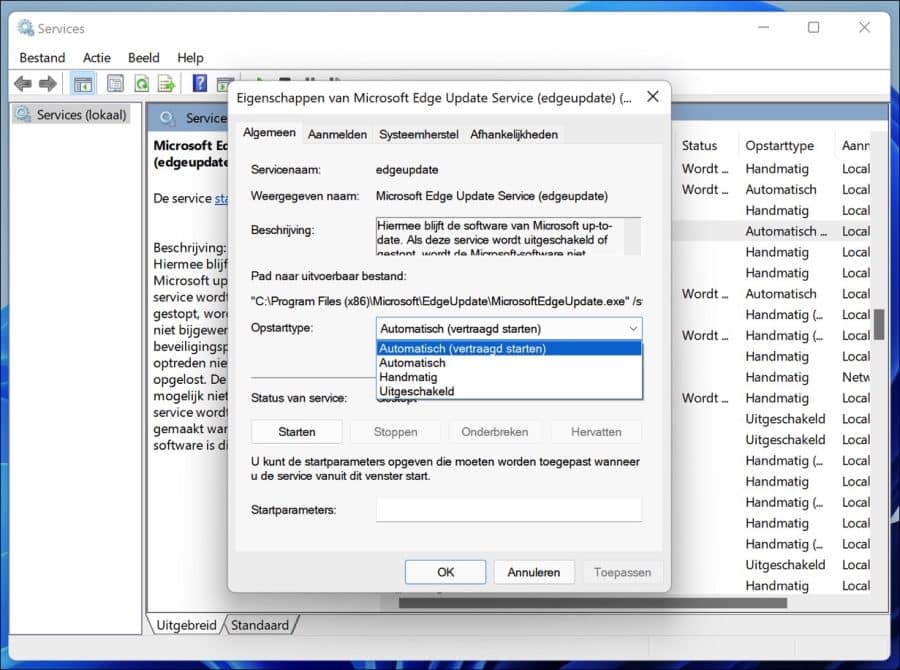
To enable a service directly, click the Start button in the properties window.
Click the Apply button and then OK to apply your changes and close the properties window.
Disable service in Windows
To disable a service, reopen the service's properties window and then click the Stop button.
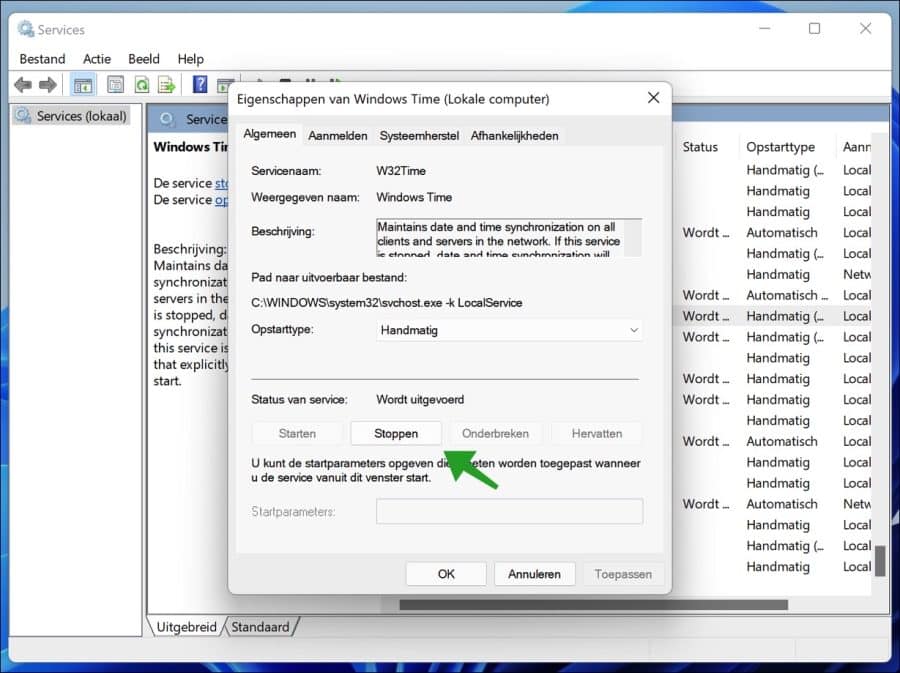
Then change the service's startup type to Disabled or Manual and click the Apply button, then OK to apply your changes and close the service properties window.
I hope this helped you. Thank you for reading!
My file explorer starts automatically at startup (windows 11)
Hello, try the following tips.
1. Press Ctrl + Shift + Esc to open the Task Manager. Click on the “Startup” tab. Search for “Windows Explorer” in the list. If it is enabled, right-click on it and choose “Disable”.
2. Press Win + R to open the “Run” window. Type “shell:startup” (without quotes) and press Enter. Check whether there is a shortcut to Windows Explorer in the “Startup” folder. If there is, remove it.
3. Press Win + E to open File Explorer. Click “View” in the menu bar and check “Navigation Pane”. Click on “Options” in the menu bar. In the “Folder Options” window that appears, select the “General” tab. Under “When opening File Explorer”, choose “This PC” instead of “Quick access”.
Success!
Which service in Windows 11 controls media streaming.
Hello, this is “Windows Media Player Network Sharing Service” (abbreviated: WMPNetworkSvc)
Success!