

Microsoft is testing one at the time of writing new theme in the insider previews (“developer”) version of Windows 11. This is the Windows Spotlight theme.
Windows Spotlight is a theme that uses a dynamic background with images sourced from Bing. This Bing background images are then used as background on the desktop and it lock screen.
You can recognize the Windows Spotlight theme in the “theme” settings by the camera icon. This icon tells you that you have set the Windows Spotlight theme. Next to this camera icon you will find a new icon on the desktop with “more information about this image”.
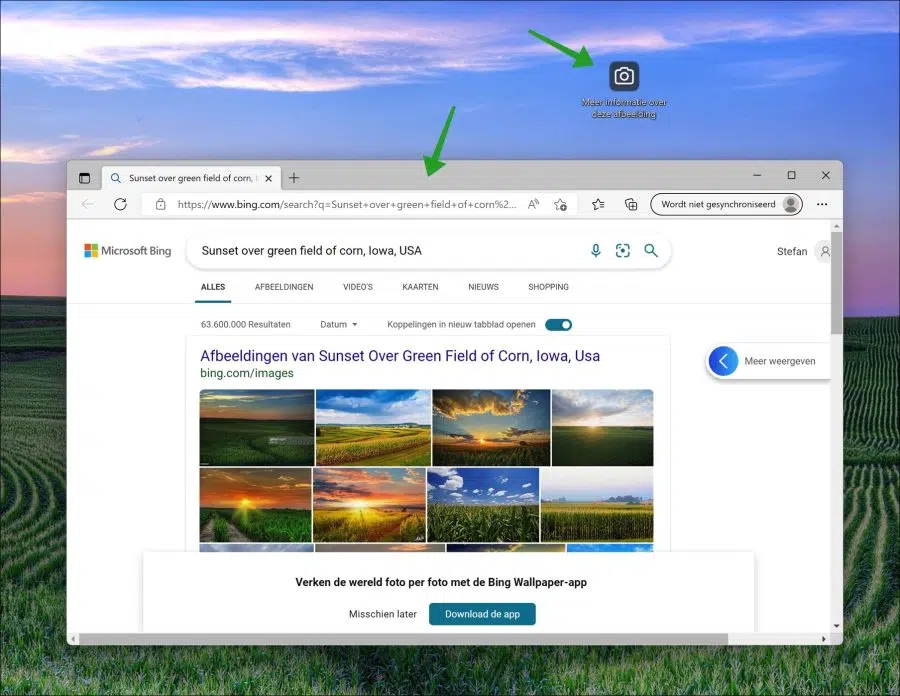
Clicking on it will open a new window in the Microsoft Edge browser that will open the Bing search engine with more information.
Again, at the time of writing this article, the Windows Spotlight theme is not yet available for the release version of Windows 11. However, it is expected that this will happen.
If you have installed the Windows 11 insider preview 25163 in the developer channel, you can already activate Windows Spotlight.
Set up Windows Spotlight theme on a Windows 11 PC
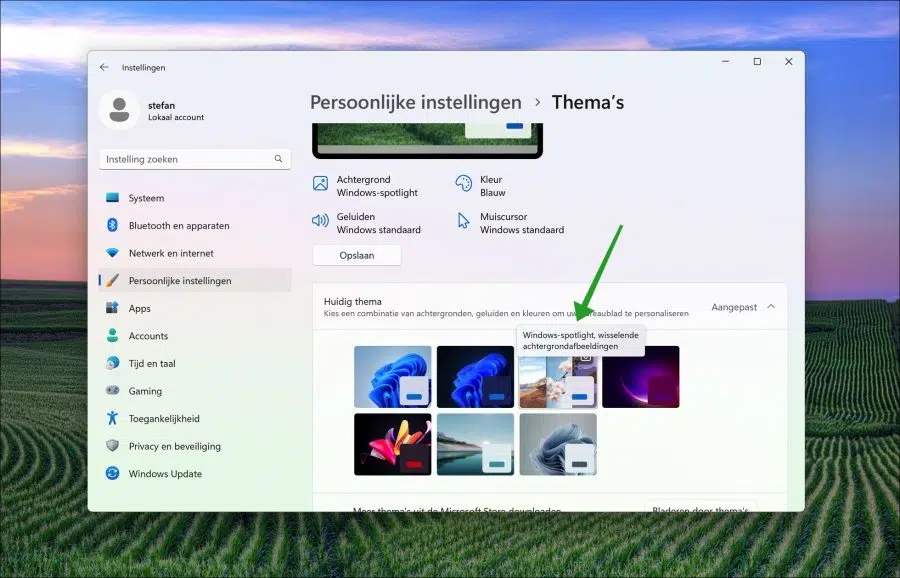
Right-click on the Start button. In the menu, then click Settings. In the settings, click on “personal settings” on the left. Click “Themes” to select a Windows 11 theme.
Click on the “Windows Spotlight” theme to set up this new theme.
If you don't see this theme, you can add it via ViveTools. Download ViveTools to your computer.
Unzip the files and place them on the desktop, for example. Now open a Windows Terminal window as administrator and go to the folder where ViveTools.exe is placed.
In the Terminal window enter the following command:
vivetools.exe /enable /id:39258685
Now restart your computer. After the restart, you can set the Windows Spotlight theme via the theme settings.
I hope this helped you. Thank you for reading!