

With a Mac user account you can log in to your Mac computer. By default, your Mac already has one user account, which you had to create when you set up your computer. If you plan to share your computer with others, you can create a separate user account for each person.
At this point you might be wondering why you might even need to use separate user accounts. If you share a computer with multiple people, for example with your family or at the office, everyone can save their own files, preferences and settings without affecting other Mac users.
When you get your Mac computer starts up, you can choose which account you want to use.
In macOS you can easily manage different accounts. You can manage these different accounts from an administrative account in macOS.
In this instruction I will explain step by step how you can manage Mac accounts in macOS.
Manage user accounts and administrator accounts in Mac
Add user to Mac
To add a user to Mac, click on it Apple icon () in the top left corner and click System Preferences from the menu.
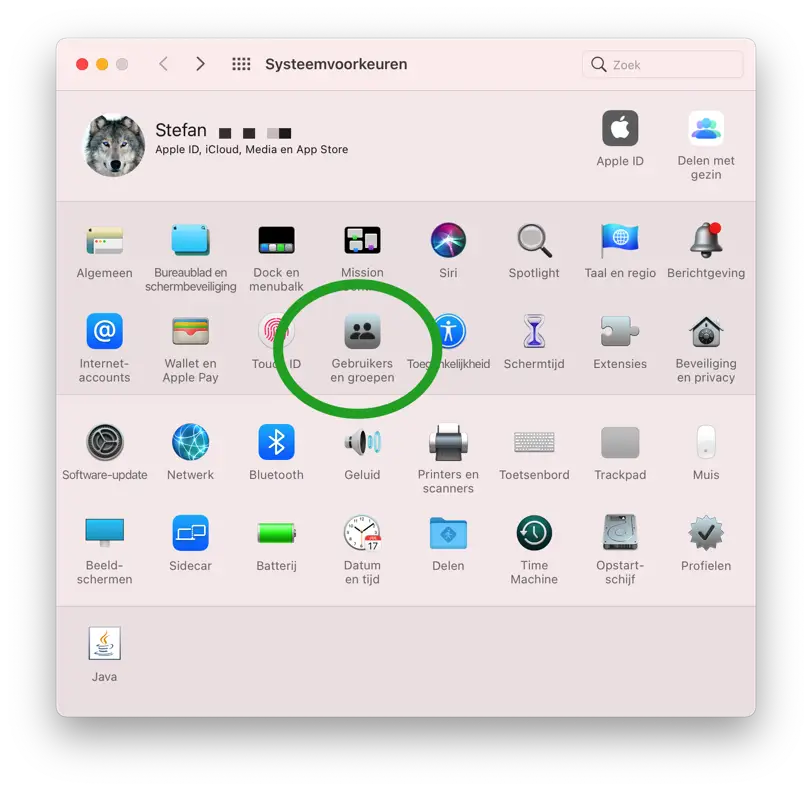
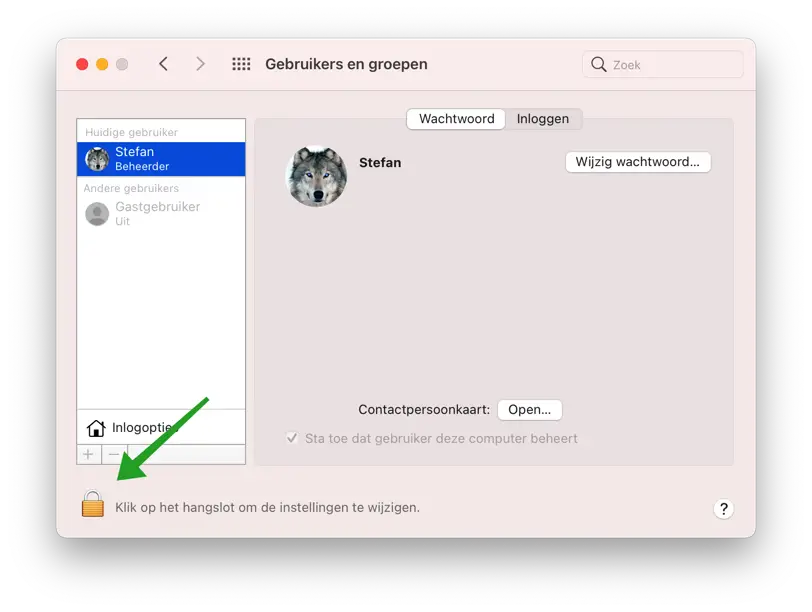
Click on Users and groups to open the user menu. Then click on the Padlock to unlock the users and groups settings. After unlocking, you can add a user or administrator account to macOS.
You need your Mac's administrator password to unlock the Users and Groups settings.
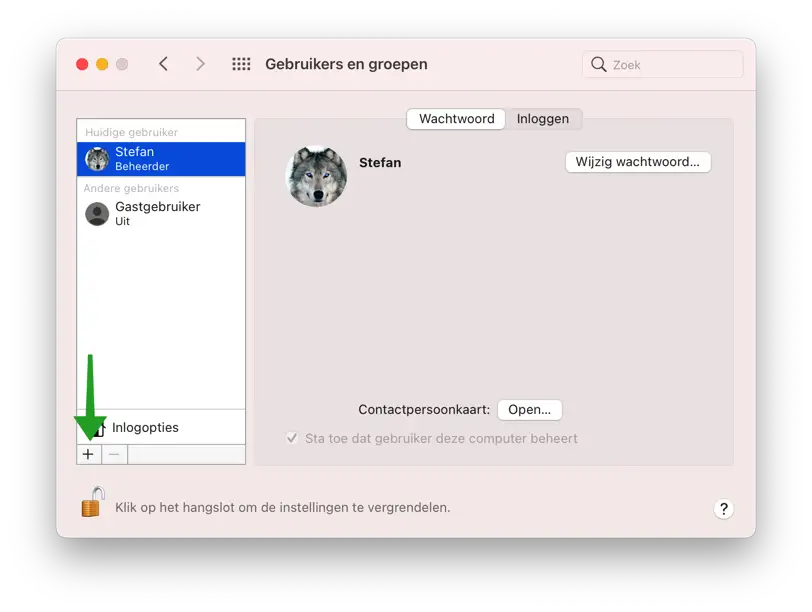
After you have unlocked the user settings, click on the + icon in the menu.
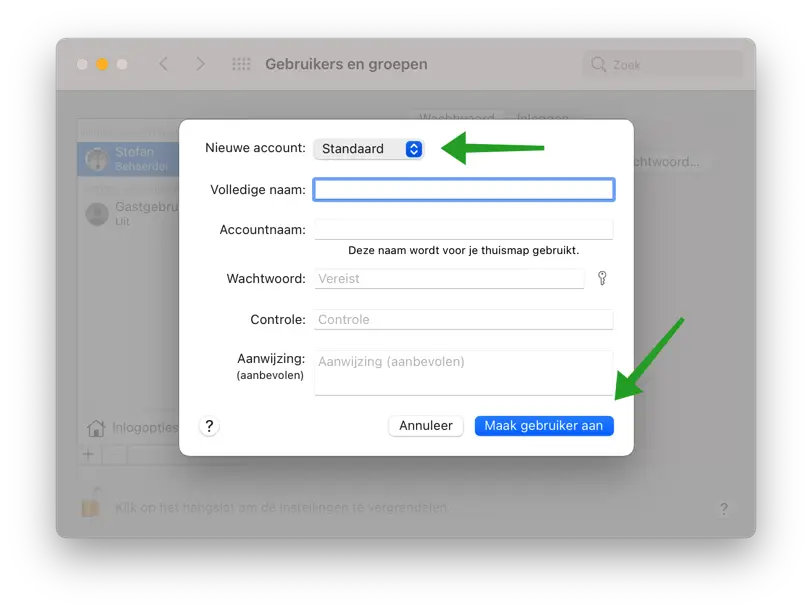
You can now create 3 different accounts. Namely an Administrator account, a User (standard) account and a Share Only account.
Administrator account
An administrator account is the administrator of the Mac computer and can do everything within macOS.
Standard account
A Standard account is an account with limited rights. A Standard account can install its own apps and change its own settings within macOS, but not system settings and settings of other Mac users.
Share account only
A sharing-only account cannot log in to macOS. This account can only use services within macOS that are defined by the administrator. This includes only access to shared files or folders, only access to screen sharing and only access to remote management. All these settings can be set in the Sharing settings via the System Preferences panel.
Let's start by creating an account in macOS.
To start, you must enter a full name. This is not your username. You will then be asked to enter an Account Name, which is your username. This name also becomes users' home folder, for example /Users/your-account-name/.
Enter an identical password twice for the new account in macOS and, if necessary, a password prompt in case the person has forgotten the password.
Then click Create user.
The new user account has now been created and visible in the left menu.
Change user account image
If you want to change the image of the account. Click on the image and choose Change.
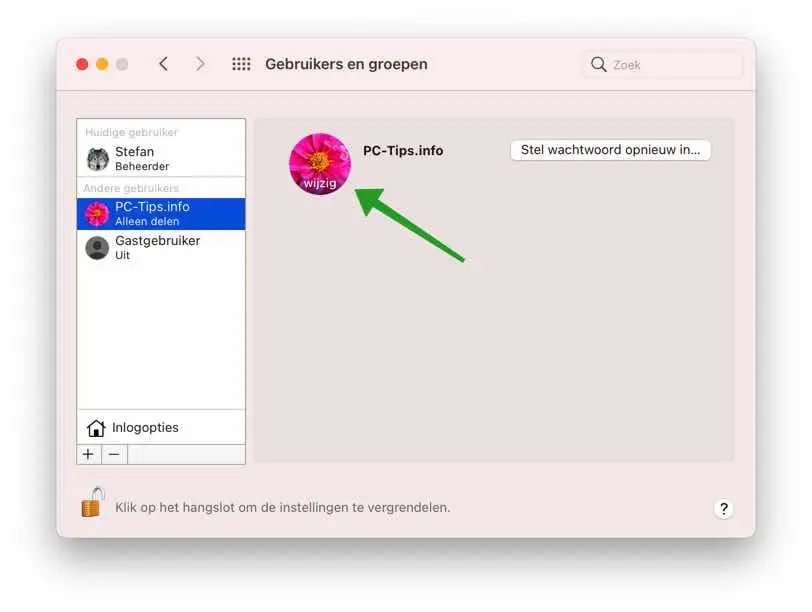
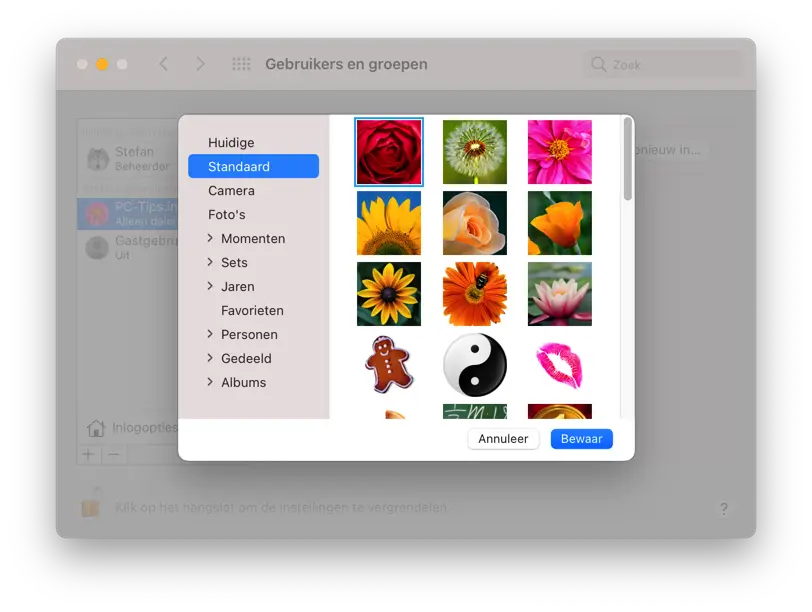
You now have a choice of several images.
Delete user account from Mac
To create a user account remove from Mac you must be logged in with an administrator account. A standard user account in macOS cannot delete accounts.
Please click on it Apple icon () in the top left corner and click System Preferences from the menu.
Click on Users and groups to open the user menu. Then click on the Padlock to unlock the users and groups settings. After unlocking, you can delete a user account from macOS.
You need your Mac's administrator password to unlock the Users and Groups settings.
After you have unlocked the user settings, click on the user account you want to remove from your Mac and then click on the – icon in the menu bar.

You will be asked what you want to do with the home folder of the user account you want to delete. The Home folder contains folders for the files you keep on the desktop, as well as for downloads, pictures, documents, movies, music, and other public files.
If you want to keep this, you can choose Save the home folder in a disk image. You can also leave the home folder existing and only delete the user account, then choose Do not change the home folder. If you want to permanently delete all files and folders belonging to this user, choose Delete the home folder.
Make your selection and click Remove user.

Enable guest account in Mac
A guest account is a temporary account that anyone who has physical access to your Mac can use (if enabled, of course).
No password is required for the Guest account and settings are not saved. If a logged in Guest user logs out of macOS, all settings will be deleted. Logging in remotely to a Guest account is also not possible.
After enabling the Guest account in your Mac, you can decide for yourself which folders these Guest user has access. You can also restrict access to explicit websites.
To enable the Guest account on your Mac, you must be logged in with an administrator account. A standard user account in macOS cannot enable the Guest account.
Please click on it Apple icon () in the top left corner and click System Preferences from the menu.
Click on Users and groups to open the user menu. Then click on the Padlock to unlock the users and groups settings. After unlocking you can enable the Guest account.
You need your Mac's administrator password to unlock the Users and Groups settings.
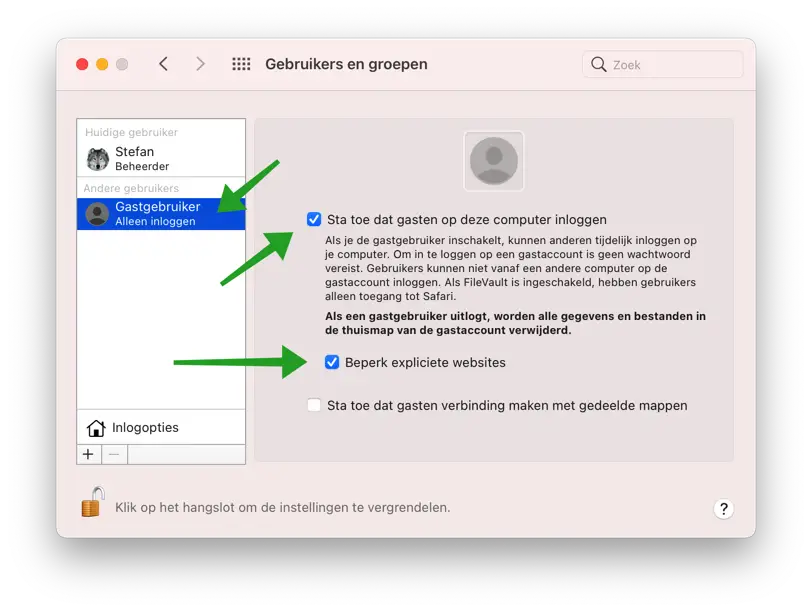
After you have unlocked the settings, click on the Guest user account in the Other users menu.
Enable the option: Allow guests to log in to this computer. If necessary you can also make explicit ones block websites by enabling the option: Restrict explicit websites.
At the bottom you will find the option: Allow guests to connect to shared folders. You can define these folders and assign them to the Guest account via the Share menu in the Mac System Preferences.
Change login options
When you log in to your Mac you will see certain options that map to the login window. You can change these login options via the Users and groups settings on your Mac.
Please click on it Apple icon () in the top left corner and click System Preferences from the menu.
Click on Users and groups to open the user menu. Then click on the Padlock to unlock the users and groups settings. After unlocking you can change the login options.
You need your Mac's administrator password to unlock the Users and Groups settings.
Automatic login
You can automatically log in to your Mac by selecting the User account. If Auto Login is not available then you are either logging in with an iCloud ID or you have FileVault enabled for the drive.
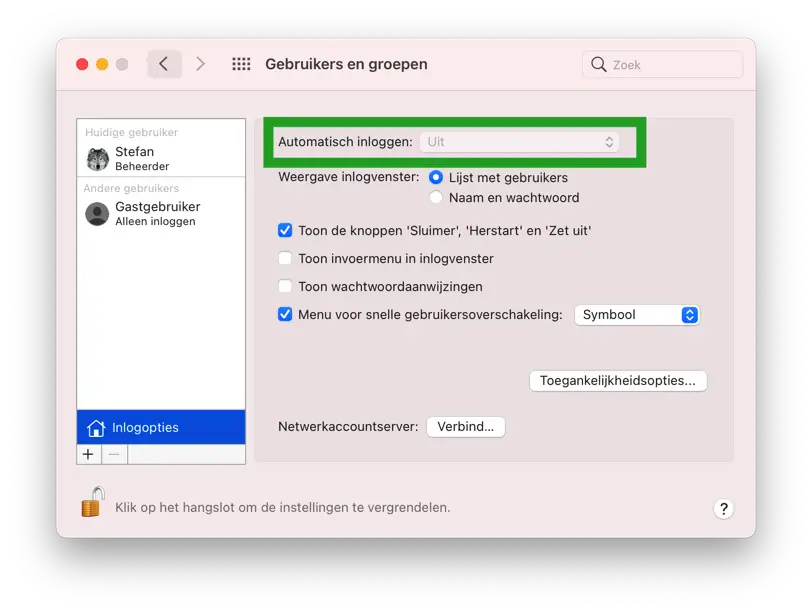
Change login window display
By default, users are displayed in a list, if you prefer to display name and password then enable this option.

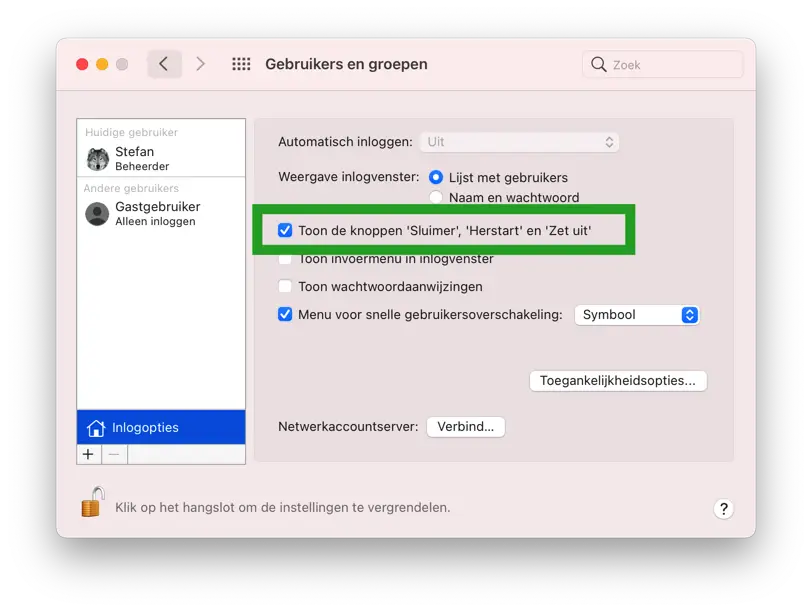
Show the Sleep, Restart and Shutdown buttons
If you enable or disable this option, the buttons will be shown or hidden in the Mac login window.
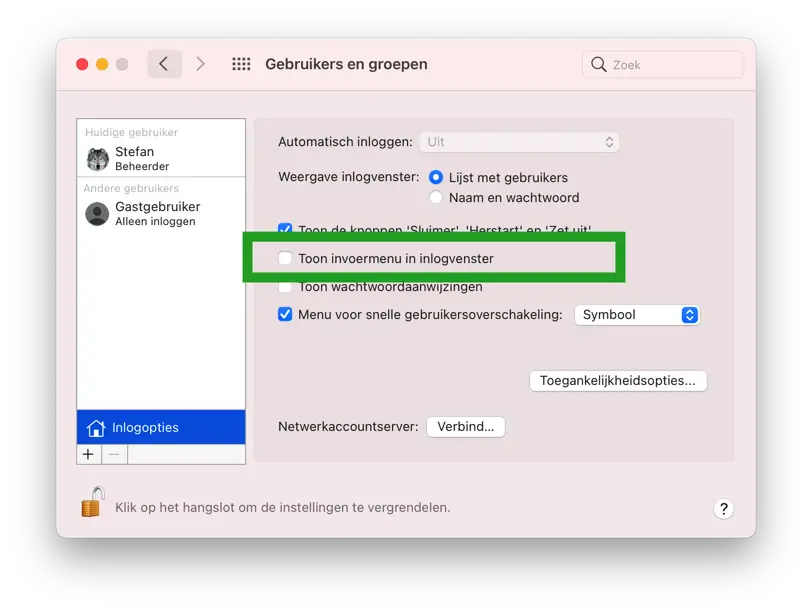
This option allows you to display and change the language of your keyboard via the login window.
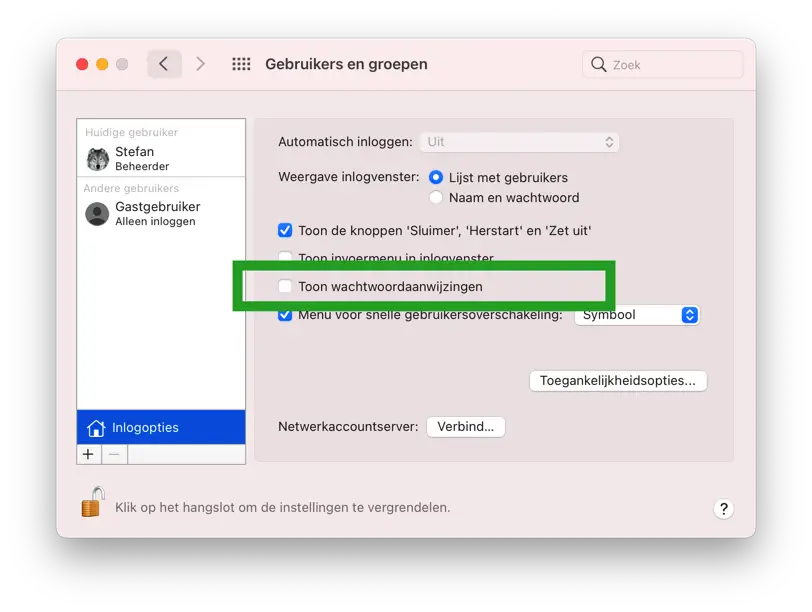
Show password prompts
If the administrator account or user account has set a password prompt, this prompt will be displayed with this option in the login window.
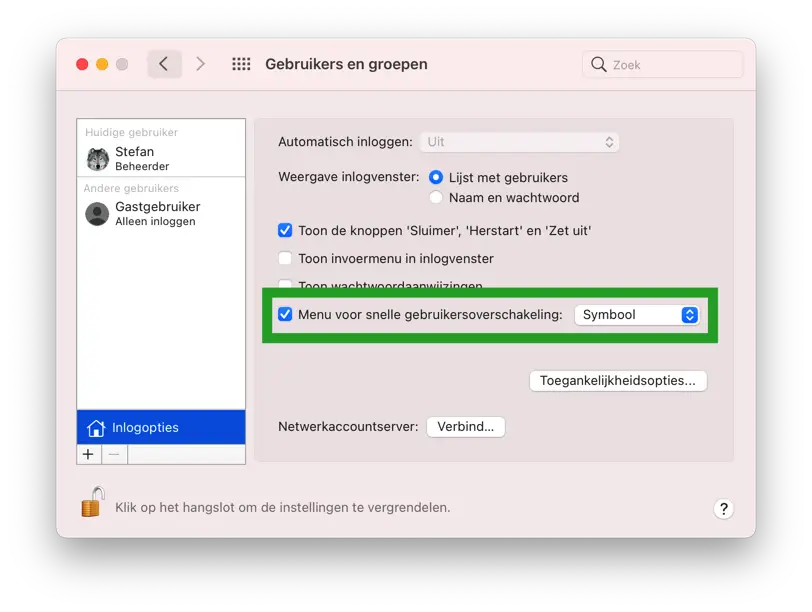
Quick user switching menu
By default, an icon of the user is displayed at the top right of the login window. If you want to change this to full name or account name, you can change it in this setting.
 Lees meer: Make Mac faster.
I hope this helped you. Thank you for reading!