

Microsoft Word is easy to take for granted, despite its reputation as an easy-to-use word processor.
But even regular Word users may not realize how powerful the program is, or how many features it has beyond the simple editing commands we all know.
These are 5 different tips that can help you in Microsoft Word.
These are 5 useful tips for Microsoft Word
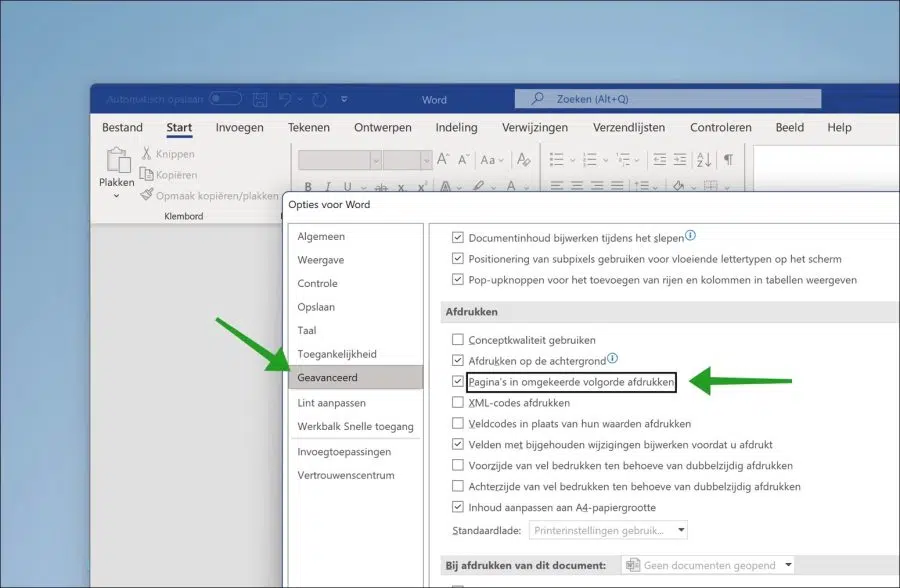
Print pages in reverse order
If you regularly print pages via Word, you know that the first printed page always ends up at the bottom of the stack. This is not a problem if you are going to print a few pages, you can simply sort them again yourself. However, it becomes annoying when you print dozens or hundreds of pages. Sorting it back then becomes a tedious job.
To prevent this, you can print pages in reverse order. The last page is then printed first. The result is that the first page is also at the top of the stack.
Open Word. Click File and then Advanced. In the Advanced settings, navigate to “Print”. Then enable the option “Print pages in reverse order” and then start printing.
Disable automatic bulleted or numbered lists
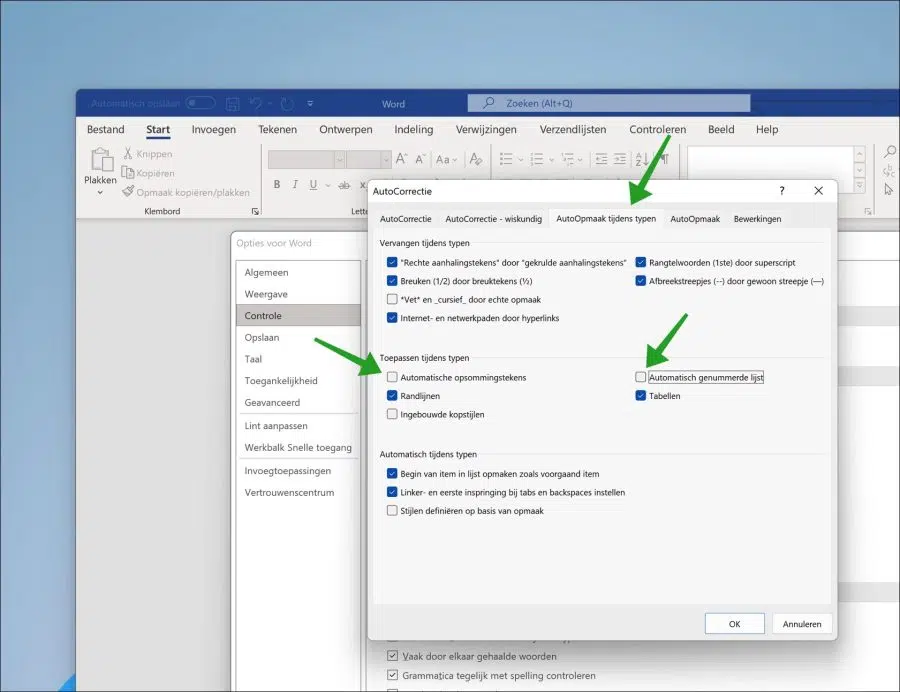
When you are typing in Word and you start typing a “*” or a “1.”, Word recognizes that you are building a bulleted list and automatically fills it in as a bullet. If you want to disable this automatic formatting, you can do this as follows.
Open Word. Click on File in the menu and then on Options. In the Options, click on Control on the left and then on Autocorrect Options.
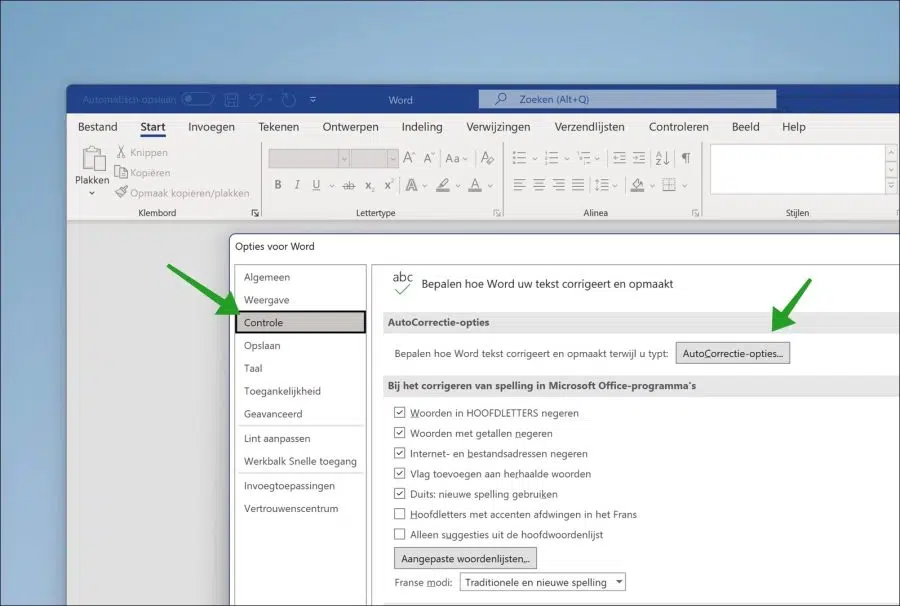
In the Autocorrect options, click on the “AutoFormat As You Type” tab. Disable the auto formatting options “Automatic Bullets” and/or “Automatic Numbered List”.
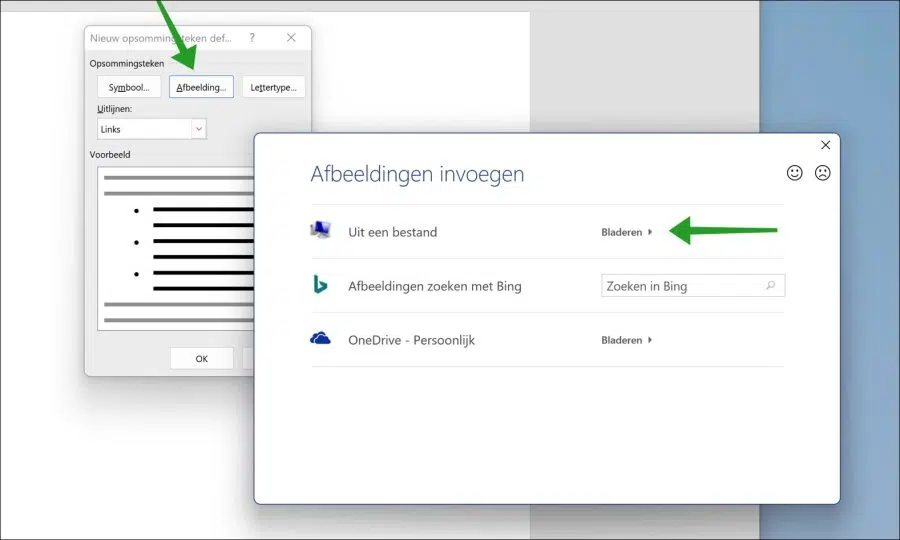
Use image as bullet point
By default, a bullet point is a circle or a number. You can also use an image as a bullet point yourself. For example, if you have created a bullet point yourself, you can use it as an image.
Click on the down arrow in the ribbon to the right of the bullet point. Here you will see the library of some predefined bullet points that you can use. If you click on the “Define new bullet” button, you can select an image yourself.
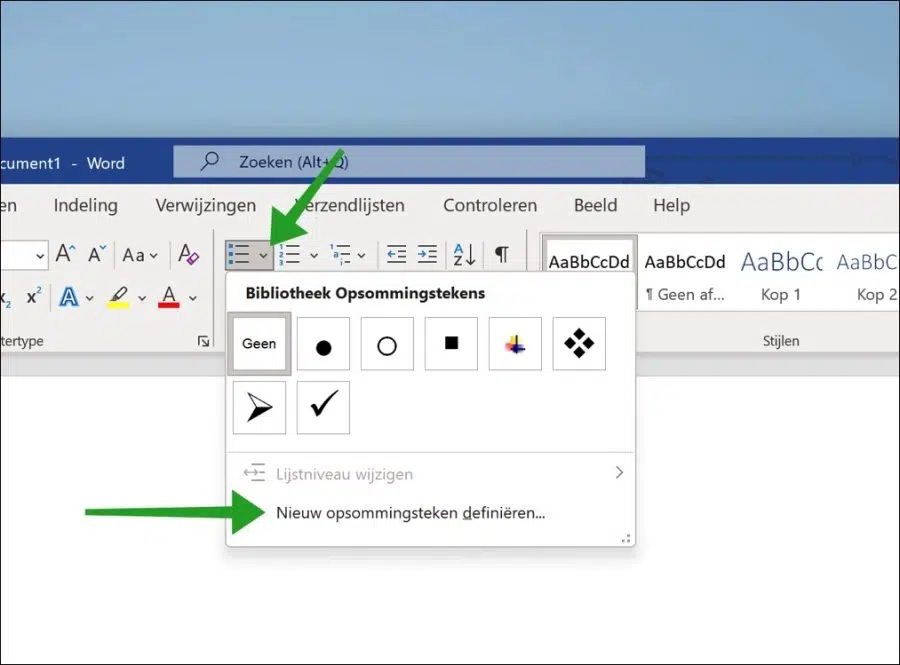
To do this, click on the “Image” button. You can now insert an image. You can retrieve this image from a file, search with the BING search engine or via OneDrive.
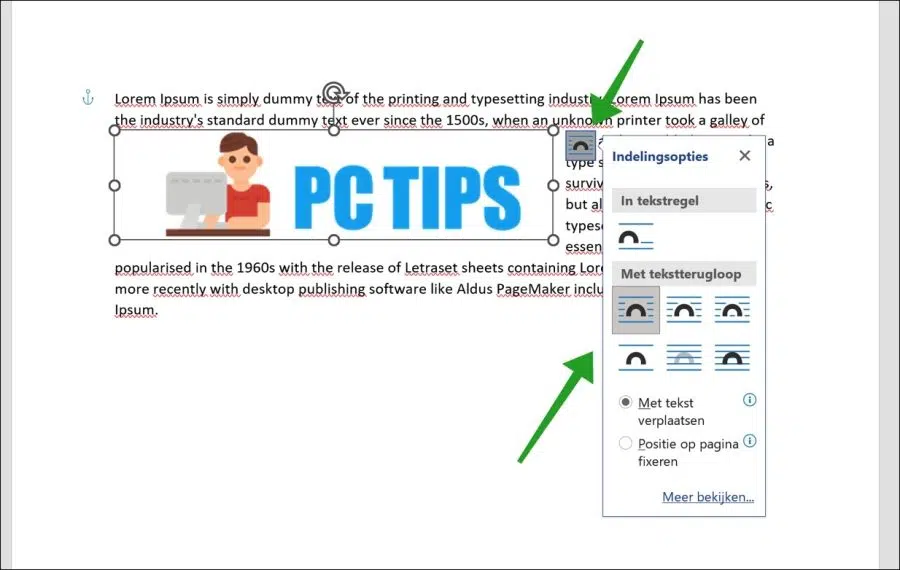
Place text around image
Placing text around an image in Word is not very difficult, but it does require a specific example of how you want it to be. Once you have a clear idea of how you want the text to wrap around an image, so to speak, you can adjust this via the layout, text wrapping and position settings.
All layout options and positions give you an instant preview in Word of how the text will wrap around the image. I assume you have already inserted text and an image into a document.
Click on the image. Then click on “Layout Options” in the menu. You will now see a “with text wrapping” menu with different layouts for how to place the text around the image. Every time you click on one of these options, you will immediately see what it will look like in the document.
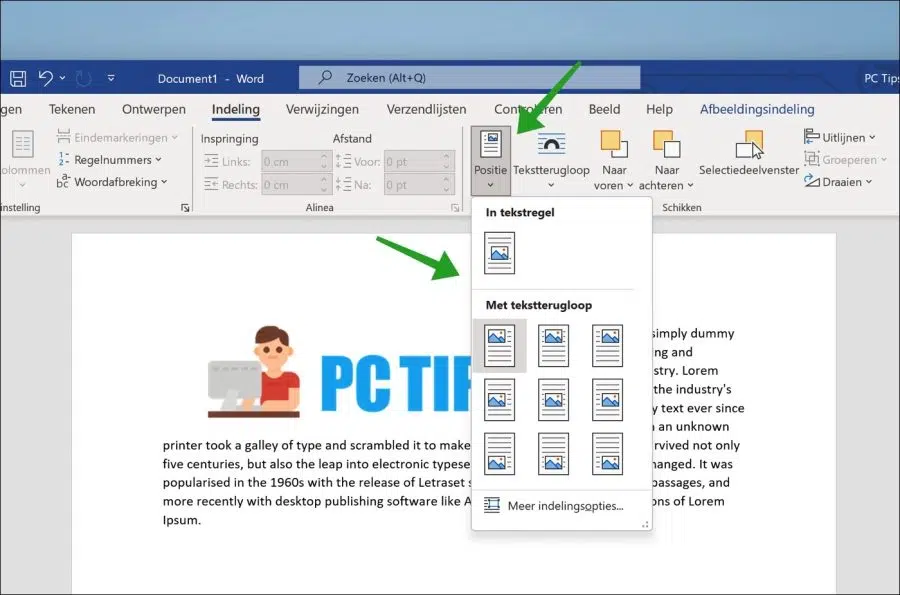
To test different positions for the image in the document, click on “Positions” in the menu. You can now set different positions for the image. The text will then appear around the image, depending on the position chosen.
Automatically insert time and date field
In Word, you can quickly add the time and date to a document with a key combination. This is a dynamic field by default. This means that every time you save the document, the time and date will be adjusted to the current time and date set on your computer.
To add the current date (set on your PC) to a Word document, press the ALT + SHIFT + D key combination.
To add the current time (set on your PC) to a Word document, press the ALT + SHIFT + T key combination.
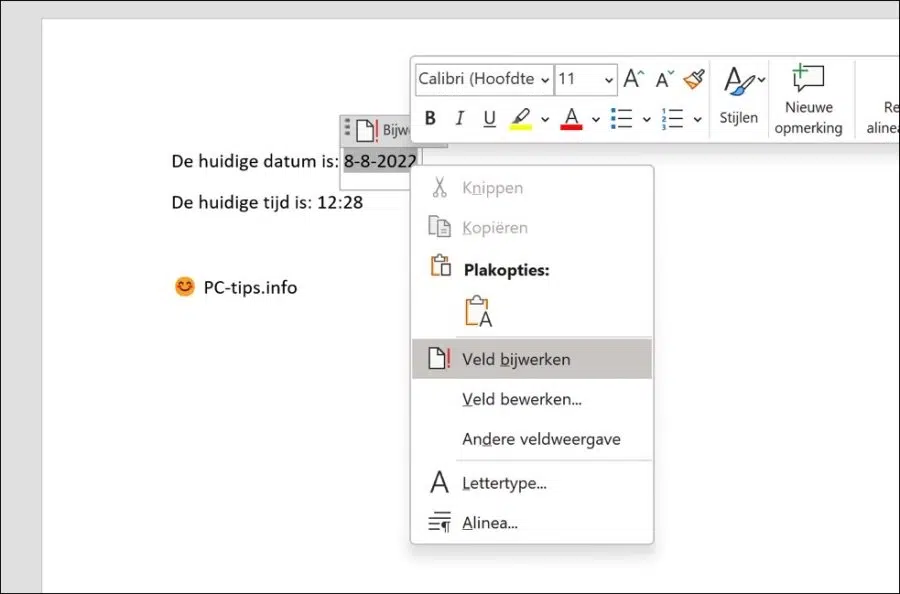
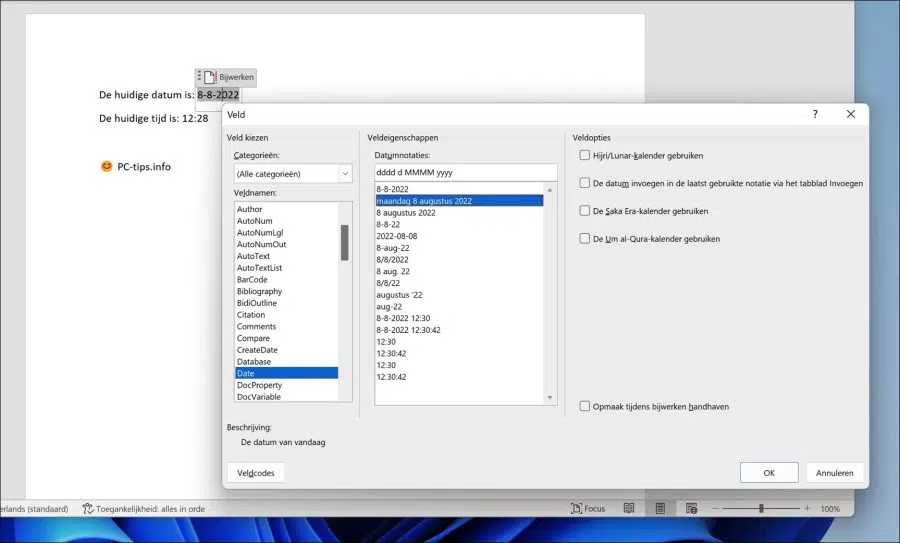
If you want to change the format of this date or time, right-click in the field and click “edit field”. If you click on “update field” you can change the date or time.
You can adjust the type of field, but also the date or time format. For example, displaying the day in writing instead of just the date as a number.
I hope to have informed you with this. Thank you for reading!
Also read: Edit secure Word document.