Microsoft Word wordt gemakkelijk als vanzelfsprekend beschouwd, ondanks zijn reputatie als gebruiksvriendelijke tekstverwerker.
Maar zelfs gewone Word gebruikers beseffen misschien niet hoe krachtig het programma is, of hoeveel functies het heeft naast de eenvoudige bewerkingsopdrachten die we allemaal kennen.
Dit zijn 5 verschillende tips die u kunnen helpen in Microsoft Word.
Meld u dan aan voor onze nieuwsbrief.
Dit zijn 5 handige tips voor Microsoft Word
Pagina’s in omgekeerde volgorde afdrukken
Als u regelmatig pagina’s via Word afdrukt dan weet u dat de eerste geprinte pagina altijd onderaan de stapel beland. Dit is geen probleem als u enkele pagina’s gaat printen, deze kunt simpelweg zelf terug sorteren. Echter het wordt vervelend als u tientallen of honderden pagina’s gaat printen. Het terug sorteren wordt dan een vervelende klus.
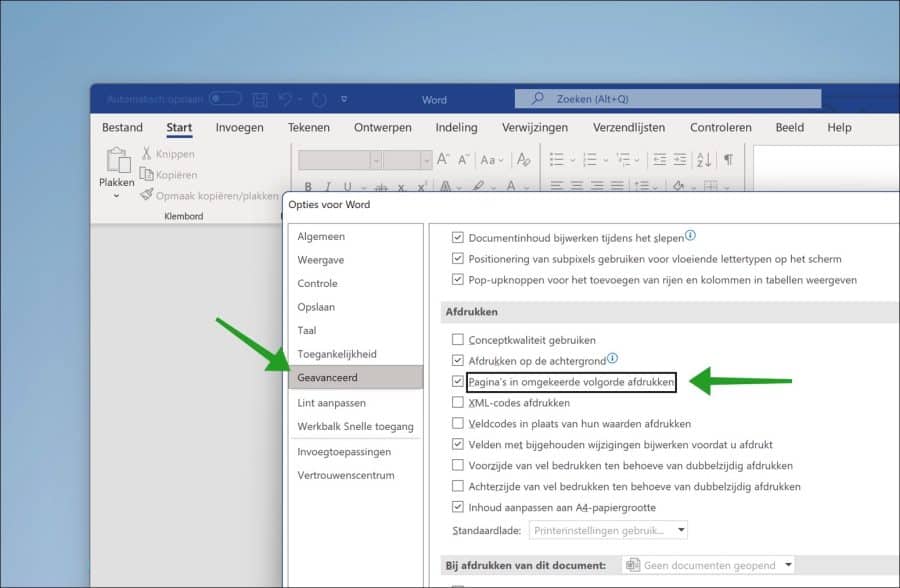
Om dit te voorkomen kunt u pagina’s afdrukken in omgekeerde volgorde. De laatste pagina wordt dan als eerste geprint. Het resultaat is dat de eerste pagina ook bovenaan de stapel ligt.
Open Word. Klik op Bestand en daarna op Geavanceerd. In de Geavanceerde instellingen navigeert u naar “Afdrukken”. Schakel vervolgens de optie “Pagina’s in omgekeerde volgorde afdrukken” in en begin daarna het afdrukken.
Automatische opsommingstekens of genummerde lijst uitschakelen
Als u in Word aan het typen bent en u begint met het typen van een “*” of een “1.”, dan herkend Word dat u een opsommingslijst aan het opbouwen bent en vult deze automatisch in als een opsommingsteken. Als u deze automatische opmaak wilt uitschakelen dan kunt u dit op de volgende manier doen.
Open Word. Klik op Bestand in het menu en daarna op Opties. In de Opties klikt vervolgens aan de linkerzijde op Controle en daarna op Autocorrectie-opties.
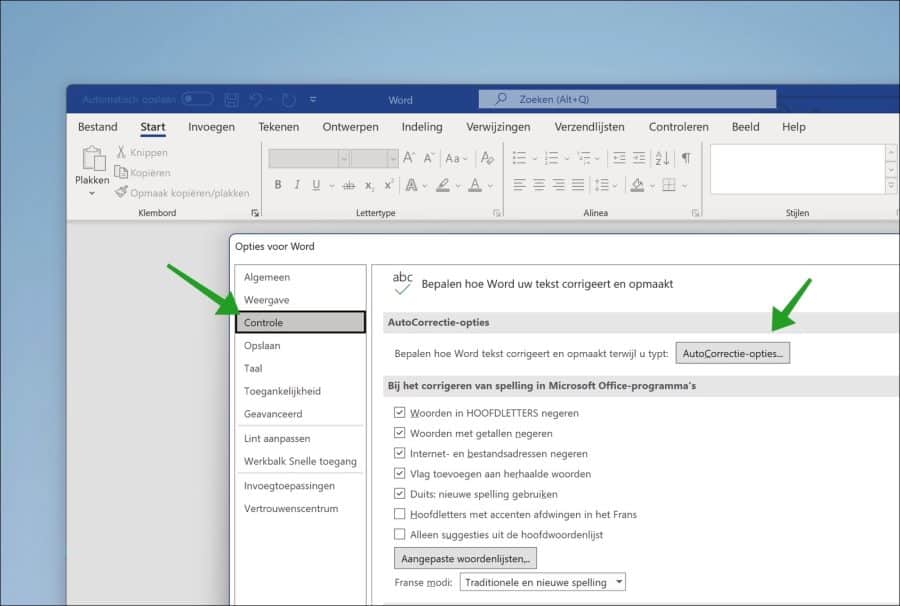
In de Autocorrectie opties klikt u op tabblad “AutoOpmaak tijdens typen”. Schakel de auto opmaak opties “Automatische opsommingstekens” en/of “Automatische genummerde lijst” uit.

Afbeelding als opsommingsteken gebruiken
Een opsommingsteken is standaard een rondje of een cijfer. U kunt ook zelf een afbeelding als opsommingsteken gebruiken. Als u bijvoorbeeld zelf een opsommingsteken heeft gecreëerd dan kunt u deze als afbeelding gebruiken.
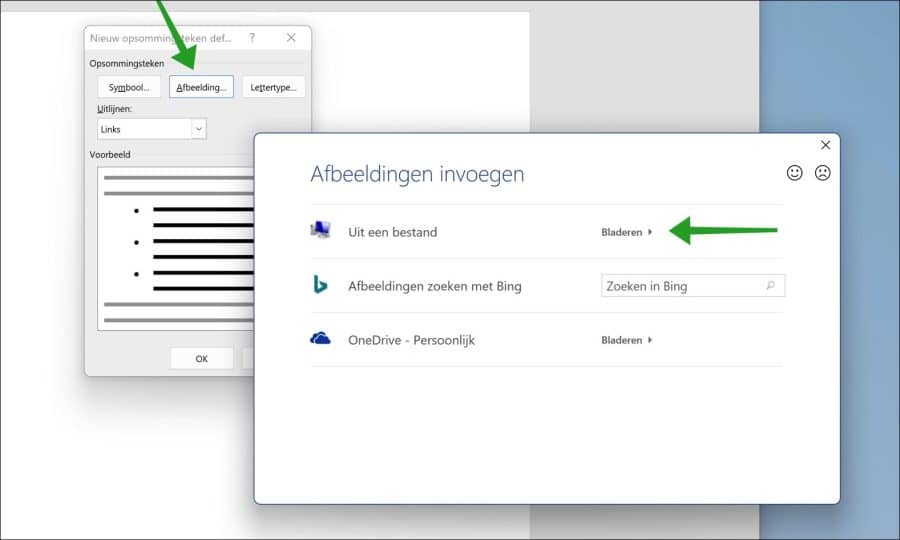
Klik in het lint rechts naast het opsommingsteken op het pijltje naar beneden. Hier ziet u de bibliotheek met enkele voorgedefinieerde opsommingstekens die u kunt gebruiken. Als u klikt op de knop “Nieuw opsommingsteken definiëren”, dan kunt u zelf een afbeelding selecteren.
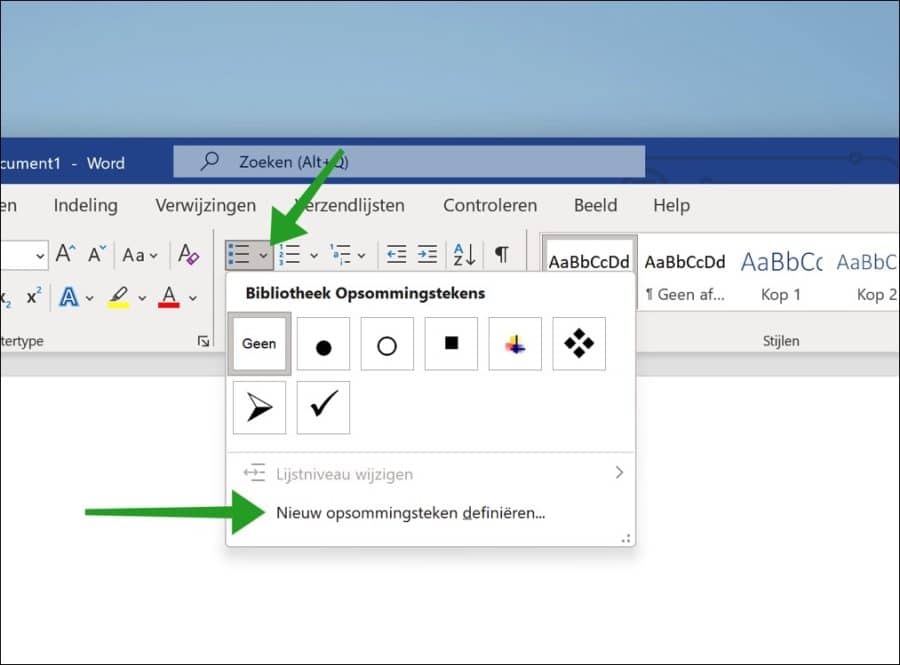
Klik hiervoor op de knop “Afbeelding”. U kunt nu een afbeelding invoegen. Deze afbeelding kunt u ophalen uit een bestand, zoeken met de BING zoekmachine of via OneDrive.
Tekst rond afbeelding plaatsen
Tekst rond een afbeelding plaatsen in Word is niet heel moeilijk, maar vergt wel een bepaald voorbeeld van hoe u het wilt hebben. Als u duidelijk heeft hoe u de tekst om een afbeelding heen wilt wikkelen om het zo maar te noemen, dan past u dit aan via de indeling, tekst terugloop en positie instellingen.
Alle indelingsopties en posities bieden u in Word een direct voorbeeld van hoe de tekst om de afbeelding heen wordt gewikkeld. Ik ga ervan uit dat u al tekst en een afbeelding heeft ingevoegd in een document.
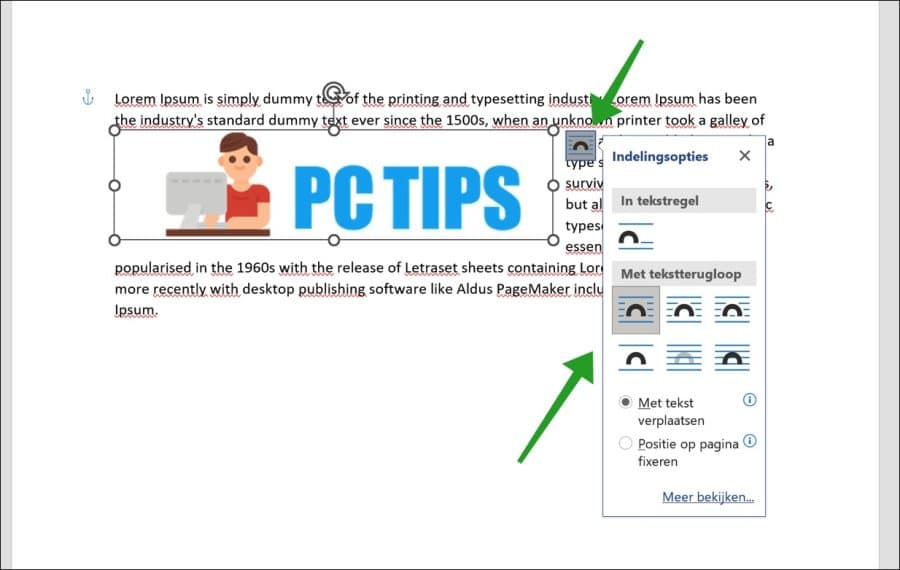
Klik op de afbeelding. Klik vervolgens in het menu op “Indelingsopties”. U ziet nu een “met tekstterugloop” menu met verschillende indelingen hoe de tekst om de afbeelding heen te plaatsen. Elke keer als u op een van deze opties klikt dan ziet u in het document direct hoe het eruit komt te zien.
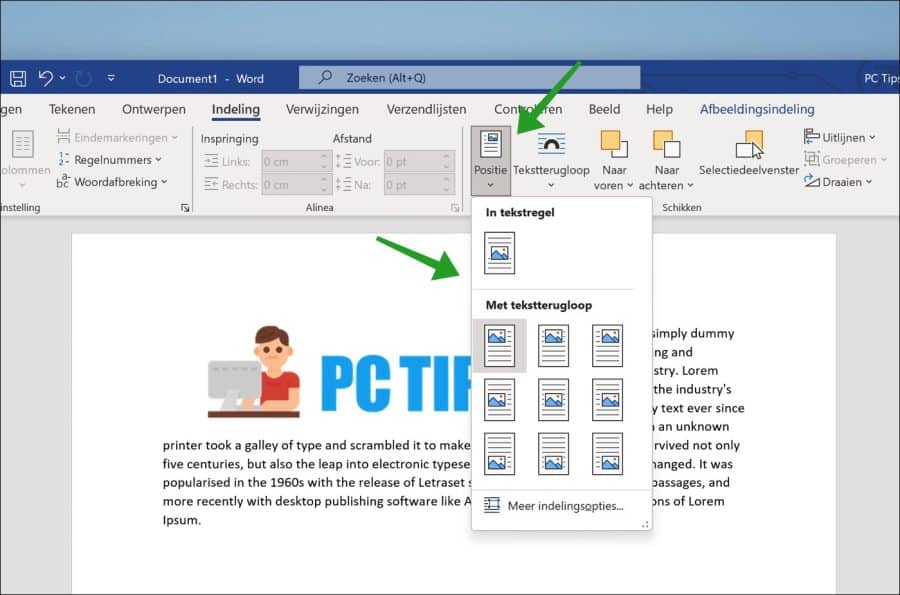
Om verschillende posities voor de afbeelding in het document te testen klikt u in het menu op “Posities”. U kunt nu voor de afbeelding verschillende posities instellen. De tekst ziet u dan om de afbeelding heen, afhankelijk van de gekozen positie.
Automatisch tijd en datum veld invoegen
In Word kunt u met een toetsencombinatie snel de tijd en datum toevoegen aan een document. Dit is een standaard een dynamisch veld. Dat betekent dat elke keer als u het document opslaat, de tijd en datum wordt aangepast naar de huidige tijd en datum ingesteld op uw computer.
Om de huidige datum (ingesteld op uw PC) toe te voegen aan een Word-document drukt u op de ALT + SHIFT + D toetsencombinatie.
Om de huidige tijd (ingesteld op uw PC) toe te voegen aan een Word-document drukt u op de ALT + SHIFT + T toetsencombinatie.
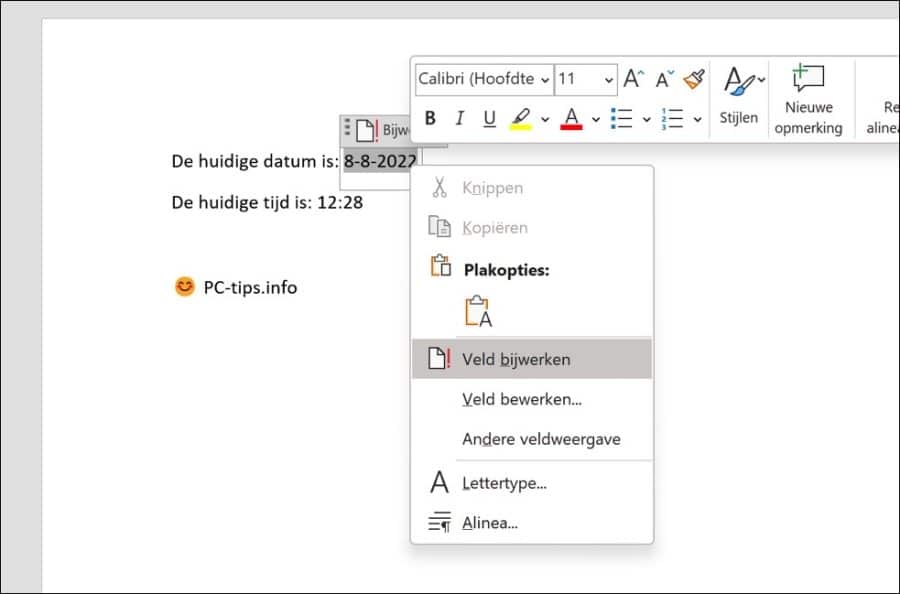
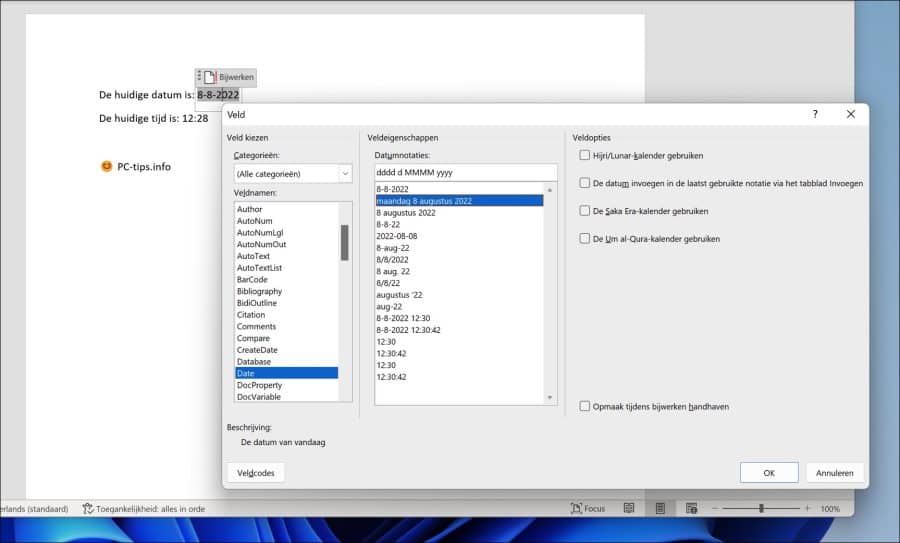
Als u het format van deze datum of tijd wilt aanpassen dan klikt u met de rechtermuisknop in het veld en klikt u op “veld bewerken”. Als u klikt op “veld bijwerken” dan kunt u de datum of tijd wijzigen.
U kunt het type veld aanpassen, maar ook de datum of tijd notatie. Bijvoorbeeld de dag geschreven weergeven in plaats van alleen de datum als getal.
Ik hoop u hiermee te hebben geïnformeerd. Bedankt voor het lezen!
Lees ook: Beveiligd Word-document bewerken.
Help mee
Mijn computertips zijn gratis en bedoeld om andere mensen te helpen. Door deze pc-tip te delen op een website of social media, helpt u mij meer mensen te bereiken.Overzicht met computertips
Bekijk ook mijn uitgebreide overzicht met praktische computertips, overzichtelijk gesorteerd per categorie.Computerhulp nodig?
Loopt u vast met uw pc, laptop of software? Stel uw vraag op ons computerforum en krijg gratis computerhulp van ervaren leden en experts.