

Any laptop or PC that has a wireless network card can connect to a WiFi network. The WiFi network is a wireless network connection that provides access to an internal network or the Internet.
If you use a wireless network connection via WiFi, you want your laptop or PC to choose the best and therefore the fastest connection. This way you have made maximum use of the connection.
In Windows, the best is not chosen by default WiFi network to connect to, you must select a network yourself, connect to it and only then will the connection be made automatically.
You can configure the wireless network adapter in Windows so that it continues to search for the best hotspot to connect to. You can configure this via the network settings in Windows and via a special adjustment in the advanced options in the wireless network adapter settings.
Automatically connect to the Strongest WiFi network
If you have made a connection and want your laptop or PC to automatically reconnect to the connected device next time WiFi network, then follow the steps below.
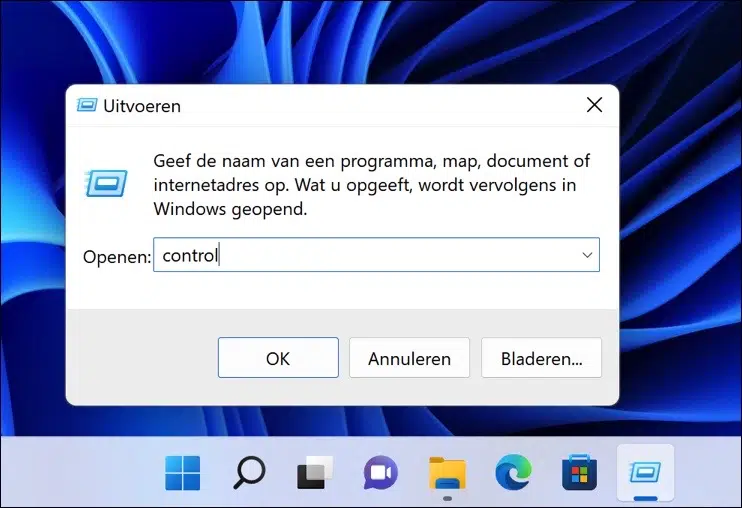
Right-click on the Start button. In the menu click on Run. In the run window type: control.
This way you open the Control Panel.
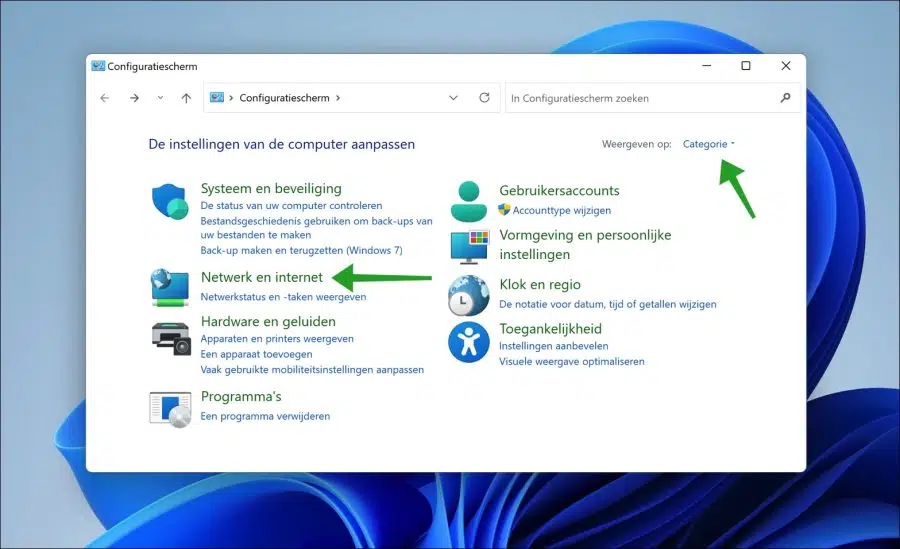
Change the “view by” settings of the control panel to “Category”. Then click on “Network and Internet”.
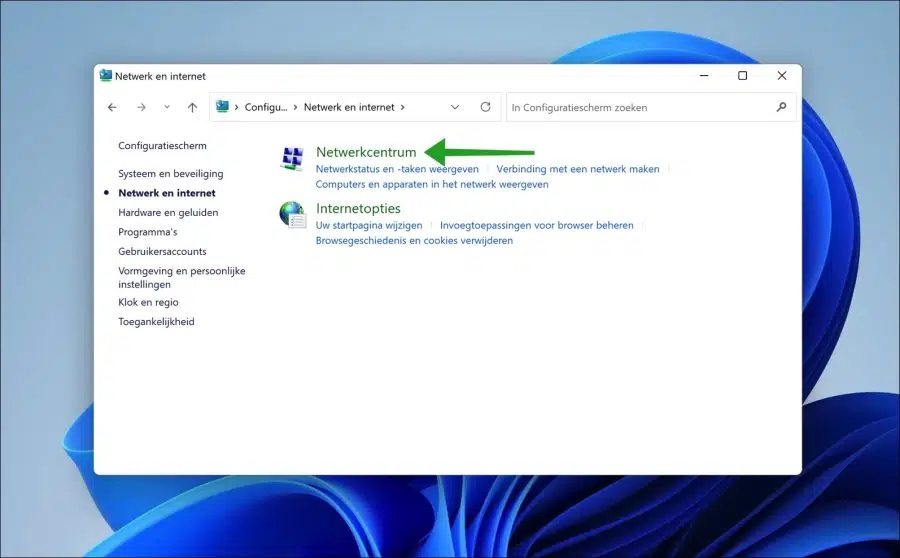
Then click on “Network and Sharing Center”.
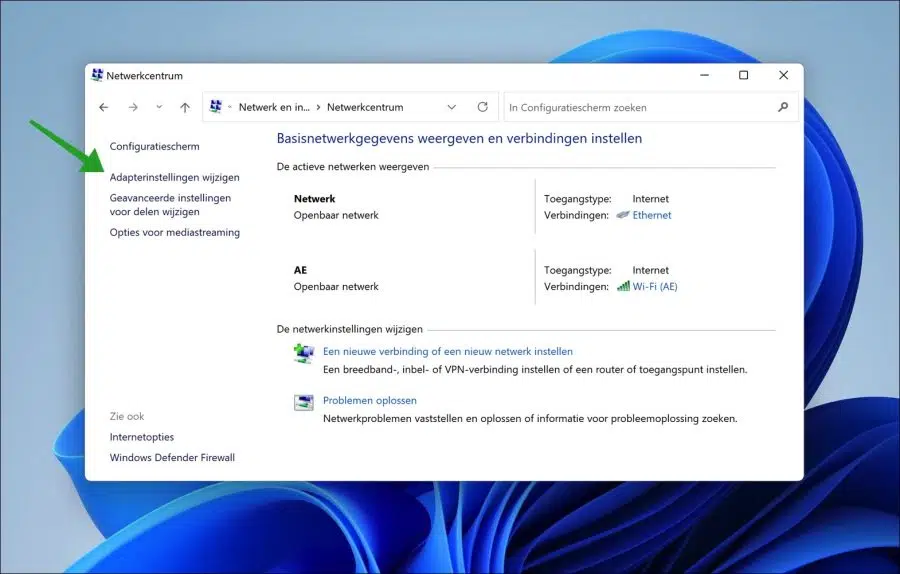
In the left menu, click on “Change adapter settings”.
Right-click on the active Wi-Fi connection. Make sure that this is connected to the WiFi network. Click on “Status” in the menu.
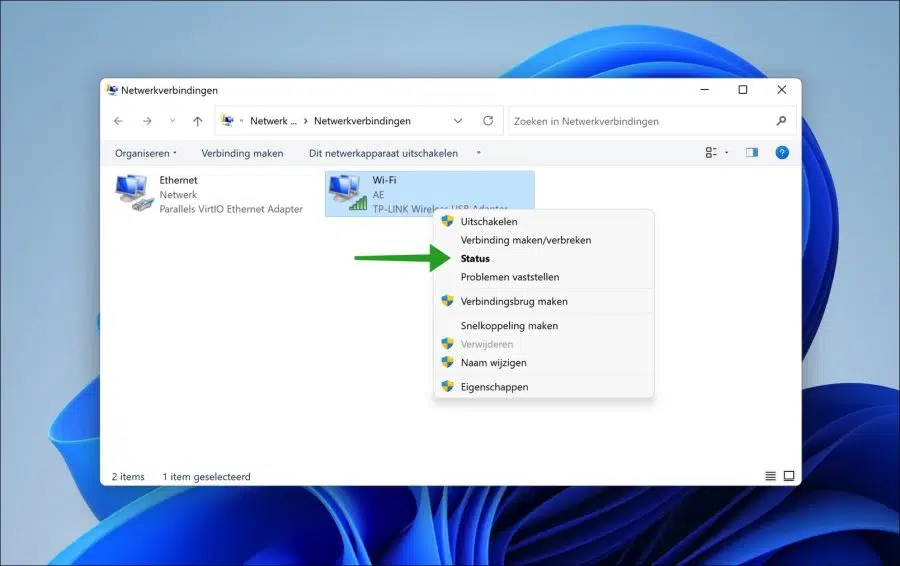
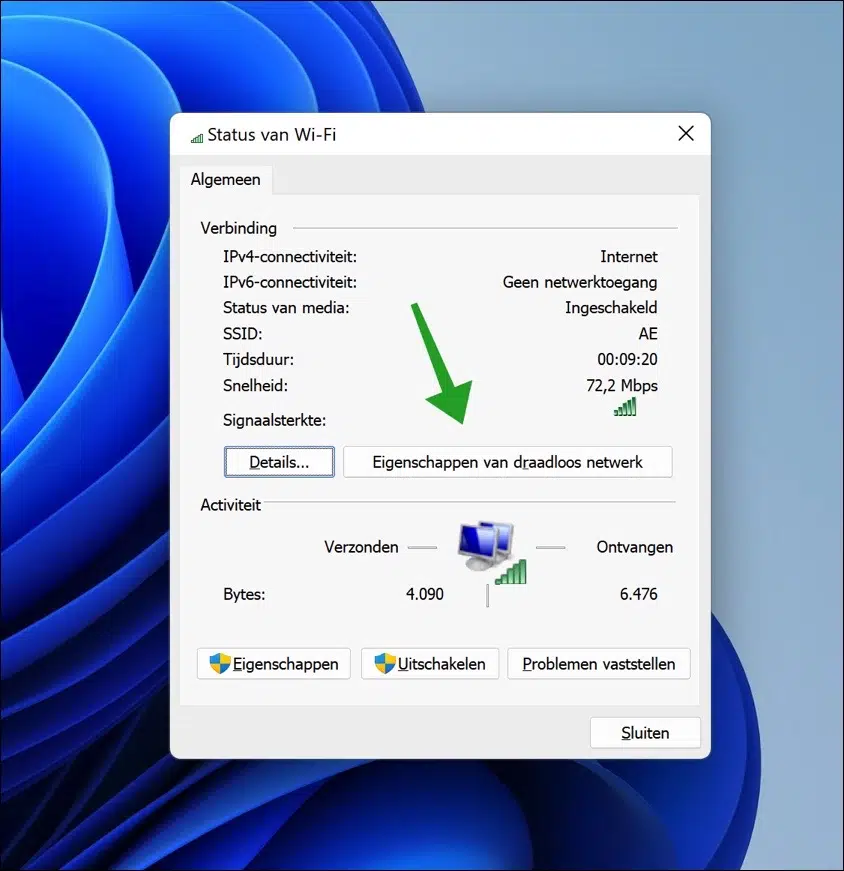
In the Wi-Fi status, click on “Wireless Network Properties”.
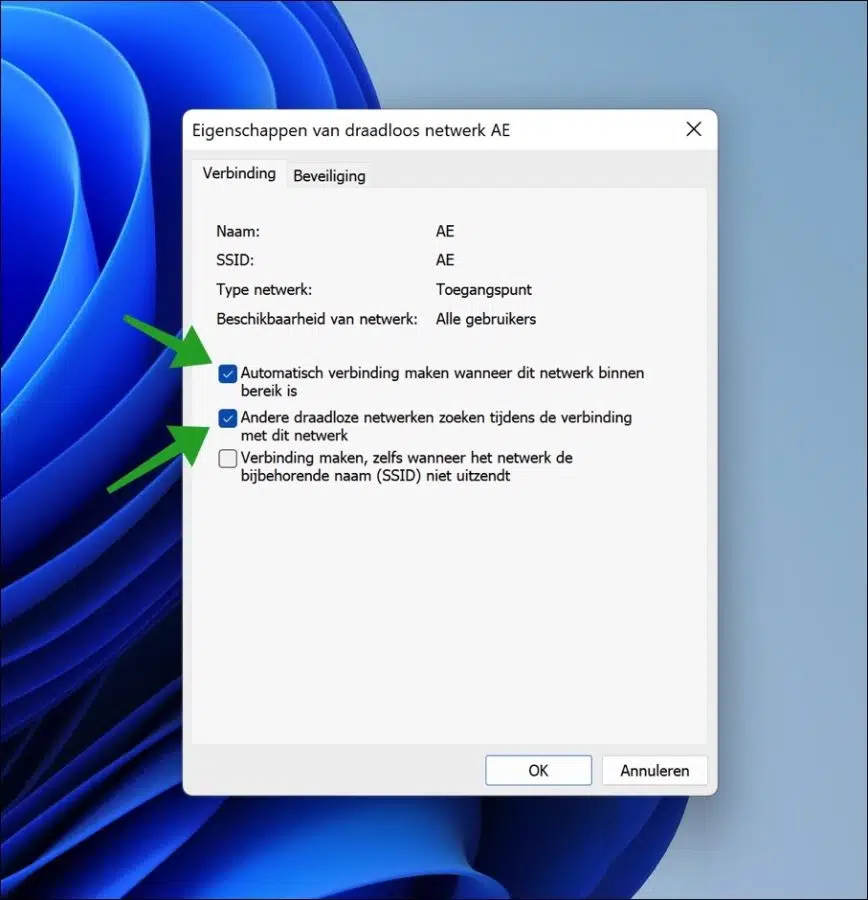
If this is the Wi-Fi network you want to automatically connect to every time this wireless network is in range, then enable the “Automatically connect when this network is in range” option.
To continue searching for other wireless networks while you are already connected, disable the “Search for other wireless networks while connected to this network” option. Click OK to confirm.
Also read: disable auto-connect to WiFi.
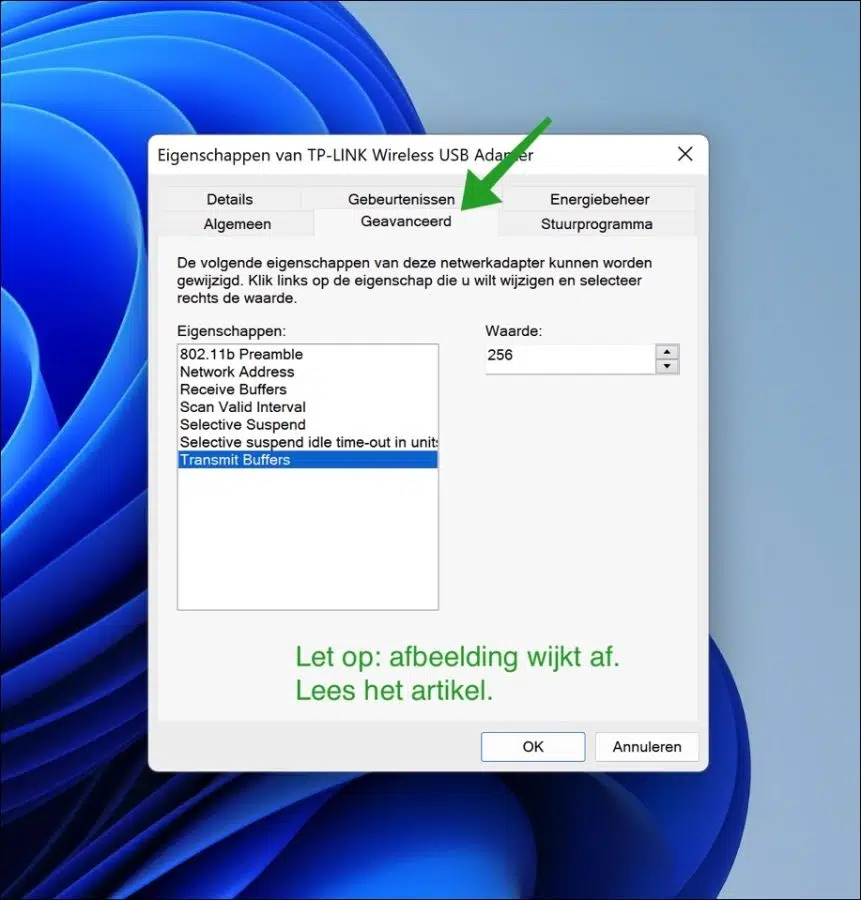
You can expand the WiFi settings even further by adjusting a setting in the advanced wireless network adapter. This is the “Roaming aggressiveness” setting.
This setting changes the signal strength threshold at which the WiFi adapter starts searching for another access point(s). You will find this setting under the advanced adapter settings. The default value is Medium. Depending on the environment, one option may work better than the other.
You can try other values to see which works best for your environment. I recommend that you return to the default value (Medium) if you see no improvement with other values.
Go back to the “Network Connections” where you will see the wireless network adapter. Right-click on it and click Properties from the menu.

Click on “Client for Microsoft Networks” and then on the “Configure” button.

Click on the “Advanced” tab and then click on “Roaming aggressiveness”. Change the “value” to “5. Highest” and click OK to confirm. Restart your computer.
Your laptop or PC will now automatically connect to the strong WiFi access point. If you do not like the above setting, select “3. Medium” to restore the default setting.
I hope this helped you. Thank you for reading!
Also read: Block wireless WiFi network.