

Wi-Fi became a standard technology in laptops more than a decade ago. Now wireless networking technology can be found in our watches, phones, televisions and smart speakers. We know what it means, but what does Wi-Fi stand for?
The term was coined by a marketing company because the wireless industry was looking for a user-friendly name for a not-so-user-friendly technology known as IEEE 802.11.
The term WiFi eventually came into being after hiring a marketing agency. Since then, we have used WiFi as a term for mainly wireless network or wireless internet.
Of course, WiFi is available everywhere, including in ours Windows 11 computers. In this article I offer four different ways to enable WiFi on a PC running the Windows 11 operating system.
Enable WiFi in Windows 11
Enable WiFi via keyboard
A less obvious key is the WiFi key on a keyboard. Some keyboards have function keys at the top.
These function keys can be used to enable Wi-Fi by pressing them. By pressing again, WiFi can be switched off again. If you have such a keyboard, you may recognize the example key below.

Enable WiFi via quick settings
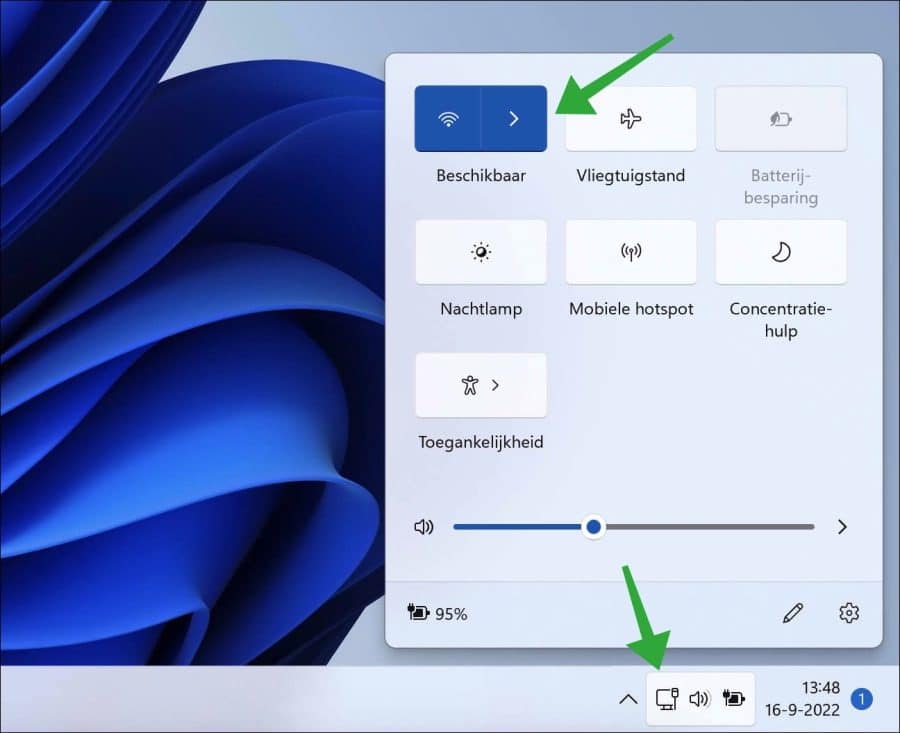
The quick settings offers some tiles with frequently used functions in Windows 11. If you use a WiFi adapter or built-in WiFi network card, you will see a WiFi tile. Click it to turn Wi-Fi on or off.
Click on the arrow to get one select and connect to a WiFi network.
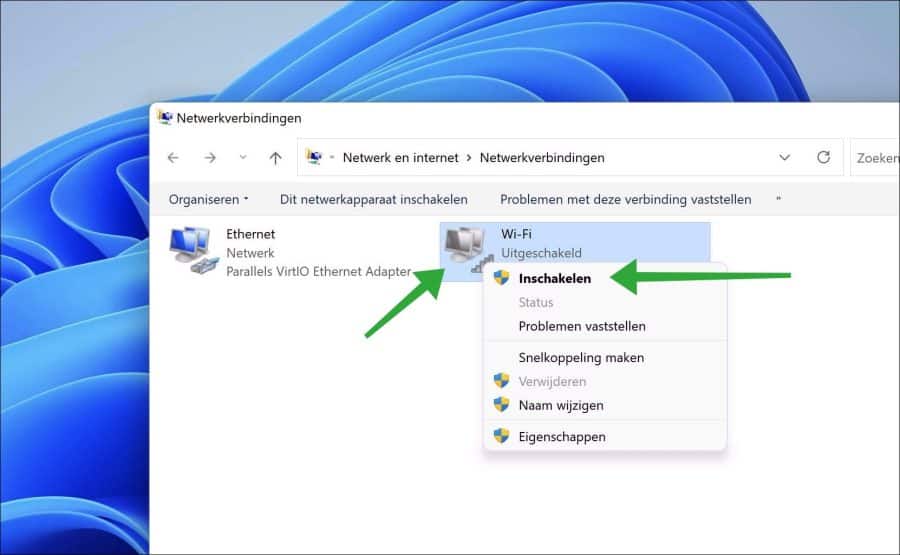
Enable WiFi via the control panel
We know the control panel from previous versions of Windows such as Windows 10. It offers us access to software and hardware settings.
In the network center you can use the wifi adapter settings enable or disable WiFi.
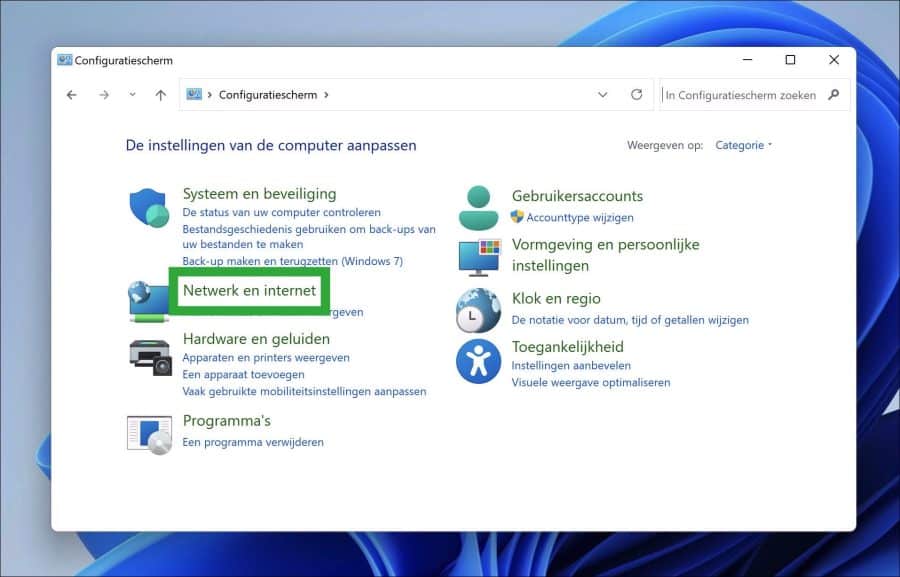
Open the control panel. Then click on “Network and Internet”.
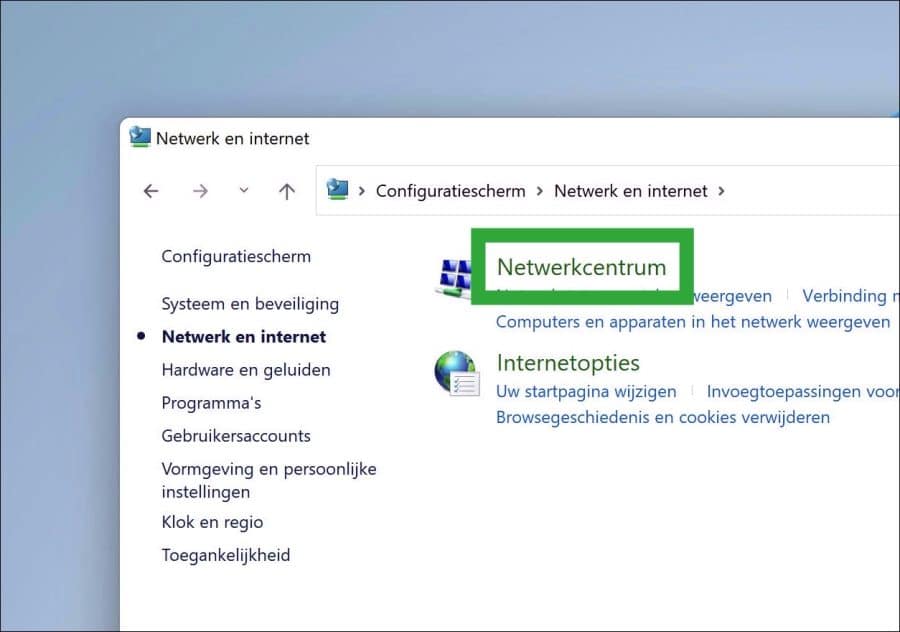
In the network and internet settings click on “Network and Sharing Center”.
On the left, click on “Change adapter settings” in the menu.
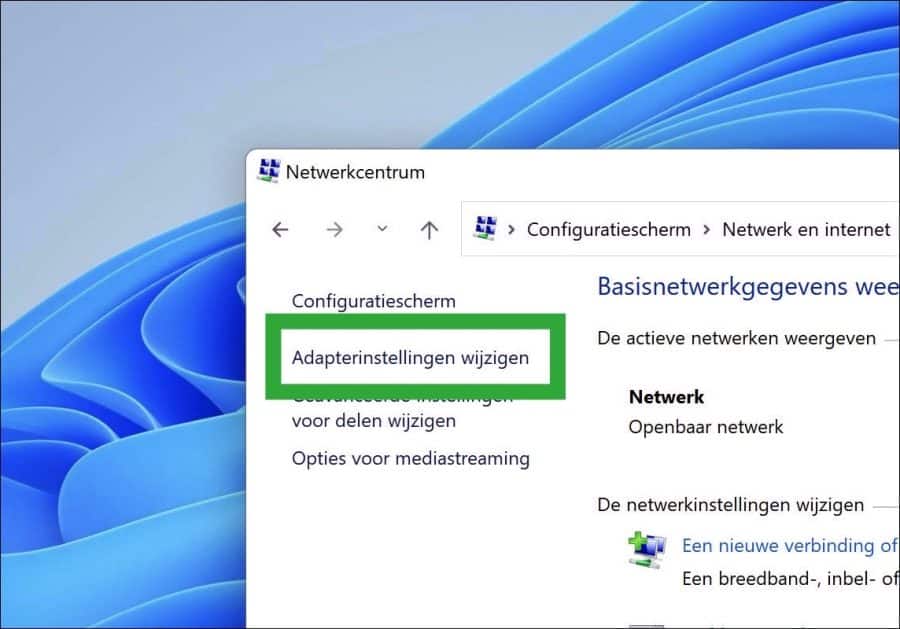
Right-click on the “Wi-Fi” connections and click “enable” from the menu. Then double click after turning on to display the WiFi information.
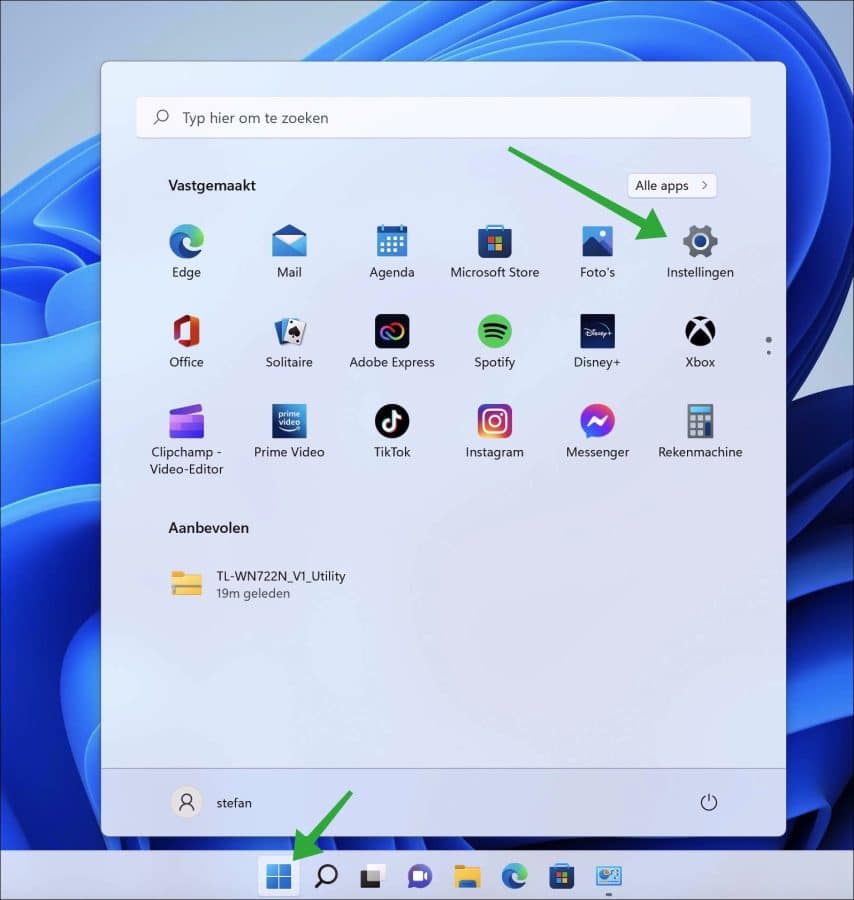
Enable WiFi via the settings
In Windows 11, the settings have been changed compared to Windows 10. The settings app is the app in Windows 11 to change computer settings. These settings also offer us the possibility to enable and manage WiFi.
Click on the Start button. Then click Settings in the apps.
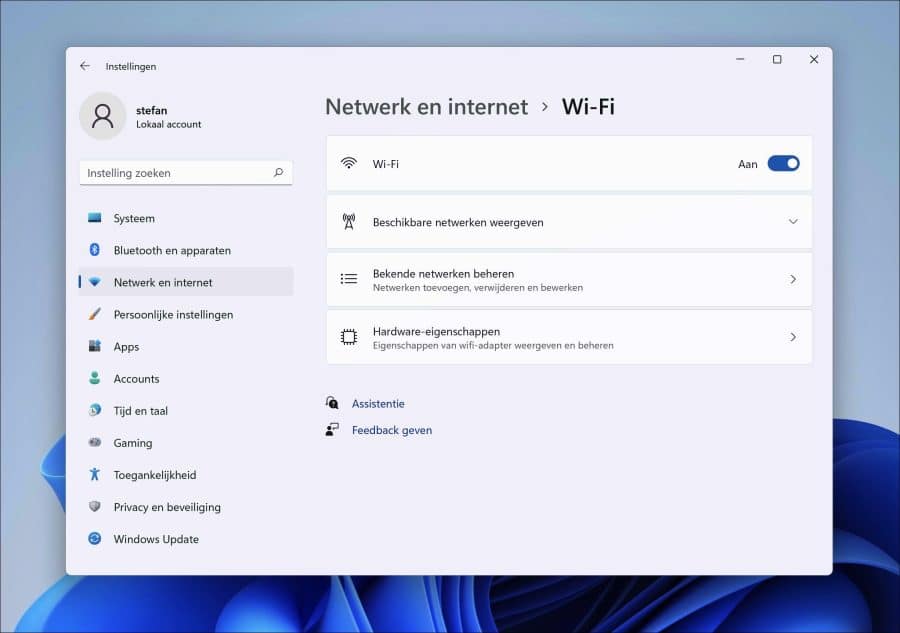
On the left side in the settings, first click on “network and internet” and then on “Wi-Fi”.
Don't see WiFi? Then check that wifi works.
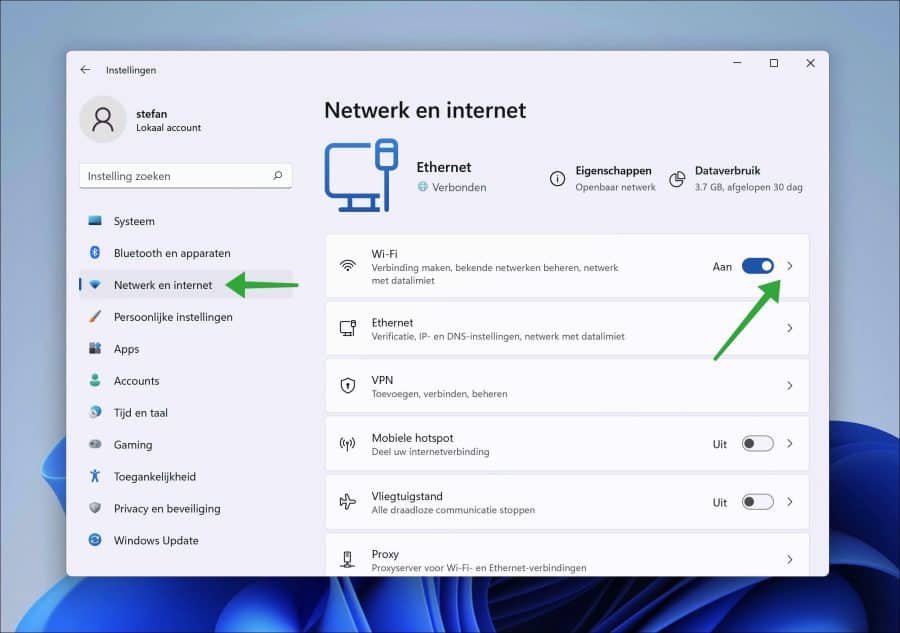
Around the wifi networks To manage, click on the arrow to the right of “Wi-Fi”. The WiFi settings will now open.
I hope this has helped you enable and manage WiFi. Thank you for reading!