Als u uw eigen stem wilt opnemen in Windows 11, dan kunt u het geluidsapparaat zo instellen dat u uw eigen stem kunt horen.
Het horen van uw eigen stem is iets wat mensen die werken met stemopnames, online gaming of elke andere vorm van communicatie willen gebruiken. Het stelt u in staat om te beoordelen of uw stem goed over komt tijdens de opname of de communicatie. Hiermee voorkomt u problemen dat de ander u niet goed hoort.
In dit artikel leest u hoe u het invoerapparaat zo instelt dat u het uw stem kunt horen. Ook leest u hoe u uw microfoon kunt testen om het stemgeluid te optimaliseren.
Meld u dan aan voor onze nieuwsbrief.
Hoor jezelf op de microfoon in Windows 11
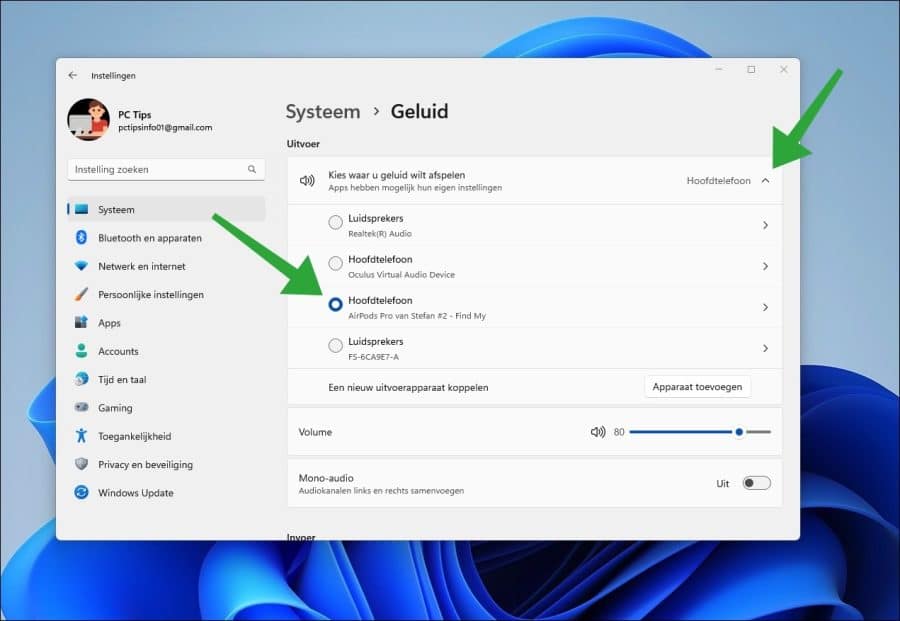
Om te beginnen opent u de Windows instellingen. In de instellingen klikt u links op “Systeem” en vervolgens op “Geluid”.

Het is belangrijk dat het juiste uitvoer en invoer apparaat selecteert. Klik eerst op “Kies waar u geluid wilt afspelen” op het juist uitvoerapparaat. Dit kan zijn een set boxen, maar ook een hoofdtelefoon met microfoon functie.
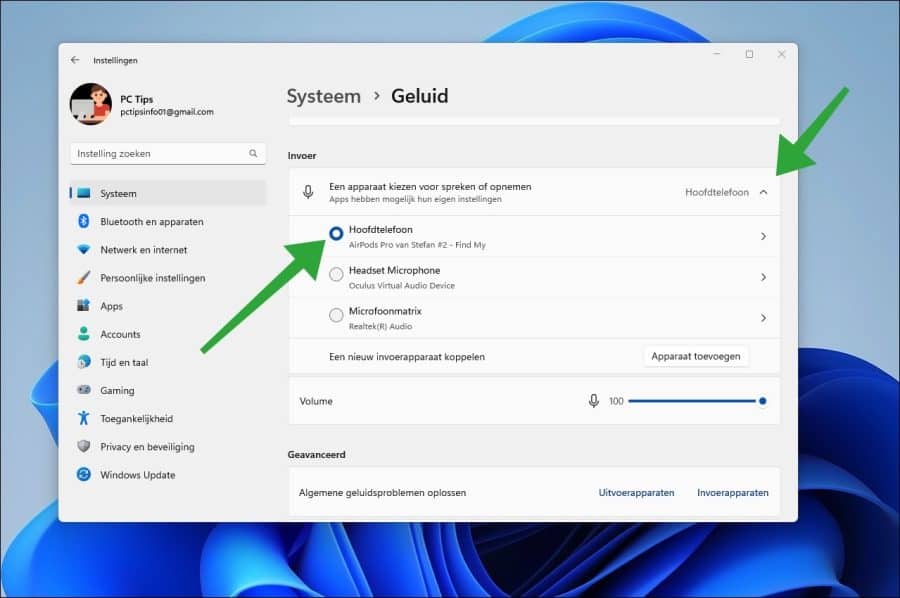
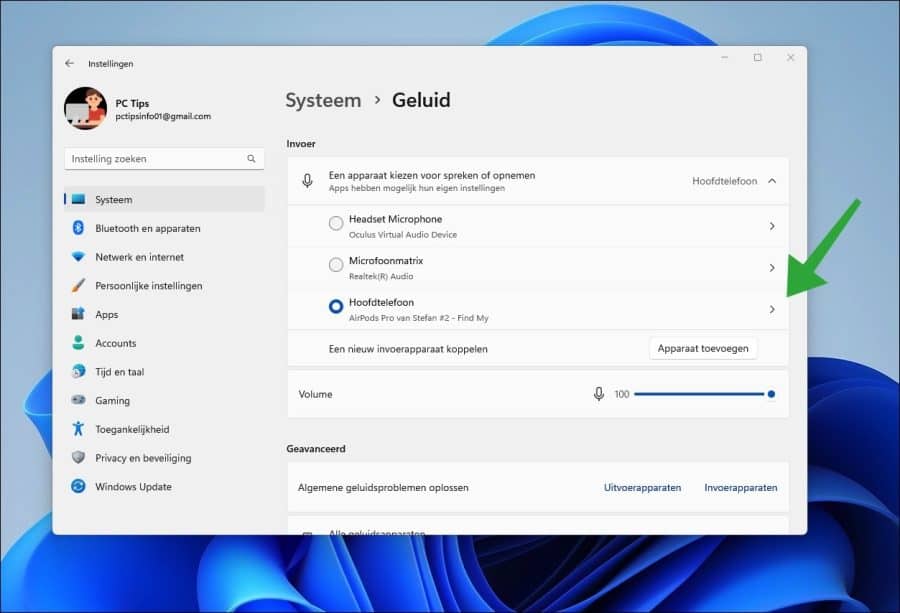
Hierna dient u het juiste geluids invoerapparaat te selecteren. Klik op “een apparaat kiezen voor spreken of opnemen” en selecteer het invoerapparaat dat u wilt gebruiken voor uw stemopname.
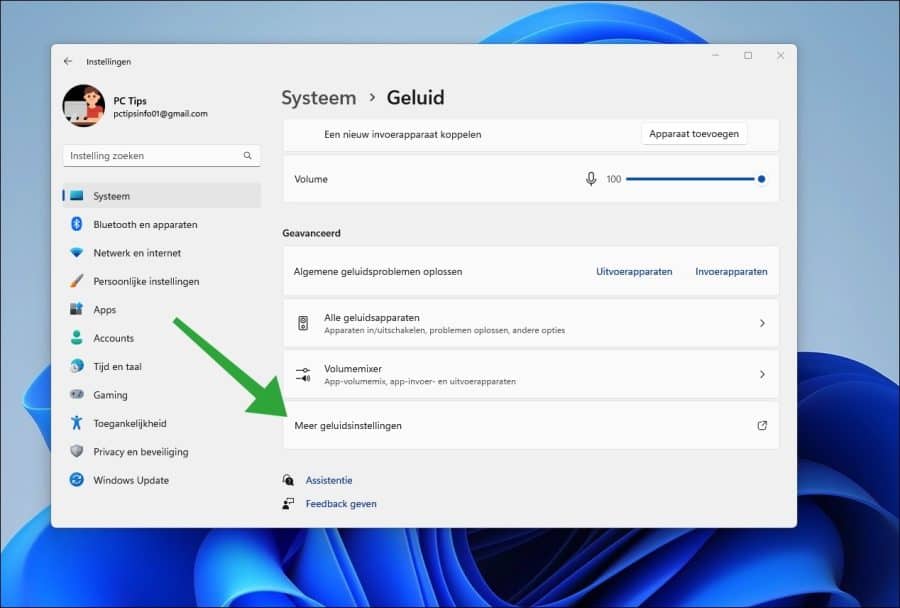
Klik vervolgens helemaal onderin in de “Geavanceerd” instellingen op “meer geluidsinstellingen”.
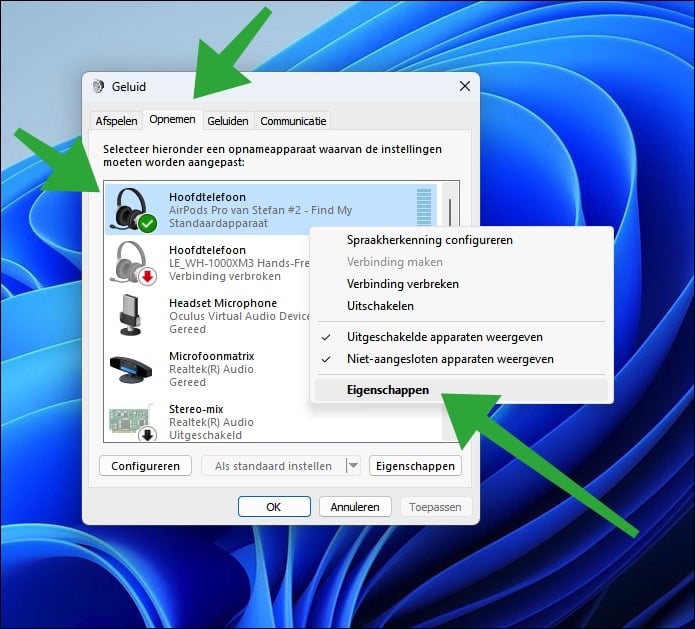
Klik nu op tabblad “opnemen” en vervolgens klikt u met de rechtermuisknop op het apparaat met de rechtermuisknop. In het menu klikt u op “eigenschappen”.
Om uw eigen stem te horen klikt u eerst op tabblad “luisteren” en vervolgens schakelt u de optie “naar dit apparaat luisteren” in.
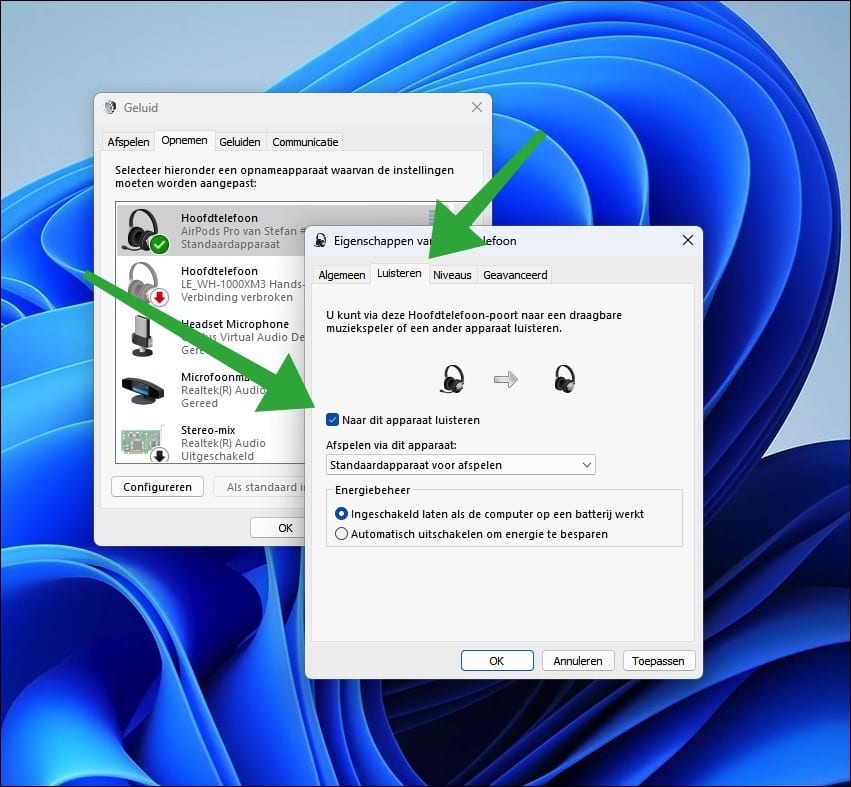
U hoort nu uw eigen stem via het apparaat wat is geselecteerd op geluid af te spelen.
Geluid van microfoon testen
Nadat u heeft ingesteld dat u uw eigen stemgeluid kunt horen, is het aan te raden om de microfoon te testen. U test dan een bepaald percentage geluid wat de microfoon bereikt en doorgezet kan worden. Op deze manier kunt u bepalen of uw stem voor andere mensen of bij stemopnames goed te horen is.
Ga terug naar de geluidsinstellingen. Klik rechts van het invoerapparaat op het pijltje naar rechts voor meer instellingen.
Klik onderin bij “uw microfoon testen” op de knop “test starten”. Begin hierna met praten op een normaal volume. Klik als u klaar bent op “test stoppen”.
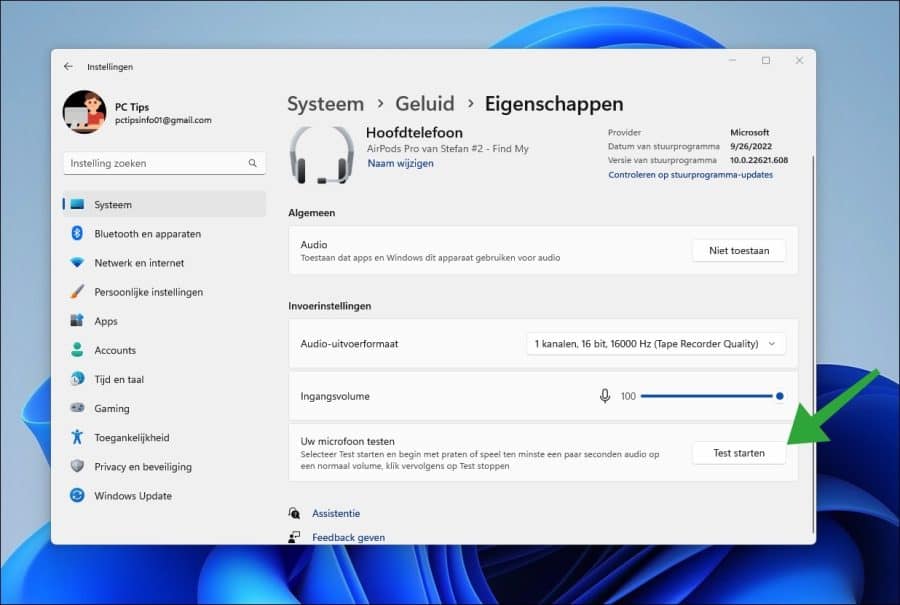
U ziet nu een bepaald percentage wat verwijst naar de output of uitvoer van het volume dat wordt gegenereerd door de microfoon. Het geeft aan hoe luid het geluid is dat wordt opgepikt en doorgestuurd door de microfoon. Hoe hoger het percentage hoe beter. Als het percentage wat lager uitvalt, controleer dan de afstand tot de fysieke microfoon en plaats deze dichter bij uw mond.
Ik hoop u hiermee geholpen te hebben. Bedankt voor het lezen!
Lees ook: Microfoon werkt niet in Zoom.
Help mee
Mijn computertips zijn gratis en bedoeld om andere mensen te helpen. Door deze pc-tip te delen op een website of social media, helpt u mij meer mensen te bereiken.Overzicht met computertips
Bekijk ook mijn uitgebreide overzicht met praktische computertips, overzichtelijk gesorteerd per categorie.Computerhulp nodig?
Loopt u vast met uw pc, laptop of software? Stel uw vraag op ons computerforum en krijg gratis computerhulp van ervaren leden en experts.