

Sleep mode on a PC is a power-saving mode that allows the computer to enter a low-power state without turning off.
In sleep mode, the system will still appear to be on, but will no longer respond to your input. This means you can put your computer to sleep and come back to it later without having to completely restart the system.
Sleep mode is beneficial because it allows the computer to turn on quickly when you want to use it again, while prolonging battery life and keeping your data safe. This causes a problem with some PCs. It often happens that a computer does not wake up from sleep mode. To solve this, you must completely shut down the PC and restart it. The downside is that your temporarily saved work will be lost.
To solve this problem, I recommend following the tips in this article. Applying these tips may help you identify and resolve the problem.
PC hangs in sleep mode
Power management troubleshooter
Power Management Troubleshooter is designed to help you diagnose and fix problems with your computer's power settings. This troubleshooter can diagnose issues related to sleep mode, power management, power schedules, and more. It can then help you solve these problems, this happens completely automatically.
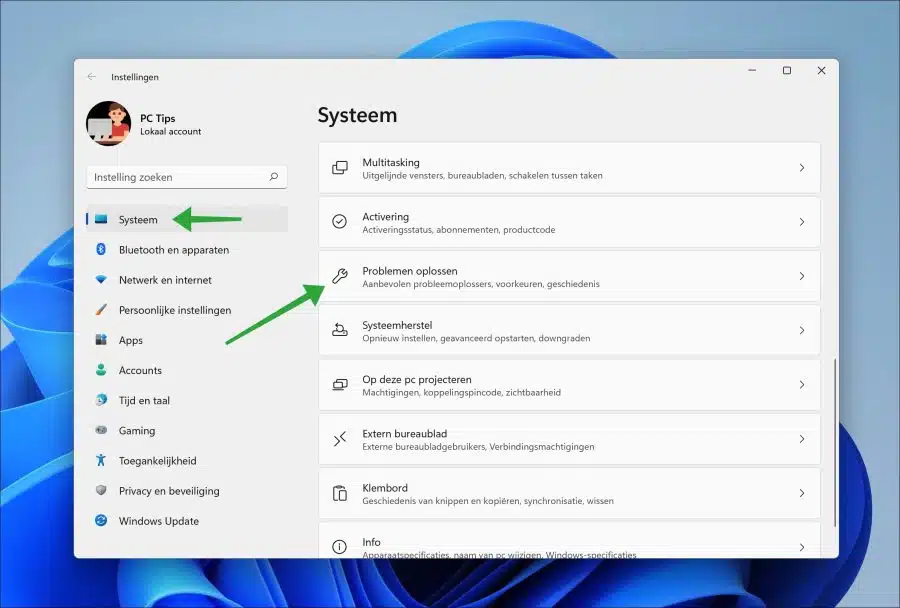
Open Settings. In the settings, click on “System” on the left and then on “Troubleshooting”.
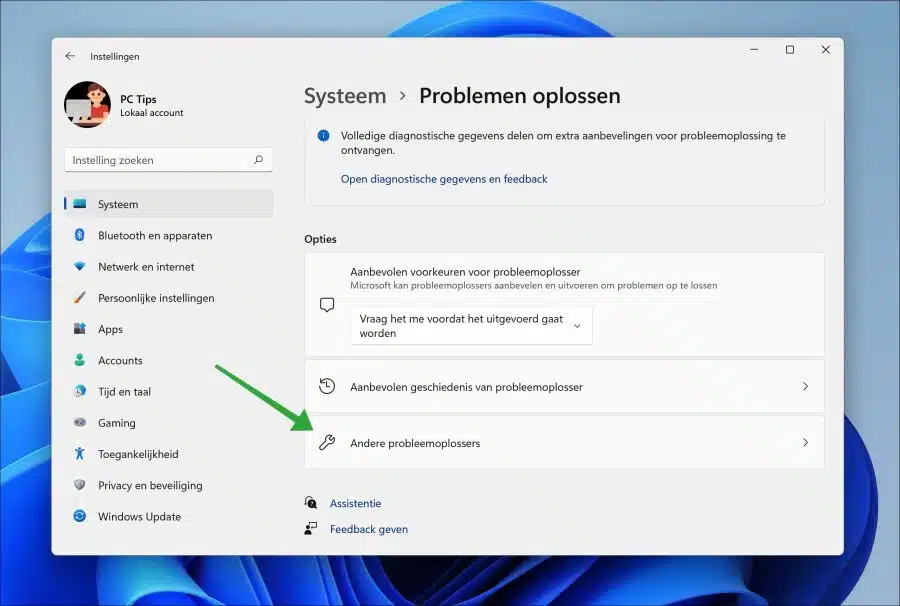
Then click on “Other troubleshooters” at the bottom of the “Options”.
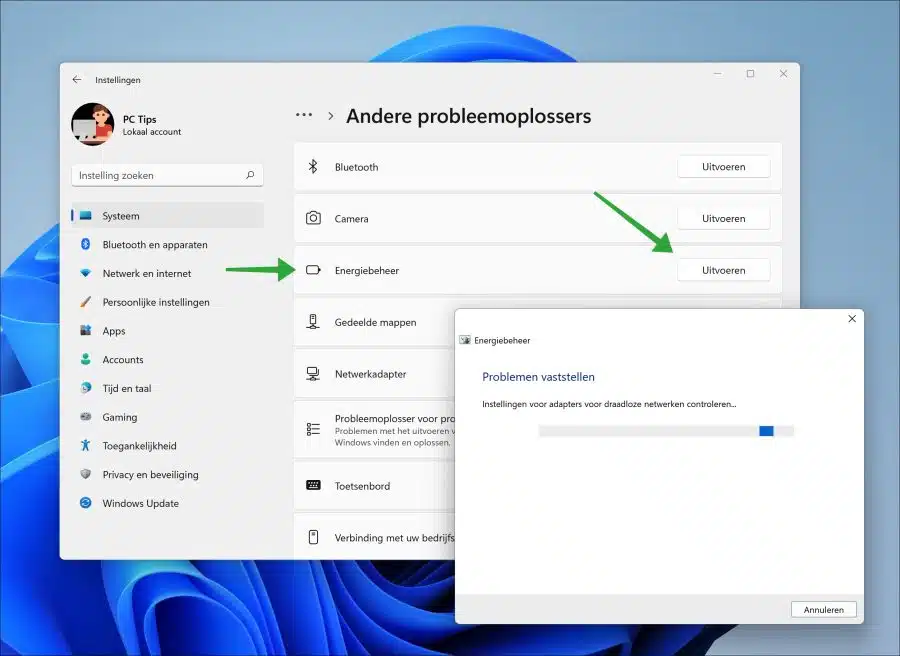
In the troubleshooters view, then click “run” to the right of the “power management” troubleshooter.
The power management troubleshooter is now running. The problem solver himself searches for problems. If found, the power management troubleshooter will resolve the issue and display a summary of the resolved issues.
Automatically repair damaged system files
In some cases there is sometimes damage system files. These system files can be damaged by software installations, driver updates, system changes, hardware installations and more.
There are two features available in Windows 11 or 10 that can automatically restore system files, these are SFC and DISM.
Run DISM
DISM (Deployment Image Servicing and Management) is a built-in tool that can be used to maintain and manage Windows images, such as those used to install Windows.
It can be used to install, uninstall, configure and update Windows features, packages, drivers and settings. It can also be used to enable or disable Windows features and to repair Windows images.
To repair the Windows image you can run the following command. The repair process is then carried out itself.
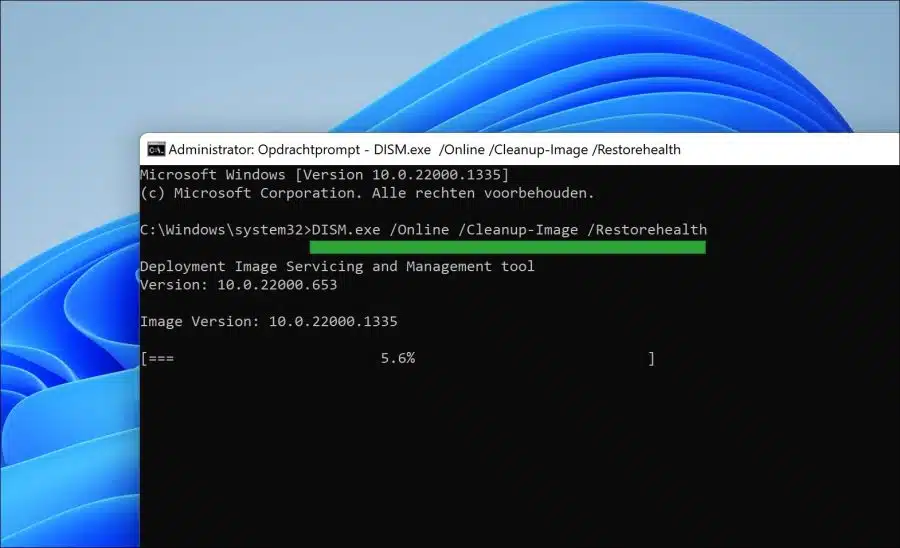
Open the Command Prompt as administrator. Enter the following command:
DISM.exe /Online /Cleanup-Image /Restorehealth
Once the DISM RestoreHealth command has been executed, next execute SFC.
Run SFC
System File Checker (SFC) is a utility in Windows 11 or 10 that allows users to scan for and repair corruptions in Windows system files.
It is an important part of keeping Windows running smoothly as it allows users to quickly locate and repair system files that have become corrupted. SFC is a built-in utility in Windows and can be safely run by anyone.
When System File Checker is run, it will scan all protected system files and replace damaged or missing files with the correct versions. It is important to note that while SFC is a useful tool, it is not a substitute for regularly backing up your data. It is only intended to repair system files and cannot be used to recover data or personal files.
Open the Command Prompt as administrator. Enter the following command:
SFC /scannow
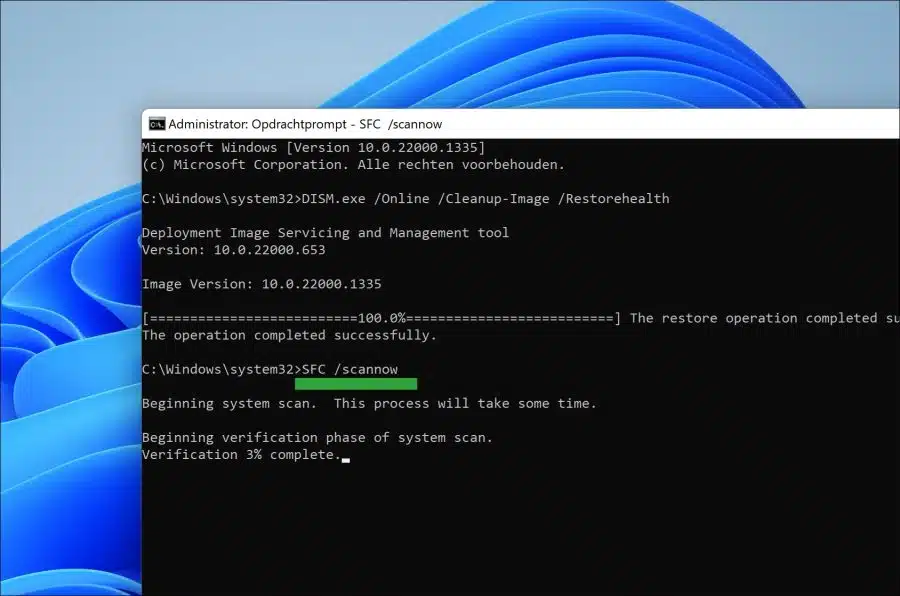
Wait for SFC to complete. Now shut down your computer and check if the problem is resolved. If the problem is not solved now, I recommend that you try the PC repair.
Disable fast startup
Fast Startup is a feature that allows your computer boots up faster after it is closed. This is accomplished by saving the state of the computer when it is shut down, and then using that saved state when the computer is restarted.
This means that instead of going through the usual boot process, the computer can use the saved state to bypass some steps and log in faster.
This feature is especially useful for those who have to shut down and restart their computer frequently, as it can reduce the time it takes to wait for the computer to boot up. However, it is important to note that this feature is not available for all computers and for all versions of Windows. Moreover, some users prefer to Disable Fast Startup, as this can also cause problems such as the computer not shutting down properly. So it's worth a try to disable fast startup to see if this solves the problem.
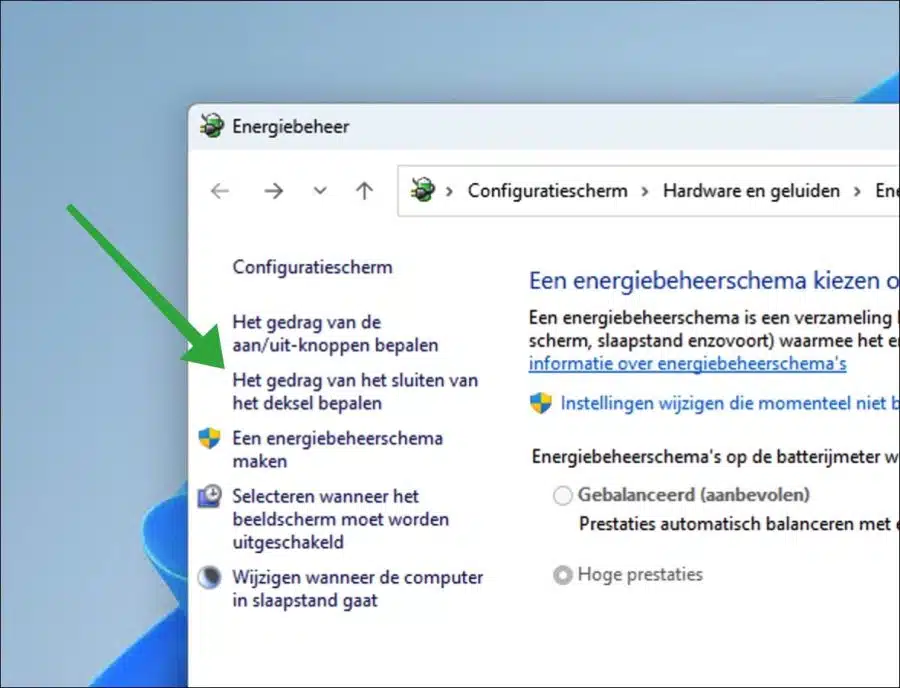
Right-click on the Start button. In the menu click on “execute”. In the run window type: powercfg.cpl.
In the power management settings, click on the left on “Determine the behavior of closing the lid”.
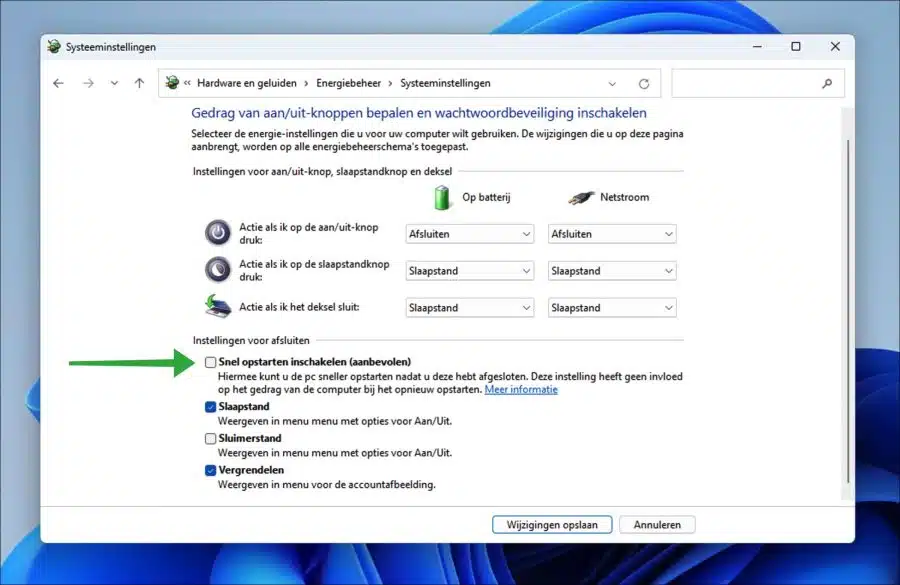
Then click on “Change settings that are currently unavailable”. Then disable “Fast Startup” by unchecking the option.
Change power management for keyboard and mouse
If you use peripherals such as a keyboard and mouse, you can use them to wake the computer from sleep mode. In general, a tap or movement with the mouse is sufficient.
I recommend checking that the option to wake the computer from sleep using a keyboard or mouse is enabled. If this option is disabled, this may be the reason why you cannot wake the computer from sleep mode using a keyboard or mouse.
Right-click on the Start button. Then click on “execute” in the menu. In the run window type: devmgmt.msc. Device management will now open.
Click “Keyboards” to open the installed drivers for the keyboard. Search for the driver and open. Click on the “Power Management” tab and enable the option “Allow this device to wake the computer from sleep mode”.

Do this for the mouse as well. Click “Mice and other pointing devices” to open the installed drivers for the mouse. Search for the driver and open. Click on the “Power Management” tab and enable the option “Allow this device to wake the computer from sleep mode”.

Allow activation timers
Wake timers are events that can wake the computer from sleep mode. This is, for example, the case with forced restart after installing updates. If you suspect that these types of events are not waking the PC from sleep, you can enable activation timers as follows.
Right-click on the Start button. In the menu click on “execute”. In the run window type: powercfg.cpl.
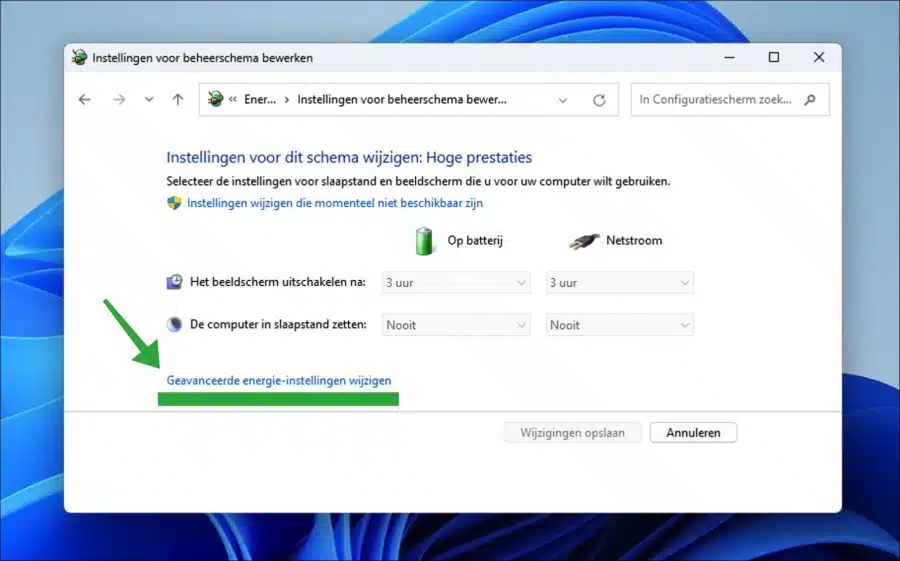
Check which power plan your computer is using. This is the example below “High performance”. To the right of the energy management plan, click on “Change the plan settings”.
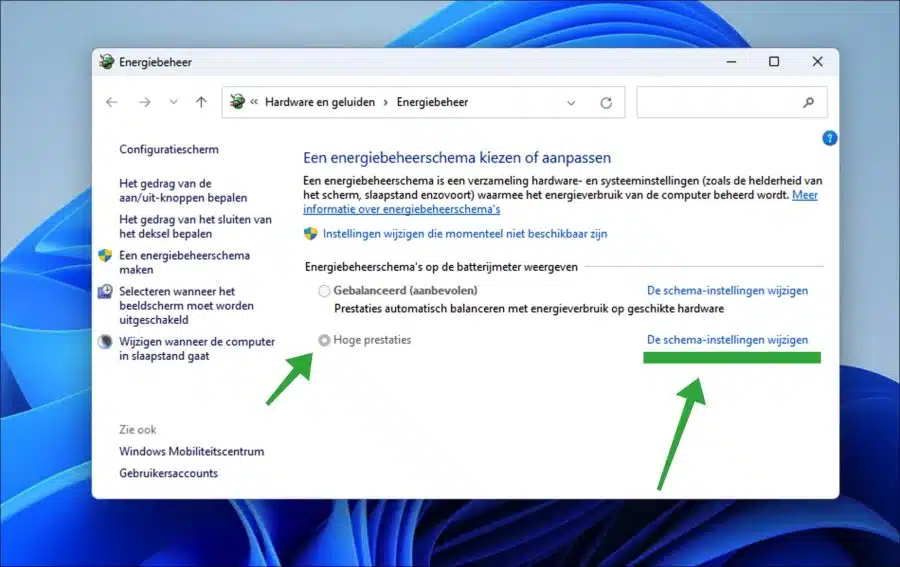
Then click on “Change advanced power settings”.
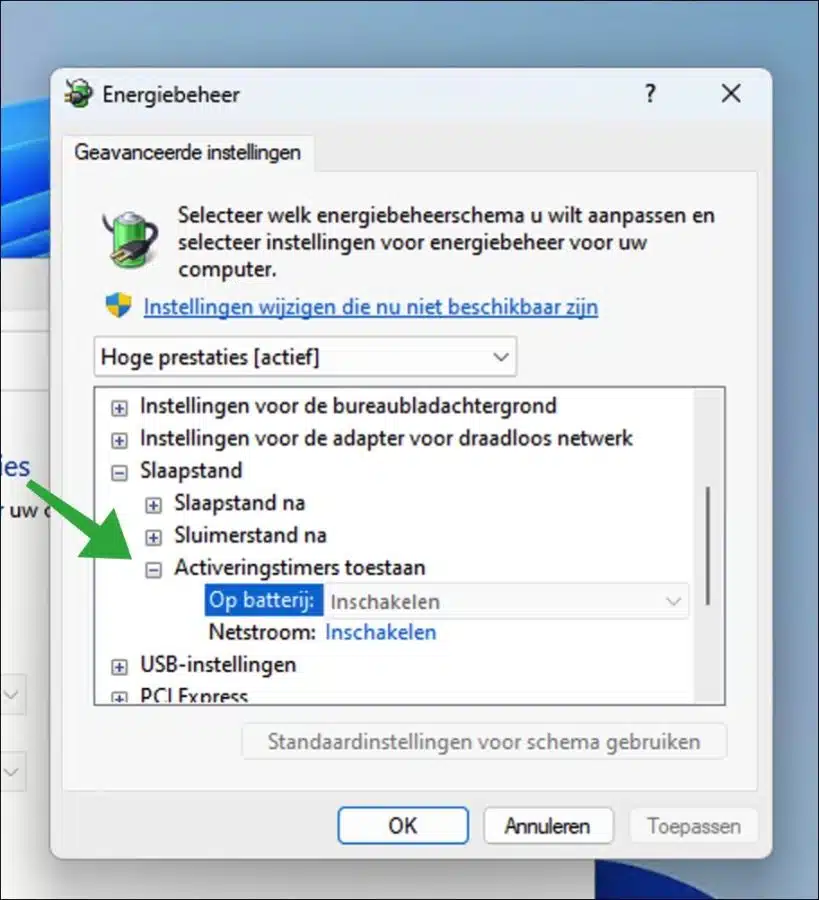
To enable wake-up timers, open the “Sleep” setting and then “Allow wake-up timers”. Check that both “On battery” and “Mains” are turned on. If not, click on “change settings that are currently unavailable” and change them to “enabled”.
I hope this helped you. Thank you for reading!