Wanneer u de Verkenner opent in Windows 11 of Windows 10, dan ziet u aan de linkerzijde een menu. Dit is het “Snelle toegang” menu.
Snelle toegang is een lijst van snelkoppelingen die u kunt gebruiken om snel naar bepaalde mappen of locaties te gaan in Windows. Zo biedt Snelle toegang bijvoorbeeld direct toegang tot deze pc, documenten en netwerklocaties.
Het is mogelijk om aanpassingen te doen aan Snelle toegang. U kunt bijvoorbeeld nieuwe snelkoppelingen toevoegen, de snelkoppelingen anders indelen en snelkoppelingen verwijderen. Hiermee kunt u de Snelle toegang dus aanpassen naar wens.
Meld u dan aan voor onze nieuwsbrief.
Wanneer u aanpassingen heeft gedaan waar u niet helemaal tevreden over bent, kunt u deze terugdraaien. Het is echter nog makkelijker om Snelle toegang te resetten. Door een reset uit te voeren kunt u de standaard weergave makkelijk terugzetten. Dit is hoe het werkt.
Snelle toegang in de Windows Verkenner resetten
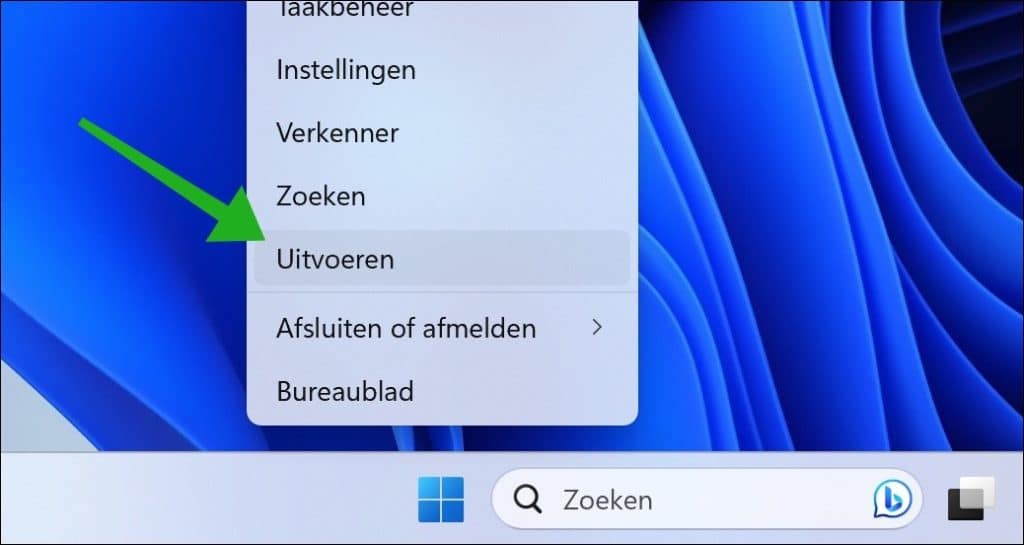
Om de weergave van Snelle toegang te resetten, klikt u met de rechtermuisknop op de Startknop. Klik vervolgens op “uitvoeren” in het menu.
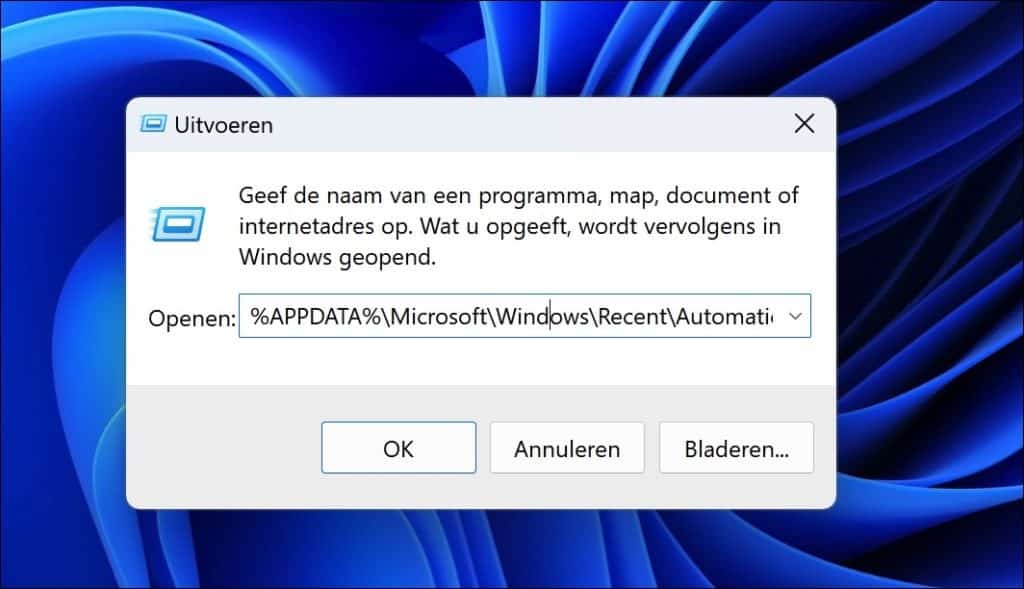
In het uitvoeren venster kopieer en plakt u onderstaande regel:
%APPDATA%\Microsoft\Windows\Recent\AutomaticDestinations
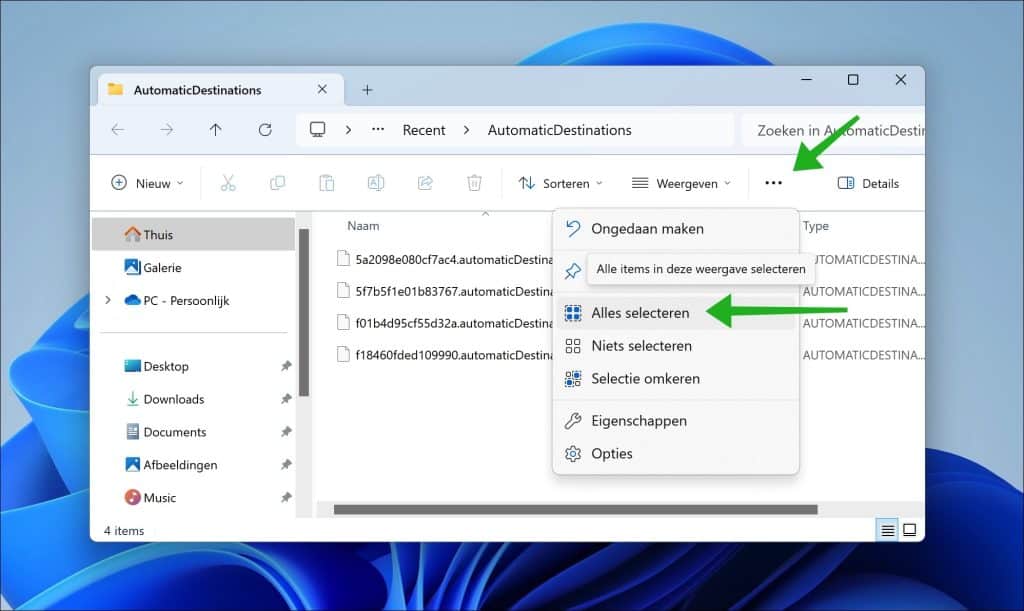
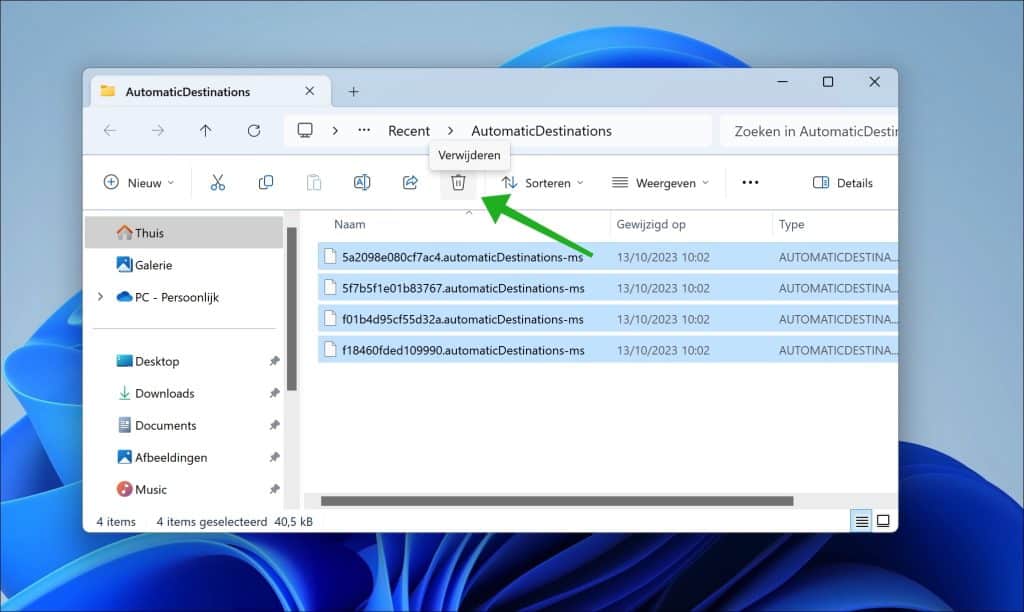
Selecteer nu alle bestanden in de “AutomaticDestinations” map. Dit doet u door in de verkenner op meer opties te klikken en vervolgens “alles selecteren”. U kunt ook de CTRL + A toetsencombinatie gebruiken.
Wanneer u alle bestanden heeft geselecteerd verwijdert u alle geselecteerde bestanden. Er zijn enkele bestanden die niet kunnen worden verwijderd omdat ze in gebruik zijn.
Sluit nu de Verkenner en open de Verkenner opnieuw. U ziet nu dat de standaard weergave in de Verkenner is hersteld.
Lees verder: Windows Verkenner opnieuw instellen.
Ik hoop u hiermee geholpen te hebben. Bedankt voor het lezen!
Help mee
Mijn computertips zijn gratis en bedoeld om andere mensen te helpen. Door deze pc-tip te delen op een website of social media, helpt u mij meer mensen te bereiken.Overzicht met computertips
Bekijk ook mijn uitgebreide overzicht met praktische computertips, overzichtelijk gesorteerd per categorie.Computerhulp nodig?
Loopt u vast met uw pc, laptop of software? Stel uw vraag op ons computerforum en krijg gratis computerhulp van ervaren leden en experts.