
Een Dev Drive in Windows 11 is een gespecialiseerde virtuele schijf die is geoptimaliseerd voor ontwikkelaars en betere prestaties, beveiliging en controle biedt over ontwikkelwerklasten. Het is gebouwd op het veerkrachtige bestandssysteem (ReFS) en profiteert van een nieuwe prestatiemodus in Microsoft Defender Antivirus, die tot 30% betere prestaties kan leveren voor bouwtijden in vergelijking met standaard Windows 11-configuraties.
Dit station is ontworpen om snelle toegang te bieden tot projectbestanden, broncodeopslagplaatsen, codebibliotheken, enz., waardoor de productiviteit aanzienlijk wordt verhoogd doordat code sneller kan worden gecompileerd en resultaten sneller kunnen worden opgehaald. Onder specifieke omstandigheden kan een Dev Drive 41% sneller werken dan een gewone drive.
Om een Dev Drive in te stellen, moet uw systeem aan bepaalde vereisten voldoen:
Meld u dan aan voor onze nieuwsbrief.
- ten minste 8 GB RAM (16 GB aanbevolen).
- ten minste 50 GB vrije schijfruimte.
- OS-versie van Windows 11 22H2 Build 22621.2361 of hoger.
- virtualisatie ingeschakeld.
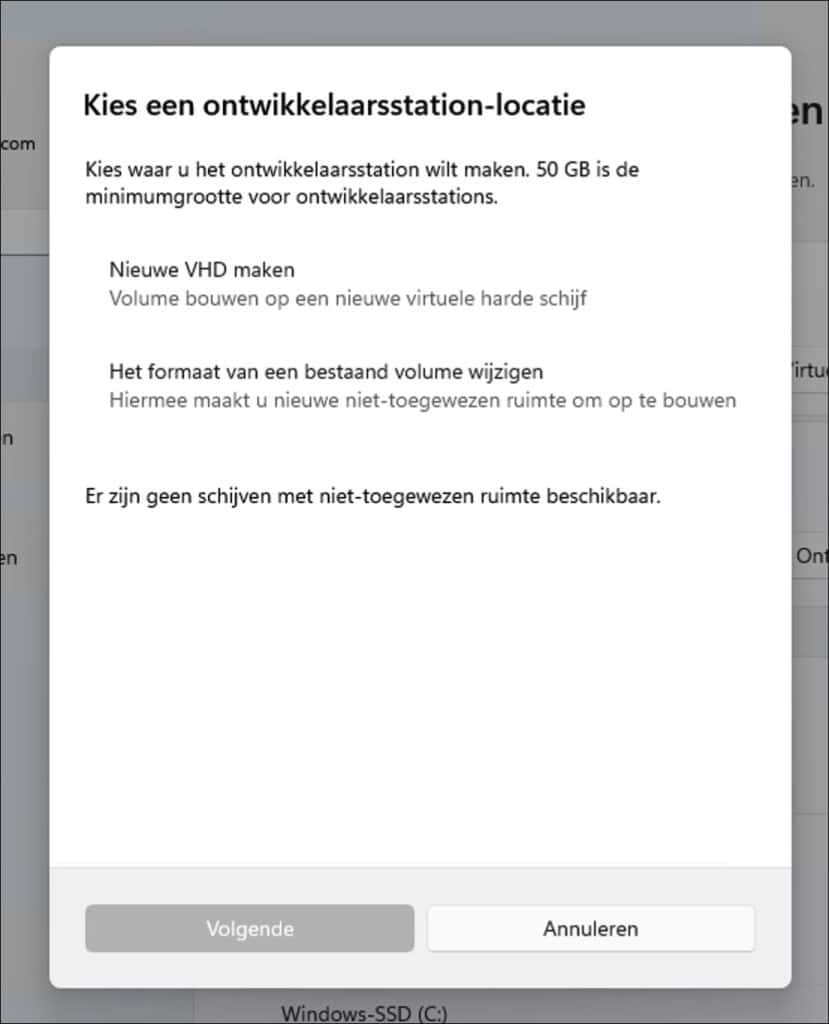
Een Dev Drive kan worden gemaakt met niet-toegewezen schijfruimte, door een bestaand volume te verkleinen om extra ruimte te creëren of door een Virtuele Harde Schijf (VHD) bovenop de fysieke schijf te maken.
Bovendien is de Dev Drive op maat gemaakt voor het opslaan van en toegang krijgen tot gegevens die constante lees/schrijfbewerkingen vereisen, zoals ontwikkelarchieven en bibliotheken. Het is geoptimaliseerd door meerdere configuraties voor betere prestaties, waaronder het gebruik van ReFS in plaats van NTFS, en het wordt beschermd door Windows Beveiliging, dus niet onderworpen aan intens onderzoek.
Dev Drive (Ontwikkelaarsstation) aanmaken in Windows 11
Via instellingen
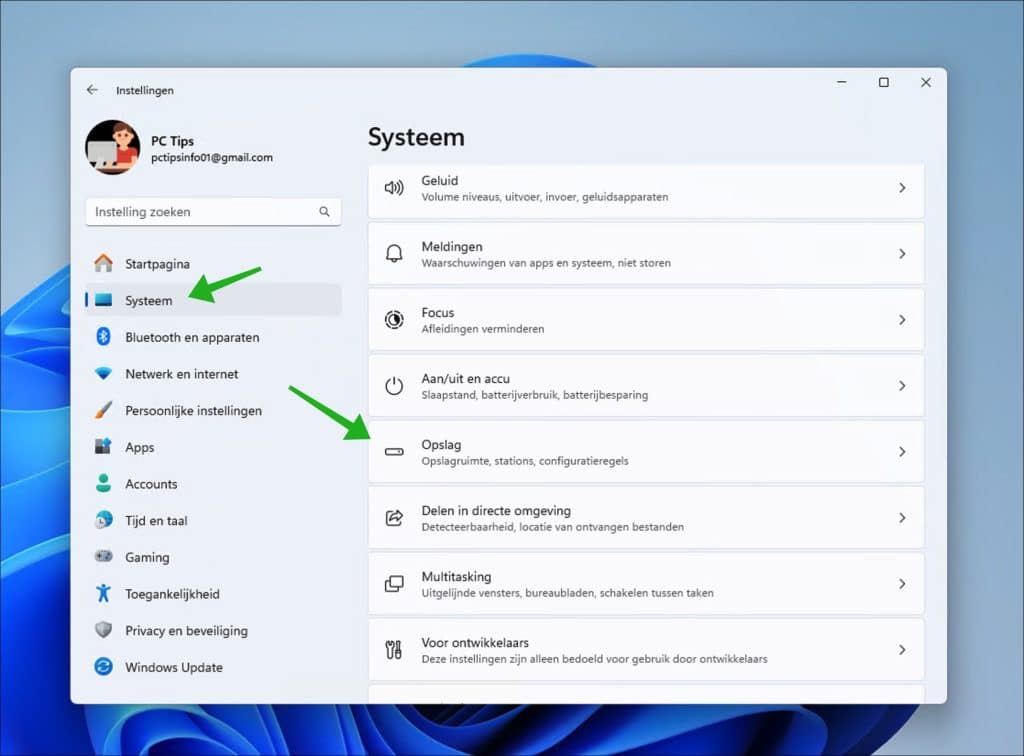
Open de instellingen. Klik op “Systeem” en vervolgens op “Opslag”.
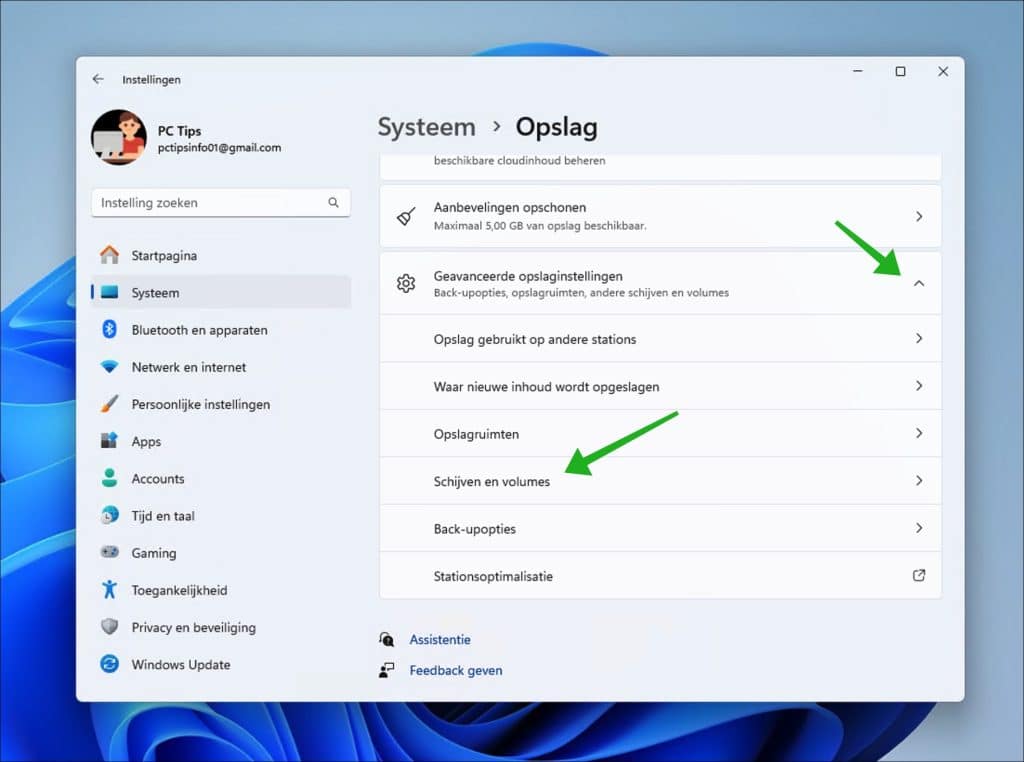
Klik eerst op “Geavanceerde opslaginstellingen” en hierna op “Schijven en volumes”.
Wanneer uw computer voldoet aan de minimale vereisten voor een ontwikkelaarsstation dan klikt u op “Ontwikkelaarsstation maken”.
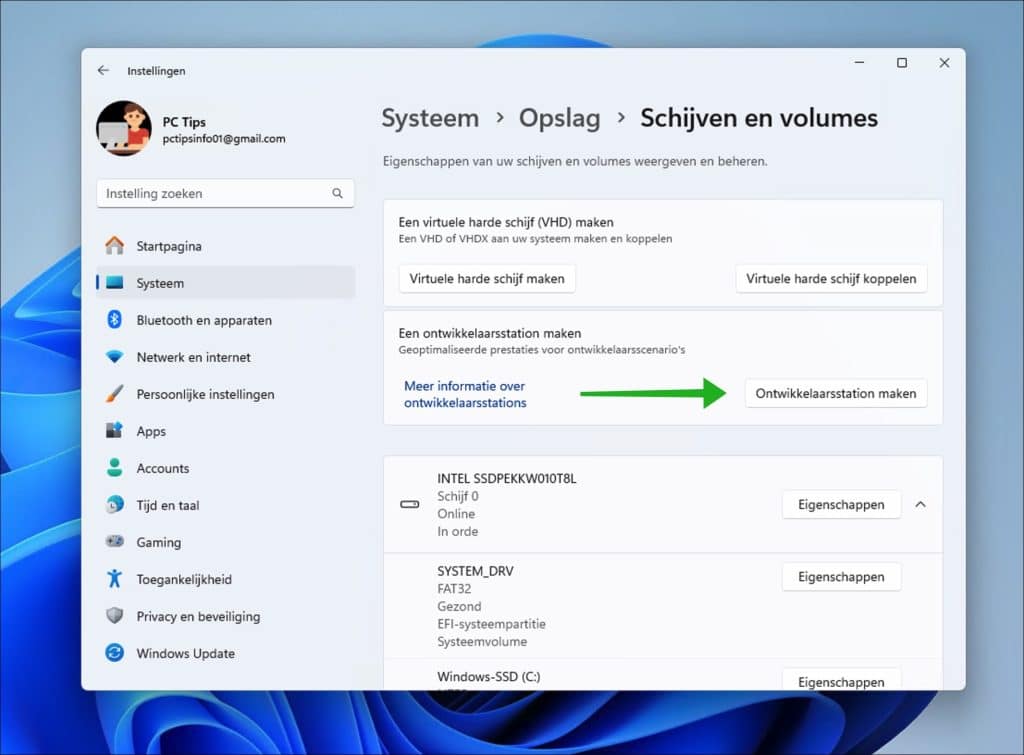
U kunt vervolgens kiezen om het ontwikkelaarsstation aan te maken op een VHD of een bestaand volume verkleinen. Als u al een volume met niet toegewezen schijfruimte heeft gemaakt dan is deze ook zichtbaar om de “dev drive” op aan te maken.
Via Opdrachtprompt of Terminal
U kunt een ontwikkelaarsstation aanmaken, ook beheren via Opdrachtprompt of Terminal.
fsutil devdrv enable: Schakelt Dev Drive-ondersteuning in en laat het systeem beslissen of het antivirusfilter aan een Dev Drive moet worden gekoppeld.fsutil devdrv enable /allowAv: Schakelt Dev Drive-ondersteuning in en staat toe dat het antivirusfilter aan een Dev Drive wordt gekoppeld.fsutil devdrv enable /disallowAv: Schakelt Dev Drive-ondersteuning in zonder toe te staan dat het antivirusfilter aan een Dev Drive wordt gekoppeld.
Het is belangrijk om op te merken dat het loskoppelen van antivirusfilters een beveiligingsrisico kan vormen, omdat dit betekent dat uw opslagstation niet zal worden gedekt door de standaardbeveiligingsscans van Microsoft Defender. Microsoft raadt aan de standaardinstelling van de “performance mode” te gebruiken wanneer u een vertrouwd Dev Drive gebruikt, om een balans te vinden tussen dreigingsbescherming en prestaties
Ik hoop u hiermee geïnformeerd te hebben. Lees hier meer over een ontwikkelaarsstation. Bedankt voor het lezen!
Help mee
Mijn computertips zijn gratis en bedoeld om andere mensen te helpen. Door deze pc-tip te delen op een website of social media, helpt u mij meer mensen te bereiken.Overzicht met computertips
Bekijk ook mijn uitgebreide overzicht met praktische computertips, overzichtelijk gesorteerd per categorie.Computerhulp nodig?
Loopt u vast met uw pc, laptop of software? Stel uw vraag op ons computerforum en krijg gratis computerhulp van ervaren leden en experts.