

If you use a hard drive in Windows 11 or Windows 10, this hard drive will be named “Local Disk” by default. If you are using a USB device, the default name is “USB Drive”.
However, in Windows we also use our own name for a hard drive. This makes it clear what kind of disk it is. For example, you can designate a drive on which many movie files are stored as “Movies” instead of “Local Disk”.
A hard drive formatted in the Windows standard “NTFS” name or volume label may contain 32 characters, including spaces. Any other drive formatted as FAT32 may contain a maximum of 11 characters including spaces. The name of a disk is also described as a label.
5 Ways to Change the Name or Label of a Hard Drive
Rename hard drive via Windows Explorer
To rename a drive in Windows we can simply use the Windows Explorer to use. The Windows explorer also offers direct insight into which local, USB whether network drives are all active.
Open the Windows Explorer. Click on “This PC” on the left. Right-click on the drive you want to rename, or press F2. Then click on “Change name” in the menu. You can now change the name of this disk.

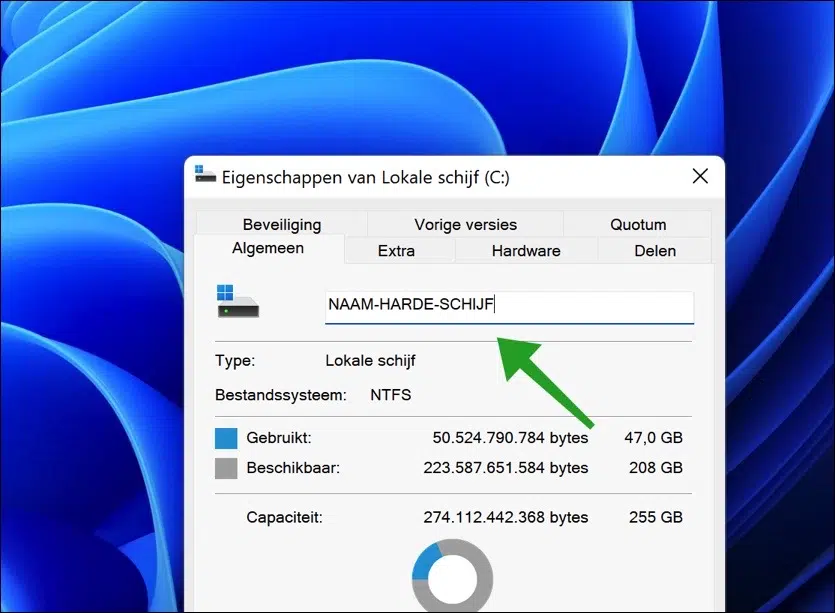
Rename the hard drive via Properties
You can view various settings in the properties of a drive. You can also change the name of this disk.
Right-click on the drive via Windows Explorer. In the menu click on properties.
Change hard drive name via settings
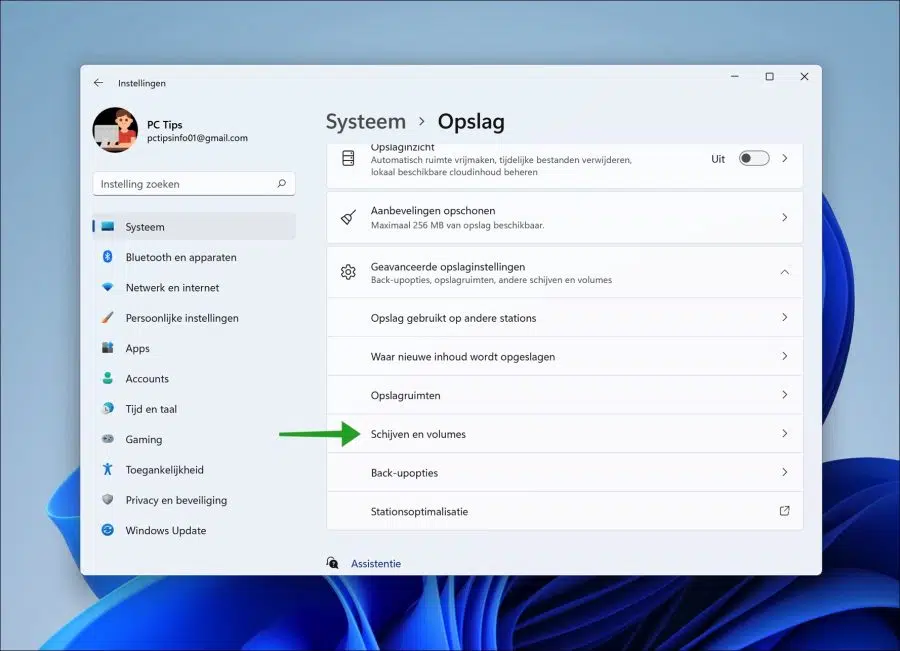
In Windows 11 you can change the label of the drive via the system and then in the storage settings.
Right click on it Start menu. In the menu click on settings. In the settings, click on System on the left and then on Storage.
In the storage settings, first click on advanced storage settings and then on disks and volumes.
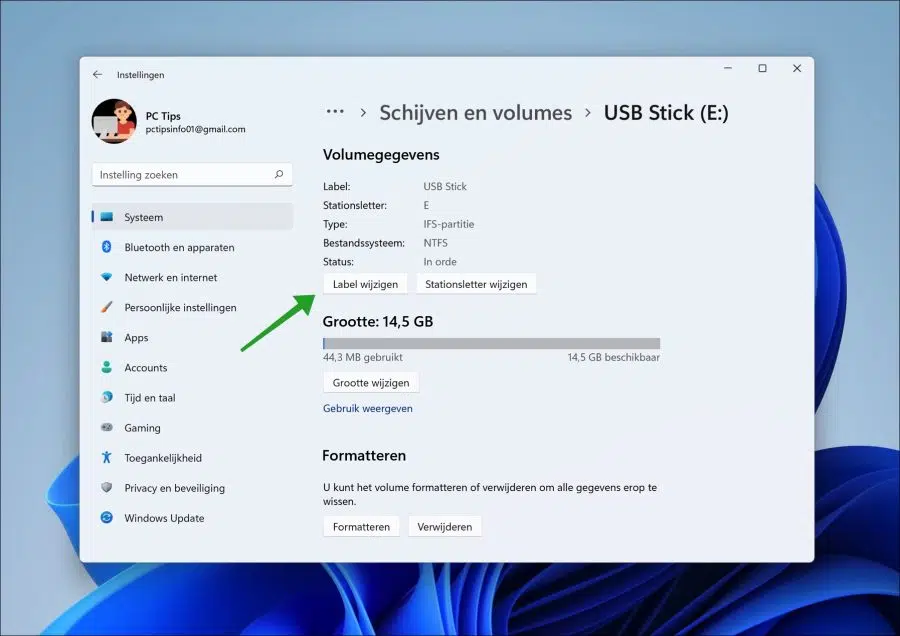
Then click on the NTFS or FAT32 volume whose label you want to change. Click on properties and then on change label.
Rename hard drive via Disk Management
Disk Management is the tool in Windows to manage disks. Here's how you can get one assign drive letter, resize a volume or formatting. You can change the name of the disk by opening the disk's properties.
Open disk management. Right-click on the drive you want to rename. In the menu click on properties.
Now you can enter a new label – name – for this disk in the label field.

Rename hard drive via Command Prompt or PowerShell
There are all kinds of tools available in Windows. Most have an interface “GUI”. If you don't have access to Windows or you prefer to work via Command Prompt or Terminal, you can also adjust a drive's volume label.
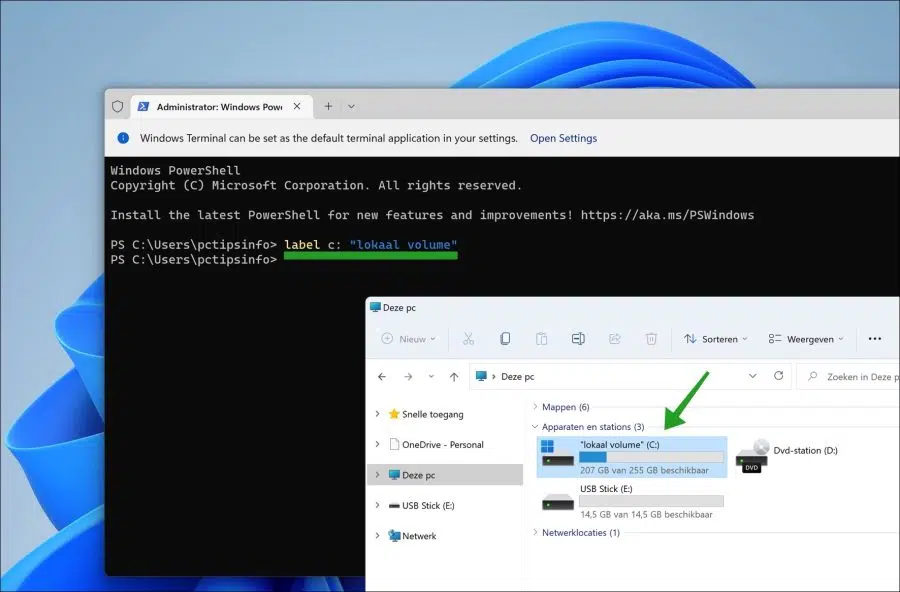
Open Command Prompt of Terminal as administrator. To rename or edit a volume, enter the following command:
label <schijfletter>: nieuwe-naam
replace with the drive letter of the volume you want to rename. New name is the new name for the volume.
You can see in the example below that the new name of the volume is immediately visible via Windows Explorer.
I hope to have informed you with this. Thank you for reading!
Super thanks. I couldn't figure it out myself...