

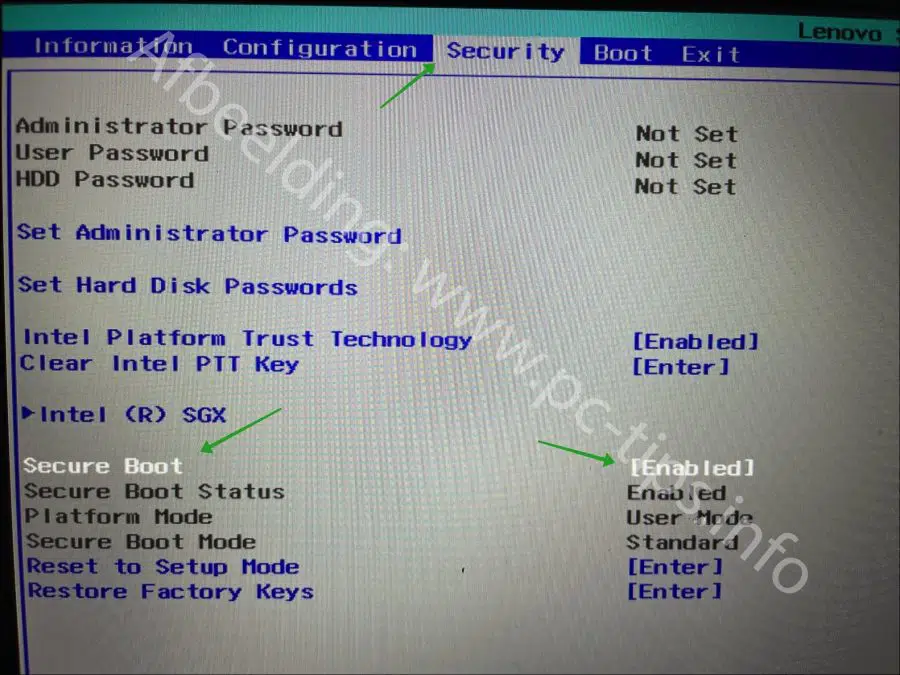
Now Microsoft with one TPM chips and SecureBoot Windows 11 has made it a lot safer, more and more users are looking for how to do it TPM and Secure Boot can be enabled in the BIOS settings.
Most computers currently sold are equipped with a TPM chip and Secure Boot. Although the PC is often equipped with it as standard, this function is not always enabled. Some users still need to enable Secure Boot in the BIOS or UEFI.
Not only specific requirements can be enabled in the BIOS. There are plenty of settings you can adjust. In this article I explain how you can access the BIOS or UEFI settings for the most common computers.
2 ways to open the BIOS or UEFI settings on your PC
Open BIOS via a key
Most computer models have a special key that provides access to the BIOS settings when the computer starts. Below you can read which test this concerns for specific models.
- HP Laptops – F10 or ESC
- ASUS laptops – F2
- Dell laptops – F2 or F12
- Acer laptops – F2 or DEL
- Lenovo laptops – F2 or FN + F2
- Samsung laptops – F2
- Sony laptops – F1, F2 or F3
- Toshiba laptops – F2
- Xiaomi – F9 or F12
- Realme – F2
There are also keyboard shortcuts to access the BIOS for desktop PC motherboards:
- ASUS – F2 or DEL
- MSI – DEL
- Gigabyte – DEL
- ASRock – F2
- Zebronics – F2
To enter the BIOS settings, shut down the computer. Restart the computer and continue pressing the BIOS key until the BIOS opens.
Open UEFI via settings
You can also open the UEFI settings via Windows 11 itself. This works via the Advanced boot options.
Right-click on the Start button. Click Settings in the menu, then click System on the left, then click System Restore.
Click the “Restart Now” button in the “Advanced Startup Options”. Now restart your PC to change the boot settings.

After booting, click on “Troubleshoot” and then on “UEFI firmware settings” and restart your PC.
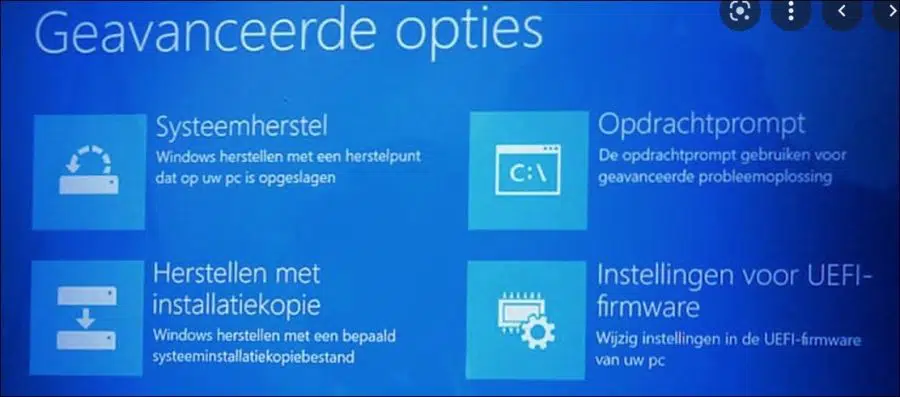
You now have access to the BIOS/UEFI settings.
I hope this helped you. Thank you for reading!
Also read: