
Wanneer er in Windows 11 een gebruiker wordt aangemaakt, bijvoorbeeld een lokaal-account of een Microsoft-account dan wordt er een profiel map aangemaakt.
Deze profiel map bevat de naam van het lokaal-account of de eerste 5 karakters uit het e-mailadres bij een Microsoft-account. U kunt de gebruikersprofielmap wijzigen. Dit betekent dat u de naam van de map kan aanpassen.
Het is niet aan te raden, omdat er apps en instellingen afhankelijk zijn van deze map. Het wordt opgenomen in allerlei verwijzingen. Ik dit artikel maak ik een “mklink” verbinding waardoor er geen problemen zouden moeten ontstaan na het wijzigen van de gebruikersprofielmap naam, maar het is nooit uitgesloten.
Meld u dan aan voor onze nieuwsbrief.
Gebruikersprofiel map naam wijzigen in Windows 11
Voordat u doorgaat, raad ik aan om een systeemkopie back-up te maken of een herstelpunt. Mocht er iets misgaan, dan kunt u altijd terug. Sla deze stap niet over.
Om te beginnen moet u uitloggen uit het profiel waarvan u de naam wilt wijzigen. Maak een andere administrator account aan of gebruik een ander administrator account op uw computer en meldt u hiermee aan. U kunt ook het tijdelijk administrator account inschakelen.
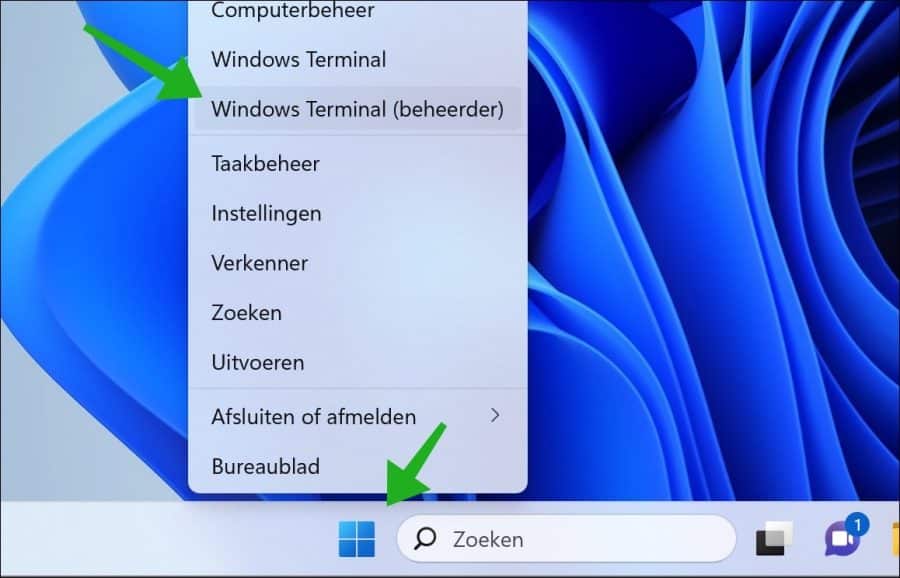
Klik nu met de rechtermuisknop op de Startknop. Klik op “Windows Terminal (beheerder)” in het menu.
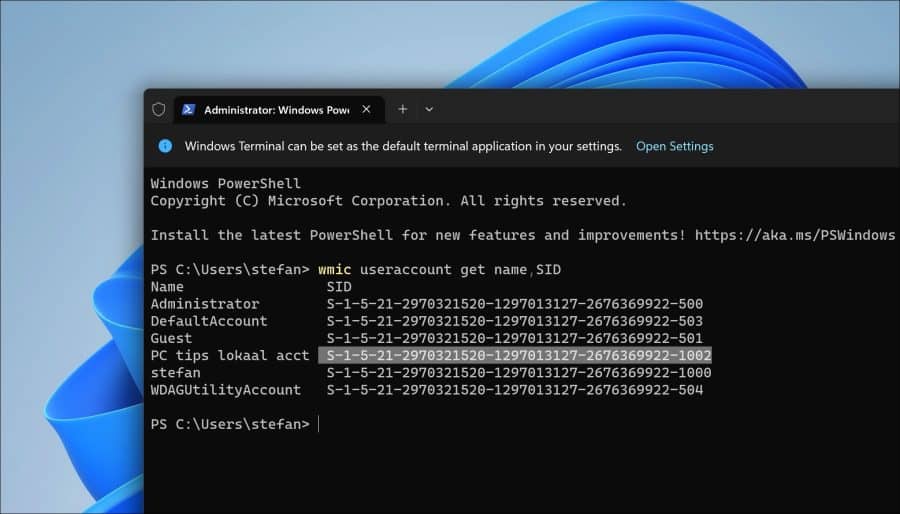
In het Windows Terminal venster kopieer en plak onderstaande regel:
wmic useraccount get name,SID
Kopieer nu het “SID” van de gebruikersnaam waarvan u de profiel map wilt wijzigen.
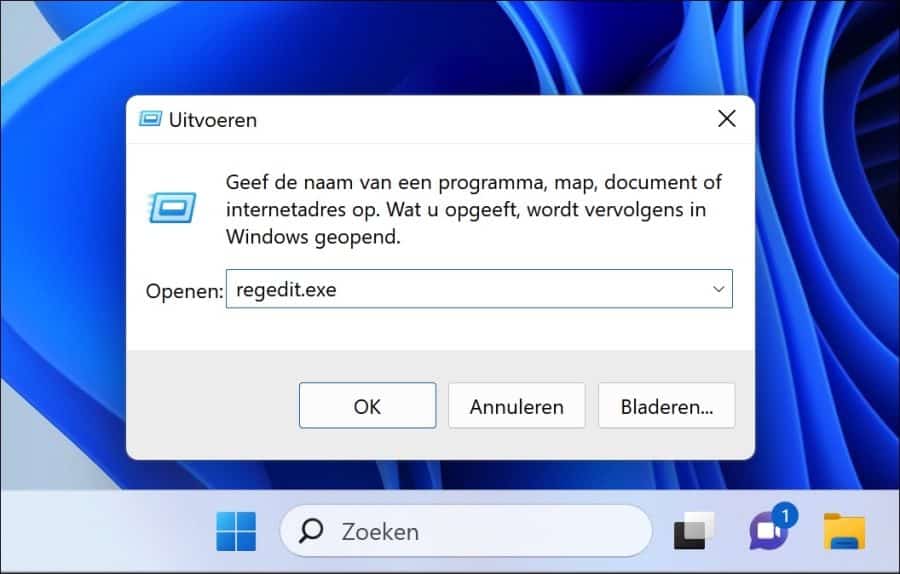
Klik nu met de rechtermuisknop op de Startknop en klik op “Uitvoeren”. In het uitvoeren venster type:
regedit.exe
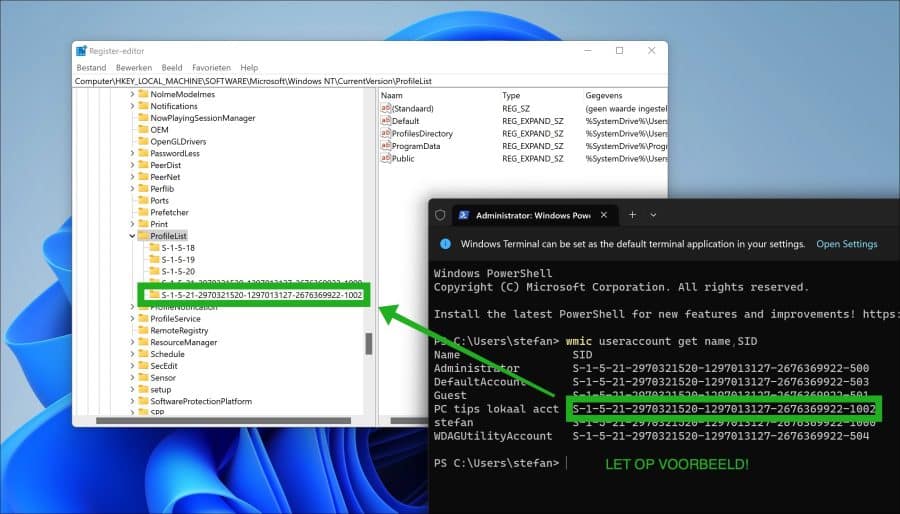
Ga naar sleutel:
HKEY_LOCAL_MACHINE\SOFTWARE\Microsoft\Windows NT\CurrentVersion\ProfileList\
Zoek nu in de “ProfileList” het SID waarvan u de profiel map naam wilt wijzigen. Klik erop.
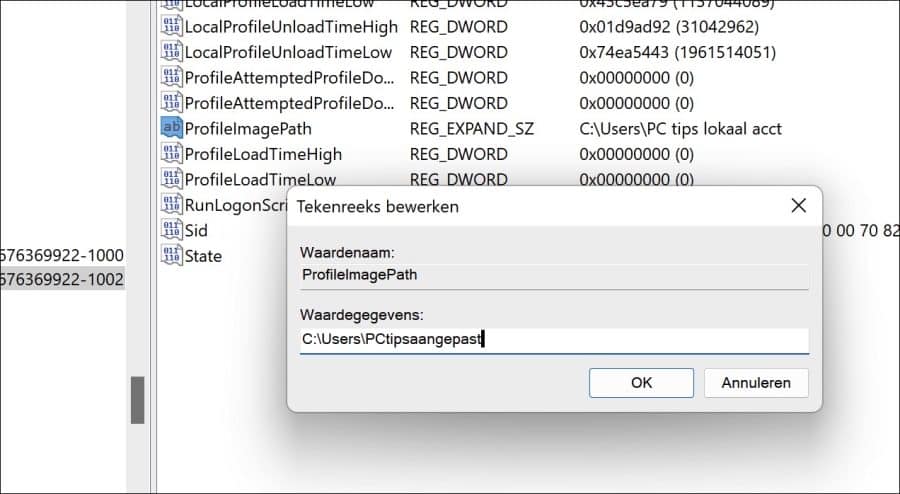
Dubbelklik nu op “ProfileImagePath”. Kopieer de inhoud eerst naar een nieuw tekstdocument. U maakt dus een back-up van de inhoud van “ProfileImagePath”.
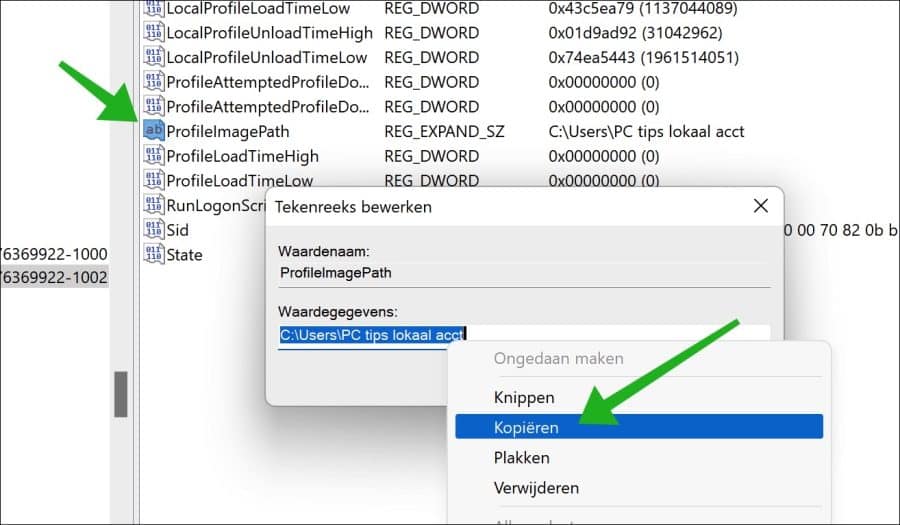
Wijzig nu “ProfileImagePath” naar de gewenste naam. Gebruik geen “\” aan het eind en zorg dat u een naam gebruikt van maximaal 10 karakters, het liefste (dat is makkelijker) zonder spaties.
Open nu de Windows verkenner. Ga naar de map:
c:\users\
Klik nu in het menu op het hernoemen pictogram. Wijzig de oude profiel map naam in het nieuwe. Dit is de naam die u heeft ingegeven in het Windows register. Klik op “Doorgaan” als hierom wordt gevraagd.

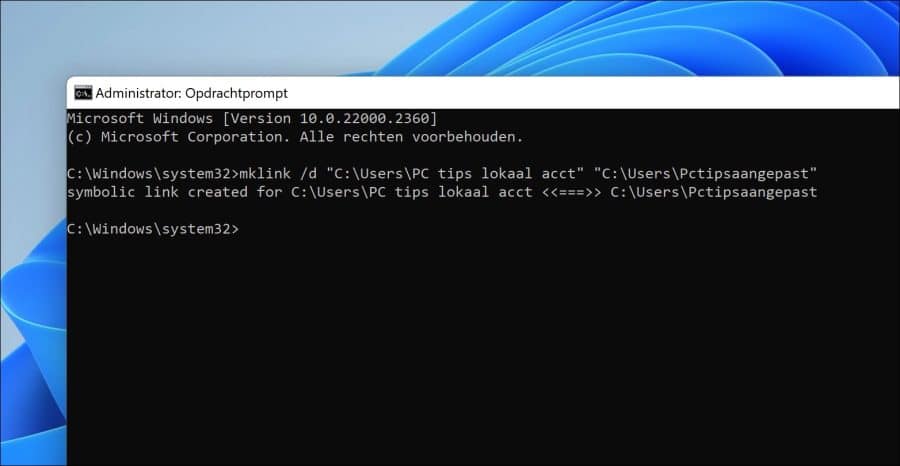
Open nu een Opdrachtprompt als administrator. In het Opdrachtprompt type:
mklink /d "C:\Users\<oude profiel map naam>" "C:\Users\<nieuwe profiel map naam>"
Wijzig de gegevens in het vetgedrukt, gebruik geen “<” of “>”.
Voorbeeld:
mklink /d "C:\Users\PC tips lokaal acct" "C:\Users\Pctipsaangepast"
Meldt u af en opnieuw aan met het gewijzigde gebruikersaccount. U heeft nu met succes de profiel map naam gewijzigd.

Ik hoop u hiermee geholpen te hebben. Bedankt voor het lezen!
Help mee
Mijn computertips zijn gratis en bedoeld om andere mensen te helpen. Door deze pc-tip te delen op een website of social media, helpt u mij meer mensen te bereiken.Overzicht met computertips
Bekijk ook mijn uitgebreide overzicht met praktische computertips, overzichtelijk gesorteerd per categorie.Computerhulp nodig?
Loopt u vast met uw pc, laptop of software? Stel uw vraag op ons computerforum en krijg gratis computerhulp van ervaren leden en experts.