

In both Windows 10 and Windows 11 you can automatically compress a hard drive, folder or file save disk space.
The hard drive you want to compress must be NTFS formatted to enable this feature.
Compressing reduces the size of a file by cleverly removing parts of the file's contents that are not needed and storing only the minimum amount of information necessary to rebuild the file. When you open the file, the information will be restored to its original form.
Those contents that Windows can compress automatically are different from the ZIP, or RAR files. This concerns basic functionality of the NTFS file system in Windows. For example, you can use a create additional partition on an external hard drive and compress this content.
This is how you can enable “compress contents” for a hard drive, a specific folder including contents or single file.
Compress content in Windows 10 or Windows 11
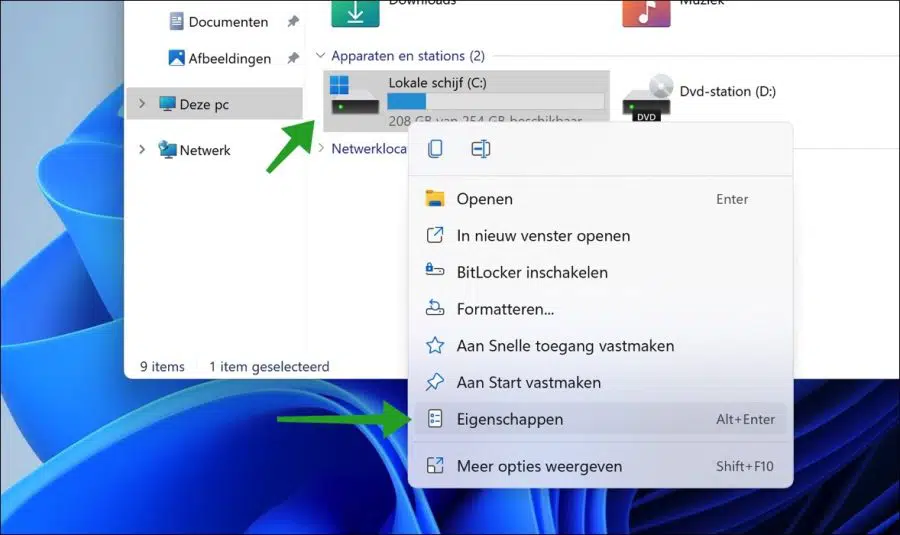
Compress contents from hard drive
To compress the contents of an entire hard drive, right-click on the drive in Windows Explorer. In the menu click on Properties.
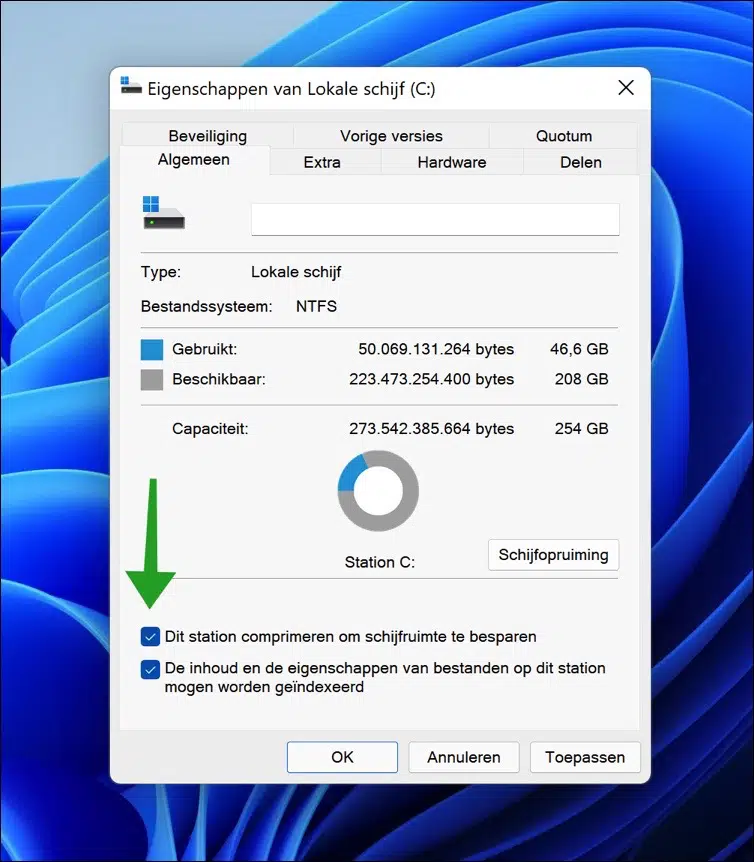
Then enable the option “Compress this drive to save disk space”. Click apply and OK.
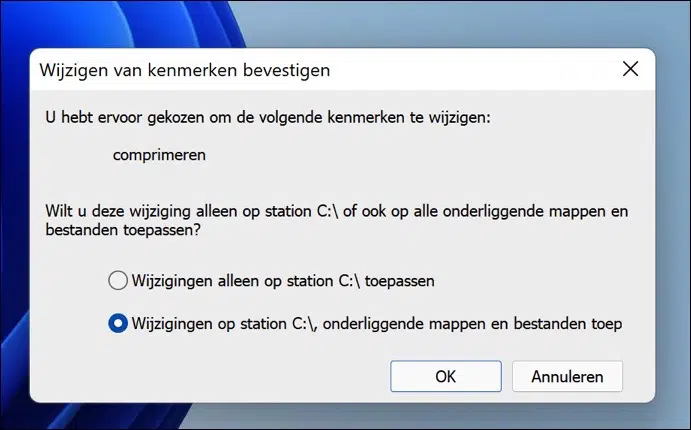
You will now receive the message “Do you want to apply these changes only to Drive C:\ or also to all underlying folders and files?”
Make your selection and click OK.
Compress contents of a specific folder
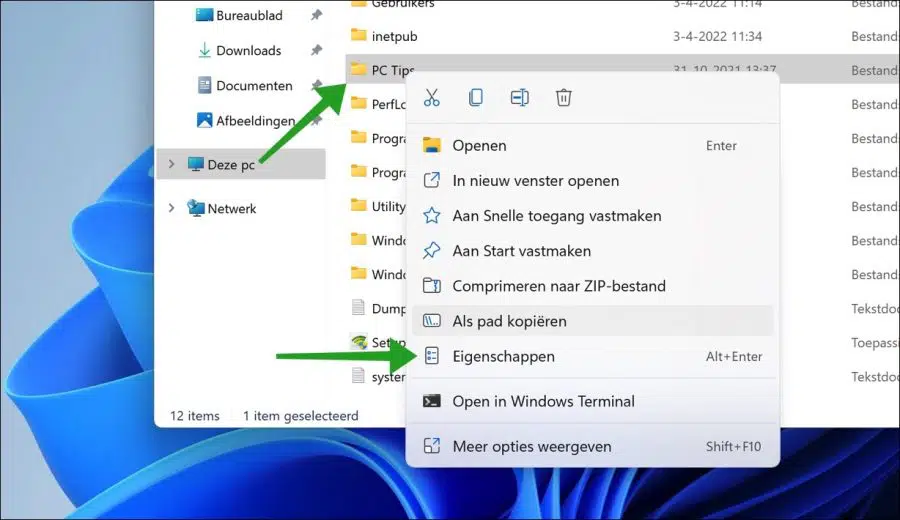
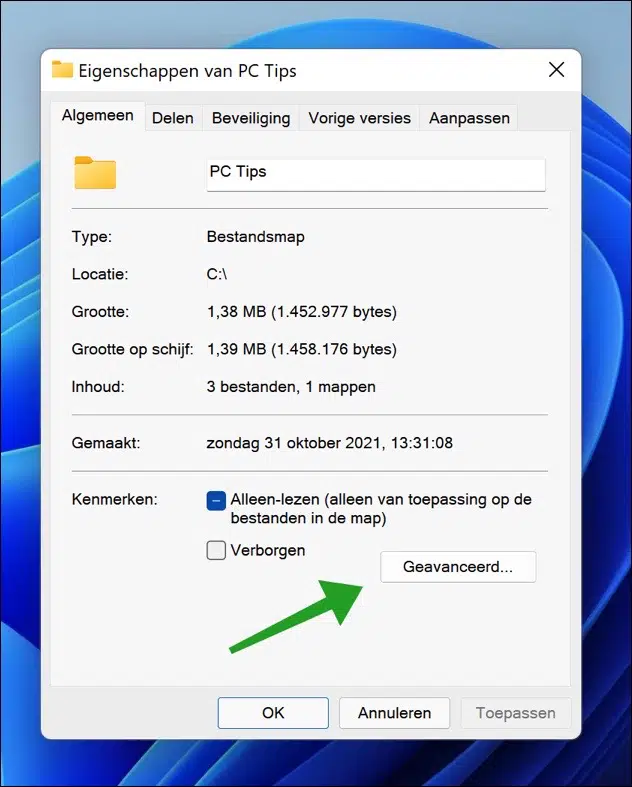
To compress the contents of a specific folder, right-click the folder in Windows Explorer. In the menu click on Properties.
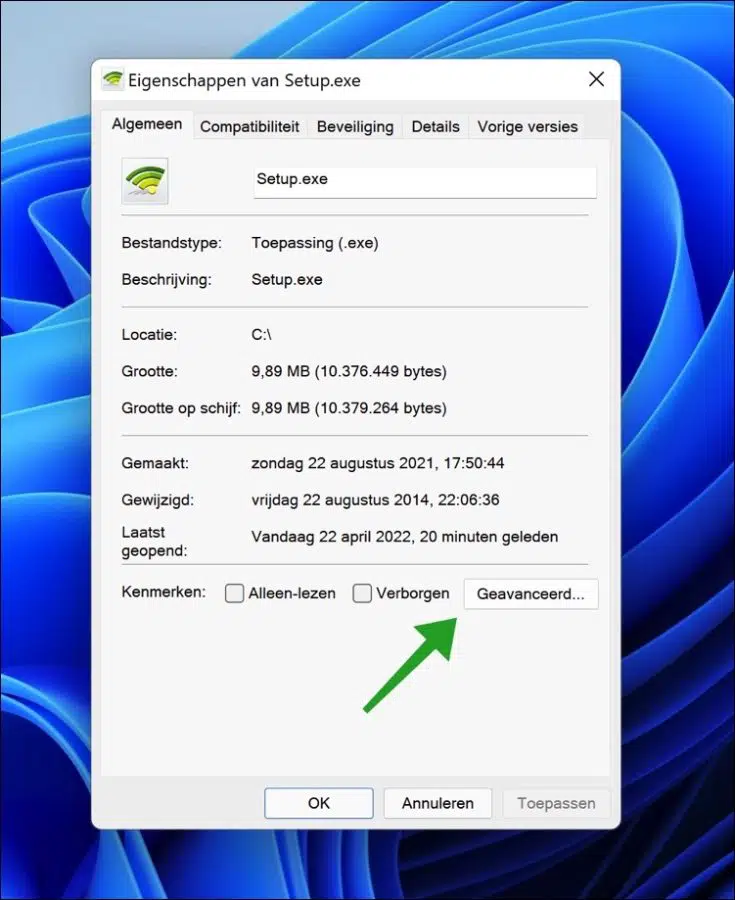
In the “General” tab, click the “Advanced” button to open the advanced folder properties.
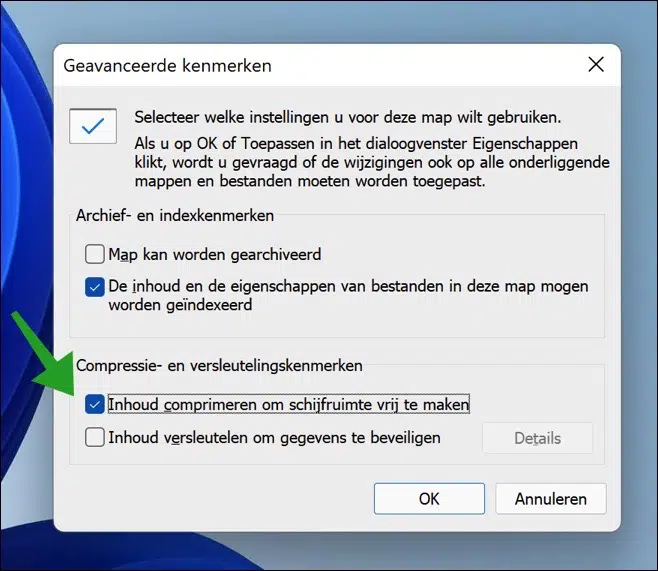
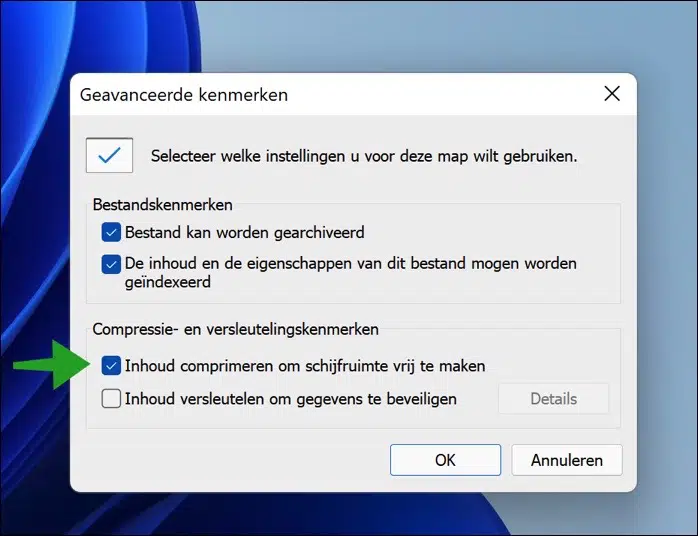
To compress the folder, enable the “Compress contents to free up disk space” option. Click OK.
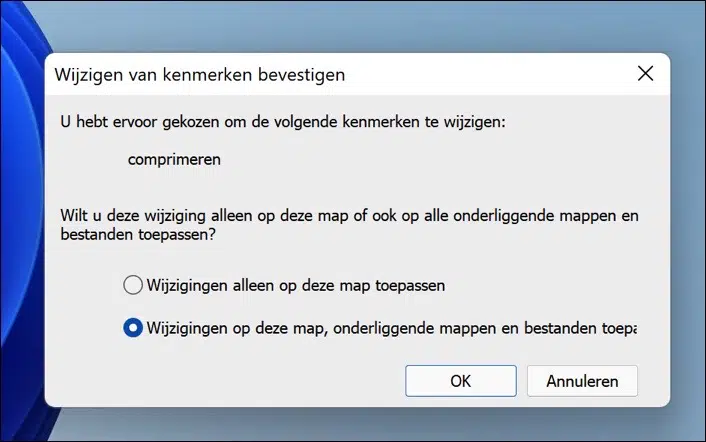
You will now be notified whether you want to apply these changes to all underlying folders and files or not. Make your selection and click OK.
Compress contents of a specific file
To compress the contents of a specific file, right-click on the file through Windows Explorer. In the menu click on Properties.
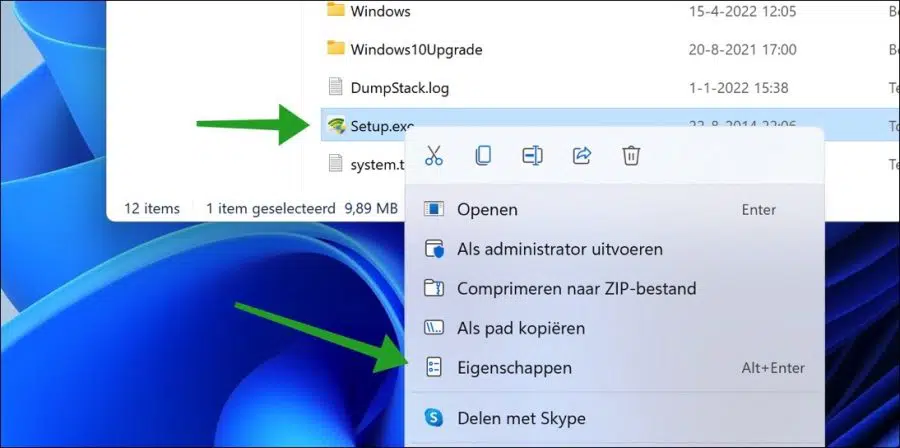
Then click on the Properties tab and at the bottom on the “Advanced” button.
To compress the contents of the file, enable the “Compress contents to free up disk space” option. Click OK to confirm.
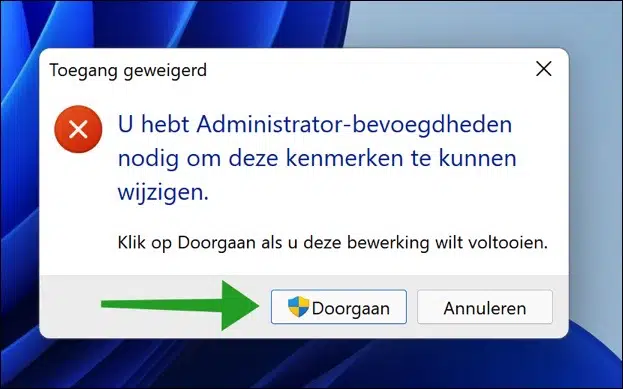
You need administrator privileges to change this file attribute. Click Continue to complete this operation.
You have now successfully applied content compression for a hard drive, folder or file.
I hope this helped you. Thank you for reading!
Also read: Enable system memory compression (MemoryCompression) in Windows 11.