
Windows 11 biedt gebruikers een “Kiosk” modus. De kiosk modus veranderd Windows 11 in een digitaal bord, een interactief scherm of iets anders.
Als er een kiosk account wordt aangemaakt dan wordt Windows 11 opgestart en meteen na het opstarten wordt er een app gestart. Het kiosk account kan niets anders dan een bericht weergeven of een website. Dit is afhankelijk van het type app dat u selecteert voor het Kiosk account.
Het kiosk account is een lokaal account zonder administrator rechten. User account control of UAC moet ingeschakeld zijn om een kiosk account te kunnen gebruiken. Ook is beheer op afstand niet mogelijk.
Meld u dan aan voor onze nieuwsbrief.
In dit artikel leest u hoe u een kiosk account in Windows 11 kunt aanmaken, kunt wijzigen en kunt verwijderen.
Kiosk modus instellen, wijzigen en verwijderen in Windows 11
Kiosk account aanmaken in Windows 11
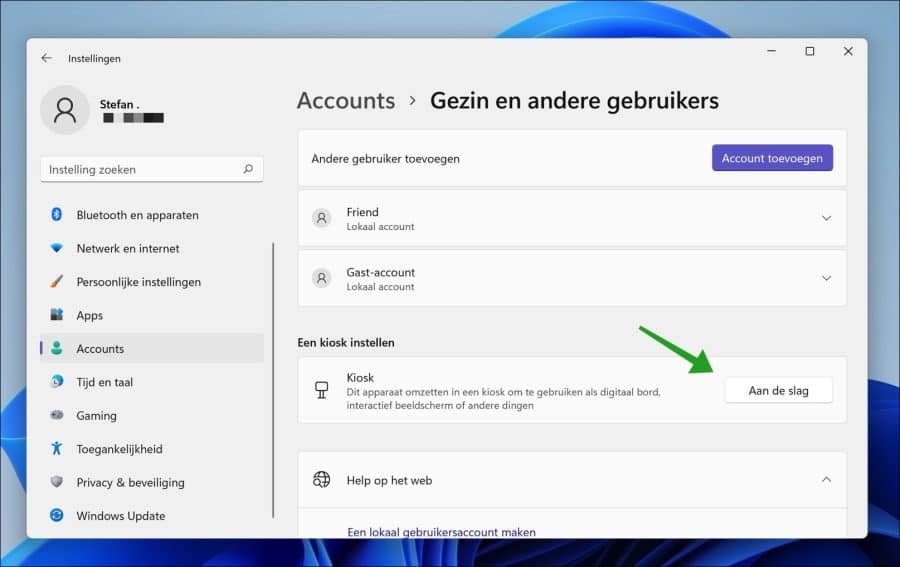
Klik met de rechtermuisknop op de Startknop. Klik op Instellingen in het menu. Klik daarna links op Accounts en daarna op Gezin en andere gebruikers.
Klik vervolgens op de “Aan de slag” knop in de Kiosk instellen opties.
Geef een duidelijke naam in voor het Kiosk account. Deze gebruikersnaam gebruikt u later om het kiosk account aan te melden op uw computer.
Klik op volgende om door te gaan.

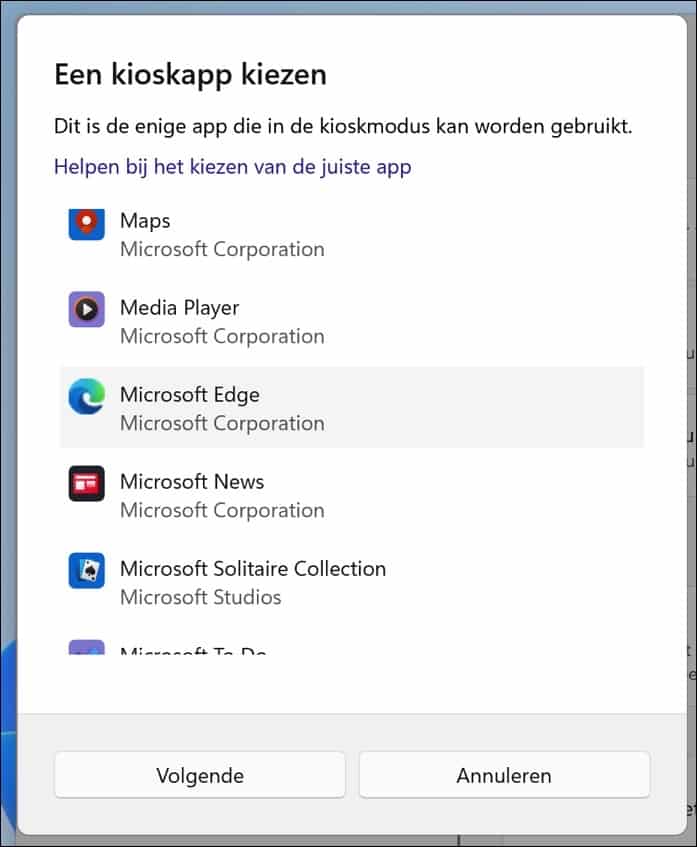
Selecteer de app die u wilt gebruiken om weer te geven in de Kiosk. Dit is de enige app die u kunt gebruiken in kioskmodus.
Wilt u bijvoorbeeld een kiosk instellen om alleen de web browser te kunnen gebruiken. Selecteer dan de browser app uit de lijst. Wilt u alleen een afbeelding weergeven selecteer dan de app om de afbeelding te openen. Geen idee welke app? Klik dan op de link Helpen bij het kiezen van de juiste app.
In dit voorbeeld selecteer ik Microsoft Edge.
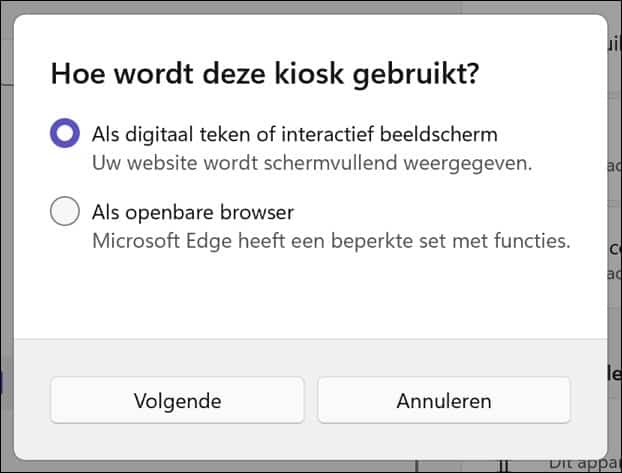
Selecteer vervolgens hoe u de kiosk wilt gaan gebruiken. U kunt kiezen uit “als digitaal teken of interactief beeldscherm” of “Als openbare browser”.
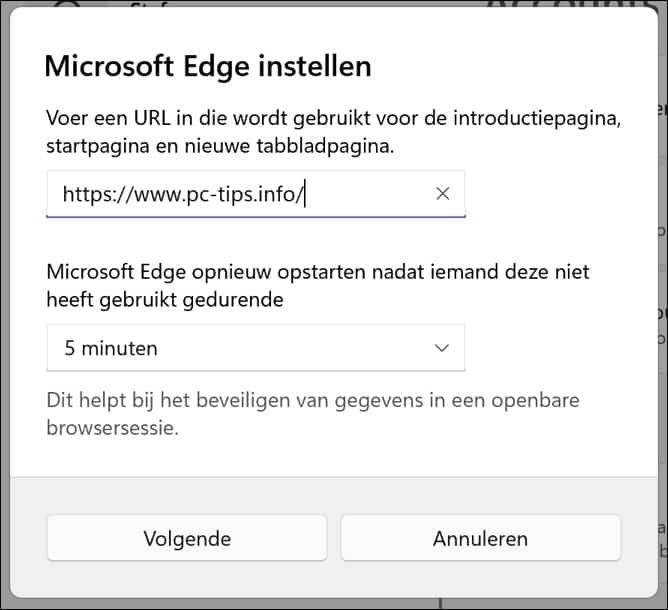
Omdat ik Microsoft Edge als enige app te gebruiken in de kiosk heb geselecteerd, dien ik de opties voor deze app in de kiosk aan te vullen. Deze opties kunnen verschillen als u een andere app of optie heeft gekozen.
U bent klaar met het instellen van de kioskmodus.
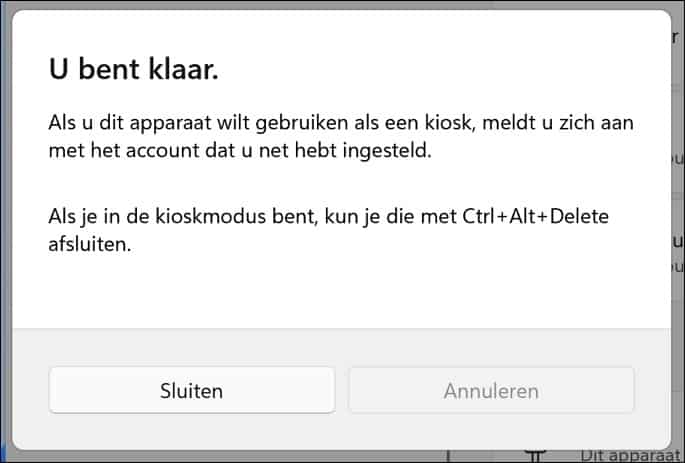
Nu meldt u zich af met uw gebruikersaccount en meldt u zich aan met het zojuist aangemaakte kiosk account.
Als u in de kioskmodus bent dan kunt u dit kiosk account afmelden door op CTRL + ALT + DEL op uw toetsenbord te drukken en daarna op Afmelden in het menu te klikken.
Kiosk bewerken in Windows 11
Om de kiosk te bewerken moet u aangemeld zijn met een beheerdersaccount en niet met het kiosk account.
Klik met de rechtermuisknop op de Startknop. Klik op Instellingen in het menu. Klik links op Accounts en daarna op Gezin en andere gebruikers.
Klik vervolgens op de actieve kiosk om de opties te bewerken. U kunt het type kiosk wijzigen zoals een digitaal teken of interactief beeldscherm. Afhankelijk van het type kiosk kunt u daarna de verschillende opties voor deze app/kiosk wijzigen.
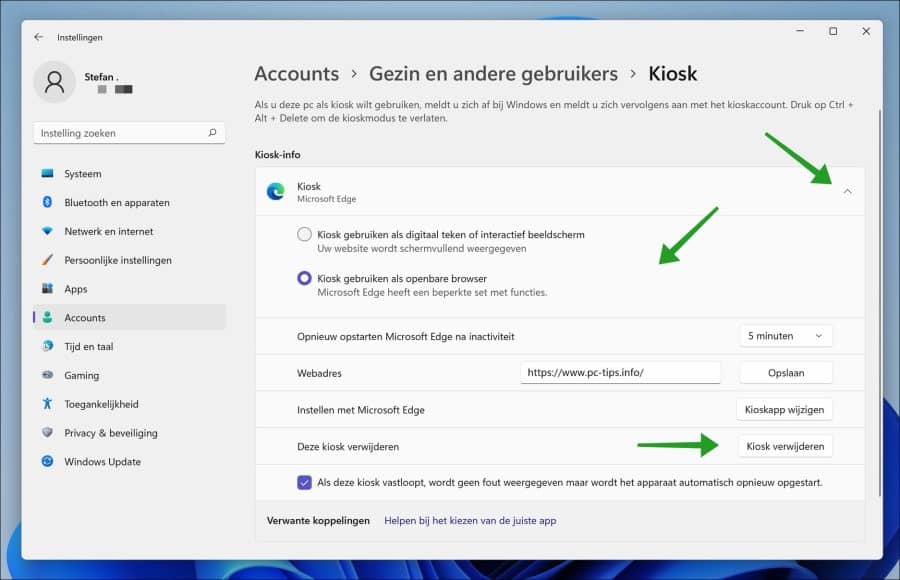
Kiosk verwijderen in Windows 11
Om het kiosk account te verwijderen klikt u in de kiosk-info op de knop “Kiosk verwijderen. Het kiosk account wordt daarna van de computer verwijderd.
Ik hoop u hiermee geholpen te hebben. Bedankt voor het lezen!
Help mee
Mijn computertips zijn gratis en bedoeld om andere mensen te helpen. Door deze pc-tip te delen op een website of social media, helpt u mij meer mensen te bereiken.Overzicht met computertips
Bekijk ook mijn uitgebreide overzicht met praktische computertips, overzichtelijk gesorteerd per categorie.Computerhulp nodig?
Loopt u vast met uw pc, laptop of software? Stel uw vraag op ons computerforum en krijg gratis computerhulp van ervaren leden en experts.